What will you do when you encounter 0x8024001e error during updating Windows? And do you know why this happens? This article will introduce the reasons for 0x8024001e error and several feasible solutions to you. Besides, there is a useful suggestion for you after solving the problem.
0x8024001e error is a Windows Update error that can prevent your computer from installing system updates and updating applications difficult. Besides, this error may affect your PC’s performance.
Reasons for 0x8024001e Error in Windows
There are many reasons that can cause update error 0x8024001e. I will list some of them.
- Missing or corrupt DLL files.
- Missing or corrupt registry key.
- Incomplete or broken updates.
- Virus or malware infection.
How to Fix 0x8024001e Error Windows 10?
After knowing what reasons can cause 0x8024001e error, so what should you do to fix it? Before fixing 0x8024001e error, you need to enter safe mode in advance in case other problems appear. Now I will introduce several methods to you to fix the error and all methods are operated on Windows 10.
Method 1: Check Internet Connection and Restart Your PC
When 0x8024001e error occurs, the first thing you need to do is to check your Internet connection because an unreliable Internet connection can cause 0x8024001e error.
Therefore, if there are problems with your Internet connection, you can try the following methods.
Way 1: Renew IP
Step 1: Type cmd in the search box and right-click the best match one, then choose Run as administrator to continue.
Step 2: Enter ipconfig/renew in the Command Prompt window, and do it again.
Step 3: Restart your PC and run Windows Update again to check whether 0x8024001e error occurs again.
Way 2: Reset Winsock API
Step 1: Open Command Prompt as an administrator and enter netsh winsock reset catalog and netsh int ipv4 reset reset.log one by one.
Step 2: Restart your PC to make the commands take effect and run Windows Update see if 0x8024001e error occurs again.
Way 3: Update Driver
Step 1: Download the latest driver for your computer from the manufacturer’s official website.
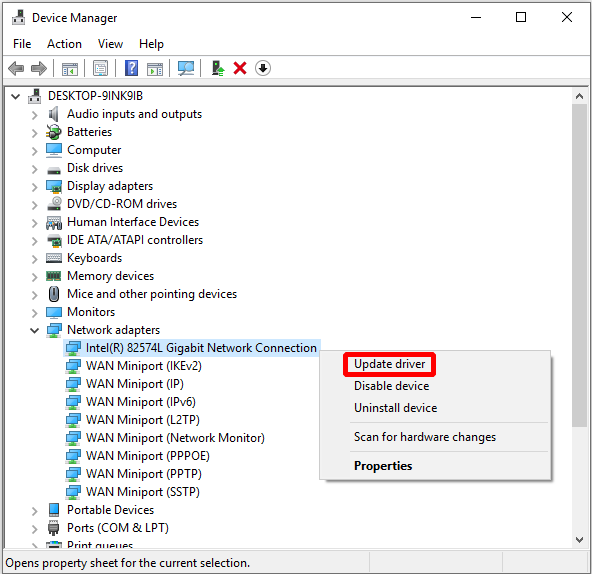
Step 2: Press Win + X at the same time to choose Device Manager.
Step 3: Right-click the Intel Network Connection under Network adapters to choose Update driver.
Step 4: Choose Browse my computer for driver software in the pop-out window and follow the instructions to update the driver successfully.
Step 5: Restart your PC to check whether this method has fixed 0x8024001e error.
If all the methods above cannot fix 0x8024001e error, then you can try the following ones.
Method 2: Repair the Registry
If your registry is corrupted, then 0x8024001e error may occur. So you need to fix the corrupted registry.
Here is the tutorial.
Step 1: Type cmd in the search box and right-click the best match one to choose Run as administrator to continue.
Step 2: In the Command Prompt window, enter sfc /scannow or DISM /Online /Cleanup-Image /ScanHealth and press Enter to repair the registry.
This process may take a little long time, so be patient and never end the process in case other system errors occur.
If this method still cannot fix 0x8024001e error, then try the following methods.
Method 3: Restart Microsoft Update
If Windows Update service has been stopped, then 0x8024001e error will occur when you update Windows, so you just need to restart the service. Now follow the steps below.
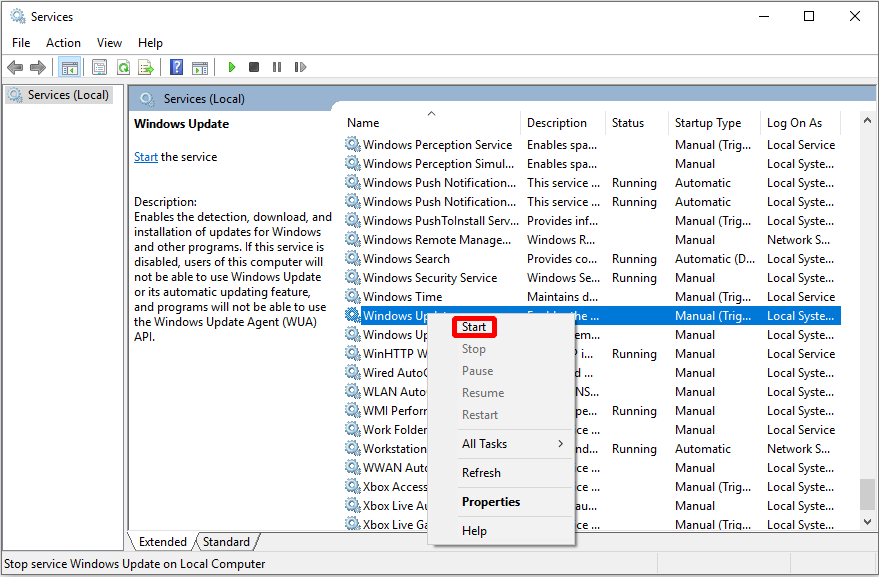
Step 1: Press Win + R at the same time and enter services.msc on the Run dialogue, then click OK.
Step 2: Find Windows Update in the list of services and right-click it to choose Start if Windows Update is stopped.
Then reboot your computer to check whether this error exists. If it does, try the following methods.
Method 4: Rename SoftwareDistribution Folder
0x8024001e error occurs even when Windows Update service is running, so in order to fix this error, you can try to rename the SoftwareDistribution folder. Here is the tutorial:
Step 1: Press Win + R at the same time and enter services.msc on the run dialogue, then click OK.
Step 2: Find Windows Update in the list of services and right-click it to choose Stop.
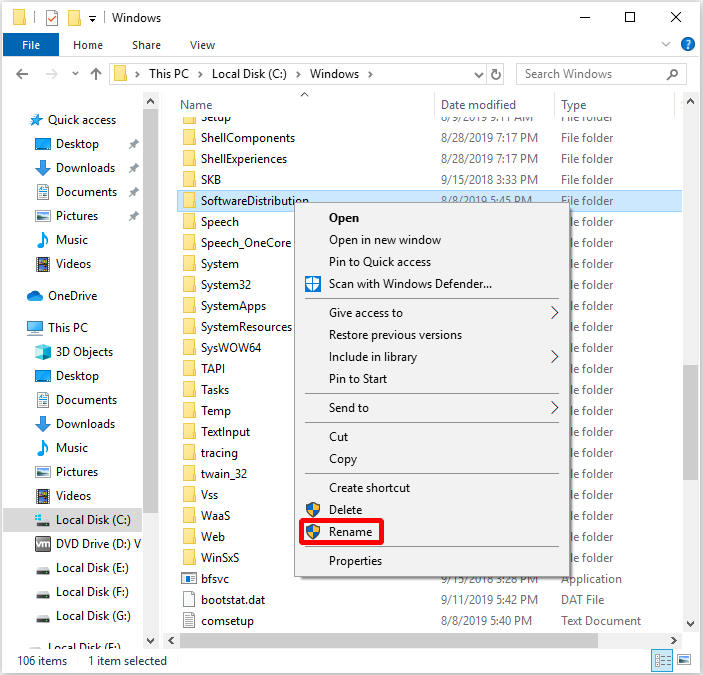
Step 3: Open This PC and navigate to Local Disk (C:) > Windows.
Step 4: Find the SoftwareDistribution folder and right-click it to choose Rename. Rename the folder to SoftwareDistributionOld or other names like this.
Step 5: Repeat step 1, find Windows Update service and right-click it to choose Start.
After finishing these steps, reboot your PC to see whether the error exists. If it does, try the following methods.
Method 5: Run System Restore
If you have created a system restore point before, then you can perform System Restore to fix 0x8024001e error. Here is the tutorial:
Step 1: Type system restore in the search box and click the best match one.
Step 2: Click Next in the pop-out window.
Step 3: Choose a system restore point and click Next.
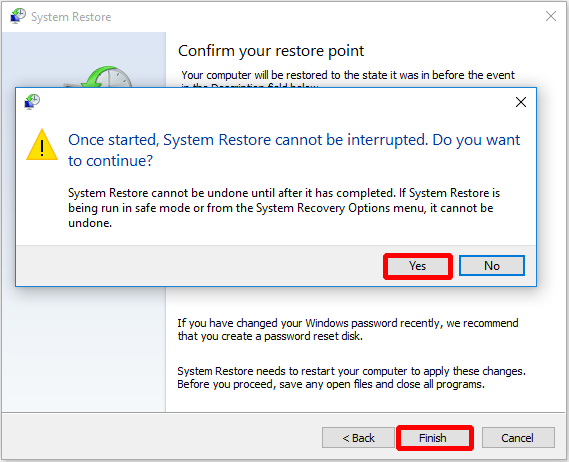
Step 4: Confirm your restore point and then click Finish and Yes.
Then you just wait for the computer to finish the process, and then restart your PC. Run System Restore will most likely fix 0x8024001e error, but if not, you need to try the last method.
Method 6: Reinstall Operating System
If the above methods cannot solve 0x8024001e error, then you’d better try to reinstall the operating system. In addition to solving the 0x8024001e error, you can also try reinstalling the operating system.
One thing you need to do before reinstalling Windows 10 is to create installation media. But you’d better back up all the important data in the computer to an external hard drive or upload them to OneDrive or other Clouds to avoid data loss.
The next thing you need to do is to download Windows 10 installation media using Microsoft Media Creation Tool to a USB flash drive with at least 8 GB available space.
Now I will tell you how to use the installation media to reinstall Windows 10.
Step 1: Insert the Windows 10 installation media to your computer, and then make sure that your computer is set to boot from the USB drive.
Step 2: Click Next after confirming the Language to install, Time and currency format and Keyboard or input method.
Step 3: Click Install now.
Step 4: If you have the license key, then enter it and click Next (if not, click I don’t have a product key to skip this step).
Step 5: Check I accept the license terms and then click Next.
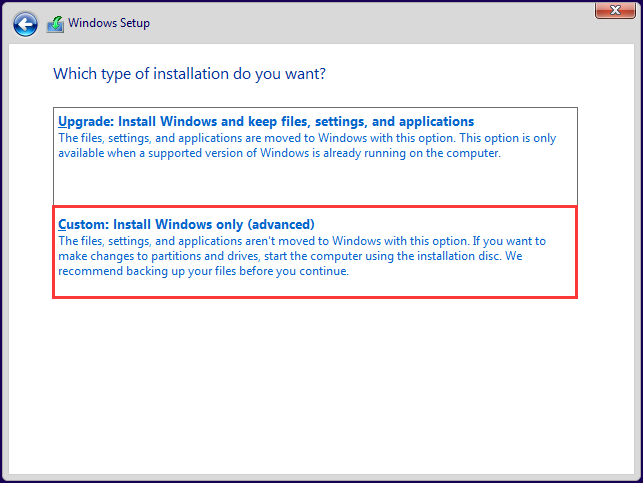
Step 6: Choose a type of installation you want and then follow the instructions to continue.
Then your computer will restart several times in the process of reinstallation. So after doing these steps, you can not only fix 0x8024001e error.
Further Reading
Sometimes when you open Windows Store, but you only receive an error code 0x8024001e. And this is because there are some problems with Windows cache, then you just clean Windows Store cache to fix this error.
Here is the tutorial.
Step 1: Press Win + R at the same time and enter WSRest.exe in the dialogue box, then click OK.
Step 2: After the command prompt window has popped up and Store has opened up, restart your PC to check whether this error has been fixed.
Useful Suggestion
After you have solved 0x8024001e error, I strongly recommend you to back up the operating system. And in the process of using the computer, it is inevitable that the system crashes or the data is lost due to improper operation or virus attack, so you can use the system image to restore your operating system when facing these errors.
Timely backing up system can guarantee to restore the system by booting the computer with bootable media when the system crashes. But what is the best way to back up the operating system?
Referring to this, there is a piece of professional and powerful backup and restore software – MiniTool ShadowMaker. You can use this piece of software to back up the system easily.
What’s more, you can also use it to back up files and folders, disks and partitions. And there is another useful feature for you – Sync. You can use this feature to sync files and folders to more than one place. The Disk Clone feature can make you create a bootable external drive easily.
And you can use the software for free within 30 days, so just download MiniTool ShadowMaker and have a try.
MiniTool ShadowMaker TrialClick to Download100%Clean & Safe
Now I will introduce you to how to use MiniTool ShadowMaker to back up the operating system.
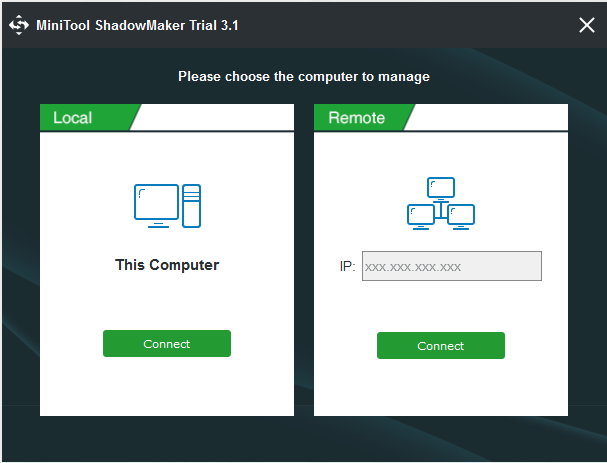
Step 1: Launch MiniTool ShadowMaker and choose whether to manage a local or remote computer to get the main interface by clicking Connect.
Step 2: Go to the Backup page. MiniTool ShadowMaker backs up the operating system and selects Destination by default. But you can click Source and Destination to change the source and destination.
Tip: MiniTool ShadowMaker allows you to back up data to five different locations: Administrative, Libraries, Computer, Network and Shared.
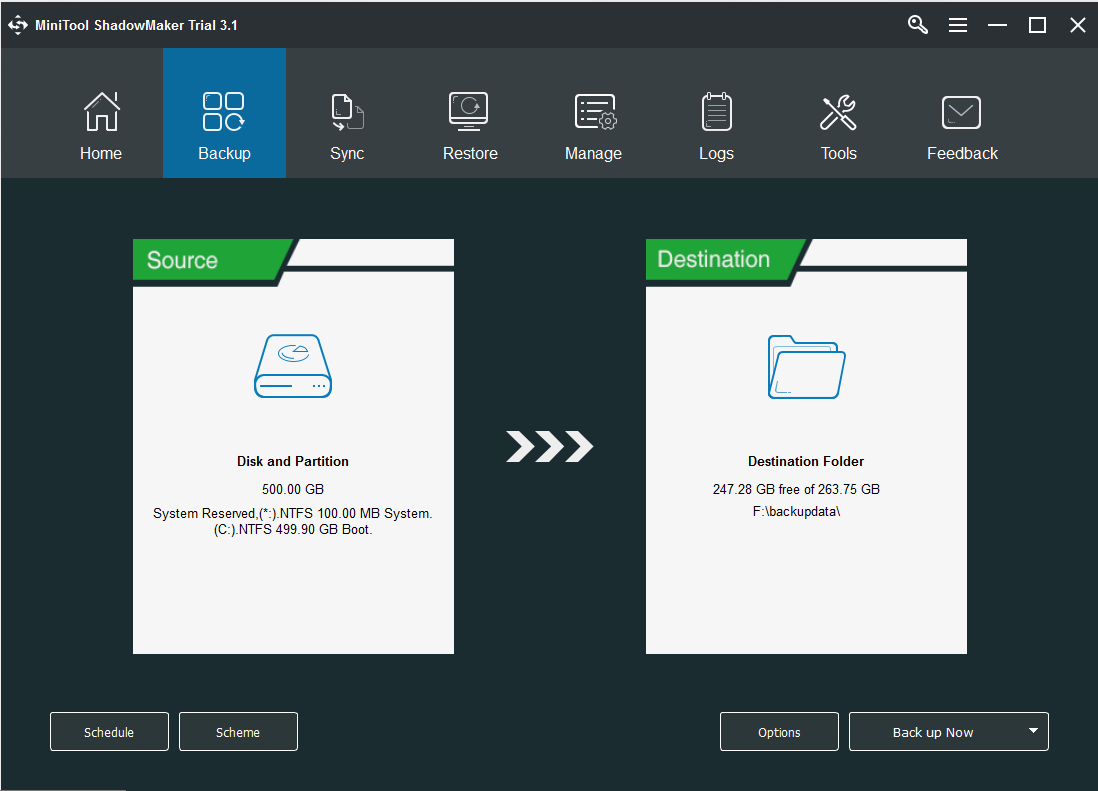
There are three useful features under the Backup page for you to protect your computer and data better.
- Schedule: You can set automatic backup here.
- Scheme: You can set three different backup schemes here: Full backup, Incremental backup and Differential backup.
- Options: You can set some advanced parameters here, such as adding comments to backup data, setting encryption mode, shutting down after successful backup, etc.
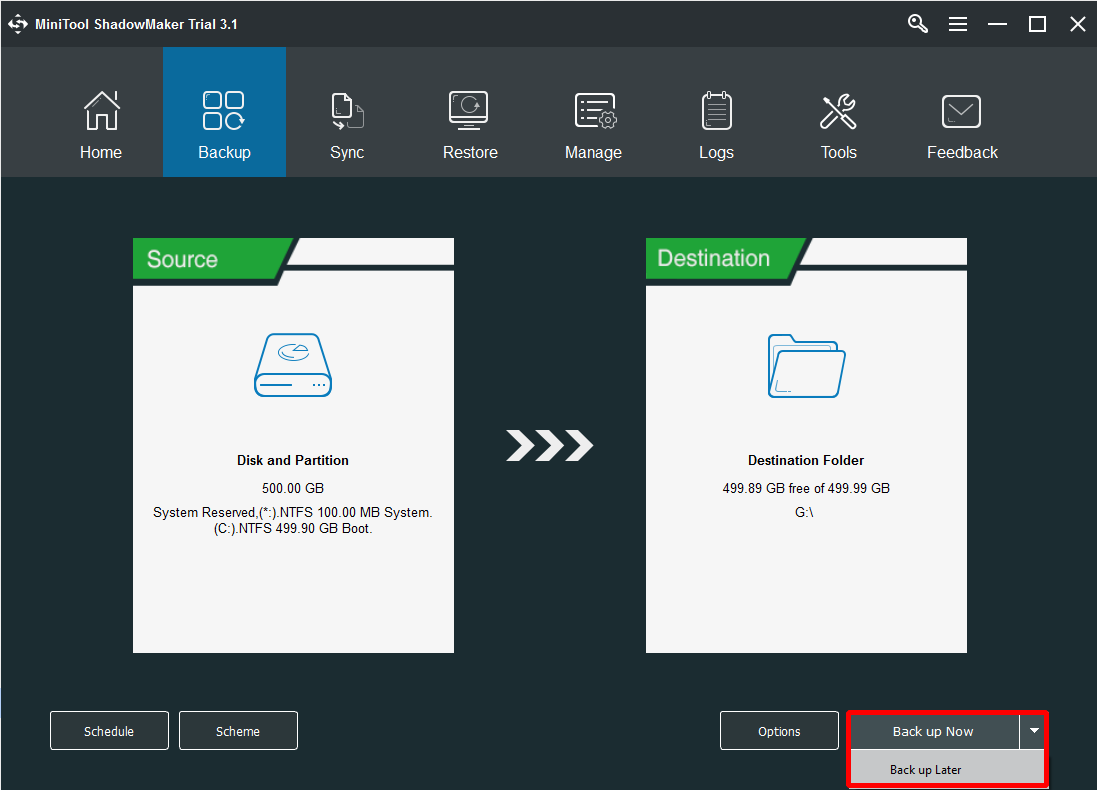
Step 3: Click Back up Now when you have confirmed the backup source and backup destination to begin the backup.
After finishing these steps, you just need to wait for the backup process to complete, then you can see the software has successfully backed up the system.
And in order to avoid failing to boot the computer because of system crash, I strongly recommend that you use the Media Builder feature under Tools page to create bootable media.
Final Words
From this article, you can know some information about 0x8024001e error. And this post has offered several efficient and feasible solutions to you to fix this error. Besides, you can also master how to use MiniTool ShadowMaker to back up the operating system.
If you have any confusion about this article or better advice about how to fix 0x8024001e error, then leave a comment below or send an email to [email protected].
User Comments :