Do you encounter error code 0xc1900101 on Windows 11/10? Example includes 0xc1900101 – 0x20017, 0xc1900101 – 0x2000c, 0xc1900101 – 0x30018, etc. If you’re suffering from one of the errors, you can refer to this article on MiniTool, which provides effective solutions to help you solve the problem.
What Is Error 0xc1900101?
Error code 0xc1900101 on Windows 10/11 is a common issue that may occur during the installation or update of the operating system.
It usually indicates problems with drivers, storage, or hardware compatibility, which can result in reverting to an earlier version, blue screen, system slowdowns, or unexpected restart.
Depending on different reasons, the error can show up in multiple variants:
- 0xc1900101 – 0x20017
- 0xc1900101 – 0x2000c
- 0xc1900101 – 0x30018
- 0xc1900101 – 0x3000D
- 0xc1900101 – 0x4000D
- 0xc1900101 – 0x40017
It’s necessary to figure out the root cause of the 0xc1900101 error before addressing it. Now, let’s check its causes in the following section:
Common Causes of the 0xc1900101 Error
When you experience an error that begins with 0xc1900101-, it might be attributed to one of the causes below:
- Incompatible or Outdated Drivers
- Faulty Hardware (RAM, Hard Drives, Peripherals, etc.)
- Antivirus or Other Security Software
- Applications That Interfere with System Updates
- Insufficient Disk Space
- Corrupted System Files
- Firmware Issues, like BIOS/UEFI
How to Troubleshoot 0xc1900101-Related Errors?
Preparations Before the Repair
① Back up Important Data
If the following methods are not operated properly, it may result in the loss of important data. Therefore, before starting the repair process, it’s highly recommended to make a complete backup of your data or system on the computer to prevent unexpected situations from occurring.
What’s the best way to back up data on your computer? MiniTool ShadowMaker is well worth a go. This is a piece of PC backup software that supports backing up various items on your computer, including personal files & folders, selected partitions, the whole disk, or the operating system.
What’s more, it is lightweight and user-friendly. Even if you are not tech-savvy, you can master this program and back up data with ease.
Here we will guide you through how to back up the operating system with it:
Step 1. Download and install MiniTool ShadowMaker Trial Edition. After installation, launch this freeware to enter its main interface.
MiniTool ShadowMaker TrialClick to Download100%Clean & Safe
Step 2. In the Backup page, MiniTool ShadowMaker sets the system-related partitions as the backup source by default.

Therefore, you only need to select a storage path for the backup image in DESTINATION. Usually, it’s suggested to choose an external hard drive or a USB flash drive.

Step 3. After making your choices, click on Back Up Now to start the process at once.
At any time, backup is a crucial remedial measure to deal with disasters such as system crashes, virus infections, hardware failures, etc. Therefore, it is of utmost importance for computer users to develop the habit of regular backups.
② Keep a Stable Network Connection
You need to ensure that the Internet is stable when implementing the following methods. Otherwise, it may lead to the failure of the operation, and the 0xc1900101 problem cannot be resolved.
③ Ensure Administrative Privileges
When conducting some of the methods, an administrator account might be required. Therefore, make sure you have sufficient permissions.
Solution 1 – Unplug All External Devices
Some external devices, such as DVD players, printers, USB flash drives, or digital cameras, may have drivers that are incompatible with your Windows system. When the Windows system attempts to access these drivers, it may get stuck and encounter the error code 0xc1900101.
You can try unplugging all external devices and then restarting the computer to see if the problem recurs. If this method does not solve the error, then you can try the following approaches.
Solution 2 – Check Disk Space
A lack of storage space might be the culprit of the 0xc1900101 error. First of all, you need to check if your system meets the minimum requirements of Windows 10 or 11.
- When updating or upgrading Windows 11, at least 20GB of free space is required.
- For Windows 10, to perform an upgrade operation, at least 16GB of available space is required to install the 32-bit version of Windows 10, while the 64-bit version requires 20GB of space.
You can use the following steps to confirm if your device has enough space:
#In Windows 11
Step 1. Press Win + I to fire up Settings.
Step 2. Go to System > Storage > check the free space of your main hard drive.
Step 3. If the available space is less than 20GB, click Clean recommendations > choose the files to delete > hit Clean up.

#In Windows 10
Step 1. Press Win + I to open Settings > head to System > Storage.
Step 2. Then confirm the free space on the system hard drive.
Step 3. If the available space is less than 200GB, select Temporary files below and choose the files to delete.

Step 4. Click on Remove files to free up space.
Not only that, there are multiple methods to increase or free up storage space for your system partitions. For example,
- Extend your system partition
- Delete temporary files and the Windows.old folder
- Turn off Hibernation
- Uninstall useless applications
- Change the Virtual Memory size in Windows 11/10
- Migrate your operating system to a larger SSD or HDD
Solution 3 – Remove Third-Party Antivirus
Third-party antivirus software, firewalls, or virtual private networks (VPN) usually install some kernel-level drivers, which have high privileges in the system.
The original purpose of designing such software is to enhance the security of the system or provide privacy protection for network connections. However, in some cases, they may conflict with the components involved in system updates or upgrades.
In such a case, disabling them should be a good choice:
Step 1. Press Win + R to launch the Run dialog.
Step 2. Type appwiz.cpl and hit Enter to open the Programs and Features window.

Step 3. Look for third-party antivirus, firewall, or VPN software installed on your device > right-click on them > choose Uninstall.
Step 4. Restart your computer and retry the upgrade or update.
Solution 4 – Update or Roll Back Drivers
Outdated or incompatible drivers are the most common cause of Windows update failure error 0xc1900101. Updating or reverting your drivers can solve the issue.
#Update Your Drivers to the Latest Version
Step 1. Press Win + X and select Device Manager from the Start menu.
Step 2. Expand categories below > right-click the device > choose Update driver > Search automatically for drivers.
- Display adapters
- Network adapters
- Storage controllers
- Any device under Other devices with warning icons

Step 3. Follow its instructions on the screen to perform the update.
#Roll back a Device Driver in Windows 10/11
If issues began after a recent update, then you need to revert the specific driver to the previous version. To do that:
Step 1. In Device Manager, right-click on the driver that needs to be rolled back and select Properties from the pop-up menu.
Step 2. Go to the Driver tab > hit the Roll Back Driver button > choose the reason why you need to revert the device > tap on OK to start the rollback process.

Step 3. Upon the rollback, the Roll Back Driver button will be disabled in gray. Now, exit the window and click Yes to restart your computer when prompted.
During rebooting, Windows will automatically load the older driver version to your computer.
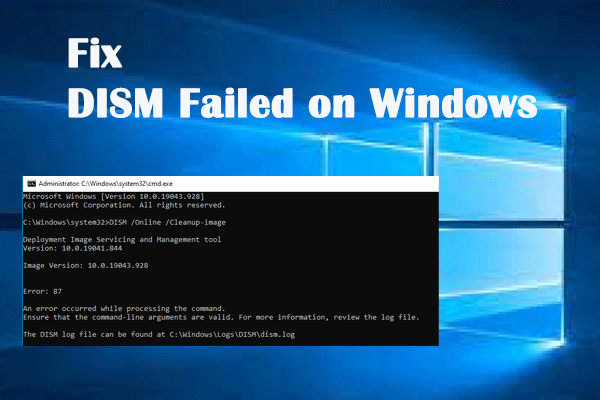
Solution 5 – Run SFC and DISM
To resolve the 0xc1900101 error, you can run the SFC scan. It is a built-in Windows tool that checks for and repairs any corrupt or missing system files.
#Run SFC (System Files Check)
Step 1. Press Win + S to open Windows Search > type cmd > select Run as administrator.
Step 2. In the Command Prompt window, input sfc /scannow and press Enter to execute it.

Step 3. Wait for the check to finish scanning your computer. In the case of any issues, the utility will restore system files and fix all errors related to them.
After scanning for system files, you can also use the DISM command to repair any issues with the system. This tool is another built-in Windows tool that helps fix the 0xc1900101 error.
Step 1. In the command window, type DISM.exe /Online /Cleanup-image /Restorehealth and hit Enter to run it.

Upon completion, close Command Prompt and restart your PC to check if the 0xc1900101 error has gone.
Solution 6 – Check and Update BIOS/UEFI
An outdated BIOS may cause compatibility issues and result in the 0xc1900101 error on a Windows PC. Updating your BIOS can fix the issue:
Step 1. Check the current BIOS version of your computer.
Open Command Prompt and run the following commands to check your BIOS version:
wmic bios get smbiosbiosversion
wmic bios get biosversion
wmic bios get version

Step 2. Then check your computer’s model name.
Open the Run window (Win + R) > type msinfo32 > hit Enter to bring up the System Information window > find & record your System Model from the right pane.
Step 3. Next up, please visit the website of your motherboard manufacturer, download and install the latest version suitable for your specific model.
Updating BIOS is a risky task since it may cause your computer to be unable to boot or run abnormally. Please back up your Windows computer system and data in advance and follow the manufacturer’s instructions strictly.
Solution 7 – Perform a Clean Install
If all other methods fail, a clean installation is a definitive way to resolve the 0xc1900101 error. This will erase all data on your Windows, so back up your files/system first.
Here’s a detailed breakdown:
Step 1. Create a bootable USB drive.
Step 2. Power off your computer and boot it into BIOS.
Step 3. Insert the created USB drive and start your computer from the drive.
Step 4. When seeing the Windows Setup interface, set your language, keyboard, and time and currency format, and then hit Next to continue.
Step 5. Hit Install now > choose I don’t have a product key > select the Windows version you should install > click Next.

Step 6. Check I accept the license terms > hit Next > choose Custom: Install Windows only (Advanced).
Step 7. Select the partition where the system is installed (usually Drive 0) > click Delete to remove it > hit OK to confirm the deletion.

Step 8. Then select Drive 0 Unallocated Space > click Next.
When finishing all the steps, Windows Setup begins to install a fresh copy of Windows on your PC.
Wrapping It Up
This guide illustrates the meaning of the 0xc1900101 error and how to solve it in 7 effective ways. Most importantly, be sure to back up your data before performing the solutions.
Do you have any questions about our product? Welcome to share them with us via [email protected]. We will reply to you as soon as possible.
0xc1900101 FAQ
Fix 2: Check Windows Update Utility Manually
Fix 3: Keep All Services about Windows Update Running
Fix 4: Run Windows Update Troubleshooter
Fix 5: Restart the Windows Update Service by CMD
Fix 6: Increase Free Space of System Drive
Fix 7: Repair Corrupted System Files
Run Windows 10 without activating it.
Upgrade from an older version of Windows.
Students can obtain Windows 10’s Education edition for free.
Way 2. Open Settings > choose Update & Security > go to Windows Update > click Check for updates.
User Comments :