Have you lost data due to a virus infection or system crash but never been able to retrieve it? With data backup, things will be much simpler. This full guide from MiniTool will introduce you to how to back up files on Windows 10/11, especially the handy tool MiniTool ShadowMaker.
Why Backup Files on PC
There could be a variety of factors that may cause your computer documents to get lost or corrupted. Therefore, understanding how to backup computer files is always advisable, particularly for those sensitive and irreplaceable files.
Backing up files has many benefits. First, sometimes disk failure or system crash can cause data loss. But if you have a data backup beforehand, it is a valid way for data loss prevention. The second merit is to provide an available option for you to recover your critical data that has been corrupted because of a disaster or something else. Thirdly, Windows updates may unexpectedly bring about data loss. Thus, backing up files could be the best way to deal with it.
Of course, there are other benefits of doing a data backup. However, do you know how to back up files with ease? Want a seamless and automated way to backup files? Follow this post and try to take advantage of the ways described below to back up your computer documents.
Wondering about audio backups? Here is a video guide:
How to Back up Files via the File Backup Software – MiniTool ShadowMaker
You may turn to some third-party software in order to backup files, but the best file backup software – MiniTool ShadowMaker is worth trying.
MiniTool ShadowMaker is a professional backup program that is a recognized specialist in backing up the operating system, disk, partition, files, and folders. Additionally, this program is also designed to offer considerate protection for your computer and data, with a user-friendly interface.
Download and install MiniTool ShadowMaker by clicking the following button to back up files to external hard drives and perform file synchronization, protecting your data. MiniTool ShadowMaker Trial is available for a complimentary 30-day usage period.
MiniTool ShadowMaker TrialClick to Download100%Clean & Safe
Begin by downloading and installing the best file backup software, and then take the following steps on how to back up data.
Back up Now
Step 1: Launch MiniTool ShadowMaker and click Keep Trial.
Step 2: Navigate to the Backup option from the main interface and hit it to enter the Backup section. Here are two modules for you to choose the backup source and its destination.
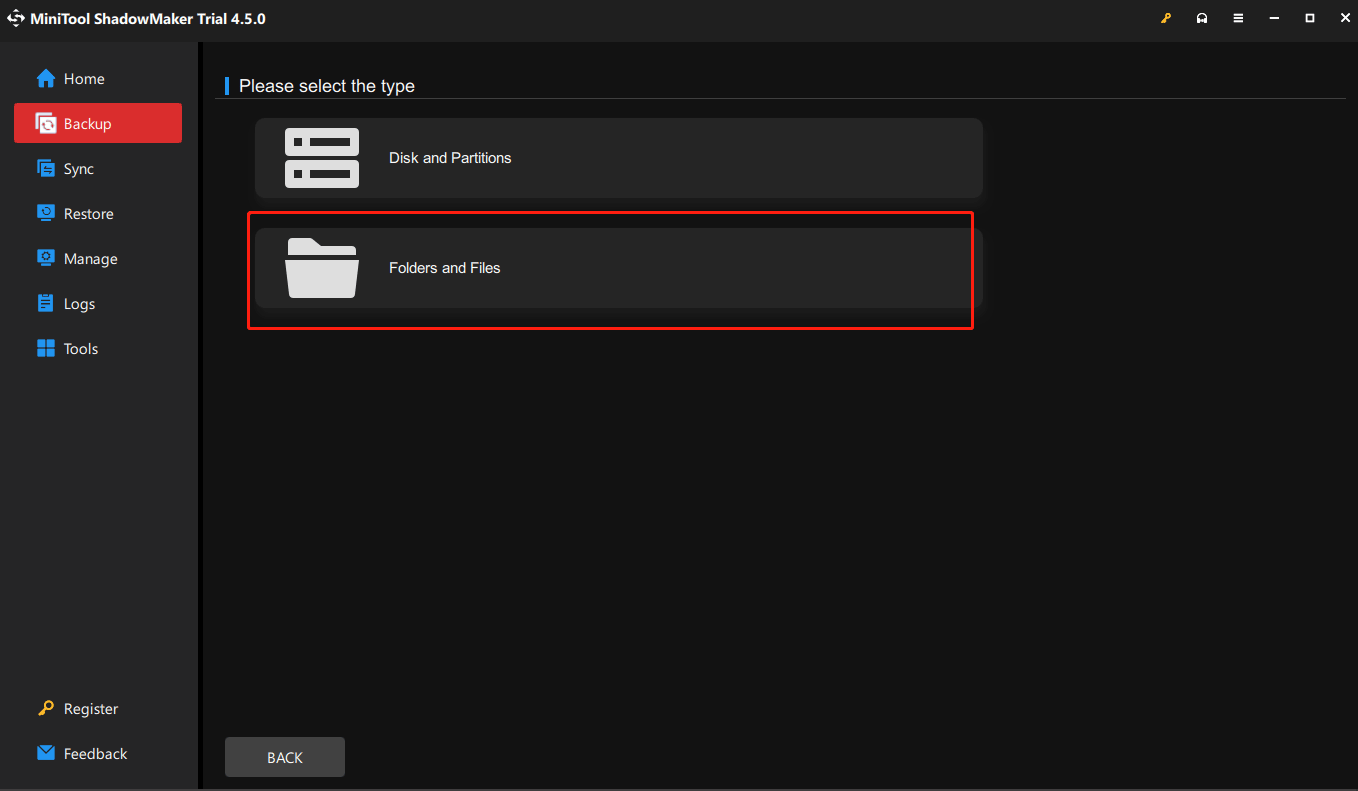
Step 3: As for data backup, select the SOURCE section. After entering this interface, you can select the Folders and Files type and choose the files you want to back up.
Step 4: Then return to the Backup page, in order to store the backup image, you need to click the DESTINATION section to select the destination path. It’s recommended to backup files to external hard drives and USB drives.
MiniTool ShadowMaker is a user-friendly program to provide you with an extraordinary file backup experience. Thus, it designs a feature for you to customize how it works according to your situation, namely, the Options button at the lower right corner of the Backup page.
- Backup Options: The Compression feature can reduce the file size so that it enables you to save your storage space. It includes three options, Medium (compressed to 50% of the size of the source file), None (without compression, but it may increase the size of the backup file), and High (compressed to 30% of the size of the source file). None is the default option, but you can also change it as you want. The Password feature allows you to enable password protection for this image.
- Backup Scheme: MiniTool ShadowMaker also provides three different backup schemes, so you are able to manage disk space by deleting some old backup images. The incremental backup scheme is chosen by default, and you can click the Scheme feature to change.
- Schedule Settings: MiniTool ShadowMaker enables you to set an automatic file backup by toggling on the Schedule Settings. You can carry out your backup tasks according to your real situation.
Therefore, you can set some advanced backup parameters by clicking the Options button.
Step 5: When successfully selecting the backup source and destination, click the Back Up Now option to immediately initiate the data backup process. Or you can postpone the process of file backup by clicking Back Up Later. It will complete the backup after clicking Back Up Now under the Manage section.
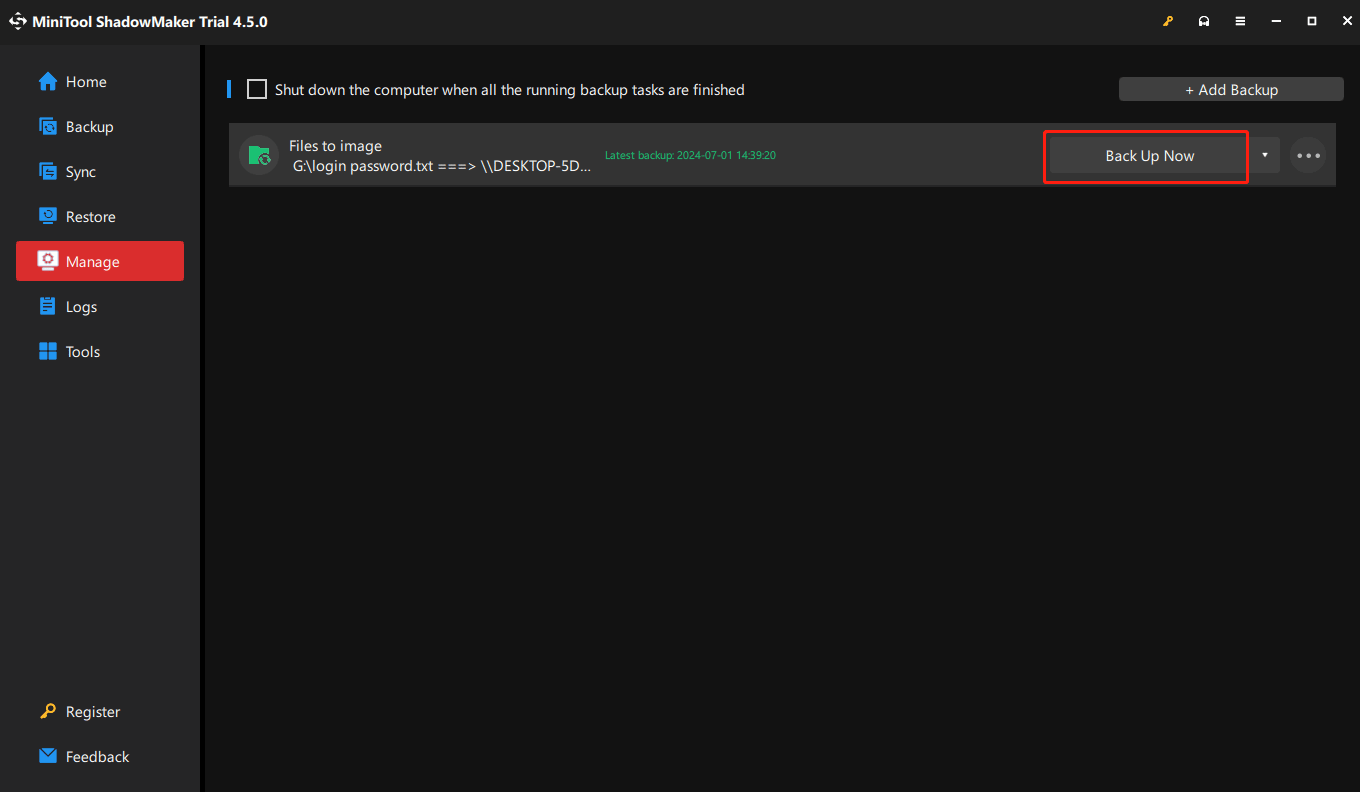
After the process is finished, you can click the Locate Image option under Manage to check if it has successfully backed up files. From the above introduction, you can see that MiniTool ShadowMaker is very easy and convenient to back up files to external hard drives.
MiniTool ShadowMaker TrialClick to Download100%Clean & Safe
File Sync
Of course, MiniTool ShadowMaker has a second way on how to back up data, namely, file sync. You may be curious about what file synchronization is and the differences between sync and backup. Indeed, file synchronization is another form of backup that enables you to store files in two or more physical locations such as external hard drives, USB flash drives, and the like. You can also protect your data in this way.
Here are how to back up computer files via the best professional file backup software.
MiniTool ShadowMaker TrialClick to Download100%Clean & Safe
Step 1: Open the MiniTool ShadowMaker program and click Keep Trail.
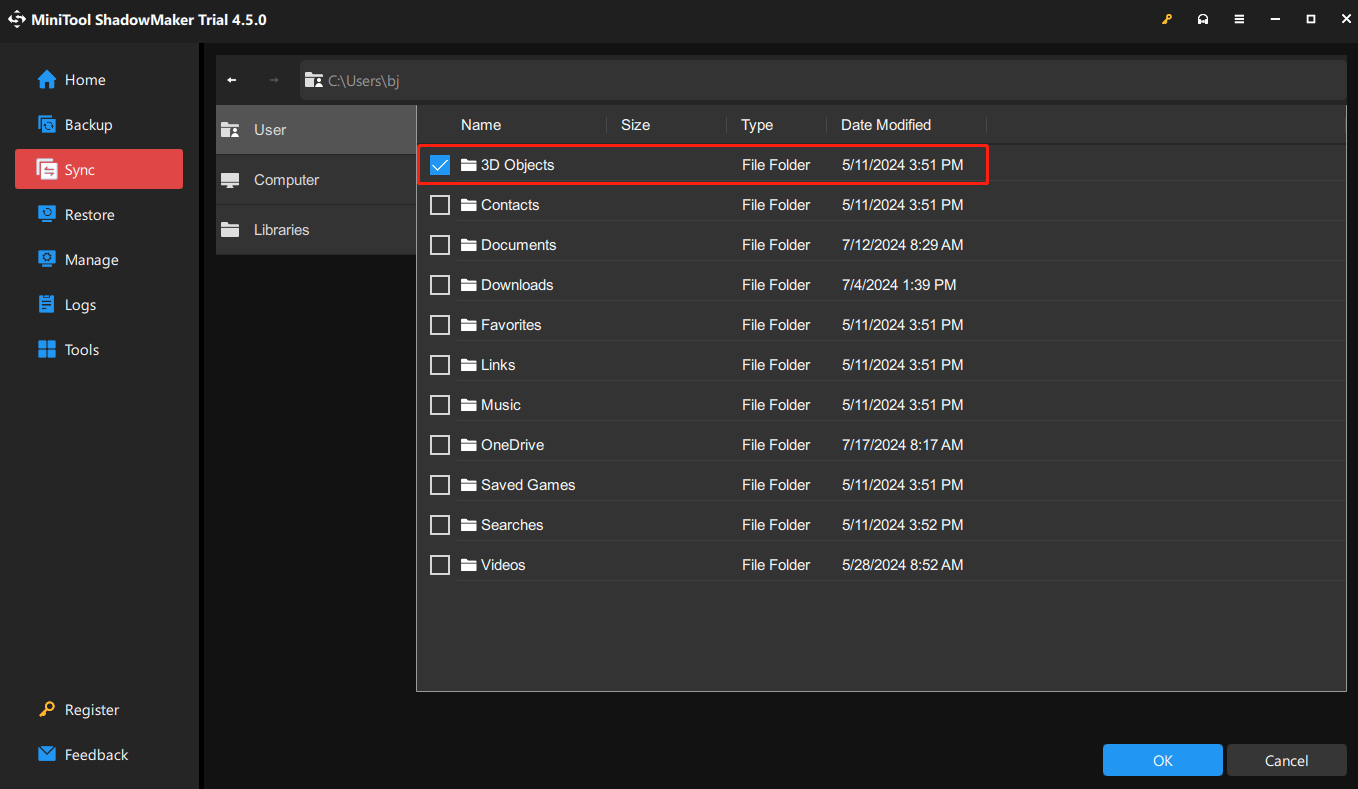
Step 2: Enter the Sync page and click the SOURCE module to select the files you want to back up, and then click OK to go on.
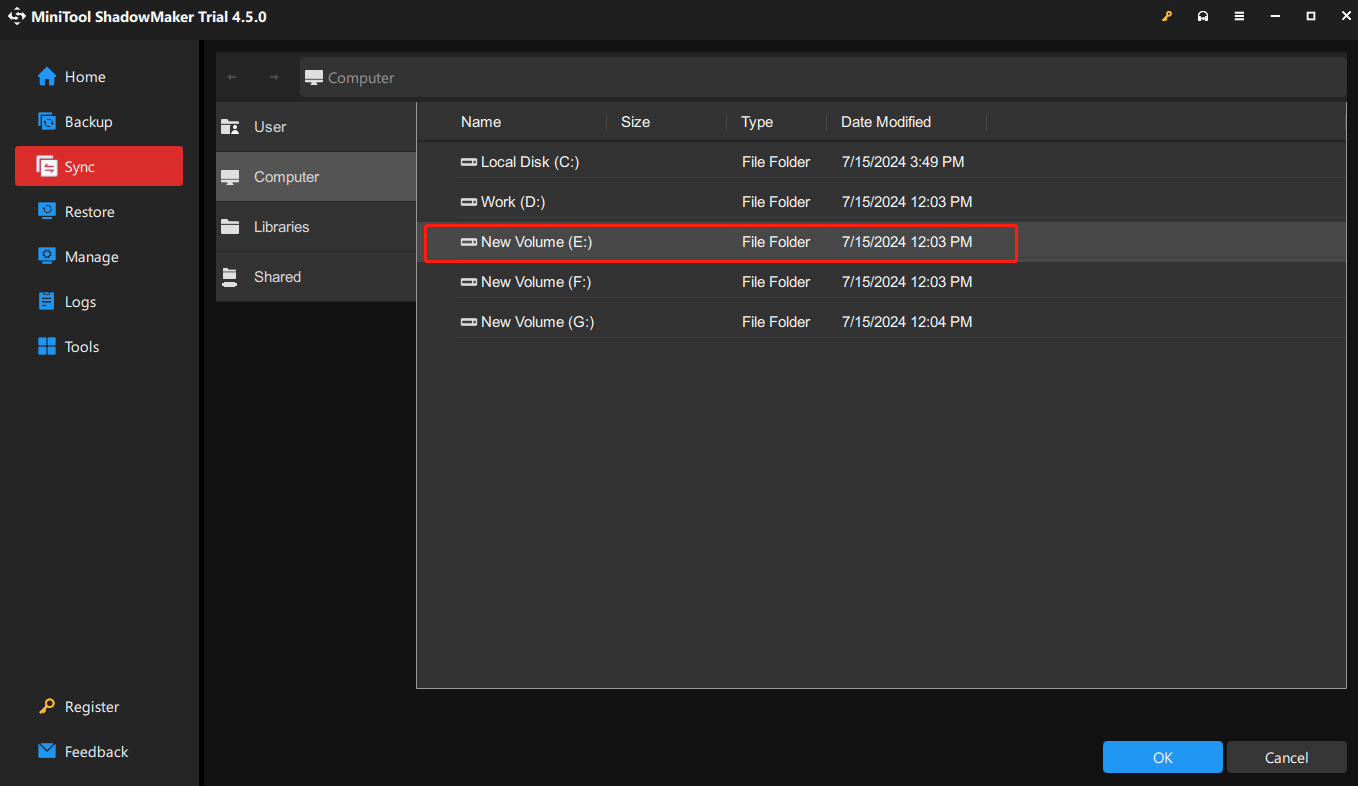
Step 3: After that, return to the Sync page, and click the DESTINATION module to choose where you want to save the synchronized file. Then click OK to continue.
In the Sync section, MiniTool ShadowMaker provides the Options feature for you to set up how it works as well.
- File Sync Options: You can set some advanced file synchronization parameters. For instance, compare the contents of the file when performing file synchronization but it will increase the sync time. Or set exclude conditions to filter sync files.
- Schedule Settings: It allows you to synchronize files regularly such as daily/weekly/monthly/on event.
Step 4: Then, click the Sync Now option to complete the file synchronization process. Or click the Sync Later option to delay the process.
When finishing the syncing process, click the Locate option under Manage to see if your files have successfully backed up.
Clone Hard Drive
In addition to the above two ways, MiniTool ShadowMaker is endowed with a feature – Clone Disk. Sometimes you could have a sea of files on the entire hard drive that need to be backed up. But if you back up files one by one, it will take a lot of time.
In this case, cloning a hard drive is an optional way for you to backup files to external hard drives. And this feature even can help you migrate Windows 10/11 to SSD without reinstalling the operating system. Follow the steps below about how to back up files on Windows 10/11 through the clone hard drive.
MiniTool ShadowMaker TrialClick to Download100%Clean & Safe
Step 1: Install the software, launch it, and click the Keep Trial button.
Step 2: Go to the Tools page, locate the Clone Disk option, and click it.
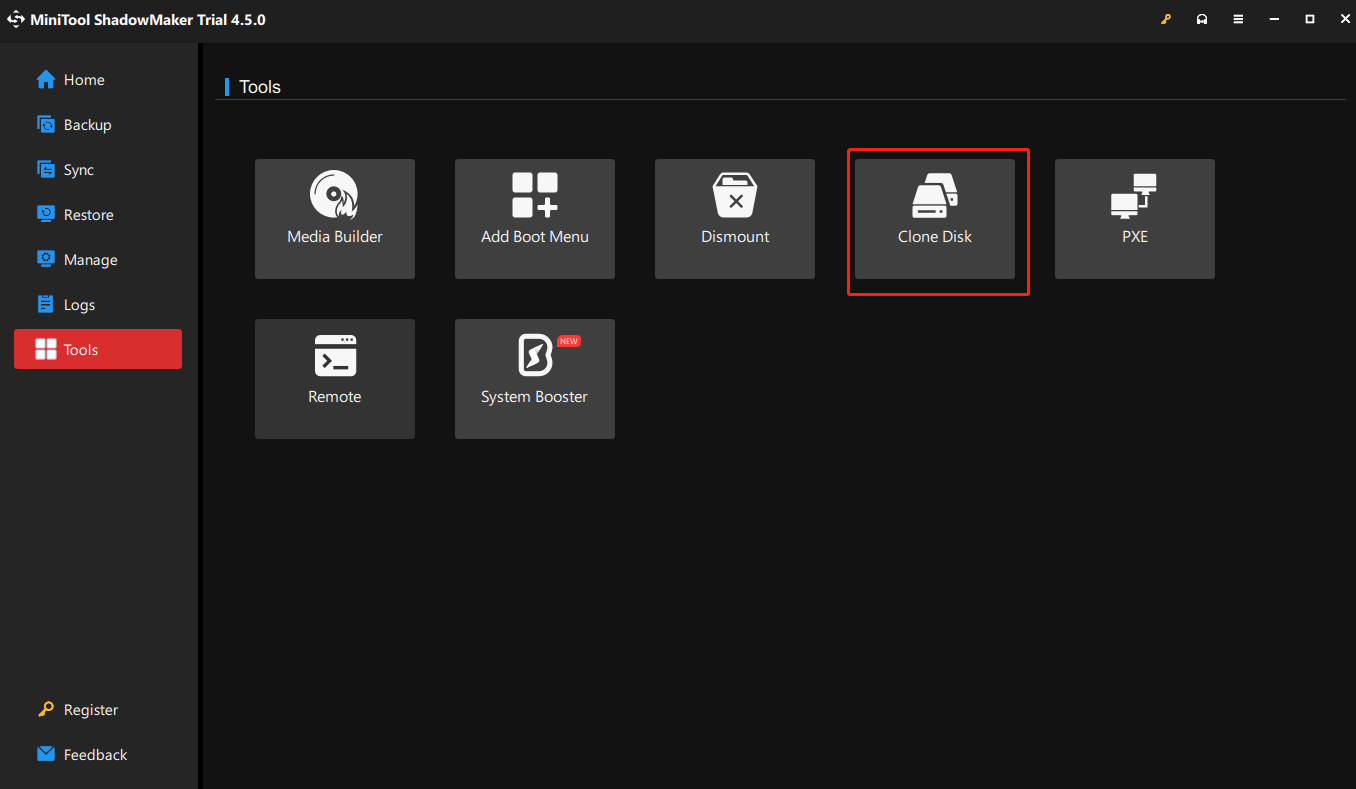
Step 3: Choose a source disk that needs to be cloned, and then click Next to choose a target disk to save data on the source disk.
Step 4: Click the Start button to perform the cloning process. It will go on for a long time.
Now, you can successfully clone the hard drive and back up files to external hard drives. From the above information, you can understand that it is easy to operate and time-saving.
MiniTool ShadowMaker TrialClick to Download100%Clean & Safe
How to Back up Files Through a Tool Built into Windows
There is, of course, another available way to back up computer files without turning to third-party software. Try to take advantage of the snap-in tools including Backup and Restore (Windows 7) and File History. Take the following steps on how to back up files on Windows 10/11.
Backup and Restore (Windows 7)
Step 1: Then type Control Panel in the search bar of Windows 10/11 and enter it.
Step 2: Point to View by and select Large icons. Choose Backup and Restore (Windows 7) from its main interface.
Step 3: In the Back up or restore your files section, look for Set up backup and click it.
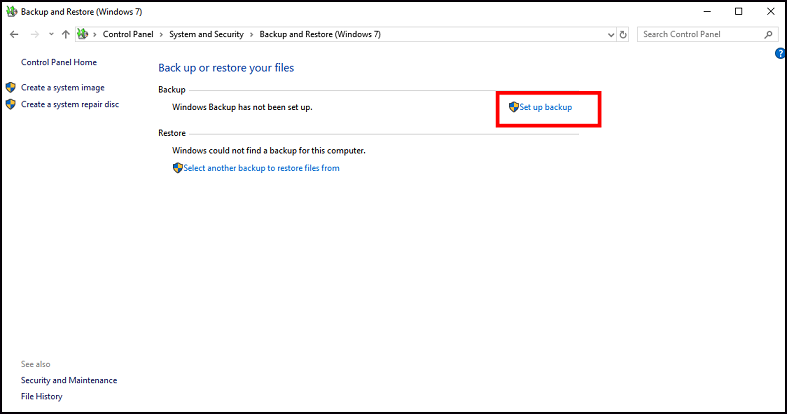
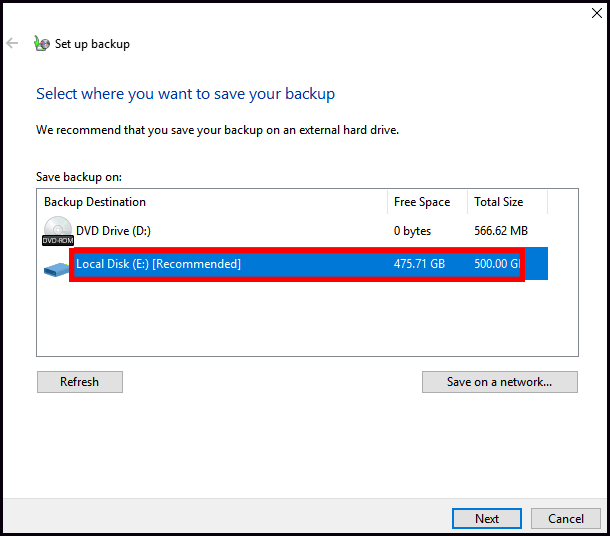
Step 4: Choose where you want to save your backup and click the Next button to go on.
Step 5: Then you will see two options. Read them and pick one according to what you want to back up. If you select Let me choose and click Next, choose the files that need to be backed up. Remember to check the option Include a system image of drives if you want to create a system image.
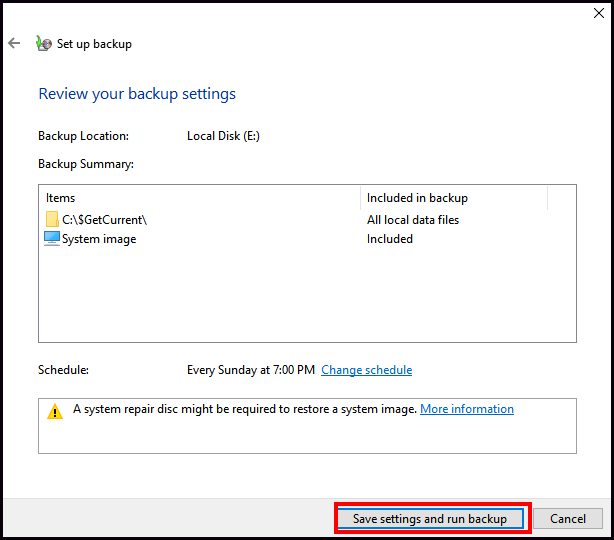
Step 6: Click the Next button, then you can set an automatic backup or change the backup schedule by clicking the Change schedule option. After that, click Save settings and run backup to perform your data backup process.
File History
You can use the File History feature in Windows 10/11 to back up files to external hard drives or network locations. Follow the below steps to try to back up files.
In Windows 10
Step 1: Open Start and click Settings.
Step 2: Navigate to Update & Security and click the Backup option.
Step 3: Connect the drive or device that you want to use as the backup location. Then click the Add a drive button and select your target drive to enable File History.
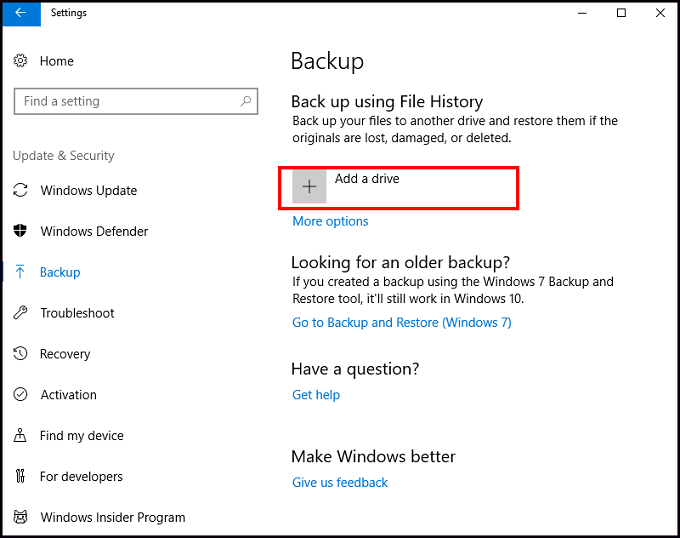
Step 4: Next, click the More options link to set up some advanced settings about when File History should run and how long it should save your old backups.
Step 5: If the specific folder you wish to back up isn’t listed, click the button for Add a folder to add it manually. You can also scroll down to Exclude these folders to exclude unwanted folders by clicking Add a folder. Finally, click Back up now.
In Windows 11, File History is more limited than in Windows 10.
Step 1: Type File History in the search box of Windows 11 and select it. File History will detect compatible drives connected to your computer and choose one. Or you can choose the drive you wish to use by clicking Select Drive. When finishing, click OK to continue.
Step 2: Click on the Exclude Folders option, click the Add button to add a folder to the exclusion list. Then click Save Changes to save your settings.
Step 3: Click Advanced settings from the File History screen to configure a backup schedule as you want. When done, click Save changes.
Bottom Line
In conclusion, it’s essential for you to back up files so as to protect your data and prevent critical and irreplaceable files from losing. This guide shares two easy and handy ways to backup files on Windows 10/11. Just try to take advantage of the mentioned backup tools for your data backup.
User Comments :