Overview of Continuous Data Protection
What Is Continuous Data Protection?
Continuous data protection (CDP), also known as continuous backup or real-time backup, means to back up computer data by saving a copy of every change happens to the data automatically. That is to essentially capture every version of the involved data that the user saves.
In the true form of CDP, it enables the user or administrator to restore the protected data to any point in time. Continuous data protection technology was patented by British entrepreneur Pete Malcolm in 1989 as a backup system in which a copy of every change made to a storage medium is recorded as the change occurs.
In an ideal continuous data protection, the recovery point objective is zero while the recovery time objective isn’t zero. The recovery point objective refers to the maximum targeted period in which data (transactions) might be lost from an IT service due to a major incident while the recovery time objective means the targeted duration of time and a service level within which a business process must be restored after a disaster (or disruption) in order to avoid unacceptable consequences associated with a break in business continuity.
CDP plays as a service that captures changes to data to a separate storage location. Multiple methods can capture continuous live data changes involving different techniques that serve different needs. True CDP-based solutions can offer fine granularities of recoverable objects ranging from crash-consistent images to logical objects like files, messages, logs, as well as database files. Yet, this is not necessarily true for near-CDP solutions, which will be discussed below.
Continuous Data Protection vs Traditional Backup
The true continuous data protection is different from traditional backup for it’s not necessary to specify the point in time to restore from until ready to recover while traditional backups only restore data from the time the backup was made.
In some situations, CDP needs less storage space for image files than traditional backup. Most continuous data protection solutions save byte or block-level differences instead of file-level differences.
For example, if 1 byte of a 1 GB file is modified, only the changed byte or block is going to be backed up. Yet, the traditional incremental and differential backups will back up the entire file. However, since 2013, enterprise client-server backup tools have implemented a capability for block-level incremental backup designed for large files like databases.
Continuous Data Protection vs RAID, Mirroring, Replication
CDP is different from RAID (Redundant Array of Independent Disks), mirroring, or replication for the latter three technologies only protect the most recent one copy of the data. If data corrupts in a way that can’t be detected immediately. Those technologies cannot protect the data effectively.
Continuous data protection protects against some effects of data corruption through enabling recovery of a previous uncorrupting version of the data. Yet, transactions between the corrupted event and the restoration are lost. They can be restored by other ways like journaling.
Continuous Data Protection vs Snapshots
Compared to snapshots, true CDP has no backup schedules. When data is written to disk, it is also written to a backup location (another machine over the Internet or an appliance like cloud) asynchronously. This brings some inconvenience to disk-write but eliminates the need for scheduled backups.
Continuous data protection is the most advanced and comprehensive data protection for enabling data restoration to any point of time. Yet, near CDP technologies can give enough protection for many organizations with less complexity and expense.
Snapshots can offer a reasonable near-CDP-level protection for file sharing and enable users to directly access data on the file share at regular intervals. This is a higher-level protection than typical disk-based or tape-based regular backups and it may be quite enough for you.
Near continuous data protection does copying at pre-set time intervals, which is essentially incremental backup separately for each source machine by timer instead of script.
Continuous Data Protection vs Near Continuous Data Protection (Near CDP)
Since true continuous data protection backup write operations are executed at the basic input/out system (BIOS) of the microcomputer in such a manner that normal use of the computer is unaffected, true CDP backup must practically be run in conjunction with a virtual machine or equivalent. This makes it not proper for common personal backup apps.
Some backup applications marketed as continuous data protection may only allow recovery at fixed intervals like 10 minutes, one hour, or one day (24 hours). Those programs take incremental backups at the intervals automatically. Such a scheme is called near CDP or near continuous backup and not universally recognized as true continuous data protection for it isn’t able to restore to any point in time.
When the interval is shorter than 1 hour, typically, near continuous data protection products are based on periodic snapshots to avoid downtime and allow apps to continue writing to their data. Yet, for high-availability systems, they may instead create the backup based on a read-only copy of the data set frozen at a point in time.
Near continuous data protection, except for Apple Time Machine, intent-logs every change on the host system, usually by storing byte or block-level differences instead of file-level differences. It is different from simple disk mirroring for it allows a roll-back of the log and thus a recovery of old images of data. Intent-logging allows precautions for the consistency of live data, protecting self-consistent files but requiring apps “be quiesced and made ready for backup”.
A debate in the industry discusses whether the granularity of backup must be “every write” to the continuous data protection, or whether a near CDP solution that captures the data every few minutes is good enough.
The debate hinges on the usage of the term “continuous”. Whether only the backup process must be continuously automatically scheduled, which is usually enough to get the benefits mentioned above, or whether the ability to recover from the backup also must be continuous.
Disadvantages and Risks of Continuous Data Protection
Besides the drawbacks mentioned above, there are some other shortcomings of CDP. When real-time edits are backed offsite over the upstream channel of the installation’s broadband network, network bandwidth throttling may be needed to reduce the impact of true continuous data protection, especially in multimedia and CAD (Computer Aided Design) environments. Alternatively, you can back up to a separate FC SAN (Fibre-Channel-connected Storage Area Network) appliance.
Perform Near Continuous Data Protection with MiniTool ShadowMaker
Since true-CDP backup is not suitable for ordinary personal backup, you are recommended to take advantage of the near-CDP scheme to protect your computer data from loss. Also, a professional and reliable near-CDP backup program is needed such as MiniTool ShadowMaker, which enables you to carry out backup tasks at a short interval and in incremental type automatically.
MiniTool ShadowMaker TrialClick to Download100%Clean & Safe
Step 1. Download, install, and launch MiniTool ShadowMaker on your computer.
Step 2. If it asks you to buy its paid edition, just click Keep Trial on the upper right of the screen.
Step 3. Then, it will get into its main user interface (UI). There, click the Backup tab in the top menu.
Step 4. In the Backup tab, specify the Source item(s), no matter they are files/folders, partitions/volumes, operating system (default selection), or the entire hard disk drive.
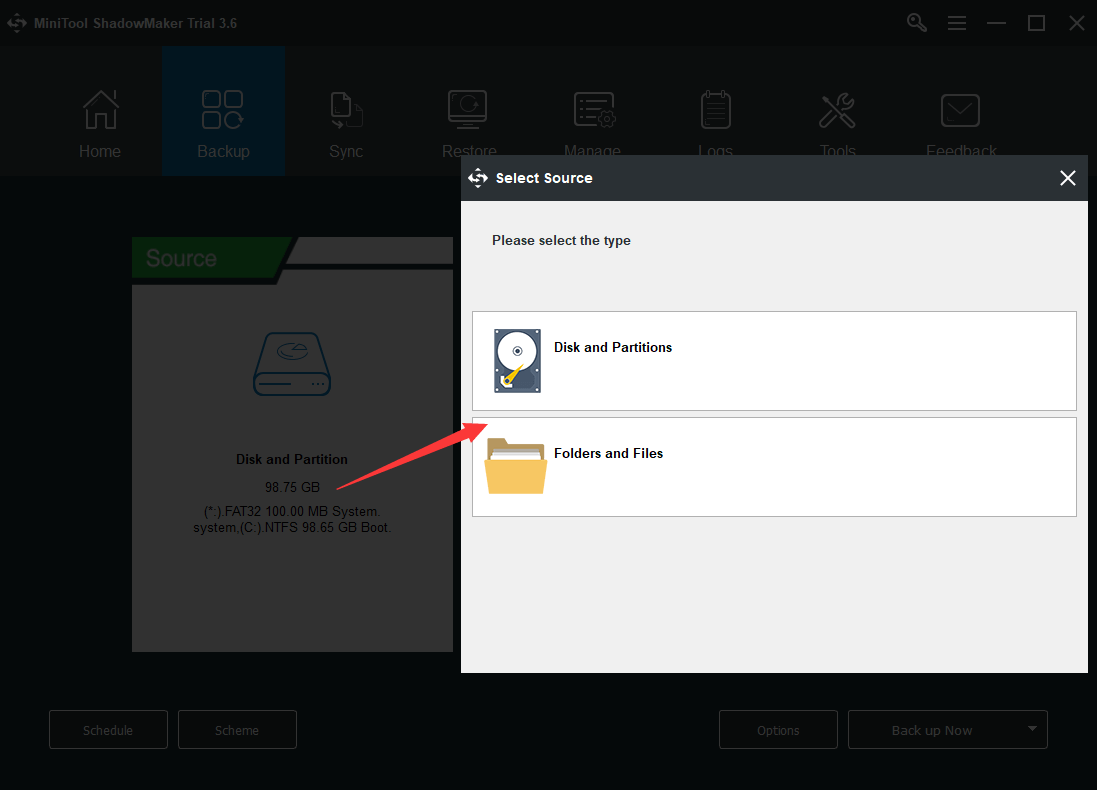
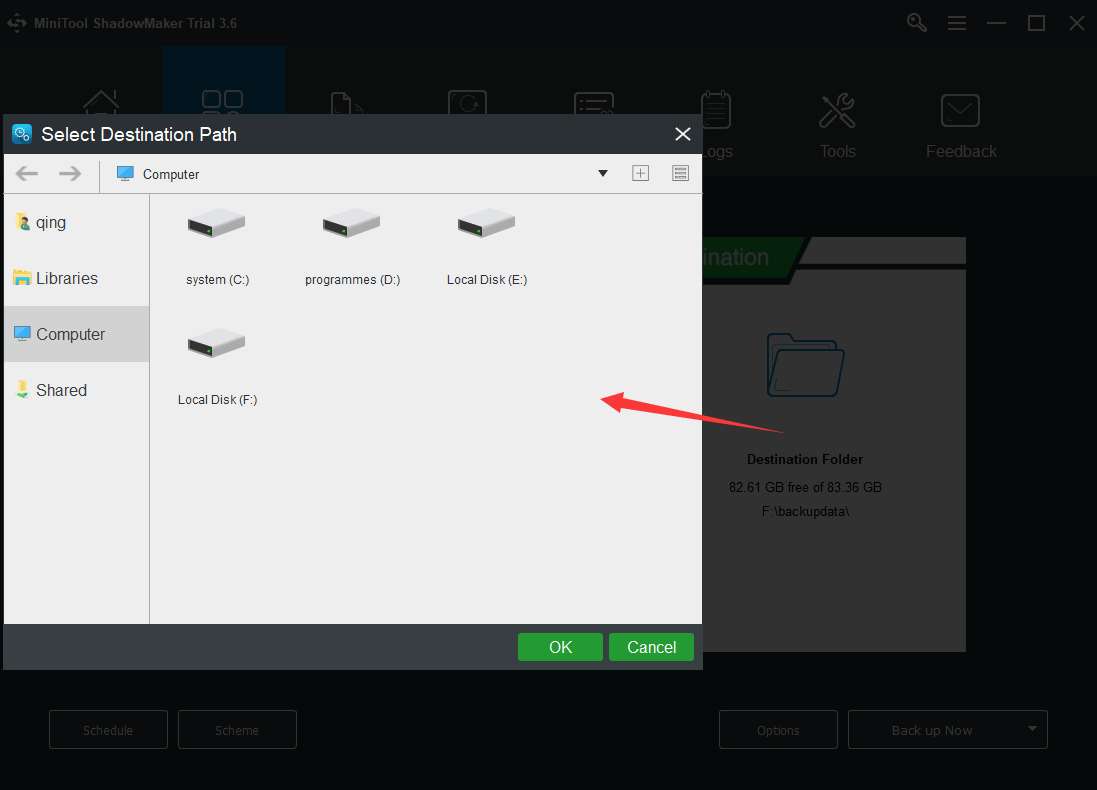
Step 5. Within the same tab, select Destination to choose where you’d like to save the backup image, a local location, external storage space, or NAS?
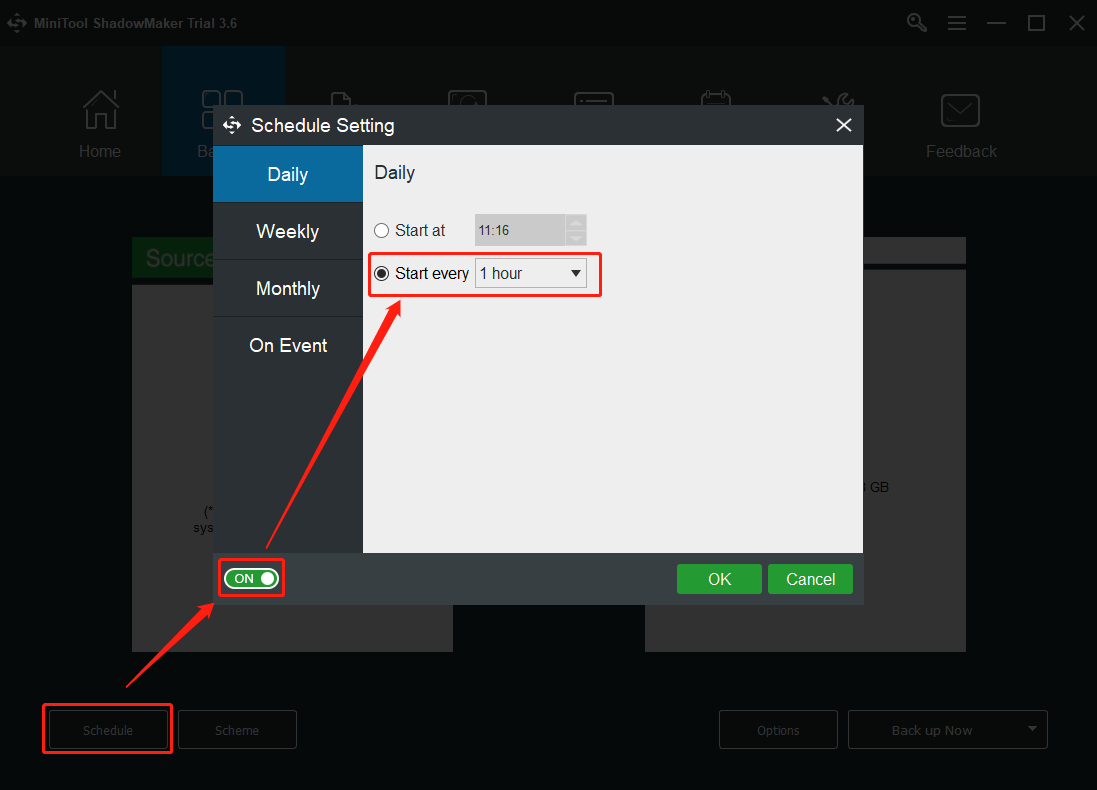
Step 6. Click on the Schedule button in the lower-left and switch on the schedule settings in the pop-up window. In the Schedule Setting window, select the default Daily backup, click the Start every option, and choose 1 hour frequency. Finally, click OK to save the changes.
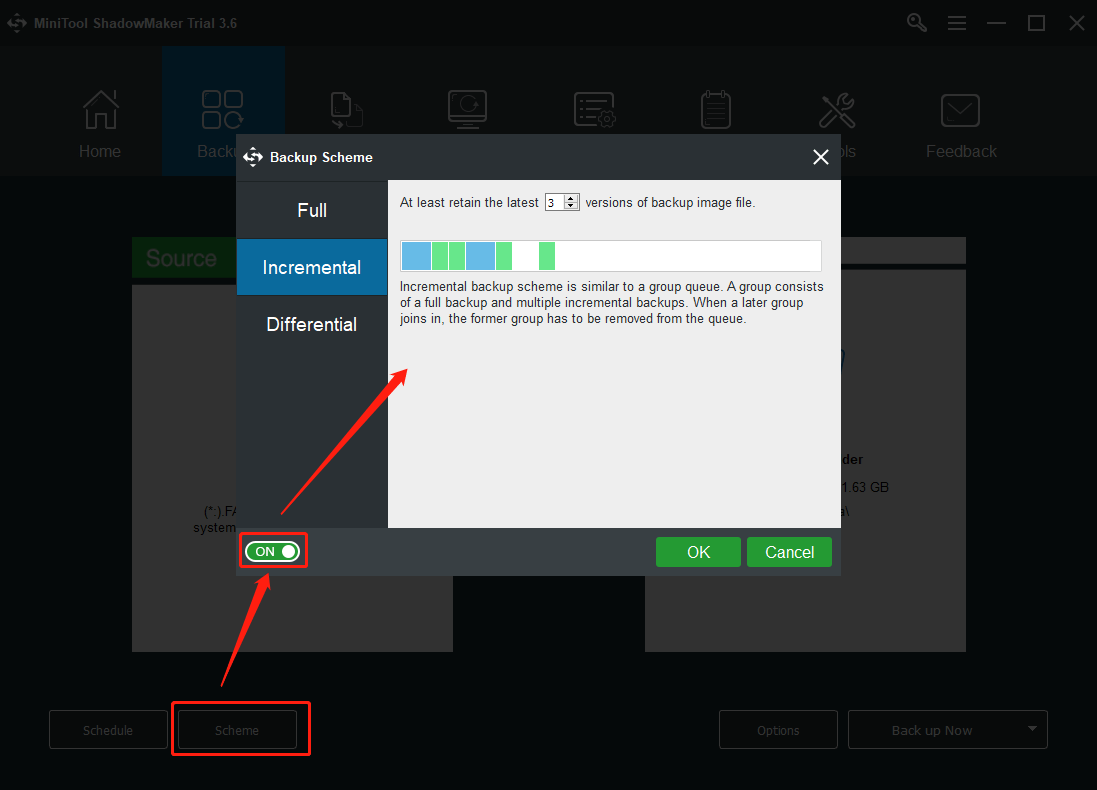
Step 7. Click the Scheme button next to the Schedule button and switch on scheme settings. Within the Backup Scheme window, keep the default Incremental backup type and customize how many latest backup image file versions to retain. Or, you can just leave it as the default 3 versions.
Step 8. Eventually, back to the Backup tab, there, click Back up Now. You will be prompted to confirm the operation before it really starts up.
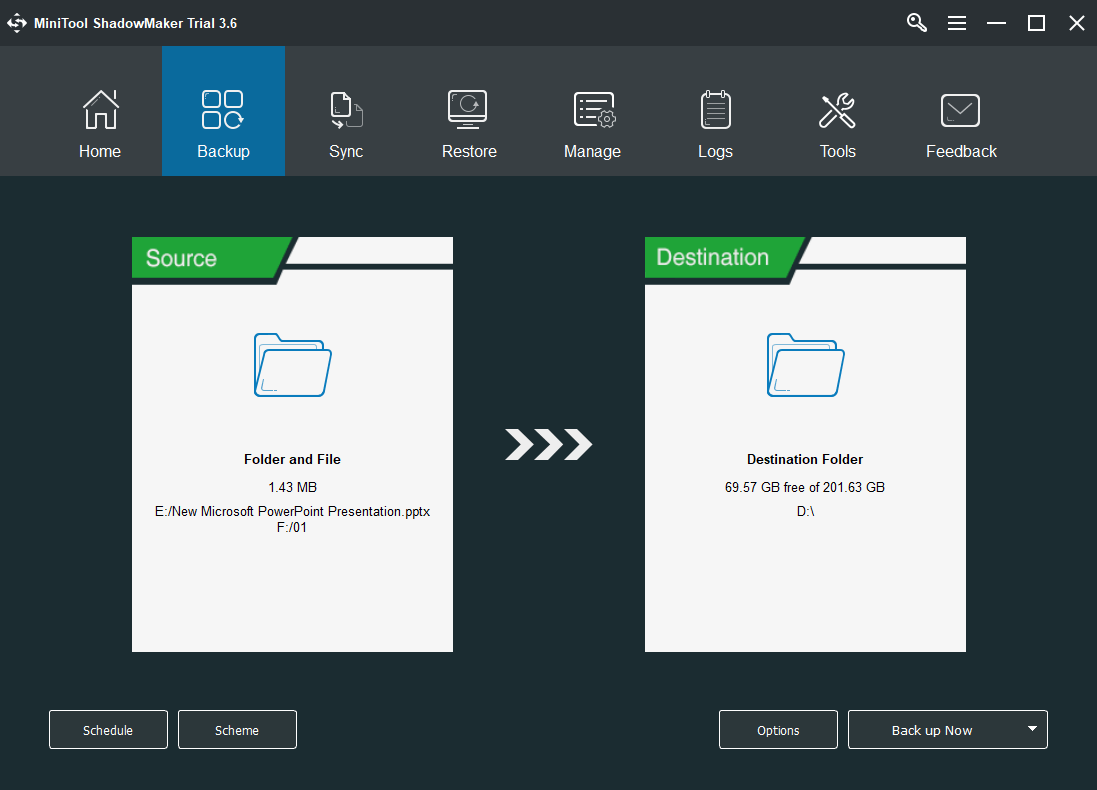
Besides the above specifications, there are a lot of other settings available for you. Just click the Options button in the lower right of the Backup tab and personalize your backup task. You are able to determine which kind of sector to back up (only used ones or all), whether to back up Windows Page Files and Hibernation Files or not, image files size, image compression level, whether to verify backup image when it is created or not…
Set up Near-CDP with Windows 10/11 File History
Also, you can carry out near continuous data protection plan with the help of system built-in service – File History. The guide is as below.
1. Navigate to Settings > Update & Security > Backup.
2. Under Back up using File History, click Add a drive and select one as your backup destination. If there is no available drive, you need to connect an external disk to your PC and try it again.
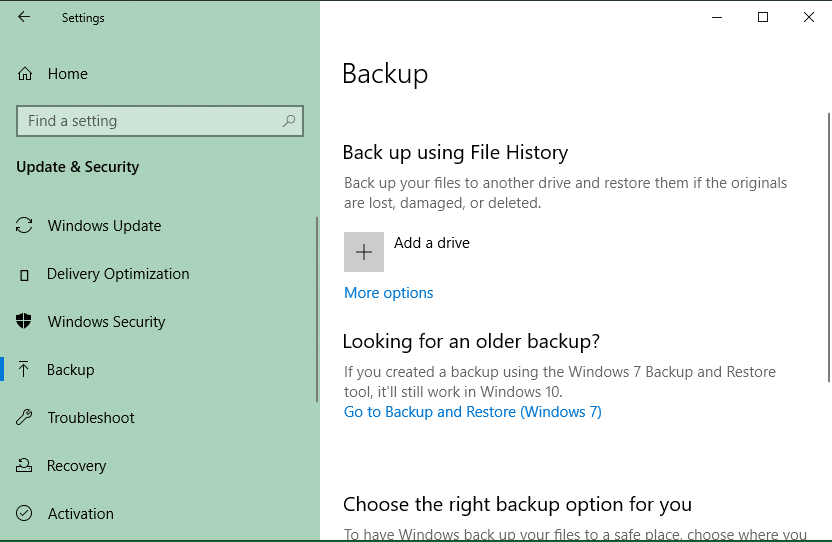
3. Then, you will see the Automatically back up my files is On.
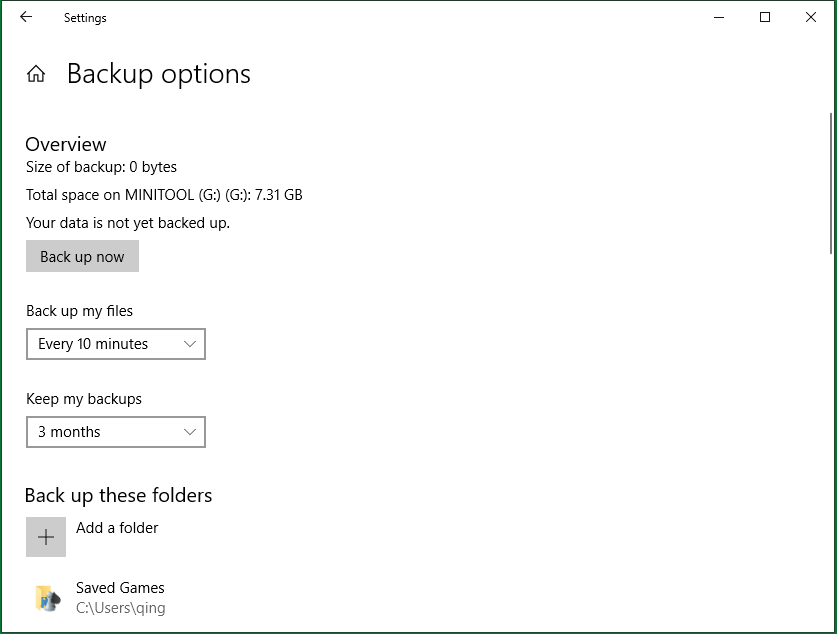
4. Click the More options below and specify some backup settings in the popup. In detail, under Back up my files, select backup frequency; under Keep my backups, choose how long to keep the backup image; and under Backup these folders, pick up the folders you want to protect.
5. Scroll down and under Exclude these folders, if you don’t want to back up some specific folders, you can add them there. Or, if you want to change your backup destination, just click Stop using drive under Back up to a different drive and reset your backup plan from the very beginning.
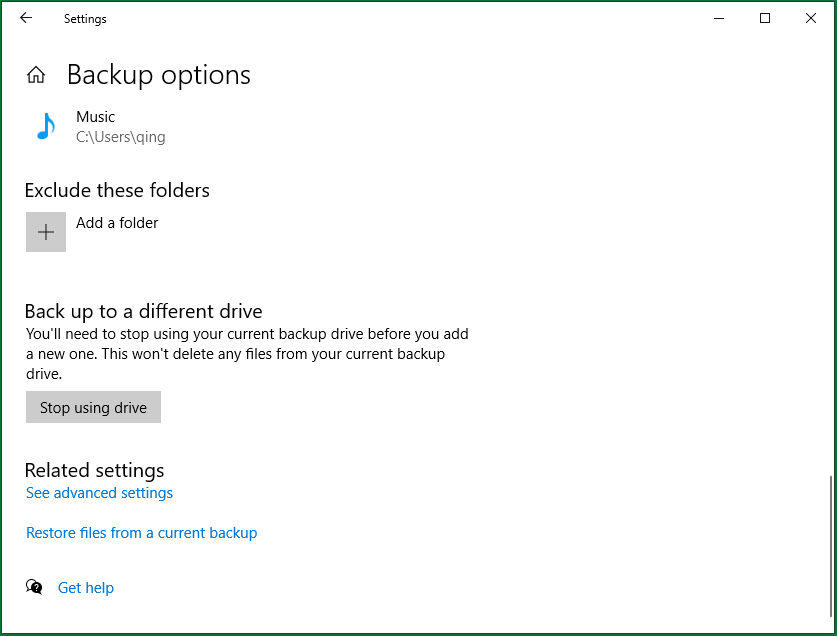
Or, you can click See advanced settings under Related settings to go to File History in Control Panel. There, click Select drive in the left menu. On the new screen, you are allowed to select a network location as the backup destination.
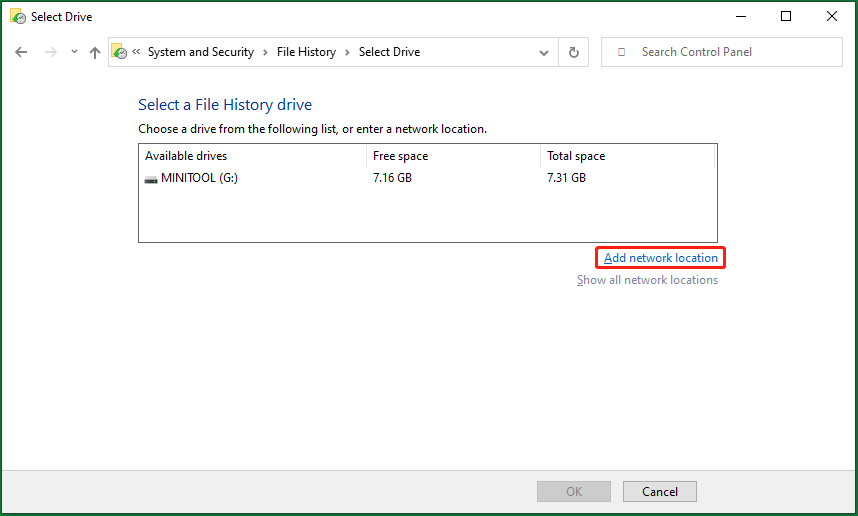
Also, you can exclude unnecessary files from being backed up by clicking Exclude folders in the left menu. Or change backup frequency and backup image maintenance time by clicking Advanced settings in the left panel.
Deploy Near Continuous Data Protection in Windows Backup & Restore
Moreover, you can conduct near CDP strategy using the Backup and Restore (Windows 7).
1. Click Go to Backup and Restore (Windows 7) under Looking for an old backup.
2. Then, you will get into the Backup and Restore window in Control Panel. There, click the Set up backup option.
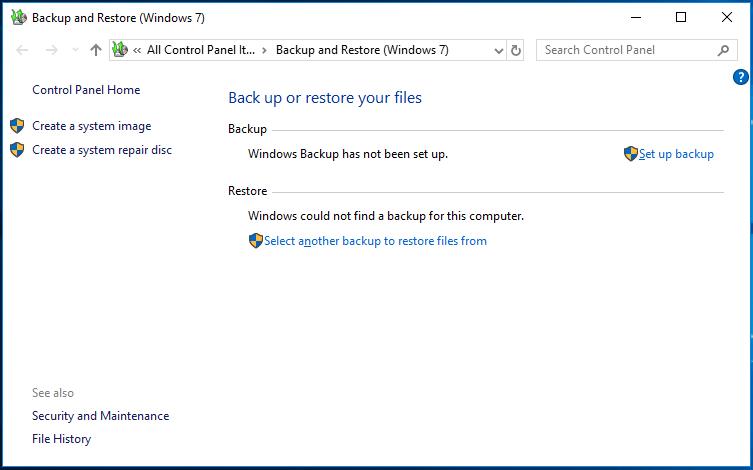
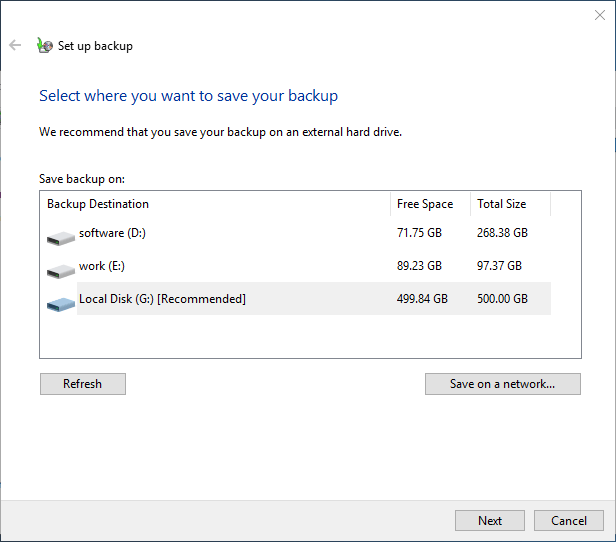
3. Next, select a backup destination, local internal or external hard drive or network location.
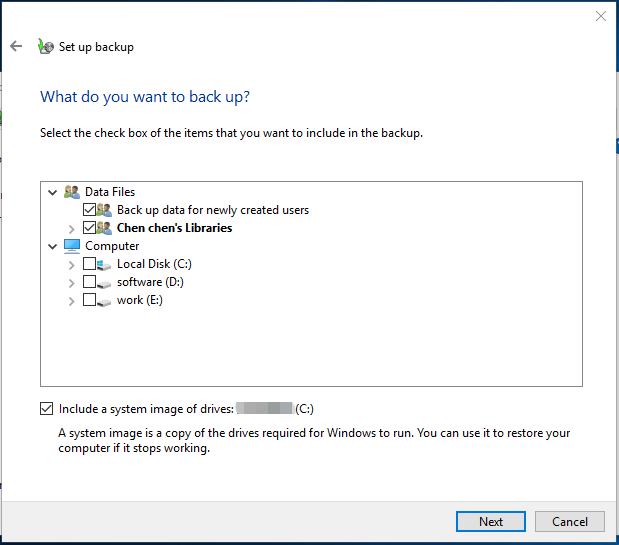
4. Under What do you want to back up, either Let Windows choose or Let me choose. For continuous data protection, you’d better select the latter.
5. Now, you can choose the specific folders or files to back up. Also, you can decide whether to back up system or not.
6. Next, click on Change schedule. In the new popup, select Daily behind How often and pick a specific time behind What time. Click OK to save the schedule.
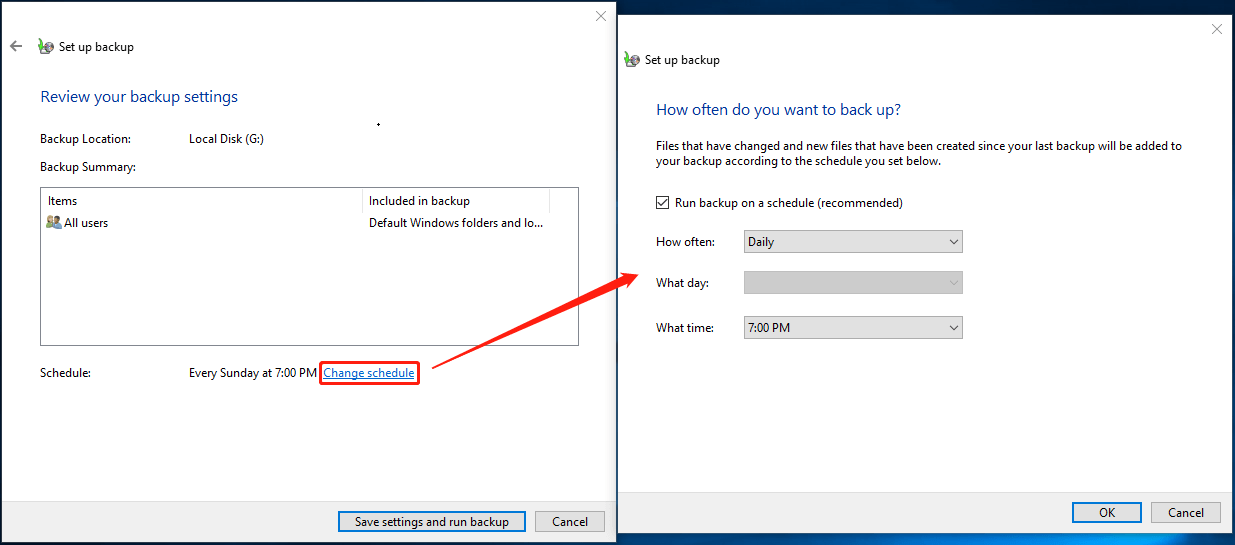
7. Finally, click Save settings and run backup. If it pops up asking for your confirmation, just do it.
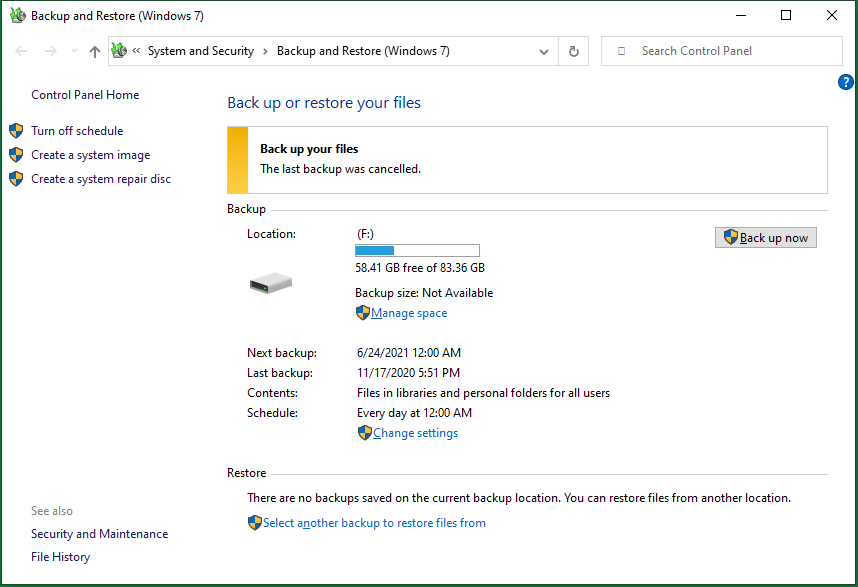
When the backup process completes, you will see a quite different appearance in the main interface of Backup and Restore in Control Panel. There, you can manage the backup task by using Manage space option to manage backup destination storage space and the Change settings option to alter backup destination, source, as well as schedule.
Near Continuous Data Protection Solutions Comparison
Until now, we have introduced all three near-CDP solutions, MiniTool ShadowMaker, File History, and Backup & Restore. Now, let’s make a comparison of them and help you to choose the one that suits you most!
MiniTool ShadowMaker TrialClick to Download100%Clean & Safe
| Near-CDP Software | Support Backup Frequency | Backup Source | Backup Destination | Backup Image Management | Other Features | Operations |
| MiniTool ShadowMaker |
|
|
| How many backup versions to keep |
| Easy and intuitive |
| File History |
| Only files and folders |
| How long to keep the backup versions | None | Easy |
| Backup & Restore |
|
|
| Manually delete previous backup versions | None | A little bit confusing |


User Comments :