
You can upgrade a CPU in a desktop PC if the new processor is compatible with the CPU socket, chipset, and BIOS version. Follow the guide to confirm compatibility, back up data, update the BIOS (optional), remove the old CPU, and install the new one.
A processor/CPU is a very important component in your PC that acts as the human brain. Games and some basic tasks are more and more demanding over time, which puts more pressure on your CPU. Some of you may want to play large games and handle video/picture editing tasks, the existing PC components cannot satisfy. Purchasing a new PC is expensive, so upgrading the components like GPU and CPU is a good option.
A GPU upgrade is not a difficult thing and you can follow the how to upgrade CPU guide. But in terms of a CPU upgrade, it is a bit complicated. Fortunately, a detailed guide is given below.
Can You Upgrade a Laptop CPU?
No. Generally speaking, you are not allowed to upgrade the processor for modern laptops since the CPU is fused permanently to the motherboard. Although you remove the motherboard, you cannot separate a soldered chip.
For a desktop, it comes with an accessible CPU socket on the motherboard. Thus, the following instructions are about a processor upgrade on the desktop rather than upgrading the laptop CPU. Let’s move to the part about how to upgrade a processor in a PC.
Move 1: Choose a Proper CPU
This is the first thing you should pay attention to – which CPU to use.
Firstly, form a budget. Based on different products, the price varies. If you need to deal with productivity work like photo/video editing or playing high-end games, a high-end CPU is required and the price is higher.
Besides, make sure the CPU is compatible with your PC’s motherboard. Just enter msinfo32 into the Windows search and press Enter to open System Information. Then, find Baseboard Manufacturer, Baseboard Product, and Baseboard Version.

Then, use the CPU-Upgrade website to search for which chips will work with your motherboard. Or go to visit the website of the manufacturer to find processors that are compatible with the motherboard.
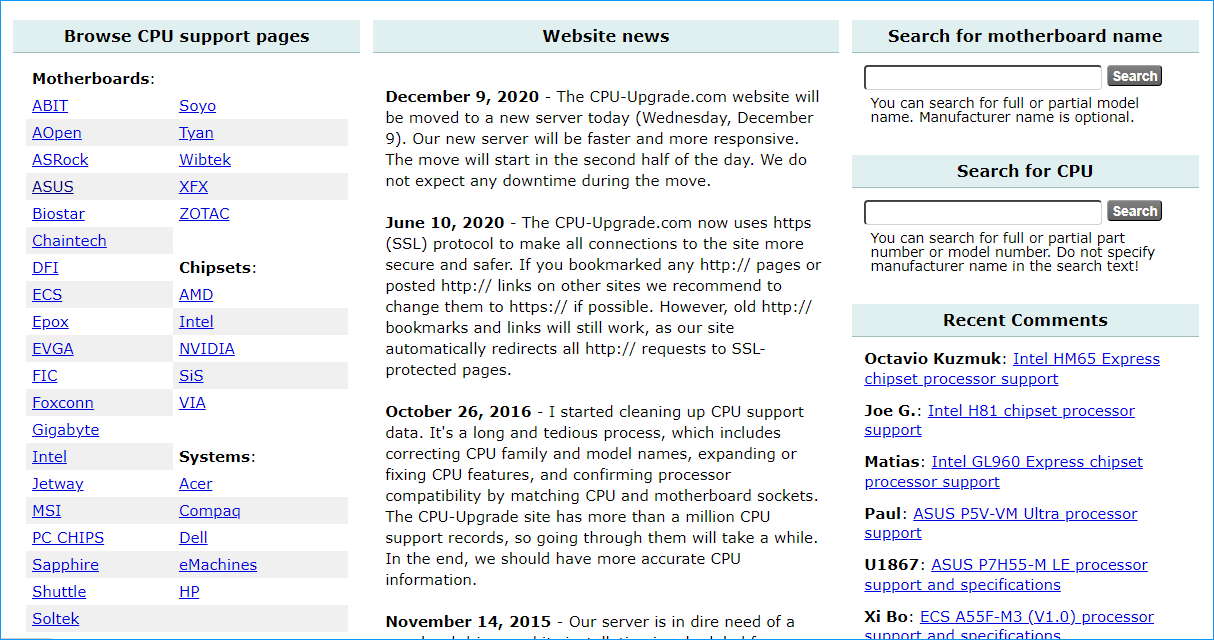
Before buying a new CPU, confirm every item in the following table.
| What to check | How to verify | Why it matters |
| CPU socket | Check the motherboard specification page | The processor must fit the motherboard socket. |
| Chipset support | Check the motherboard manufacturer’s CPU support list | A matching socket alone does not guarantee support. |
| BIOS version | Access the BIOS or check the motherboard support page | An older BIOS may not recognize the new CPU. |
| CPU cooler | Check socket mounting, cooler height, and TDP | A stronger CPU may need a larger or more efficient cooler. |
| Power supply | Check CPU power connectors and PSU wattage | High-performance CPUs may require more stable power delivery. |
| RAM compatibility | Check DDR type | Changing CPU platforms may require different RAM sticks. |
Move 2: Back up Your Important Data
A CPU upgrade is usually safe, but backing up important files before proceeding is a sensible precaution. Unexpected issues may occur, for example, a BIOS update failing, Windows not booting after the hardware change, or a component being damaged.
If you want to back up data to an external hard drive, MiniTool ShadowMaker is a good assistant. As professional and free backup software, this tool can create a system image, back up files/folders, sync files/folders to the cloud, and clone a hard drive to another disk. Just get this software for a backup before upgrading CPU.
MiniTool ShadowMaker TrialClick to Download100%Clean & Safe
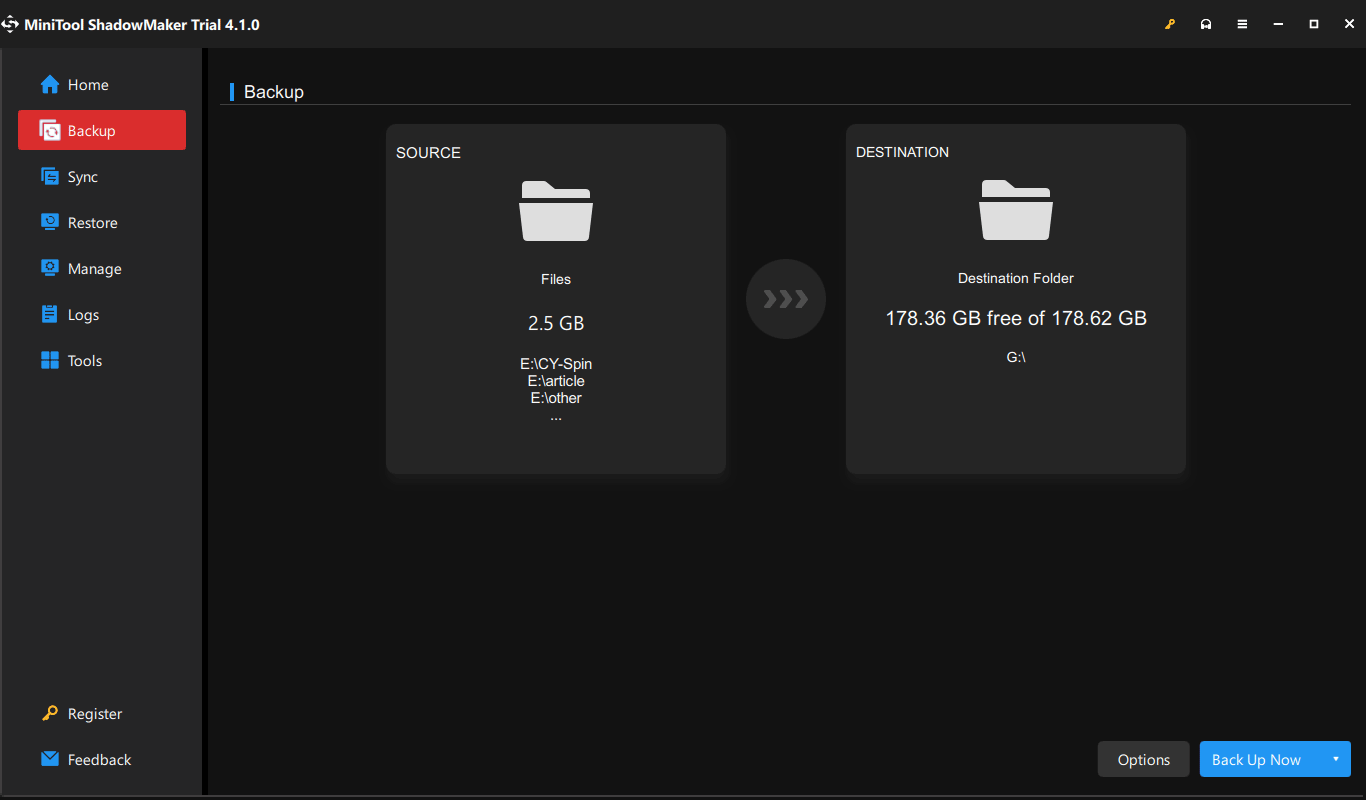
Step 1: Connect your external drive or USB drive to the PC and launch MiniTool ShadowMaker to enter its main interface.
Step 2: Under the Backup page, choose the backup source and destination by clicking the corresponding section.
Step 3: Click Back Up Now to start the backup.
Move 3: Update BIOS (Optional)
Before upgrading your CPU, check the CPU support list to see if your new CPU requires a BIOS upgrade. If yes, follow the manufacturer’s instructions to finish the update task.

Move 4: Upgrade Processor with Step-by-Step Guide
After finishing the preceding operations, now you can remove the original CPU and install a new one. To do this, prepare some items:
- Cloth or paper towels
- Rubbing alcohol
- Thermal paste
- Phillips screwdriver
After having these things at hand, follow these instructions on how to replace a CPU:
Step 1: Use a screwdriver to unscrew the screws on the computer case to open it.
Step 2: Locate and remove the CPU cooler or fan from the motherboard.
Step 3: Clean up the old thermal paste on the contact part between the old CPU and the cooler using rubbing alcohol and a paper towel.
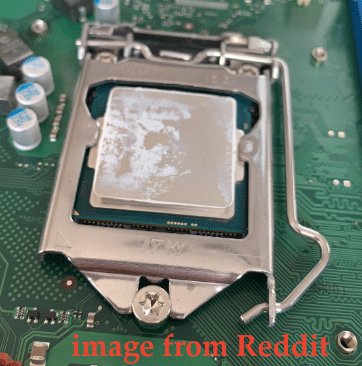
Step 4: Lift the lever or retention arm to loosen your CPU and remove the old CPU from the motherboard. Don’t touch the pins on the socket since this can easily break or bend pins.
Step 5: Find the corner of the socket with a small triangle or a dot, align the CPU with this socket, put the new CPU to the socket and lock it to the original place using the retention arm.
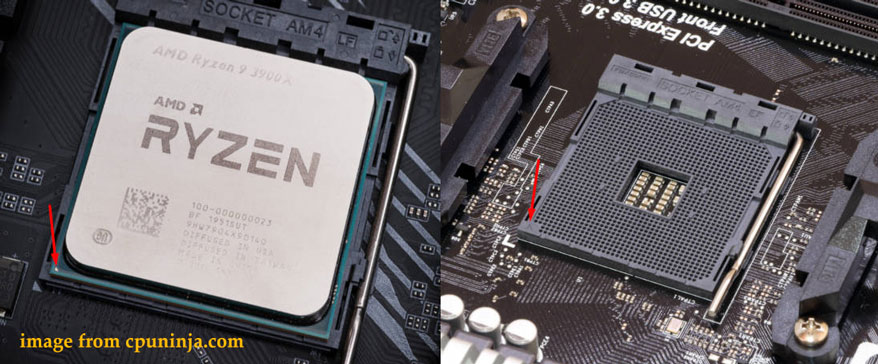
Step 6: Apply a pea-size dot of thermal paste to your new CPU.
Step 7: Reinstall the cooler or fan and put back the computer case. Then, you can boot your PC with the new CPU.
The process of CPU upgrade is a bit complicated. If you are not a professional, back up your important data with MiniTool ShadowMaker and then send the PC to a shop/store to seek help from a technician.
Verdict
That’s basic information about how to replace a CPU on your desktop. Just do the processor upgrade operation by following this detailed guide. If you have any idea about CPU/processor upgrade, let us know.
Feel free to contact [email protected] or leave a comment below.
CPU Upgrade FAQ
1. Reseat the CPU and cooler
2. Check power connections
3. Reseat the RAM
4. Clear CMOS
5. Update BIOS
About The Author

Position: Columnist
Vera has been working at the MiniTool Team for over 10 years as a technical editor and content writer. She mainly focuses on disk and partition management, data recovery, Windows backup and restore, and PC troubleshooting. Through in-depth software testing and hands-on experience, she has helped users solve a wide range of computer problems and better protect their data on Windows devices.
User Comments :