File History continuously protects personal files stored in the Library, Desktop, Favorites, and Contacts folders. It preserves every change to your personal files. However, your backups will get bigger and bigger until your disk is full.
You may want to delete old Windows 10 File History backup to release space. The following part introduces 4 ways for you.
How to Delete Old Windows 10 File History Backup?
Way 1: Change File History Backup Settings
The first method for you to delete File History backup is changing File History backup settings. Follow the guide below:
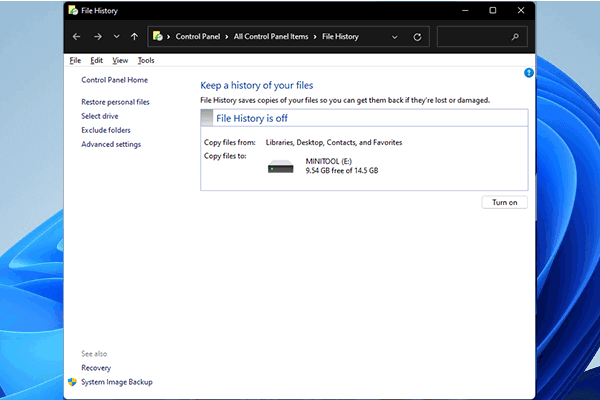
Step 1: Type Control Panel in the Search box and click Open to launch it.
Step 2: Click Small icons next to View by. Then, choose File History from the list.
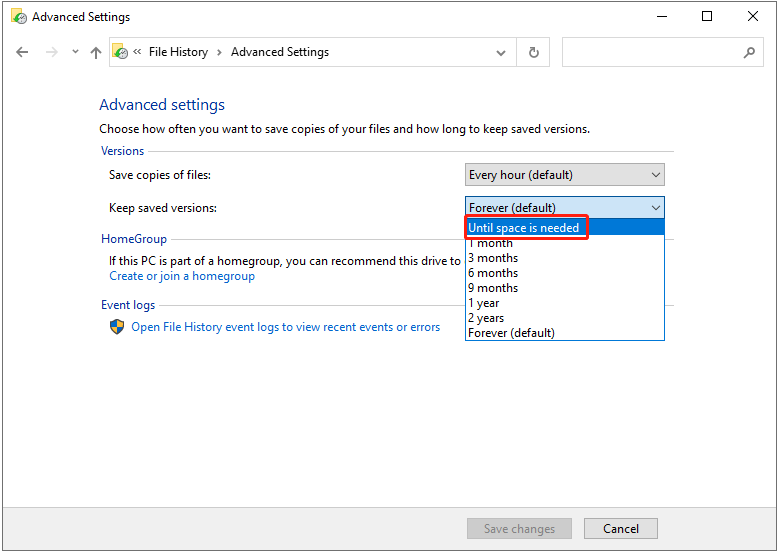
Step 3: Choose Advanced Settings in the left panel.
Step 4: Go to Versions > Keep saved versions and click the drop-down menu to choose Until space is needed. Then, click Save changes.
![[Full Review] Windows 10/11 Backup Options of File History](https://images.minitool.com/minitool.com/images/uploads/2021/05/windows-10-backup-options-thumbnail.png)
Way 2: Clean up Old Versions
The second method to delete File History Windows 10 is cleaning up old versions.
Step 1: Type Control Panel in the Search box and click Open to launch it.
Step 2: Click Small icons next to View by. Then, choose File History from the list.
Step 3: Choose Advanced Settings in the left panel.
Step 4: Go to Versions > Keep saved versions. Select Clean up versions under it.
Step 5: Select All but the latest one or older than 1 year (default).
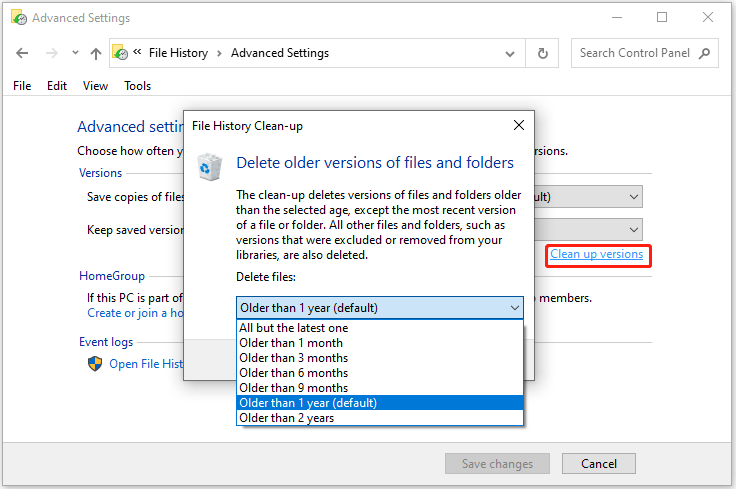
Step 6: Then, click Clean up to delete File History Windows 10 backup.
Way 3: Delete File History Backup via Command Prompt
To clear old versions of file history backups, there is also a command-line tool called fhmanagew.exe. FhManagew.exe deletes file versions older than the specified age from the currently assigned file history target device.
Step 1: Type cmd in the Search box and choose Run as administrator to open Command Prompt.
Step 2: Type the FhManagew.exe -cleanup (time) command and press Enter.
The number is the period of the backup you want to delete. Then, your old File History backups for the period you specified will be deleted.
- All but the latest one: FhManagew.exe -cleanup 0
- Older than 1 month: FhManagew.exe -cleanup 30
- Older than 3 month: FhManagew.exe -cleanup 90
- Older than 6 month: FhManagew.exe -cleanup 180
- Older than 1 year (default): FhManagew.exe -cleanup 365
Way 4: Turn off Back up Using File History
Another way to fix delete File History backup is by turning off back up using File History.
Step 1: Open Settings by pressing the Windows + I keys together.
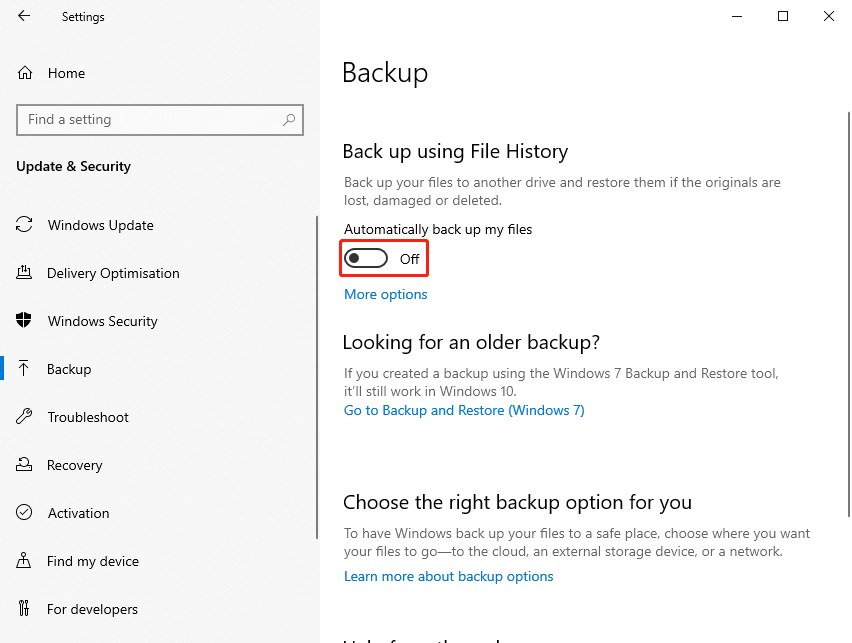
Step 2: Go to Update & Security > Backup, then you will see Back up using File History.
Step 3: Turn off the Automatically back up my files button. If it shows Off, the File History is disabled.
Step 4: Go to the backup drive and delete the File History folder. Usually, it’s named as FileBackup.
File History Cannot Delete Old Backups
Some users report that they encounter the “File History delete old backup not working” issue. The error messages vary as follows:
- File History element not found
- Failed to perform File History cleanup with error 80040507
This issue can occur for various reasons such as corrupted system files, disk issues, etc. The easiest way to do this is to unplug all USB drives and devices connected to your computer and perform a File History cleanup again.
If the solution is not working, try the following solutions.
Fix 1: Transfer Files to the New User Profile
If your File History or user profile is corrupt, you can transfer files to a new user profile to fix the issue.
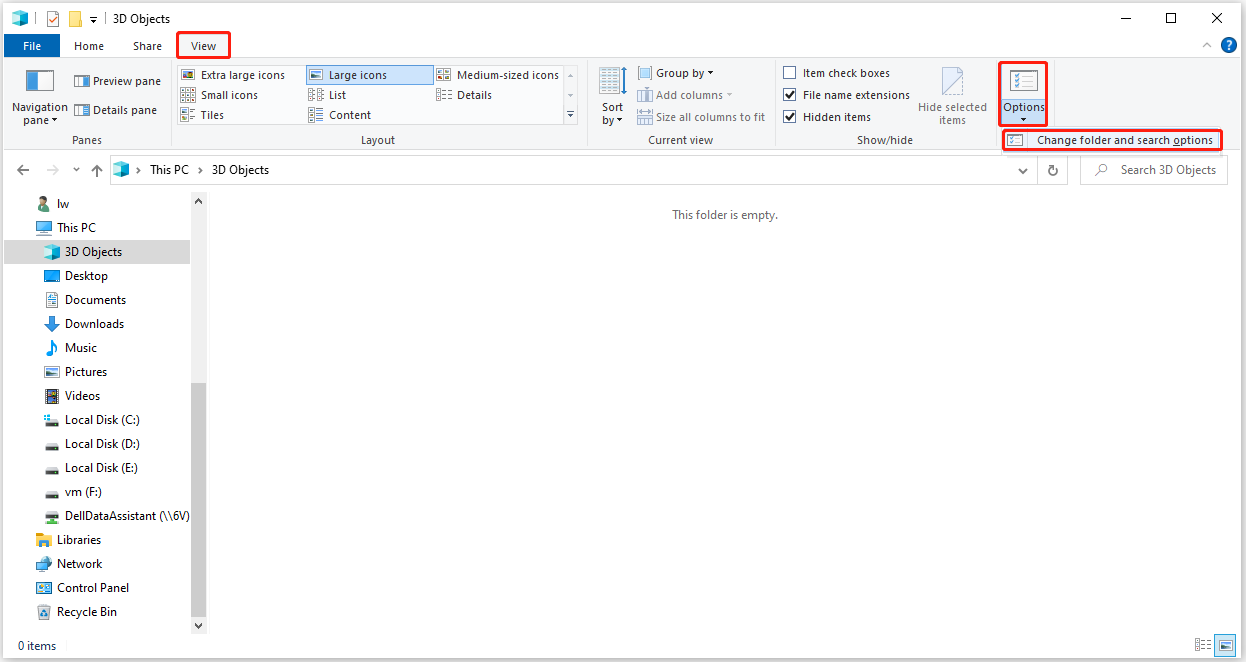
Step 1: Go to File Explorer > View > Options > Change folder and search options.
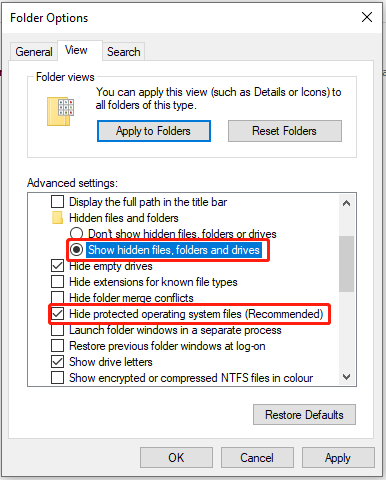
Step 2: In the Folder Options window, go to the View tab, check Show hidden files, folders or drives, and uncheck Hide protected operating system files. Then, click Apply and OK to confirm.
Step 3: Locate the C:\Users\Old_Username folder and C:\Users\New_Username folder. The C: is the drive with Windows installed on it. And the Old Username and New Username are the names of the profile you want to copy files from and to.
Step 4: Copy files in the older user profile and paste them into new user profiles. Please don’t copy the following 3 files.
- Ntuser.dat
- Ntuser.dat.log
- Ntuser.ini
Step 5: Restart your computer and see if you can access files in the new user profile.
Fix 2: Clean up and Repair the Disk
A full hard drive can also cause the “File History Clean up versions not working” issue. Thus, you should clean up and repair the hard drive. You can follow the steps below to do that:
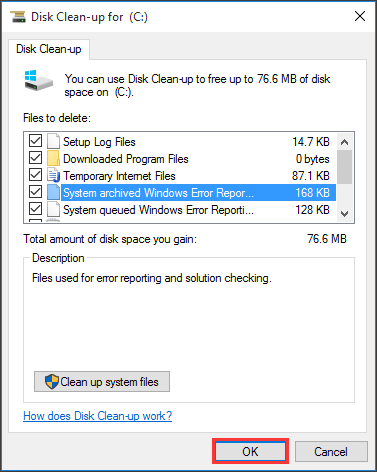
Step 1: Type disk cleanup in the Search box and choose Disk Clean-up from the best match.
Step 2: In the pop-up window, the system drive is selected by default. You need to click OK to continue.
Step 3: Then, you will see how much disk space you can get in total by deleting all files listed in the box, including:
- Windows Upgrade Log Files.
- Setup Log File.
- Downloaded Program Files.
- Temporary Internet Files.
- System archived/queued Windows Error Reporting.
- Delivery Optimization Files.
- Recycle Bin.
- Temporary Windows Installation Files.
- Previous Windows installation(s).
Step 4: Now, select the file types you want to delete and click the OK button.
Step 5: Right-click the C drive in File Explorer to choose Properties. Then, click Tools and the Check button to check your drive for file system errors.
Fix 3: Reset File History
This solution is to reset File History and clean up your old version again.
Step 1: Go to Control Panel > System and Security > File History. Then, click Turn off if it says File History is on.
Step 2: Go to %UserProfile%\AppData\Local\Microsoft\Windows\FileHistory in File Explorer.
Step 3: Delete all files and folders.
Step 4: Go to File History in the Control Panel again and click Turn on.
Step 5: Click Advanced settings in the left menu, and set a longer backup frequency and shorter backup retention. Then Click Save changes.
Step 6: Now, you need to click Delete Files to confirm.
Fix 4: Run SFC
If there are some corrupted or missing system files, you may also encounter the File History can’t delete backups issue. You can run Windows System File Checker (SFC) to fix the issue.
Step 1: Type cmd in the search box. Right-click Command Prompt and choose Run as administrator.
Step 2: When you get into Command Prompt, input sfc /scannow and press Enter.
Step 3: Then Windows will scan for system file issues. You need to wait until the process is 100% completed. Now exit Command Prompt and restart the computer.
Fix 5: Uninstall Recent Updates
If the File History issue starts appearing after updating the operating system, you can uninstall the latest update and restart your computer
Step 1: Go to Control Panel. Under Programs, click Uninstall a program.
Step 2: Click View installed updates to uninstall an update.
Step 3: Then find the recent update and delete it.

How to Backup Files Without Occupying Much Disk Space
You can easily delete old Windows 10 File History backups, but it’s only temporary if you don’t configure your backup settings properly. The backup settings in File History are limited, the longest backup frequency is daily, the shortest retention is 1 month, and your file history drive will fill up quickly.
If you want more flexible backup features, it’s recommended to try a piece of professional backup software – MiniTool ShadowMaker. It allows you to perform system backup, partition backup, disk backup, file backup, and folder backup. Now, let’s see how to back up files without occupying much disk space in MiniTool ShadowMaker.
MiniTool ShadowMaker TrialClick to Download100%Clean & Safe
Step 1: After downloading MiniTool ShadowMaker, double-click it to enter its main interface and click Keep Trial.
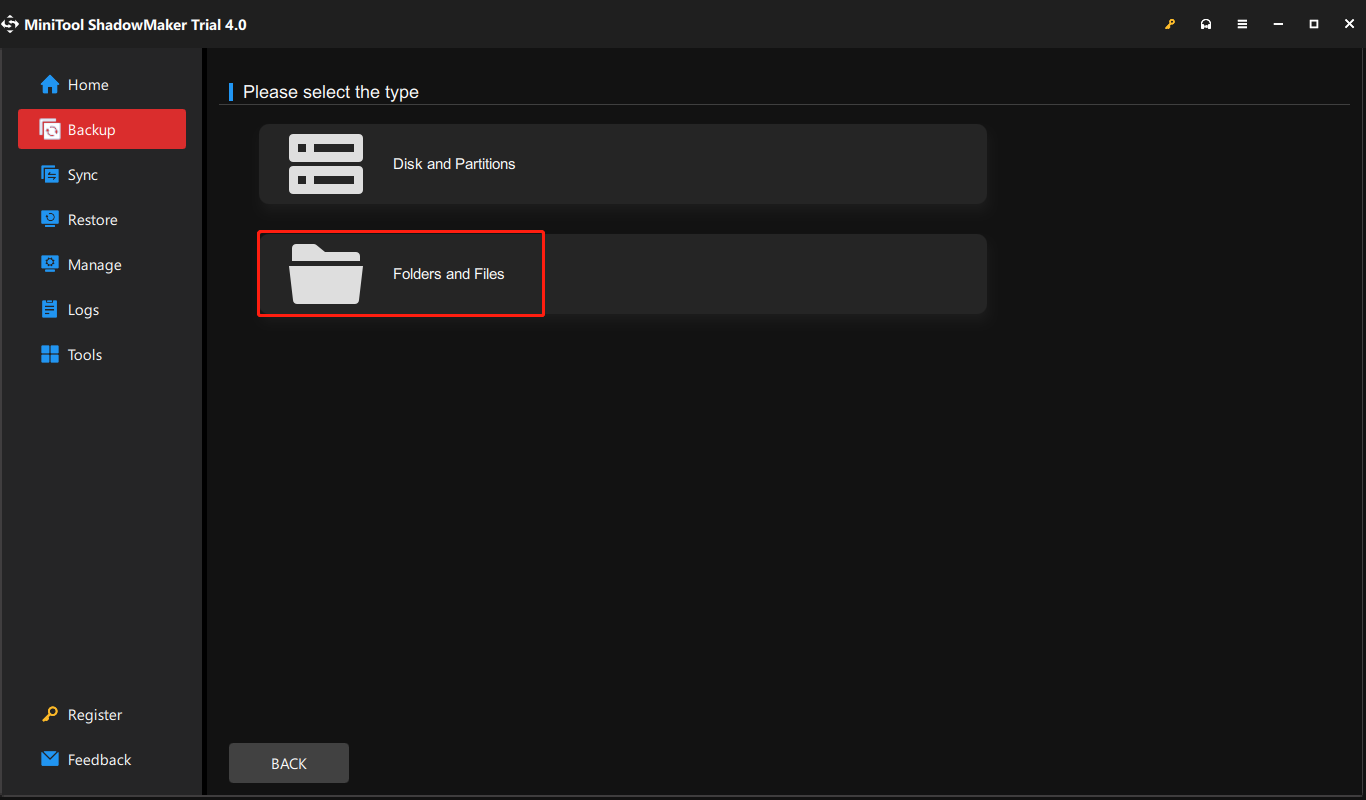
Step 2: Go to the Backup tab, and click the SOURCE part. Click Folders and Files to choose the files you want to backup.
Step 3: Click the DESTINATION part and choose a location to store your backup. Click OK to continue.
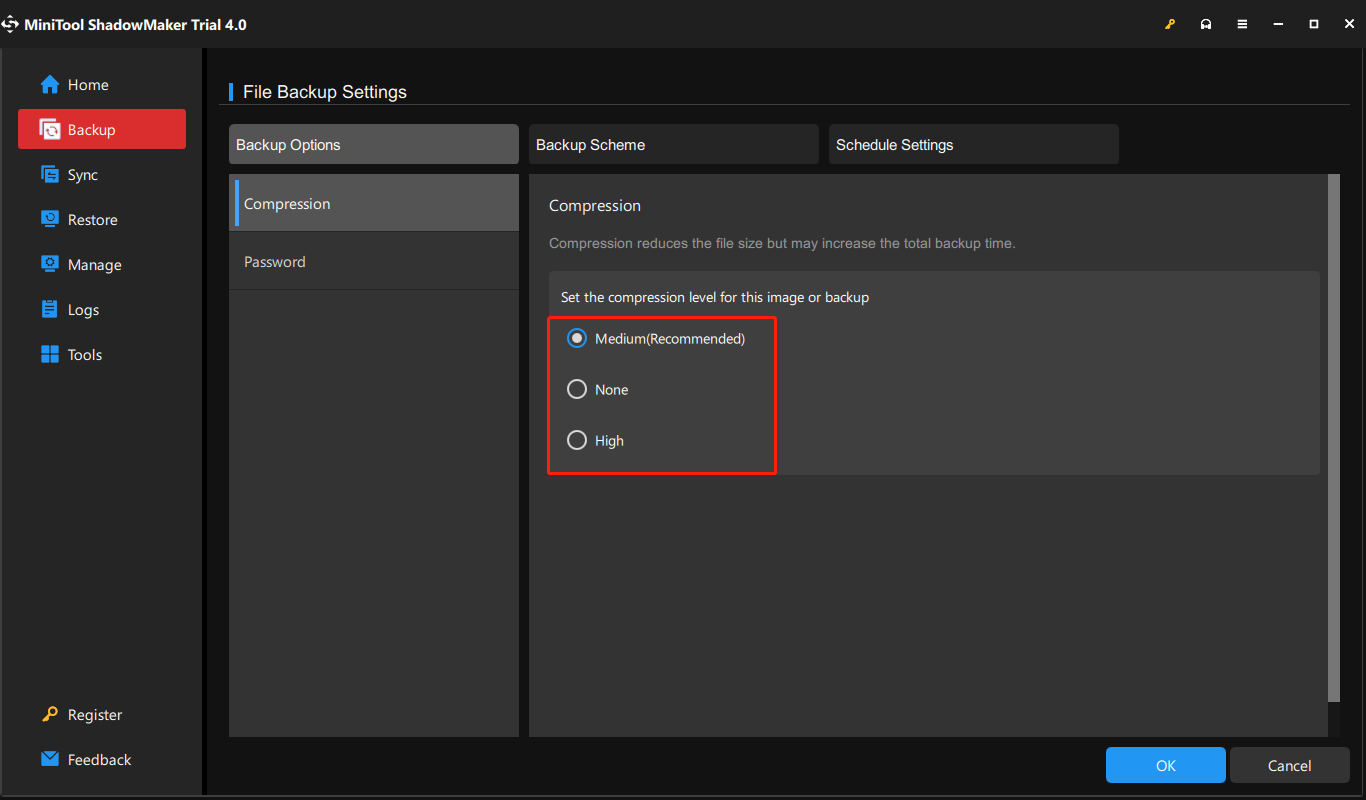
Step 4: Click the Options button on the lower right corner of the main interface. There are some file backup settings for you. Under the Backup options tab, click Compression. There are three options:
- Medium: Data will be compressed moderately. This is the default data compression level.
- None: Data will be imaged without any compression, which may increase the backup file size.
- High: This compression level will take a long time to create a backup and the image file size is smaller than the other two levels.
Step 5: Click OK. Then, you can click Back Up Now to perform the backup task immediately.
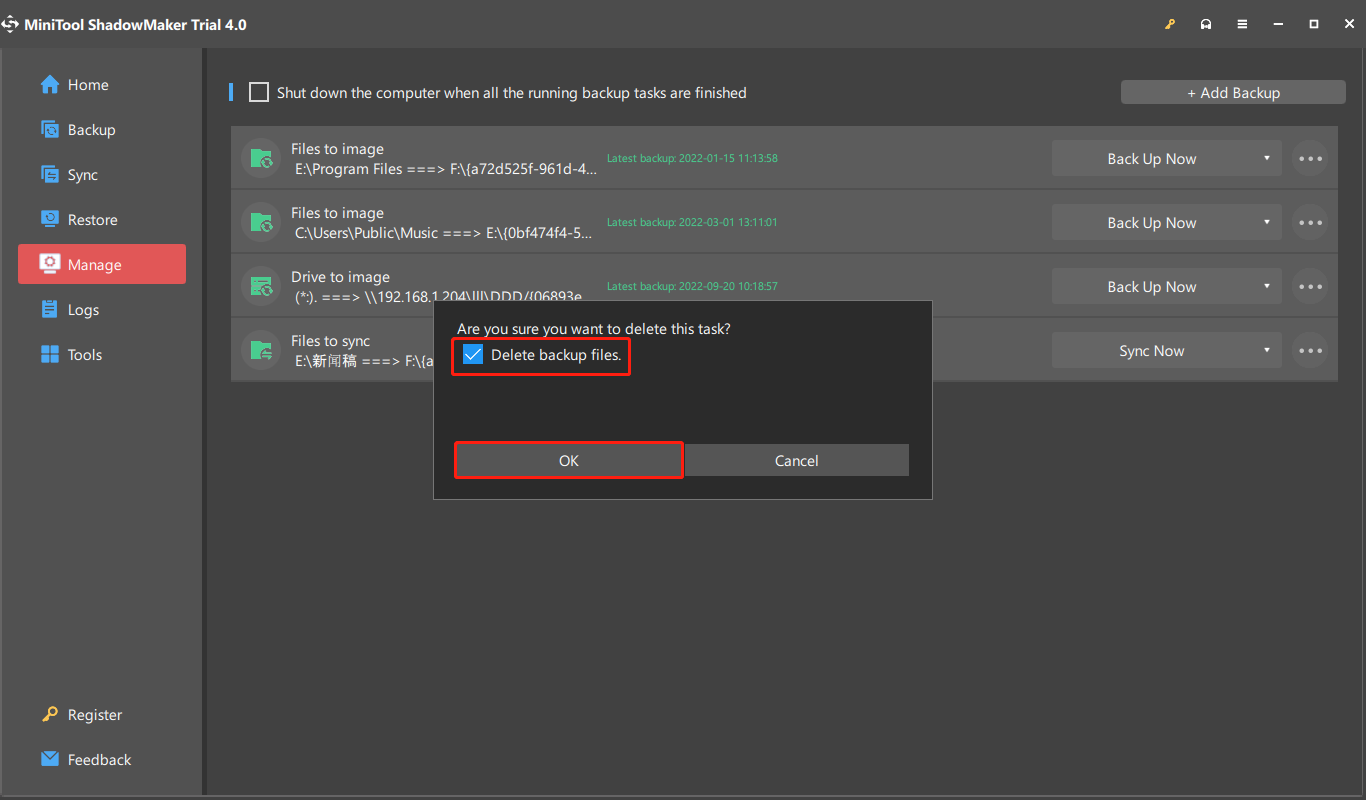
If you want to delete the backup files to get more space. Go to Manage and find your backup task. Click the three-dot menu next to your task and choose Delete. When you receive the Are you sure you want to delete this task? message, check the Delete backup files box.
Bottom Line
To sum up, this post has introduced 4 ways to delete old Windows 10 File History backup. If you come across the same issue, try these solutions. If you have any better solution to fix the issue, you can share it in the comment zone.
To back up files without occupying much space, it is recommended you use MiniTool ShadowMaker. If you have any problem when using the MiniTool program, please feel free to contact us via the email at [email protected] and we will reply to you as soon as possible.
User Comments :