
Quick Answer
DISM error 0x800f0954 usually means Windows cannot find the required source files when installing .NET Framework 3.5. To fix it, you can bypass WSUS, edit group policy, and install .NET Framework from a Windows ISO.
What Is DISM Failed Error 0x800f0954
.NET Framework is a general-purpose platform developed by Microsoft. It provides a runtime environment and a set of libraries and tools for building and running applications on the Windows operating system.
However, you may receive error code 0x800f0954 when trying to install .NET Framework 3.5 or other optional features via the Windows Features functionality or the DISM command-line tool in Windows 11 and Windows 10.
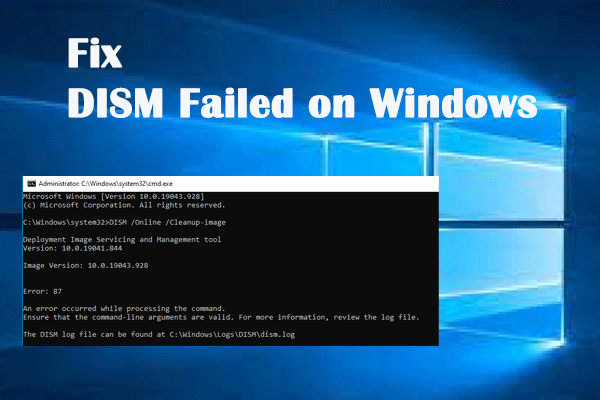
Here are the error messages you might receive when getting DISM error 0x800f0954 or .NET Framework error 0x800f0954.
- Error: 0x800f0954. DISM failed. No operation was performed.
- Windows couldn’t complete the requested changes. The changes couldn’t be completed. Please reboot your computer and try again. Error code: 0x800f0954.
- 0x800f0954, CBS_E_INVALID_WINDOWS_UPDATE_COUNT_WSUS.
Why Does Error 0x800f0954 Occur
The DISM error can be caused by several factors, including:
- WSUS (Windows Server Update Services) restrictions: Your PC is configured to look for updates on a local server that lacks the specific optional feature files.
- Group Policy issues: A policy prevents Windows from downloading repair content or optional features.
- Missing source files: DISM needs the original SxS folder but cannot find it locally or download it online.
- Corrupted system logs: The CBS log files may be damaged, blocking DISM from validating system files.
How to Fix DISM Error 0x800f0954 in Windows 10/11?
Fix 1: Bypass WSUS Temporarily
If your PC is configured to use WSUS, Windows may fail to install .NET Framework 3.5, displaying the 0x800F0954 error code.
Step 1. Press Win + R to open the Run dialog.
Step 2. Type regedit and hit Enter to launch Registry Editor. If prompted by User Account Control, hit Yes to grant the permissions.
Step 3. Navigate to the following location: HKEY_LOCAL_MACHINE\SOFTWARE\Policies\Microsoft\Windows\WindowsUpdate\AU
If you find there is no WindowsUpdate key under Windows, you can create it manually. Just right-click on the Windows key > select New > choose Key > rename it to WindowsUpdate.
Then, right-click on WindowsUpdate > select New > choose Key > rename it to AU.
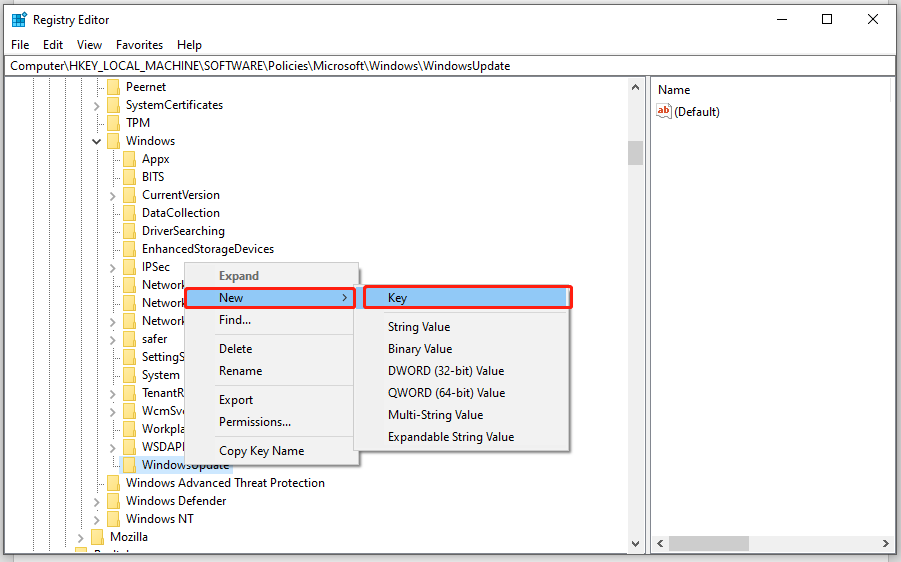
Step 4. Select the AU key > right-click on the blank area on the right side > select New > choose String Value > rename it to UserWUServer.
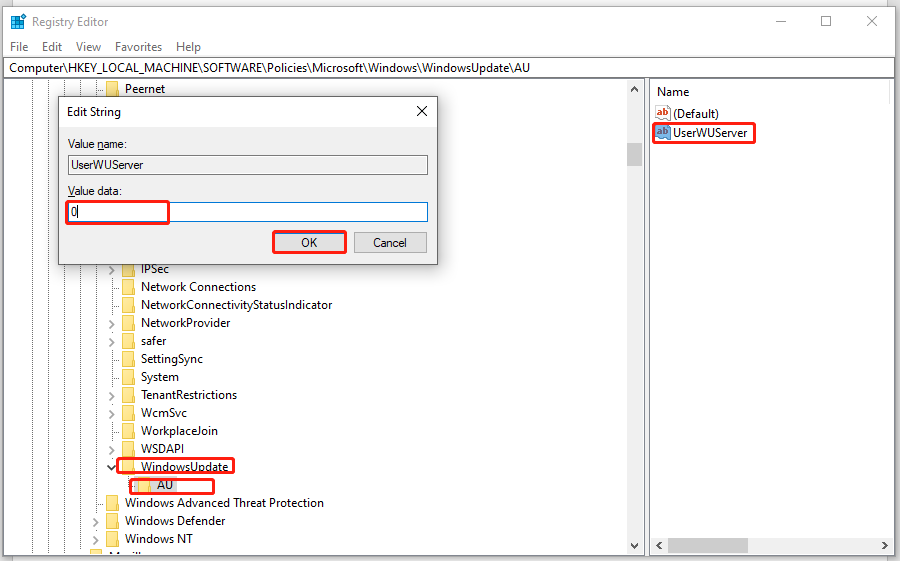
Step 5. Double-click on UserWUServer to change Value data to 0 and press OK to save the changes.
Step 6. Open File Explorer and right-click on This PC to choose Manage.
Step 7. Double-click on Services and Applications & Services > scroll down to find Windows Update > right-click on it to choose Restart. Now, you can install .NET Framework 3.5 successfully without the error code 0x800f0954.
Fix 2: Change Group Policy Settings for Optional Components
Incorrect Group Policy settings can prevent Windows from downloading optional features, resulting in .NET Framework 3.5 error 0x800F0954.
Check and change your settings:
Step 1. Press Win + R to open the Run box.
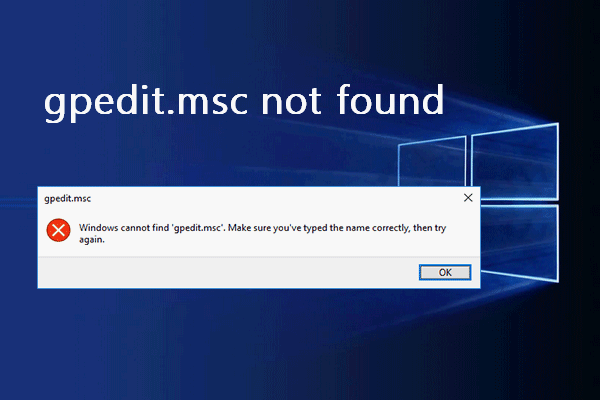
Step 2. Type gpedit.msc and hit OK to launch Local Group Policy Editor. If prompted by UAC, hit Yes.
Step 3. Navigate to Computer Configuration > Administrative Templates > System. With System selected, scroll down in the right-hand pane to find Specify settings for optional component installation and component repair and double-click on it.
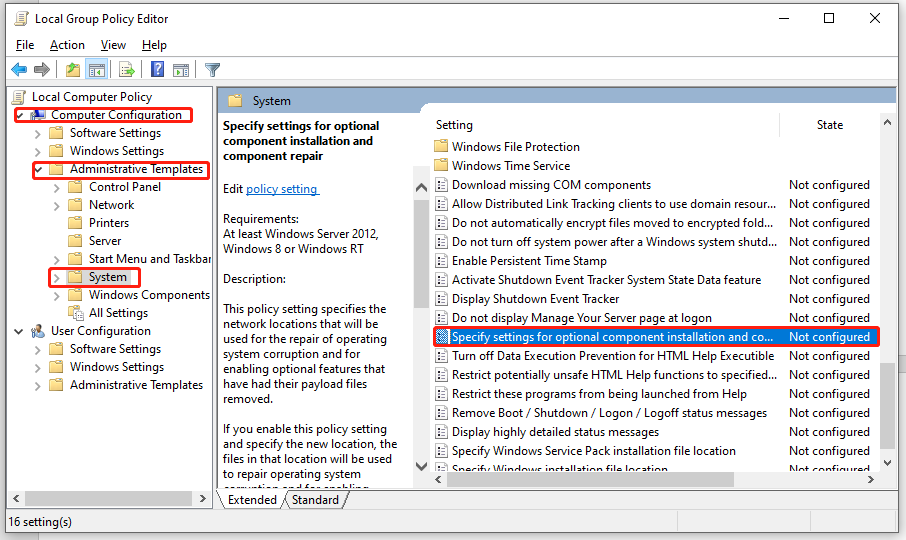
Step 4. Set the policy to Enabled and check Download repair content and optional features directly from Windows Update instead of Windows Server Update Services (WSUS).
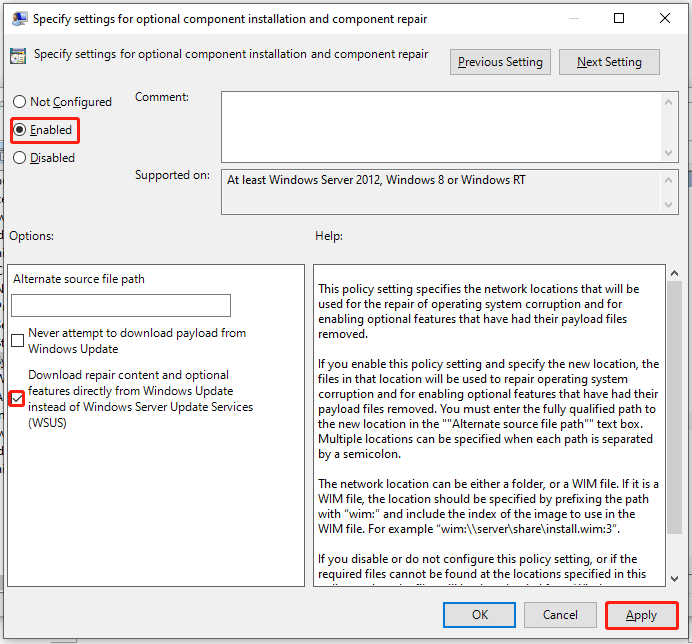
Step 5. Click on Apply to save the configuration and then exit Local Group Policy Editor. DISM error 0x800f0954 might be gone at the next system startup.
Fix 3: Install .NET Framework 3.5 from a Windows ISO
If none of the solutions are useful to you, the last option is to install .NET Framework 3.5 or optional features from a Windows 10/11 ISO. Make sure that the ISO file corresponds to the version of Windows installed on your computer.
Step 1. Go to Microsoft official website and click on Download tool now.
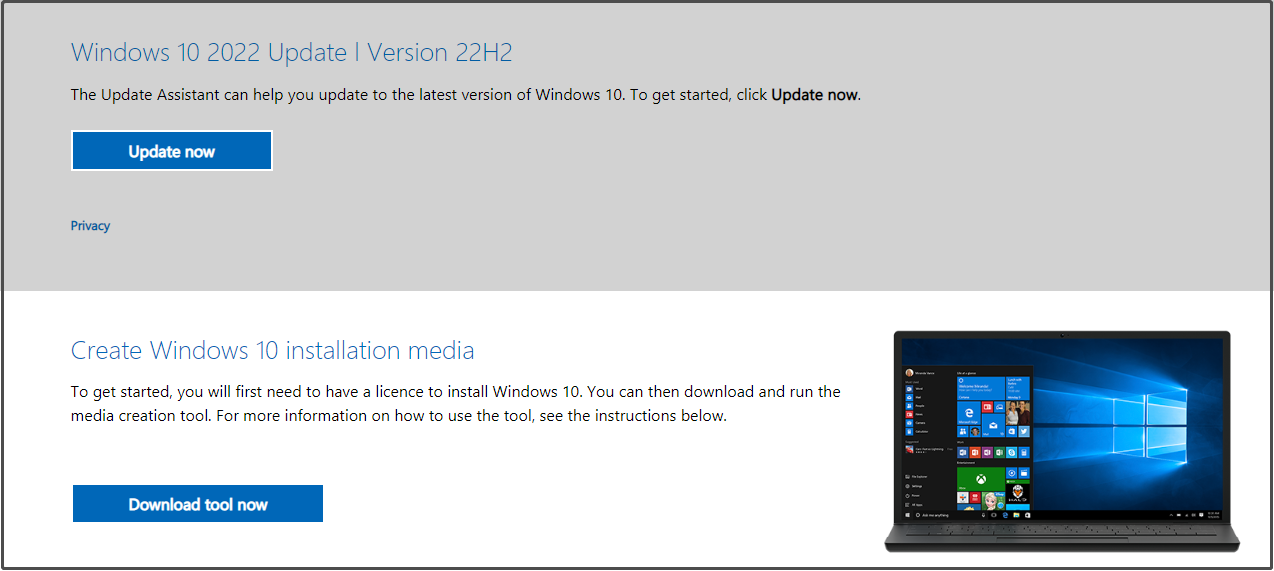
Step 2. Launch Media Creation Tool and follow the on-screen instructions to download the Windows 11/10 ISO.
Step 3. Once downloaded, find the ISO file in File Explorer and right-click on it to select the Mount option. Then, note down the drive letter of the mounted drive.
Step 4. Launch Command Prompt as an administrator and run the following command (don’t forget to replace H:\ with the drive letter of your mounted drive):
dism /online /enable-feature /featurename:NetFX3 /Source:H:\sources\sxs /LimitAccess
If you need to installing all the components (including Windows Communication Foundation HTTP Activation and Windows Communication Foundation Non-HTTP Activation), please add the /All parameter in the command behind featurename:NetFX3. Most users don’t need the two components.
Fix 4: Install .NET Framework 3.5 with PowerShell
Additionally, you can run PowerShell to install .NET Framework from your ISO file.
Step 1. Right-click on the Start icon and select Windows PowerShell (Admin) in the context menu.
Step 2. In the command window, type Add-WindowsCapability –Online -Name NetFx3~~~~ –Source D.\sources\sxs and then tap on Enter.
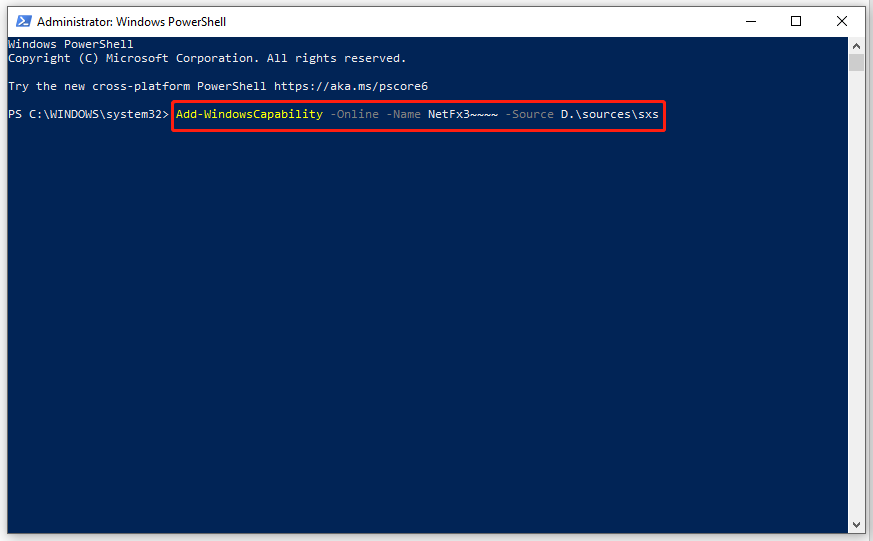
Step 3. After the process is done, quit Windows PowerShell and reboot your computer.
Fix 5: Clean the CBS Logs
It is reported that DISM error 0x800f0954 is no longer existing after deleting the Component Based Servicing logs related to DISM. Here’s how to do it:
Step 1. Press Win + E to open File Explorer.
Step 2. Navigate to the following location: C:\Windows\Logs\CBS.
Step 3. Press Ctrl + A to select all the files inside the CBS folder and right-click on them to choose Delete.
Step 4. Then, close the CBS folder and run Command Prompt as an administrator.
Step 5. Run the following command to install .NET Framework and don’t forget to hit Enter.
Dism.exe /online /enable-feature /featurename:NetFX3 /source:C:\
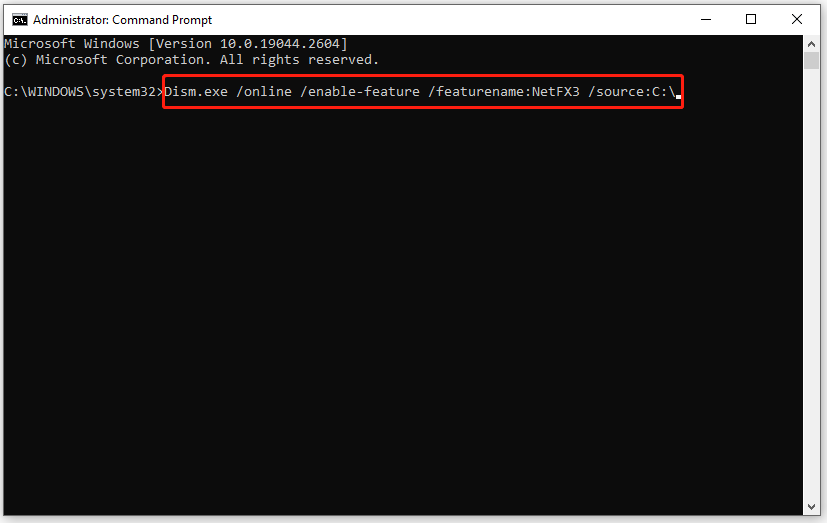
Now, you will probably install .NET Framework without error code 0x800f0954.
What if your CNS logs are corrupted? Don’t worry! You can find some effective solutions in this guide - What Is CBS.log Windows 10 & How to Fix CBS.log Corrupt Issue.
Suggestion: Back up Your System with MiniTool ShadowMaker
By now, you may manage to remove DISM error 0x800f0954 from your computer. It is natural for computer users to encounter such errors in daily life and work. Even if you are very proficient in computers, you will never predict what you will suffer from the next second.
Therefore, backing up your computer is an indispensable part of daily life. With a backup copy before hand, you can restore your system to a normal state easily when your Windows devices get into trouble rather than thinking hard about how to troubleshoot the error.
With regard to backup, MiniTool ShadowMaker is in a class of its own. This professional backup software is free & reliable, and you can create a backup of your files, folders, partitions, disks, & operating system within a few simple steps.
Step 1. Download, install, and launch this free tool.
MiniTool ShadowMaker TrialClick to Download100%Clean & Safe
Step 2. Click on Keep Trial and go to the Backup page.
Step 3. System drives are selected automatically. Just go to DESTINATION and choose a USB or external drive to store the system image file.
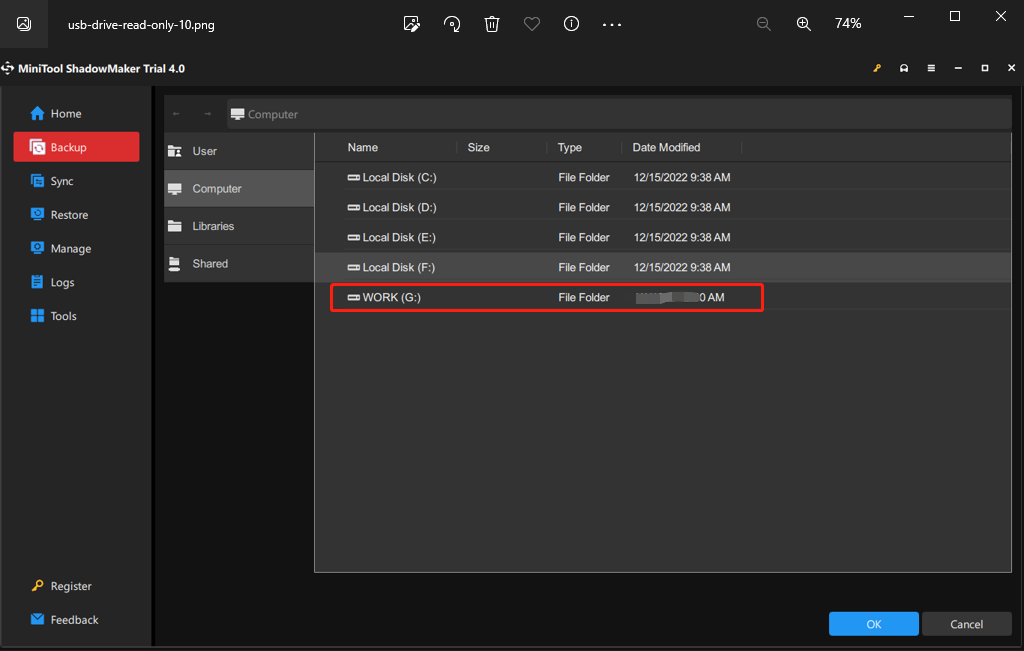
As for creating a backup for your valuable files, you can go to Backup > SOURCE > Folders and Files to choose the desired files/folders and then choose a storage path in DESTINATION.
Step 4. After making your choice, click on Back Up Now to start the backup at once.
After backing up, it is necessary to create a bootable USB disk with MiniTool ShadowMaker in case your computer fails to boot.
Conclusion
Windows 11/10 DISM error 0x800f0954 can be easily fixed by following the instructions. Start with the quick fix, such as bypassing WSUS, then go to install .NET Framework 3.5 from a Windows ISO.
If you have any issues with our software, contact us at [email protected].
DISM Error 0x800f0954 FAQ
About The Author

Position: Columnist
Vera has been working at the MiniTool Team for over 10 years as a technical editor and content writer. She mainly focuses on disk and partition management, data recovery, Windows backup and restore, and PC troubleshooting. Through in-depth software testing and hands-on experience, she has helped users solve a wide range of computer problems and better protect their data on Windows devices.
User Comments :