What Is Kernel32.dll Error
The Kernel32.dll file is a crucial 32-bit Dynamic Link Library (DLL) for the Windows operating system. This file manages essential system tasks like memory allocation, input/output operations, and process creation.
It provides core instructions for applications to interact with hardware and the Windows kernel. Additionally, it is loaded into a protected memory space at startup to ensure system stability.
However, the Kernel32 dll error can occur on a computer from time to time.
For instance, it typically happens when a program tries to access the protected memory space reserved for the Kernel32.dll file. Furthermore, it may also occur when a software instruction conflicts with the operating system’s core management functions.
Here are the common scenarios of this error:
- Entry Point Not Found: Occurs when software is not compatible with the current version of Windows (e.g., trying to run software requiring Windows 10 on Windows 7).
- Invalid Page Fault in Module: Occurs when a program tries to access forbidden memory, often during application startup, shutdown, or while gaming.
- Missing Component/File: Occurs when the OS cannot find the Kernel32.dll file during startup.
Why Does Kernel32.dll Error Occur
Various reasons may cause the Kernel32 dll error:
- Corrupt or missing files
- Incompatible software
- An outdated system
- Hardware problems
- Software conflicts
- Insufficient permissions
Suggestion: Back Up Data Before Fixing the Error
Backing up your data immediately when encountering a Kernel32 dll error is critical, as this error can sometimes cause system corruption and data loss.
To do that, it is recommended to use MiniTool ShadowMaker. It is a professional Windows backup tool that has advanced features for a computer backup.
Here’s how to use this software:
Step 1. Click the Download button below to get MiniTool ShadowMaker’s installation package. Then, run the downloaded file to install this software on your computer.
MiniTool ShadowMaker TrialClick to Download100%Clean & Safe
Step 2. Open this app to enter its main interface and select Backup.
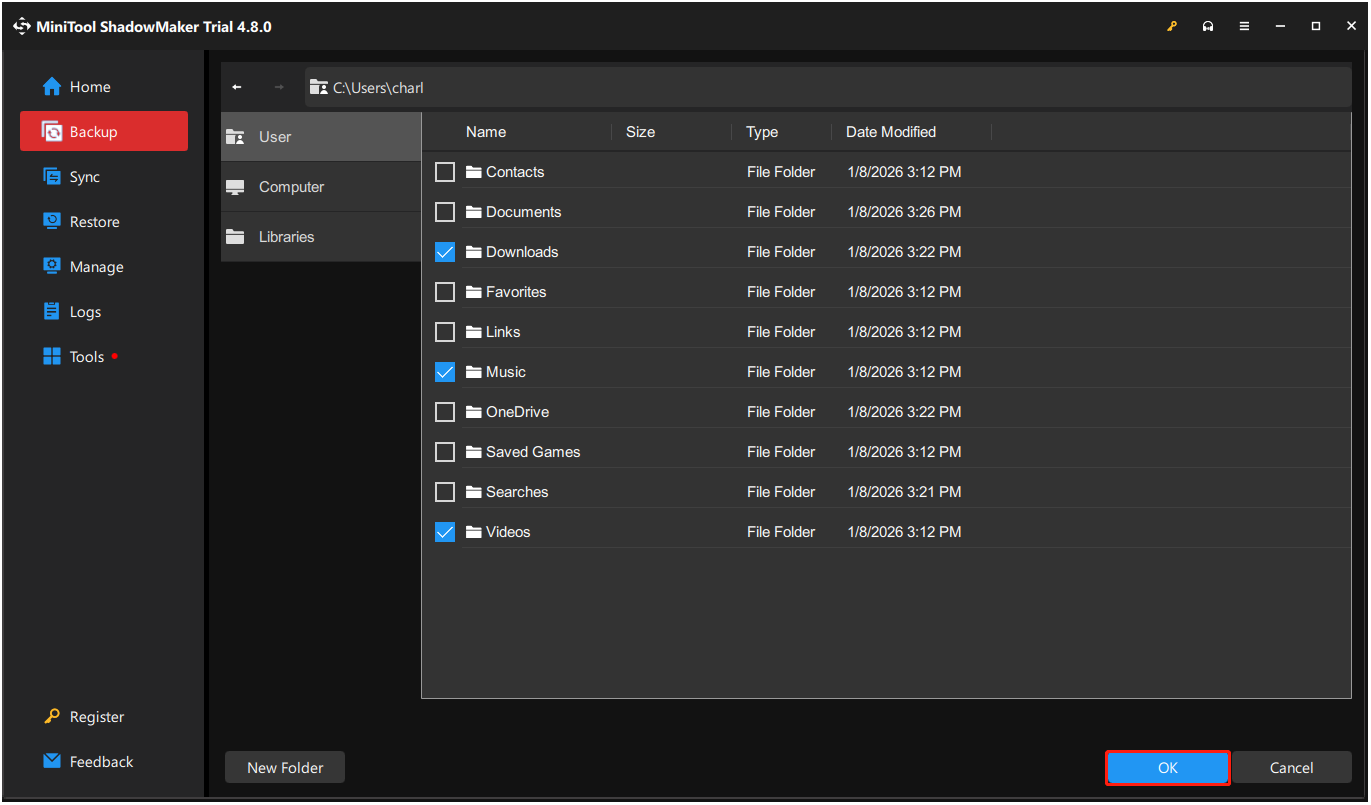
Step 3. Access the SOURCE section and select Folders and Files. Then, choose the files that you want to back up and click OK.
Step 4. Go to DESTINATION, select the preferred location to save the backup files, and then click OK to proceed.
Step 5. Click Back Up Now and OK sequentially to confirm the operation.

How to Troubleshoot Kernel32.dll Error in Windows XP/7/10/11
To remove the Kernel32.dll error, start by restarting the PC, then run SFC & DISM, update Windows/drivers, scan for viruses, check hardware, or perform a system restore.
Here’s the detailed guide:
Approach 1. Restart Your Computer
A simple restart can resolve a Kernel32.dll error if it was caused by a temporary software glitch or a temporary file lock. However, if the issue persists, proceed to a more extensive troubleshooting process.
Approach 2. Run A Virus Scan
If your PC has been infected by viruses or has installed malware, it’s easy to encounter the Kernel32.dll error. Therefore, running the antivirus software on your PC to do a security scan and clear existing viruses or malware is necessary.
Here’s how to use Windows Security to do a virus scan:
Step 1. Press Win + S to open Search, type windows security, and press Enter.
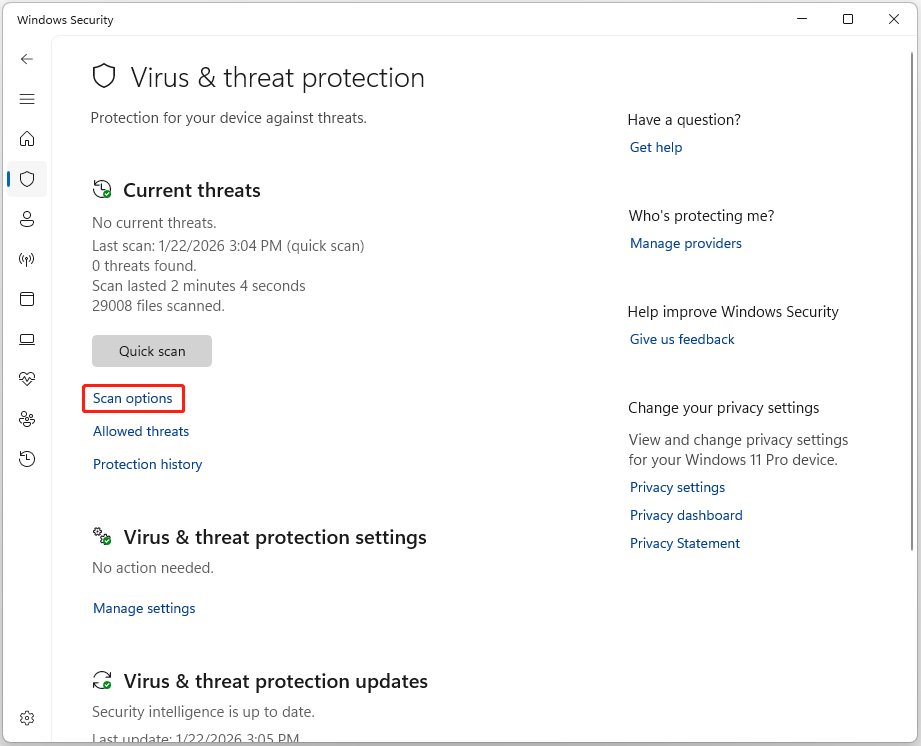
Step 2. In the prompted window, select Virus & threat protection and click Scan options.
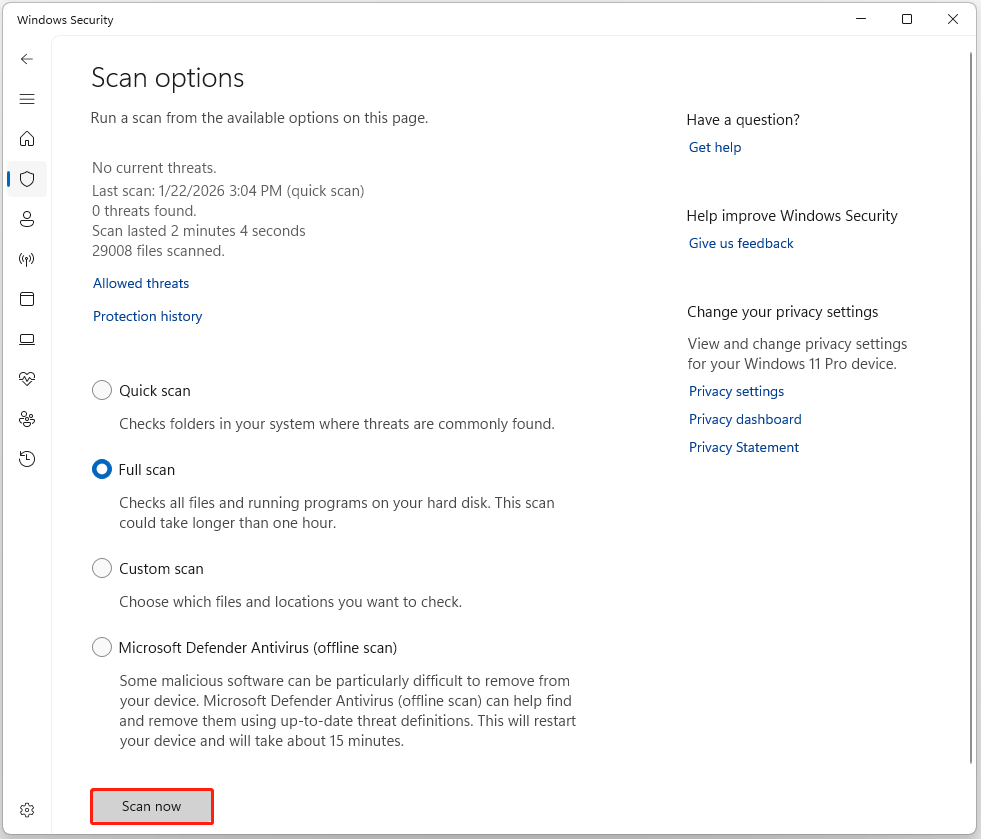
Step 3. Choose a scan method you prefer and click Scan now.
- Quick scan: This option efficiently checks only the most common system folders and registry keys where threats are typically found.
- Full scan: This option examines every file and running program on your hard drive, though it can take significantly longer to complete.
- Custom scan: This option allows you to manually select specific files, folders, or drives for targeted inspection.
- Microsoft Defender Antivirus (offline scan): This option removes viruses that can’t be found when Windows is running. It restarts your device and scans for persistent malware before the operating system loads to prevent threats from hiding.
Step 4. After the scanning is complete, go to the Protection history page to locate the quarantined item. Then, select Remove to permanently delete it.
Approach 3. Check Windows Update
An outdated Windows installation might be causing the Kernel32.dll error. Microsoft releases Windows updates to deliver essential security patches, fix bugs, improve performance, and add new features.
Check Windows Update to install the latest updates to fix the error. Here’s the way:
Step 1. Press Win + I to open Settings.
Step 2. Go to Windows Update and click Check for updates.

Step 3. If there are available updates, update them.
Approach 4. Update Your Drivers
Corrupted or outdated drivers may also cause a Kernel32.dll error. To fix this error, update outdated drivers in Device Manager.
Device Manager is a built-in tool on Windows PCs that helps manage all device drivers, including updating, uninstalling, and rolling back drivers.
Follow the steps:
Step 1. Press Win + X to open Quick Link and select Device Manager from the menu.
Step 2. In Device Manager,expand the category that contains the outdated driver.
Step 3. Right-click the driver and select Update driver.
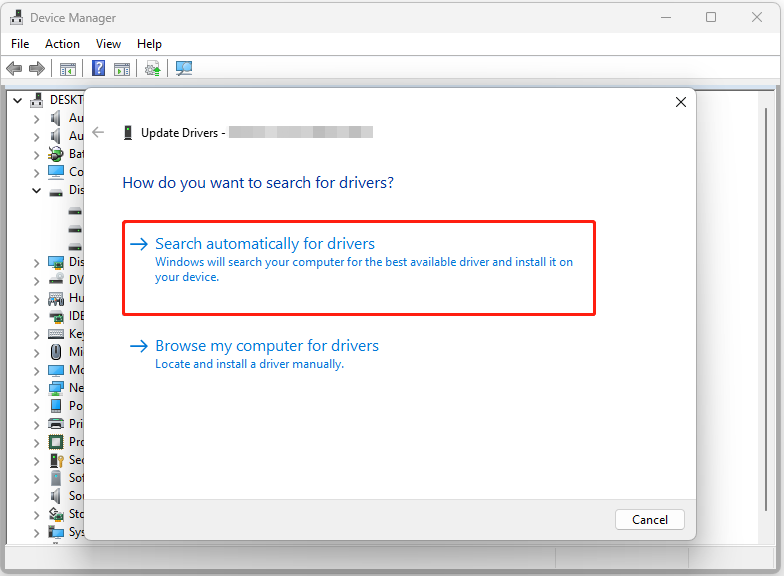
Step 4. In the prompted window, select Search automatically for drivers. Then, follow the on-screen instructions to complete the process.
Step 5. Repeat Step 3 and 4 to update all the outdated drivers.
Once finished, check if the error has been resolved.
Approach 5. Repair System Files
Corrupted system files are also related to the Kernel32.dll error.
System File Checker (SFC) checks the integrity of Windows system files and replaces incorrect, corrupted, or damaged versions with the correct ones.
The DISM scan can repair critical, corrupted, or missing Windows system files by repairing the underlying Windows system image.
Therefore, run SFC and DISM to fix this error with the following steps:
Step 1. Press Win + R to open Run, type cmd, and then press Ctrl + Shift + Enter to run Command Prompt as administrator.
Step 2. Execute the following commands in the elevated Command Prompt window one by one:
- DISM.exe /Online /Cleanup-Image /ScanHealth
- DISM.exe /Online /Cleanup-Image /CheckHealth
- DISM.exe /Online /Cleanup-Image /RestoreHealth
Step 3. Once the process is finished, type sfc /scannow and press Enter.
Approach 6. Check Your System Memory
The presence of Kernel32.dll errors may indicate an issue with your computer’s memory.
The Windows Memory Diagnostic tool is a built-in utility to check the RAM for errors.
Here’s how to do it:
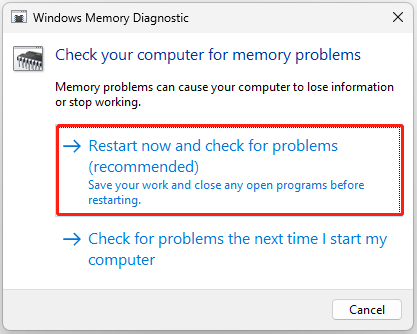
Step 1. Open the Run window, type mdsched.exe, and press Enter to access the Windows Memory Diagnostic window.
Step 2. Click Restart now and check for problems (recommended).
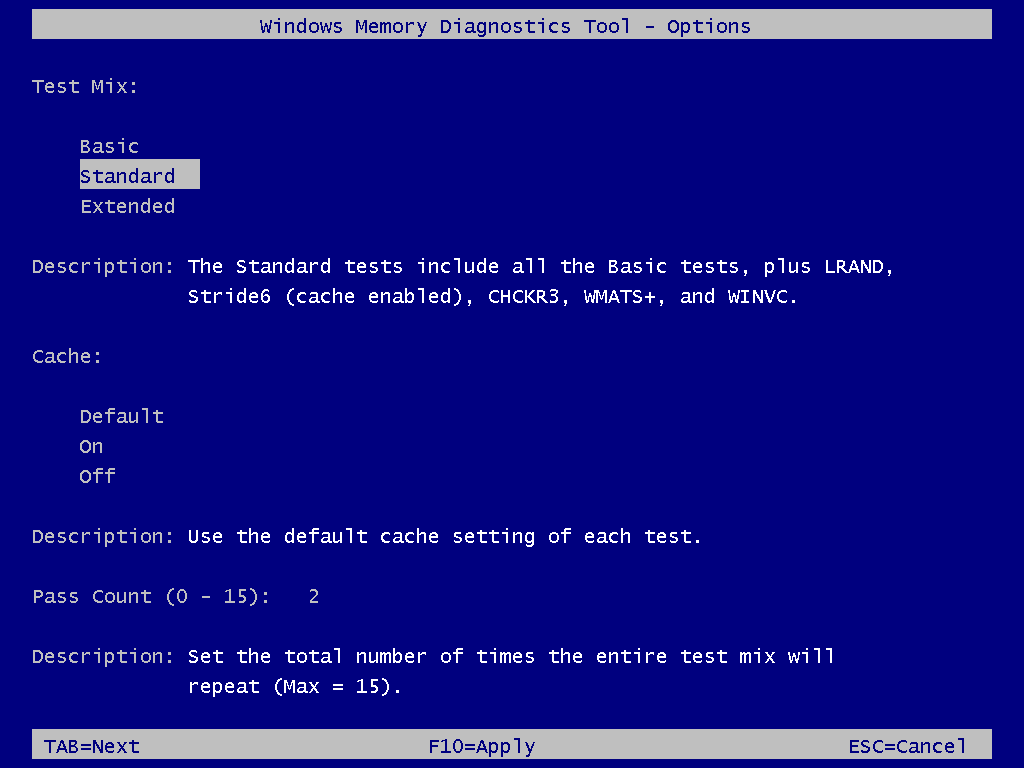
Step 3. Now, your computer will restart and boot into the Windows Memory Diagnostic Tool page. Press F1 to enter the Options page, set Test Mix, Cache, and Pass Count according to your needs, and then press F10 to apply it.
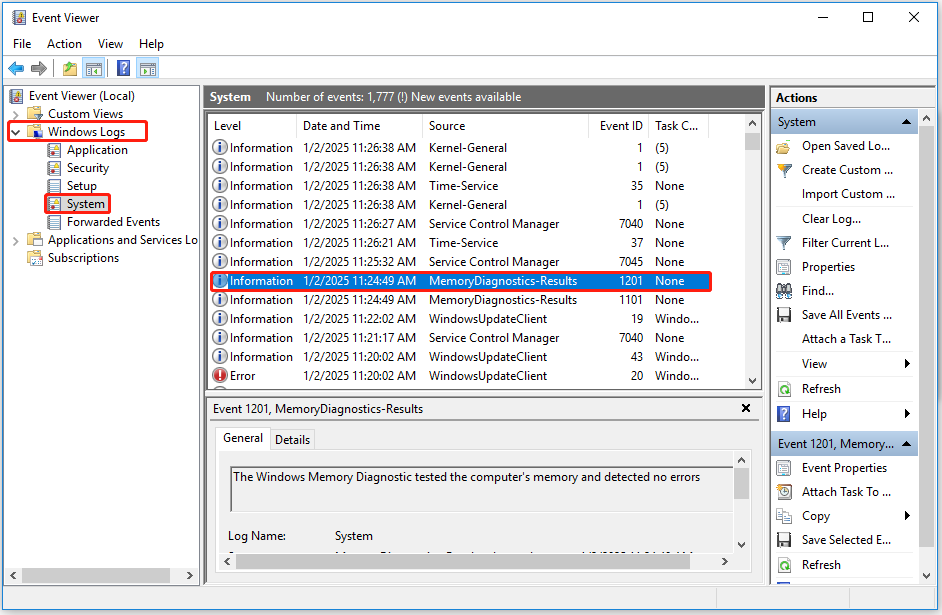
Step 4. Once the diagnostic is complete, your computer will restart once more. Then, you can open the Quick Link menu and select Event Viewer.
Step 5. Go to Windows Logs > Systems, and select the most recent log with MemoryDiagnostics-Results to view the scan result.
Step 6. If you see any errors listed, the RAM might be faulty. You can try reseating your RAM to fix the errors. If it doesn’t work, consider cleaning your RAM and the RAM slot when they are dusty. If necessary, replace the faulty RAM.
Approach 7. Repair Hard Disk Errors
If there are hard drive corruption on your computer, you can also easily receive the Kernel32.dll error. Check Disk (chkdsk.exe) is a useful Windows tool that checks the hard drive errors and repairs them if possible. To address your issue, follow the steps:
Step 1. Run Command Prompt as administrator.
Step 2. Type chkdsk C: /f /r and press Enter.
Step 3. Now, you can see an error message “CHKDSK cannot run because the volume is in use by another process. Would you like to schedule this volume to be checked the next time the system restarts?” Type Y and press Enter to proceed.
Step 4. Restart your PC, and the scanning starts.
Approach 8. Run a System Restore
System Restore functions as a time machine, allowing you to revert your computer’s system files, registry settings, and installed programs to a previous state.
If you have created a system restore point before encountering a Kernel32 dll error in Windows XP/7/10/ 11, consider using System Restore to resolve the issue.
Here’s the process:
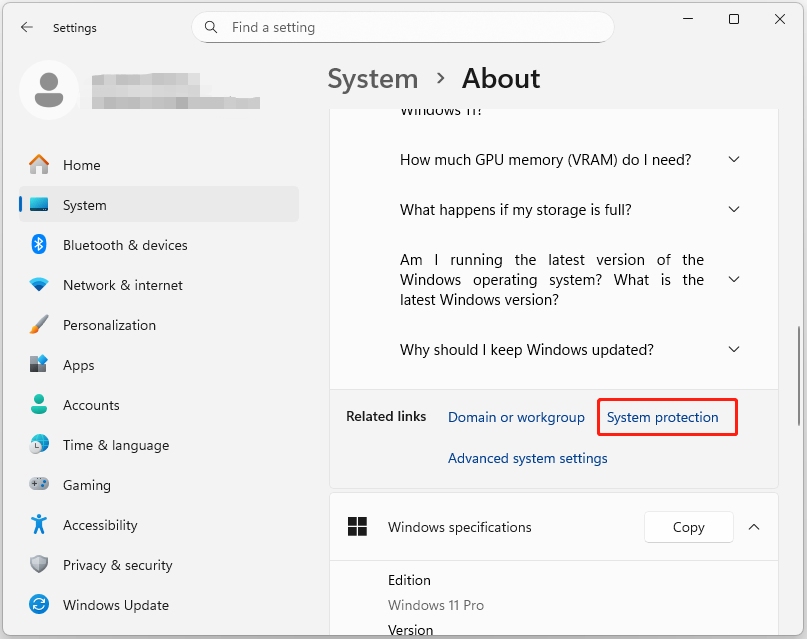
Step 1. Open Settings, go to System > About, and then select the System protection link on the right panel.
Step 2. In the prompted window, click System Restore, and then Next.
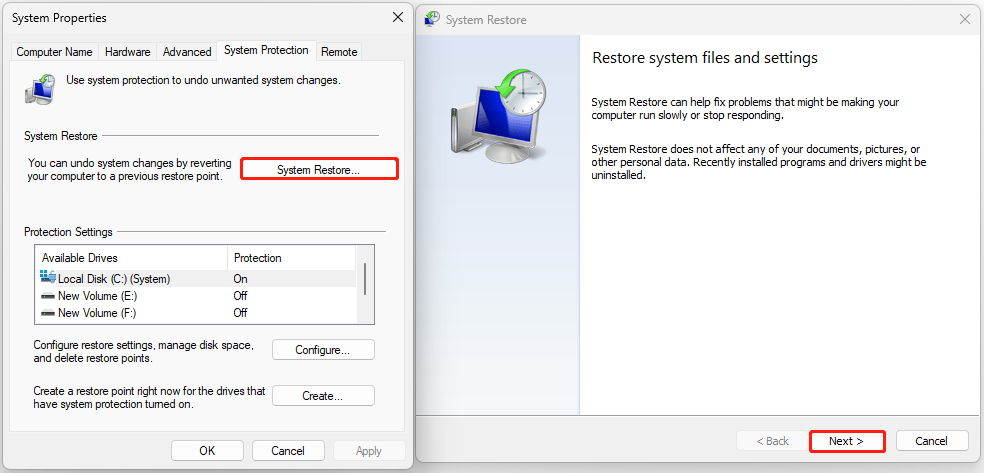
Step 3. Choose the restore point you want to use and click Next.
Step 4. Click Finish and Yes sequentially to confirm the operation.
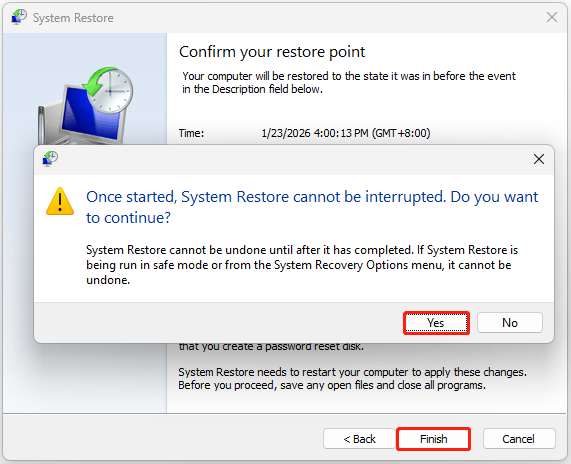
The System Restore process will begin. Wait for this process to be completed. Once done, your Windows will revert to the previous state.
Approach 9. Try Some Other Methods
If none of the above fixes can help you fix the Kernel32 dll error in Windows XP/7/10/11, try the following methods to fix the error:
- Replace KERNEL32.dll
- Install Visual C++ Redistributables
- Run a clean boot
- Reinstall the problematic program
- Disable hardware acceleration
- Stop overclocking your PC
- Perform a clean installation
Bottom Line
If the Kernel32.dll file is deleted, corrupted, or damaged, it can lead to system malfunctions or an unbootable application. This post gives a full guide on solving Kernel32.dll errors. If you run into the same error, try the methods mentioned earlier.
Moreover, remember to back up your data before trying these methods to keep data secure with MiniTool ShadowMaker. If you have any issues or suggestions when using this software, send an email to [email protected].
Kernel32.dll Error FAQ
To fix it, install specific updates or use older compatible software, install Visual C++ Redistributables, or run SFC and DISM.
To fix the missing vcruntime140.dll in Windows 7, install the Microsoft Visual C++ Redistributable for Visual Studio 2015 that matches your system (x86 for 32-bit, x64 for 64-bit). After installation, restart your computer. If the issue persists, reinstall the problematic program.
For more information, refer to the guide on DSOUND.dll missing or not found.
If those fail, use the Recovery Console (from an XP CD) to run chkdsk /r for disk errors or fixmbr for boot record issues.
About The Author

Position: Columnist
Charlotte is a technology columnist with a strong focus on the Windows operating system, specializing in disk management, backup, and data recovery. She is passionate about analyzing computer errors, identifying root causes, and delivering practical solutions. In her free time, she stays updated on the latest developments in computer systems and hardware while continuously learning new technologies to broaden her expertise. Her writing style is clear and easy to understand, making complex technical topics accessible even to users with limited computer knowledge.
User Comments :