This easy-to-use tutorial written by MiniTool will show you what Powershell.exe virus is and the ways of Powershell.exe virus removal Windows 10/11. In addition, you can also learn about some methods to prevent your computer from being infected by a virus or malware as well as how to keep your PC safe.
What Is Powershell.exe Virus Windows 10/11?
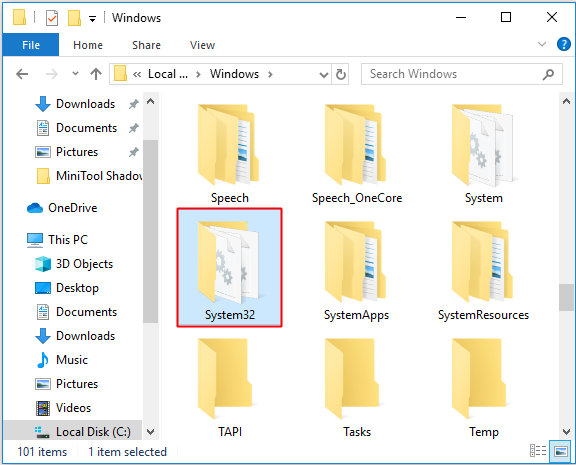
The genuine Powershell.exe file is an indispensable part of the Windows System. Its location is in a subfolder of C:\Windows\System32\WindowsPowerShell\v1.0\. The Powershell.exe is an executable file related to PowerShell and will not damage your computer in a normal state.
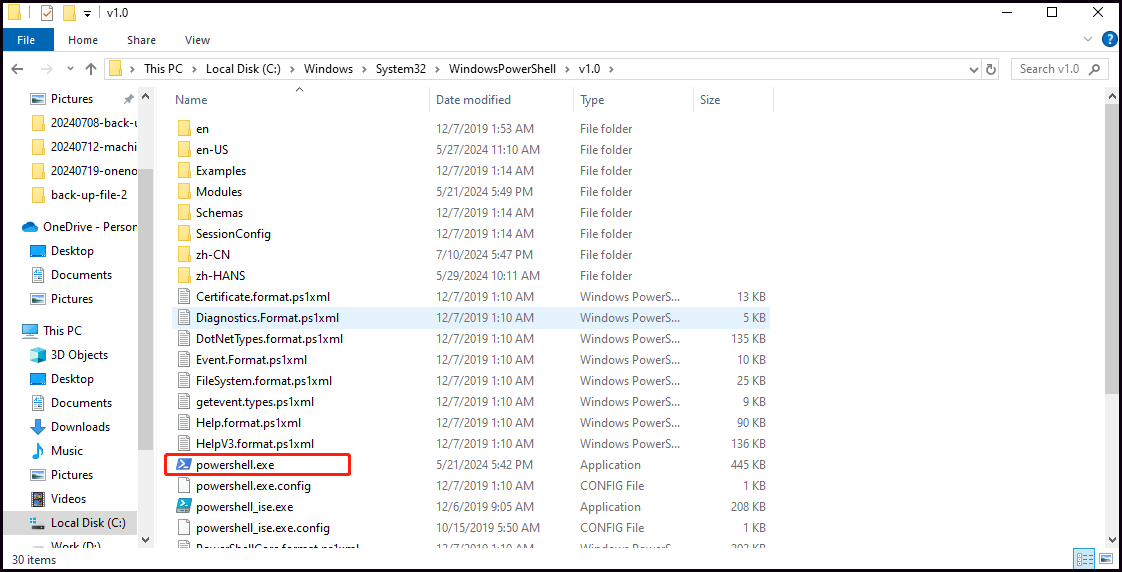
Powershell.exe virus is one of the most dangerous viruses. It is also known as PowersShell pop-up virus, a malicious program or script that uses PowerShell to display unwanted pop-ups on your computer. These pop-ups will entice you to get into them in the form of ads, warnings, alerts, or other messages. Once your system gets infected, the Windows Powershell virus can wreak havoc on your Windows PC and endanger your privacy.
The implications of getting the Powershell.exe virus could be new malware, poor device performance, changed settings, loss of important data, and corrupted systems or files, etc.
How Would You Get the Powershell.exe Virus?
Your computer can get access to the Powershell.exe virus from many different channels, for example,
- Open suspicious emails with malicious attachments or files.
- Download and install problematic software or malware from unknown sources.
- Click the notifications popping up when you use a web browser.
- Other suspicious ways or sources.
Next, you should know how to recognize the Powershell.exe virus.
How to Recognize if Your System Has Windows PowerShell Virus?
If your system has a Powershell.exe pop-up virus, there would be some signs for you to identify it. We list some in the following part:
- There are some notifications warning you to update programs that you never installed on your computer before.
- Strange applications that you do not remember being used or never installed appear on your desktop.
- Your computer runs slowly for no reason.
- Phishing messages keep appearing with notifications and require you to fill up with details of your sensitive information and files.
- Suspicious processes run in your task manager.
- Your files or folders are moved to other places or deleted.
You should recognize the possible signs right the first time in the event of getting the Powershell.exe virus. Next, you can remove it because the longer you have it, the worse the consequences may occur. It’s important to learn how to remove Windows PowerShell virus.
How to Remove Powershell.exe Virus?
How to remove Powershell.exe virus? There are several proven ways about the Powershell.exe virus removal. Just keep reading the following part to get detailed information.
1. Use Antivirus Software and Malware Removal Tool
You should first try to remove the Windows PowerShell virus using antivirus software and a malware removal tool. This way may be the most effective.
In fact, Windows 10/11 comes with a powerful feature, which is Windows Security also known as Windows Defender. It can help you to scan your computer. When running Windows Security to scan your computer, the scanning process will take a long time. However, you can’t argue that it is useful on Powershell.exe virus removal Windows 10/11.
Here’s how to remove Powershell.exe virus with Windows Security.
Step 1: Type Windows Security in the search bar and choose it.
Step 3:In the new window, choose Virus & threat protection from the left pane.
Step 4: Click Quick Scan and then wait patiently.
Besides, you can download and install other powerful antivirus software or a malware removal tool to help you detect viruses & malware and remove them. It is recommended you use McAfee.
2. Reset Your Browser to Its Default Settings
Sometimes there are many pop-up ads appearing on your web browser and it’s the first stage of the Powershell.exe virus before it has spread to your entire system. And most malware comes into your computer via the Internet.
Therefore, resetting your browser to default settings could be a temporary method to get rid of the Powershell.exe virus Windows 10/11 and help you minimize further damage. The reset can also remove malicious plug-ins or tools running within the browser. But you need to find a permanent solution to remove the virus thoroughly.
Take Google Chrome with most users as an example. Here’s how to reset the browser to default settings.
Step 1: Open Google Chrome, click on the three dots in the top right corner, and select the Settings option.
Step 2: Choose Reset settings and click Reset settings to their original defaults.
Step 3: Click the Reset settings option in the popup window.
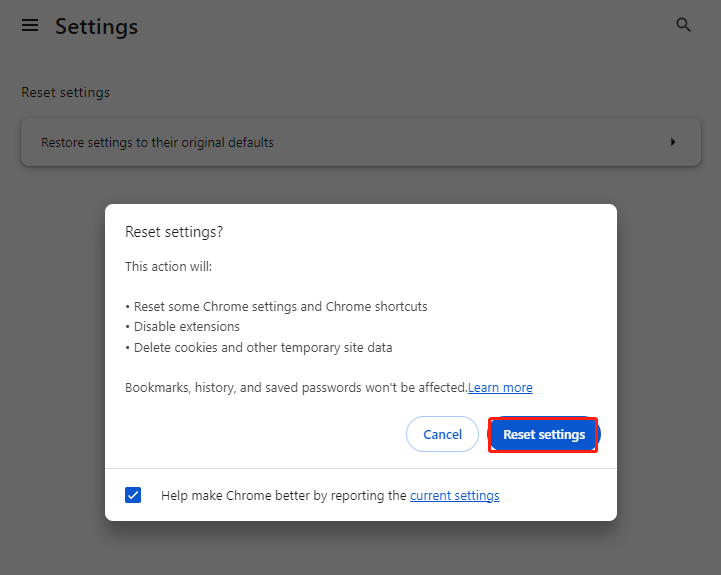
After you finish these steps, you have successfully removed all the extensions and add-ons on your browser and reset it to default settings.
3. Remove Malicious Third-party Apps on Your PC
Powershell.exe virus can always make its way to gain access to your computer. It will attach to certain malicious programs. So you can look for these suspicious applications in your All Apps collection and remove them at once. Take the following steps.
Way 1:
1. Press the Win + R key at the same time to open the Run dialog.
2. Type the command control – appwiz.cpl into the Open bar in the Run window and click OK to go on. It will take you to the apps manager in the Control Panel.
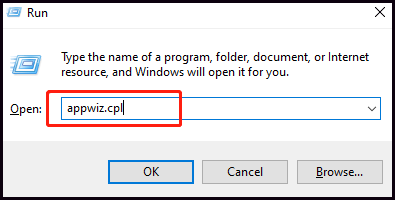
3. Then you can double-click the malicious programs and uninstall them.
Way 2:
1. Press the Win + I simultaneously to open Settings, locate the Apps option, and click on it. In the Apps & features section, you can see a list of all the programs installed on your PC.
2. Then click the suspicious applications and click the Uninstall button to remove them.
Both above two ways can help you check your installed applications. Once you find any suspicious software that you never used or installed before, just uninstall them completely. When finishing, check if strange pop-ups arose from the Powershell.exe virus persists.
Useful Suggestion
As long as you use an internet-connected device, the risk of being invaded by malware or viruses could arise at any moment. In this way, even if you prepare everything to protect your data, you always might suffer from data loss or something else that you can never retrieve. Therefore, making backups regularly is the best way to protect your computer.
When it comes to backup, we strongly recommend you try to use MiniTool ShadowMaker. It is a brilliant and professional Windows backup software, which has many wonderful features such as backup, recovery, sync, disk cloning, and so on.
For backup, MiniTool ShadowMaker enables you to backup files and folders, disks and partitions, and even the operating system. Also, it provides different backup locations, including USB flash drives, external hard drives, and so on.
For recovery, MiniTool ShadowMaker allows you to restore everything you have backed up before. Its Sync feature lets you sync files and folders to other locations and you can use the Clone Disk feature to create a bootable external hard drive and clone a dynamic disk with simple volumes. With it, you can get clear on how to clone a hard drive.
MiniTool ShadowMaker TrialClick to Download100%Clean & Safe
Next, we will show you how to back up your PC using MiniTool ShadowMaker. Take the steps below.
Step 1: Download and install MiniTool ShadowMaker.
Step 2: Launch the software and click Keep Trial.
Step 3: Go to the Backup page. At the beginning, the source of your operating system and the destination is selected by default. You can change them by clicking the SOURCE or DESTINATION module respectively. Speaking of the destination for saving backup files, you are supposed to choose the external hard drive.
Step 4: After that, you can click Options on the Backup page. In this section, you can configure some advanced settings, such as backup scheme, automatic backup, file size, and the like. Click the Schedule Settings tab and toggle on the switch (disabled by default). Then, you can set up a schedule as per your preference and then click OK to continue.
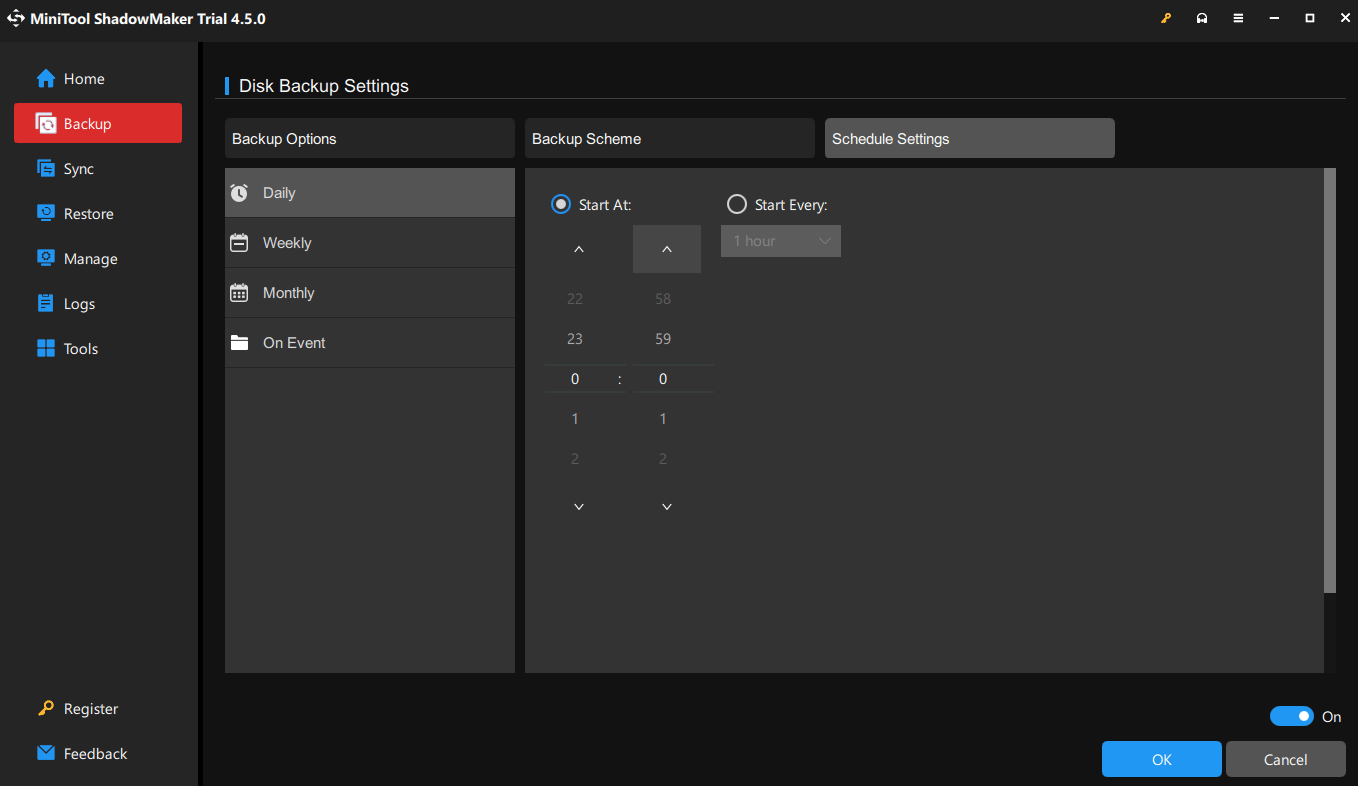
Step 5: Click Back Up Now to perform the automatic backup and wait for it to complete the backup process.
Tips for Avoiding Malware and Protecting Computer
Here are several helpful security tips that can help you guard against virus infections or malware and protect your device.
- You should always update your operating system and software regularly once there is an available update. The updating process often fixes security bugs or glitches, patch vulnerabilities as well as other maintenance.
- Download and install a reputable antivirus and keep it up to date. A good antivirus will detect cyber threats and defend them for your computer.
- Do not use pirated software and keep in mind that installing third-party applications from an authority site. The malware can be disguised as a common app. Once you download, it will compromise or leak your data and privacy.
- Try to use strong and unique passwords as much as possible. When you set a password, do not contain your personal information or easily guessable words.
Bottom Line
To sum up, this guide is written to tell you the answer to what Powershell.exe virus is and how to remove Windows PowerShell virus. And beyond that, it also recommends you back up critical information and data with MiniTool ShadowMaker so as to keep your data safe. In the end, some basic security tips are given for you to prevent future infections by another virus or malware.
If you have any suggestions or problems with MiniTool ShadowMaker, please send an email to [email protected]. We will reply to you as soon as possible.
Powershell.exe Virus FAQ
2. Select the Uninstall a program link under Programs.
3. Click Turn Windows features on or off from the left options.
4. Navigate to Windows PowerShell 2.0, uncheck it, and click OK to get rid of Windows PowerShell.
Plus, go to How to Uninstall PowerShell in Windows 10 – 4 Ways for more methods.
User Comments :