
Is SFC Actually Stuck or Still Running?
System File Checker (SFC) is a built-in command-line tool that scans and repairs corrupted Windows system files. When running the SFC /scannow command, it may stay at a certain percentage (like 4/5/30/40/73/96/100) for several minutes or longer.
However, this doesn’t always mean that the scan is really frozen. Windows may still be scanning, verifying, or repairing system files in the background.
How Long Does SFC /Scannow Usually Take?
An SFC scan usually takes 5-30 minutes on modern computers. The actual time varies depending on the computer hardware, disk performance, and the level of system file corruption.
If you use an older HDD or the tool finds extensive file corruption, it may take longer.
How to Tell If an SFC Scan Is Frozen?
To check if SFC is running:
- Press Ctrl + Shift + Esc to open Task Manager.
- Check whether the disk activity is active under Performance.
How to Fix SFC /Scannow Stuck at Verification or Beginning
When the issue occurs, wait for the scan to complete. If the progress percentage remains unchanged, try the following methods.
Run DISM Scan
If SFC /scannow is not progressing, corrupted Windows component store files may be the cause. Run DISM first, then run SFC again.
DISM, also called Deployment Image Servicing and Management, is another useful command-line tool in Windows to service & prepare Windows images, including those used for Windows RE (Windows Recovery Environment), Windows Setup, and Windows PE.
Here is a table of DISM vs SFC.
| Tool | Main Function |
| DISM | Repairs the Windows component store |
| SFC | Scans and repairs protected Windows system files |
Step 1: Click the search icon in Taskbar, type in cmd, right-click on Command Prompt and choose Run as administrator.
Step 2: In the CMD window, type in the following command and press Enter.
dism /online /cleanup-image /restorehealth
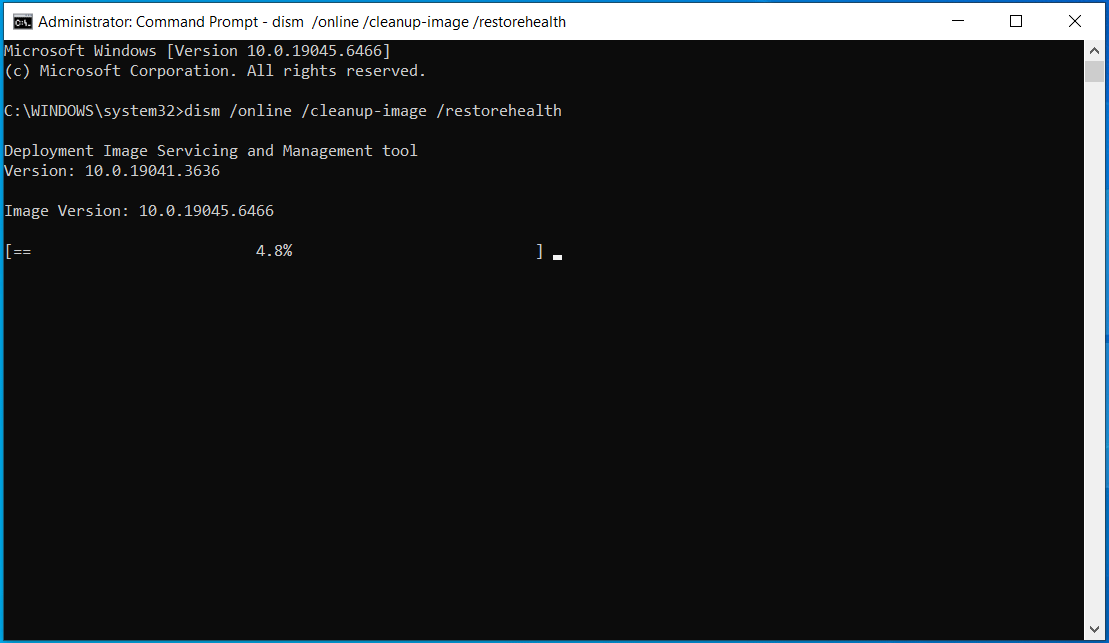
Step 3: This could take several minutes. Wait for the operations to finish. After that, restart your PC and run an SFC scan again to see if the issue is fixed. If not, try other ways.
Run SFC Scan in Safe Mode
If the issue of SFC /scannow stuck still appears, you can try to run this command line in Safe Mode.
Safe Mode loads Windows with a minimal set of drivers and services, reducing potential third-party application conflicts.
Step 1: Click the Start icon, press the Power button and click the Restart button. Press and hold the Shift key on the keyboard while pressing Restart to boot the PC to Windows Recovery Environment.
Step 2: Under the Choose an option interface, click Troubleshoot to continue.
Step 3: Go to Advanced options > Startup Settings and click Restart.
Step 4: Use a function key to choose an option to enter Safe Mode, for example, F4, F5, or F6.
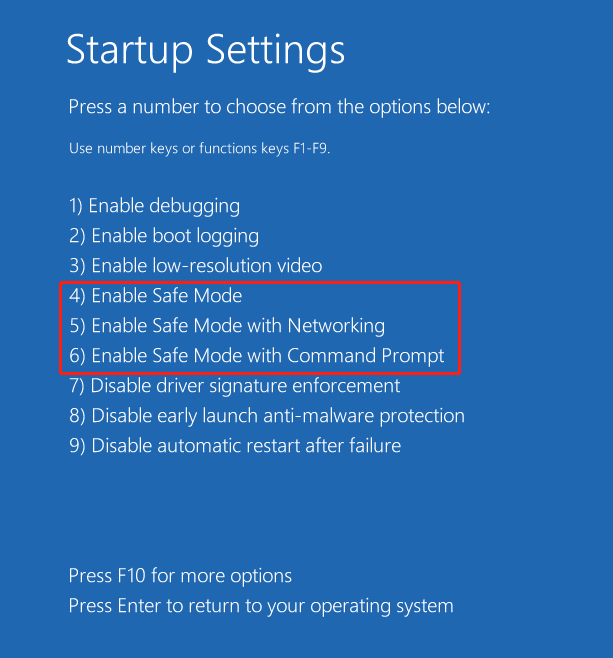
Step 5: In Safe Mode, type in sfc /scannow to the Command Prompt window and press Enter to see if it still gets stuck at beginning system scan or at 4/5/23/30/40/72/96/100 verification.
Use the CHKDSK Command
According to users, performing a CHKDSK scan can help to fix the issue SFC /scannow stuck at verification or beginning system scan. Sometimes, disk errors or file system corruption may prevent an SFC scan from completing.
Step 1: Launch Command Prompt with admin privileges.
Step 2: Type in chkdsk /f and press Enter.
Step 3: Windows will ask you if you want to schedule this partition to be checked next time the PC restarts. Type Y and press Enter to start the operation.
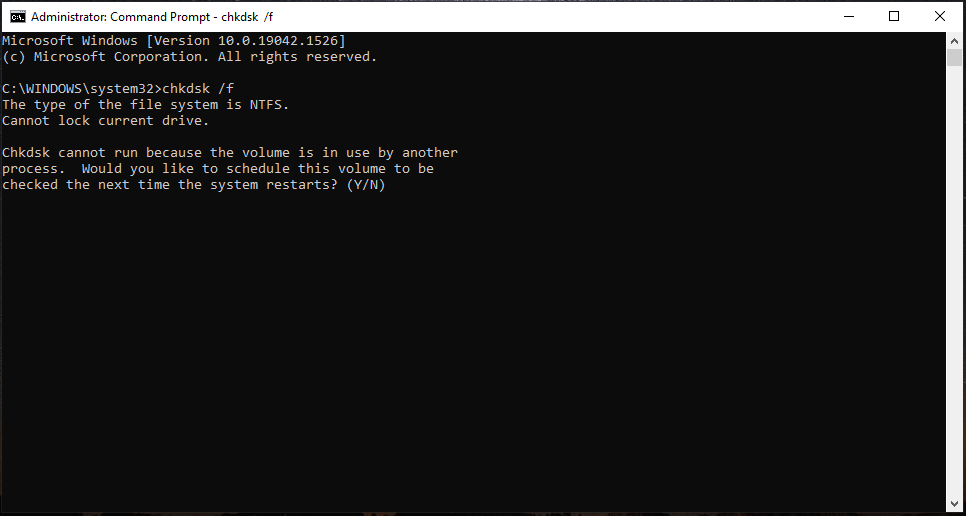
Step 4: After the reboot, run an SFC scan to see if your issue is fixed. If not, continue the fix.
Perform a System Restore
System restore points are useful to undo system changes to revert your PC to a previous restore point. If you have a restore point that is created beforehand, you can perform a system restore if SFC /scannow fails with 4/5/30/40/100 verification.
Step 1: Type create a restore point to the search box in Windows 10/11 and click the result to enter the System Properties window.
Step 2: Click the System Restore button to continue.
Step 3: In the pop-up interface, Windows will choose the recommended restore option by default. You can click Next to continue. If you don’t want to restore the restore point, tick the option – Choose a different restore point.
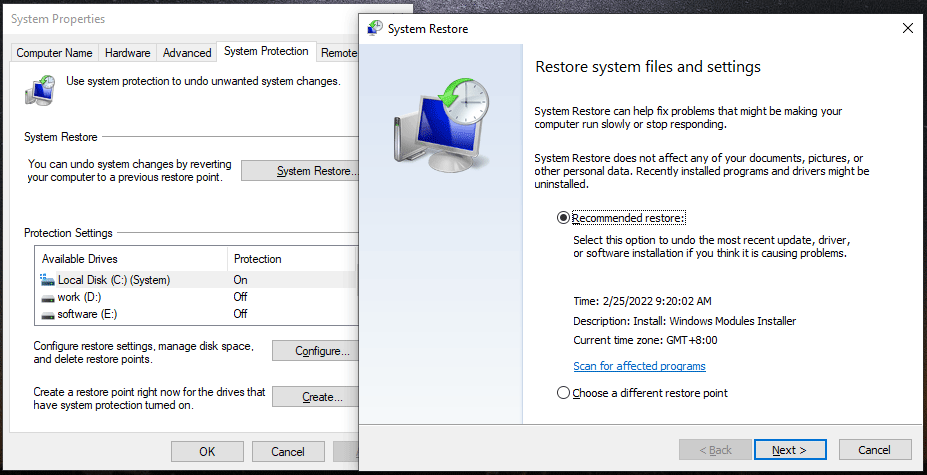
Step 4: Choose the restore point you wish to revert to and click Next to go on.
Step 5: Confirm the operation and click the Finish button.
If you don’t have a restore point, this way doesn’t work for you to solve your issue. What if all the above ways cannot fix SFC /scannow stuck? The last resort is to perform a Windows in-place upgrade repair or reset the PC.
Perform an In-Place Upgrade
It is an easy task to run an in-place upgrade and no USB flash drive is required. Here is what you should do:
Step 1: Go to the Microsoft website and click the Download tool now button to get Media Creation Tool.
Step 2: Double-click the executable file to launch this tool on your PC.
Step 3: Accept applicable notices and license terms.
Step 4: After everything is ready, choose Upgrade this PC now to run the in-place upgrade.
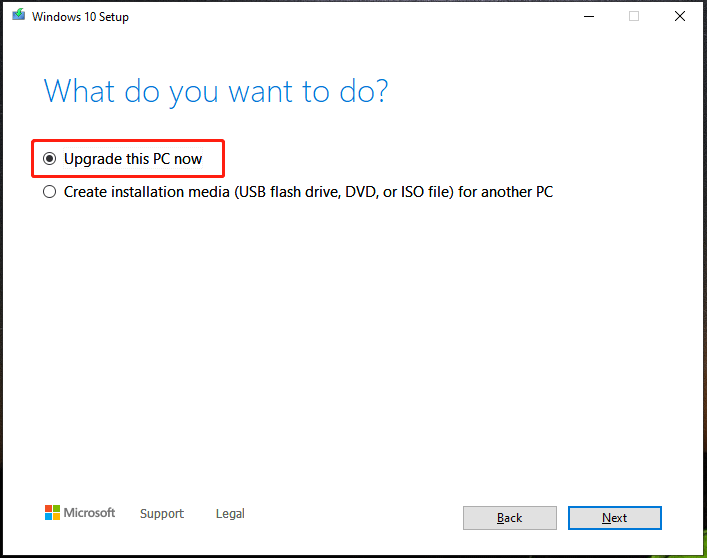
Step 5: The Windows Setup tool is downloading Windows.
Step 6: Follow the on-screen instructions to finish the upgrade repair.
After that, go to check if SFC can scan for your system successfully.

Reset Your PC
If none of the above methods fixes the stuck issue, you may need to reset your PC as a last resort to repair persistent Windows problems.
Back up your important files before resetting Windows to avoid unexpected data loss, even if you choose Keep my files.
Back up Data Before Resetting
To do this work, use the professional data backup software, MiniTool ShadowMaker. It allows you to easily back up files, folders, systems, disks, and partitions.
MiniTool ShadowMaker TrialClick to Download100%Clean & Safe
Follow the guide below to back up your data:
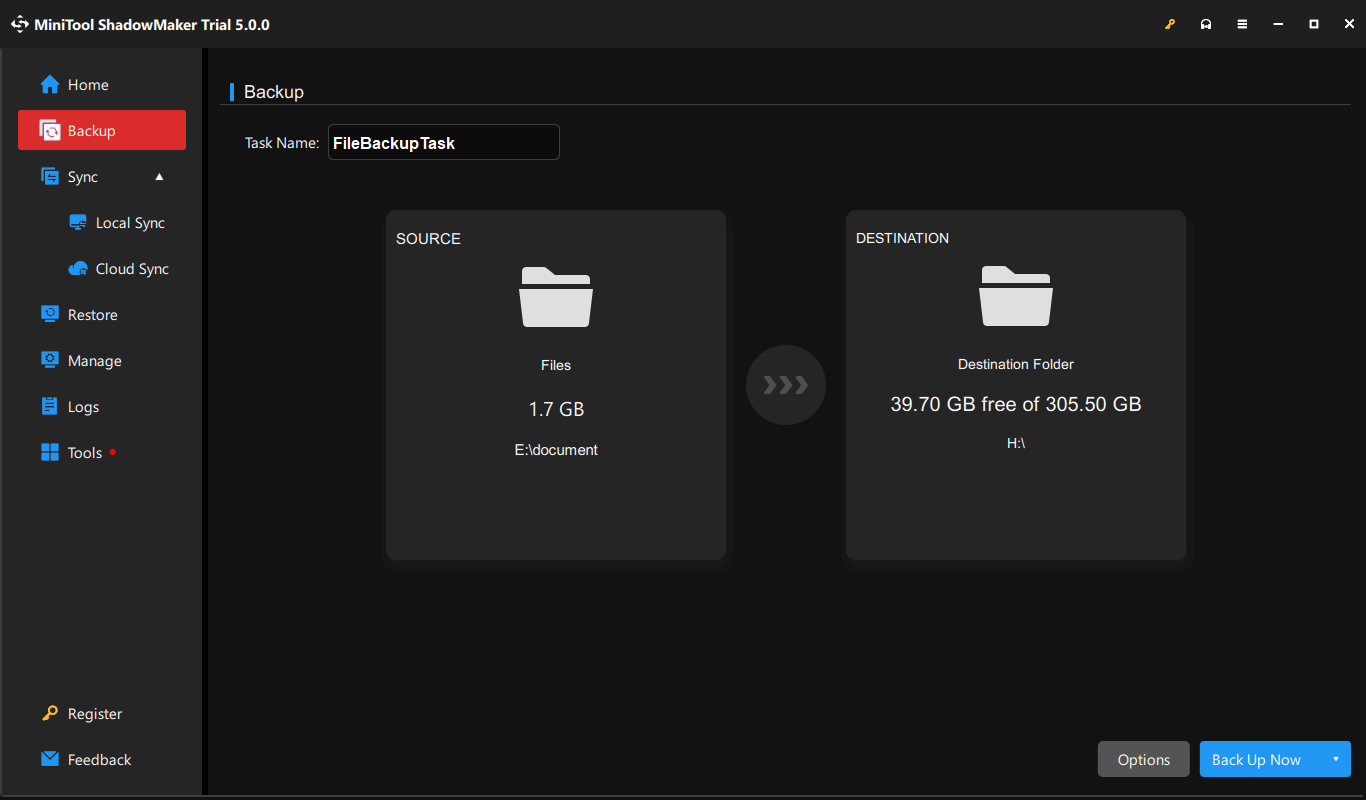
Step 1: Launch MiniTool ShadowMaker.
Step 2: Go to Backup > SOURCE > Folders and Files and choose the files or folders you want to back up.
Step 3: Click DESTINATION to select a drive.
Step 4: Start the backup task by clicking Back Up Now.
Reset Windows 10/11
After backup, it is time to reset your PC to its default settings. Here is what you should do:
Step 1: Click Start > Settings > Update & Security.
Step 2: Go to System > Recovery > Reset PC in Windows 11 or Update & Security > Recovery > Get started in Windows 10.
Step 3: Choose Keep my files or Remove everything based on your needs.
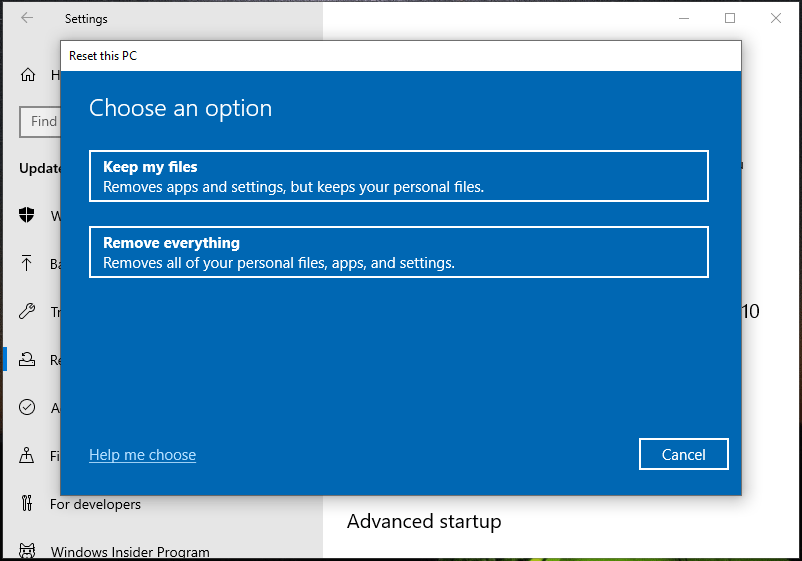
Step 4: Determine how you would like to reinstall Windows – Cloud download or Local reinstall. If you don’t know which one to choose, refer to this post to get the answer – Cloud Download vs Local Reinstall: Differences on Win 10/11 Reset.
Step 5: Finish the rest operations by following the instructions on the screen.
After that, the issue of SFC /scannow stuck should be removed from your PC.
Bottom Line
It is easy to fix SFC /scannow stuck at 4/5/30/40/73/96/100 verification by trying the methods above. It is recommended to back up your PC to avoid data loss before resetting the PC.
If you meet some issues when using MiniTool ShadowMaker, send an email to [email protected] or leave a comment below. We will reply to you as soon as possible.
SFC /Scannow Stuck FAQ
About The Author

Position: Columnist
Vera has been working at the MiniTool Team for over 10 years as a technical editor and content writer. She mainly focuses on disk and partition management, data recovery, Windows backup and restore, and PC troubleshooting. Through in-depth software testing and hands-on experience, she has helped users solve a wide range of computer problems and better protect their data on Windows devices.
User Comments :