
Standard Hardware Security Not Supported Windows 11/10
The “standard hardware security not supported” Windows error message can happen on many in Windows Security. And when you encounter this error, it is possible that your device does not meet the minimum requirements for hardware security.
The requirements of standard hardware security are as follows, please make sure every one of them has been enabled.
- TPM 2.0 (Trusted Platform Module)
- Secure Boot enabled
- DEP (Data Execution Prevention)
- UEFI MAT (Unified Extensible Firmware Interface Memory Attributes Table)
In addition to these disabled settings, the error can also be caused by:
- Outdated Windows
- Windows Security bugs
- Disabled Memory Integrity
After knowing about these potential reasons, you can go to the next part for the specific methods.
How to Fix Standard Hardware Security Not Supported on Windows 11/10
Check the table to find the right solution for your situation.
| Situation | Recommended Fix |
| Required security features are disabled. | Check security settings and enable TPM 2.0, Secure Boot, and DEP |
| Memory Integrity is disabled. | Check Memory Integrity |
| Security settings are disabled, but the issue persists. | Re-register or reset Windows Security |
| The issue started after a recent Windows update. | Uninstall the recent update |
Fix 1: Check Requirements of Standard Hardware Security
To make sure every requirement of standard hardware security has been met, please check them one by one and make sure they are enabled.
1. Check and Enable TPM 2.0
To check TPM 2.0, please do as follows.
Step 1: Open the Run dialog box by pressing the Win + R key and input tpm.msc to enter.
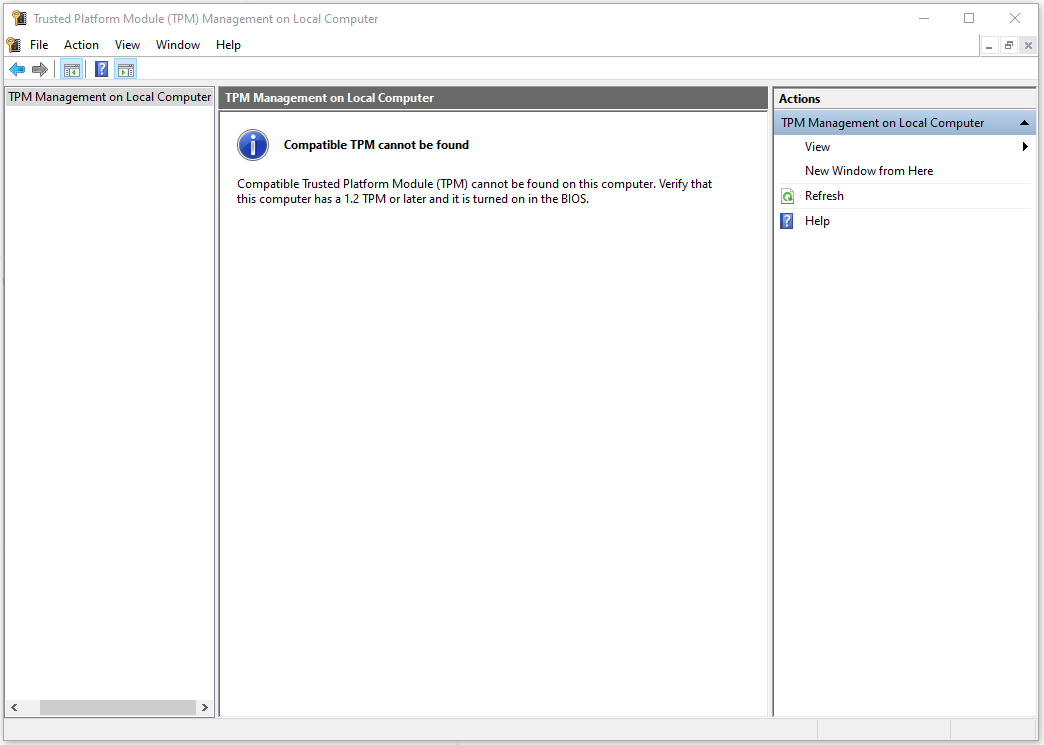
Step 2: Then a management window pops up. If you see the message showing you that Compatible TPM cannot be found, you need to enable TPM 2.0.
If you see the message The TPM is ready for use after clicking Status, it means the TPM is enabled and then please check for its Specification Version which should be 2.0 or later.
Then to enable TPM 2.0, you are required to get into BIOS by pressing the dedicated key, such as Esc, Delete, F1, F2, F10, F11, or F12, after you boot the PC up and see the initial screen. The key depends on your manufacturer.
Go to the Security tab at the top and locate TPM to enable it. After that, save your changes and quit to restart your computer.
2. Check and Enable Secure Boot
To enable Secure Boot, you still need to get into BIOS and switch to the Boot tab at the top menu. Locate the Secure Boot option and turn it on. Then save your changes and quit.
3. Enable DEP (Data Execution Prevention)
To enable DEP, you can follow the next easy steps.
Step 1: Open the Run dialog box and input sysdm.cpl to enter System Properties.
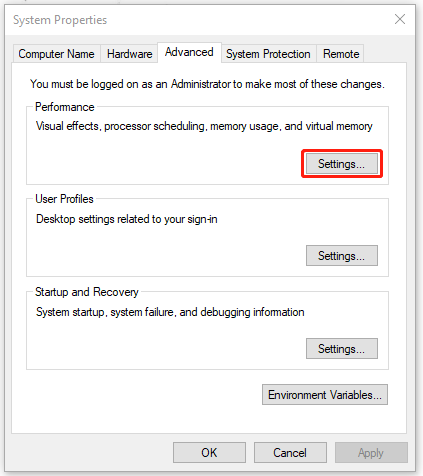
Step 2: Then go to the Advanced tab and under Performance, click Settings….
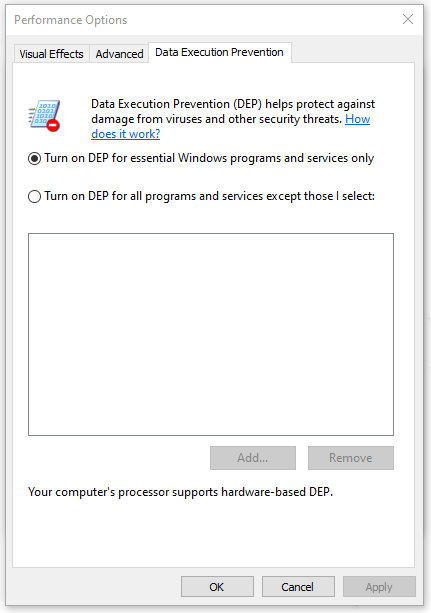
Step 3: In the pop-up window, go to the Data Execution Prevention tab and choose the option labeled Turn on DEP for essential Windows programs and services only. Then click Apply and OK.
After all of that and all requirements have been checked and enabled, you can check if the “standard hardware security not supported” issue has been resolved.
Fix 2: Enable CPU Virtualization
To fix the standard hardware security not supported error, it is necessary to enable virtualization in BIOS.
Step 1: In BIOS, go to the Advanced tab, click on CPU configuration.
Step 2: If you are using AMD CPU, please enable SVM Mode from Advanced settings; if you are using Intel CPU, please enable the option labeled Intel Virtualization Technology. Step 3: Save your changes and quit to restart your PC.
Fix 3: Enable Memory Integrity
For the newest version of Windows, it may require you to enable Memory Integrity so that the standard hardware security can run well. So you can try this by following the next steps.
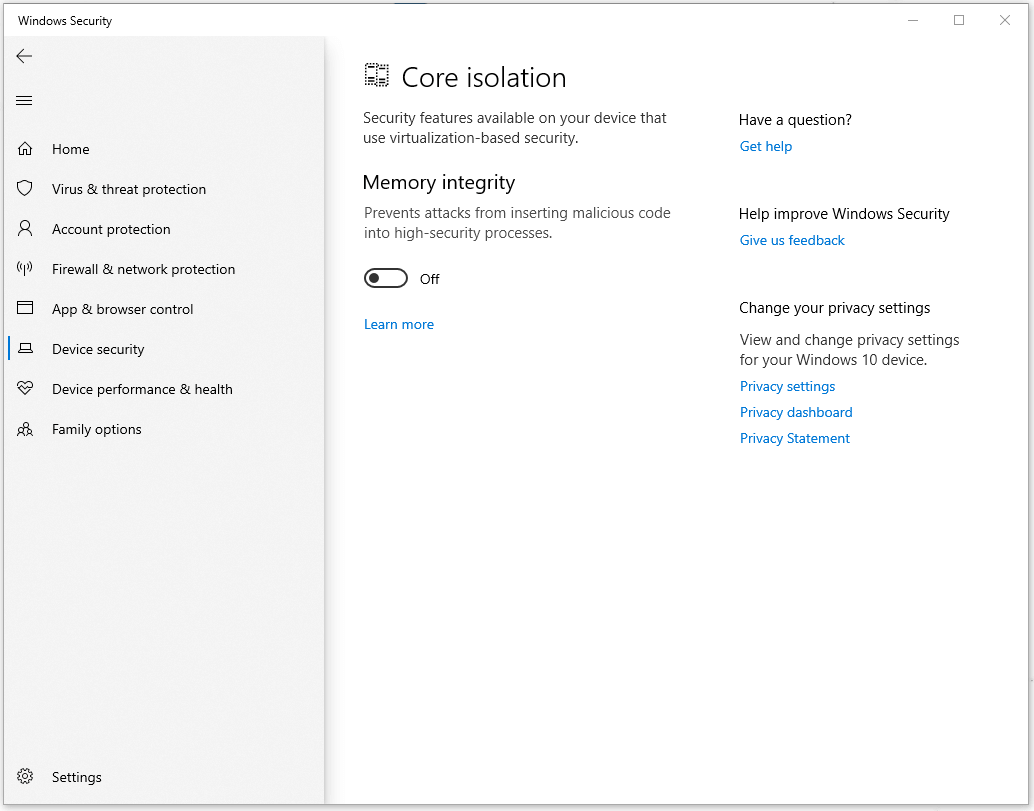
Step 1: Please go to Start > Settings > Update & Security > Windows Security > Device security.
Step 2: Click on Core isolation details under Core isolation and turn on the toggle under Memory integrity.
Then you can see if the “standard hardware security not supported” error message has been gone.
If you need more methods to enable Memory Integrity, you can read this article: Enable and Disable Core Isolation Memory Integrity in Windows.
Fix 4: Reregister Windows Security App via PowerShell
Re-registering Windows Security can help resolve issues caused by a corrupted or incorrectly registered app package. Try this method if the error persists, although your PC meets the standard security requirements.
Step 1: Open Search by pressing Win + S and type in Powershell to run it as an administrator.
Step 2: Then please copy and paste the following command and press Enter.
PowerShell -ExecutionPolicy Unrestricted -Command “& {$manifest = (Get-AppxPackage *Microsoft.Windows.SecHealthUI*).InstallLocation + ‘\AppxManifest.xml’ ; Add-AppxPackage -DisableDevelopmentMode -Register $manifest}”
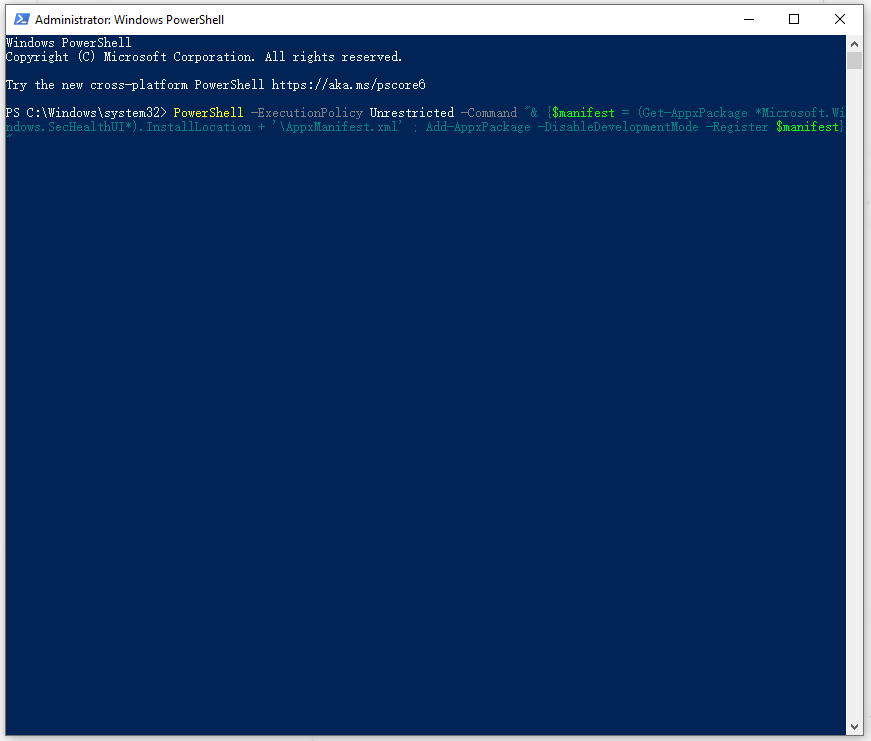
Step 3: Once the command has been successful, you can close the window and restart the PC to check if the error persists.
Related article: 10 Best PowerShell Commands You Should Know
Fix 5: Reset Windows Security
Windows Security may be corrupted, resulting in “standard hardware security not supported”. Resetting it may help.
To reset Windows Security, do the following:
Step 1: Open Search by pressing Win + S and input windows security to click on App settings in the pop-up window.
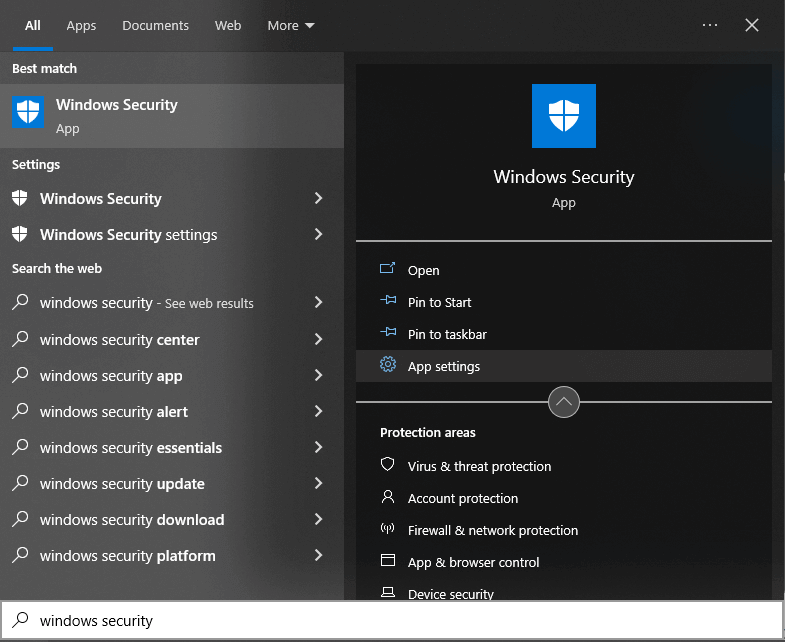
Step 2: When a window pops up, please scroll down and choose Reset. That will help you fix some app’s bugs but all your app’s data will be deleted.
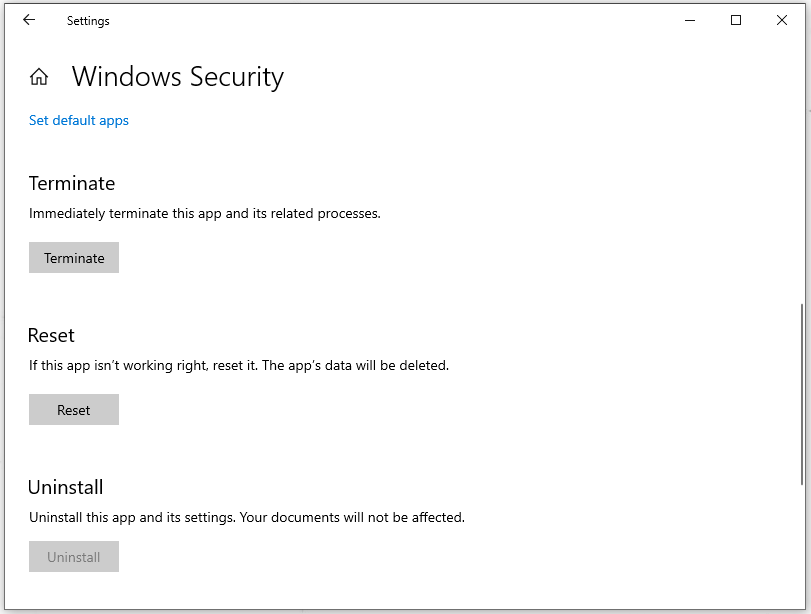
Or you can reset Windows Security via PowerShell. Run your PowerShell as an administrator and type the following command to enter:
Get-AppxPackage *Microsoft.Windows.SecHealthUI* | Reset-AppxPackage
Once the command executes, you can exit the PowerShell console and restart your PC to check the error.
Fix 6: Update Windows
After trying the above methods, if your issue still exists, you can owe this error to the outdated Windows version.
Follow these steps to update Windows.
Step 1: Open Settings.
Step 2: Then choose Check for updates under the Windows Update from the left panel.
Step 3: If there is any available update for you, download and install them on your PC.
Fix 7: Uninstall the Recent Windows Update
If the issue appeared after a Windows update, uninstalling it may help.
Step 1: Go to Settings > Windows Update.
Step 2: Click Update history > Uninstall updates.
Step 3: Locate the recently installed update and click Uninstall.
Back Up PC with MiniTool ShadowMaker
The “standard hardware security not supported” on Windows may make your Windows Security fail to work and all kinds of cyber-attacks will seize the chance to infiltrate your computer system. That can result in data loss.
Backup is always what we stress to cope with data loss. It is easy and efficient. MiniTool ShadowMaker, a backup expert, covers a variety of features and functions, which can be your go-to choice.
After downloading and installing it, open it to click Keep Trial and you can try this free version for 30 days.
MiniTool ShadowMaker TrialClick to Download100%Clean & Safe
Then you can go to the Backup tab to choose your backup source and destination; after everything has been settled, you can click Back Up Now to start the task.
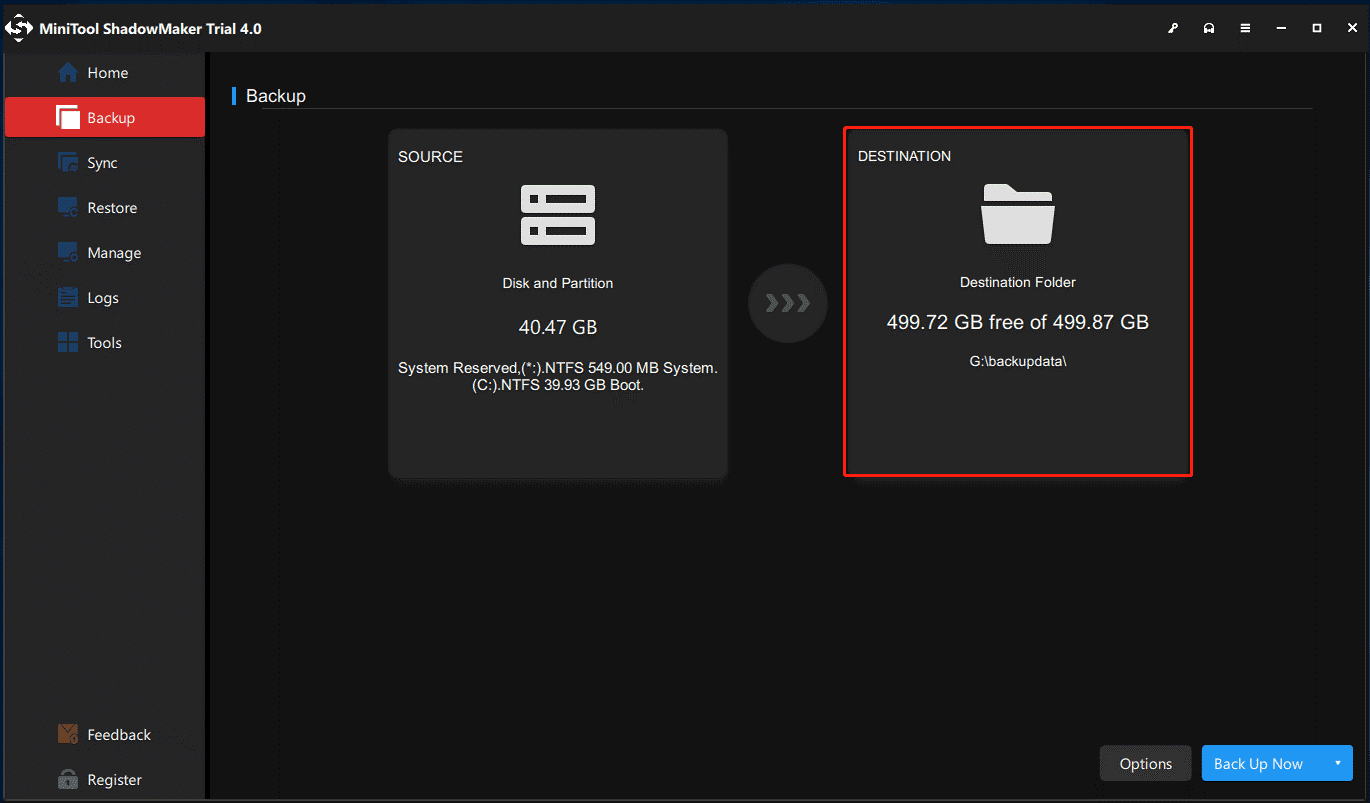
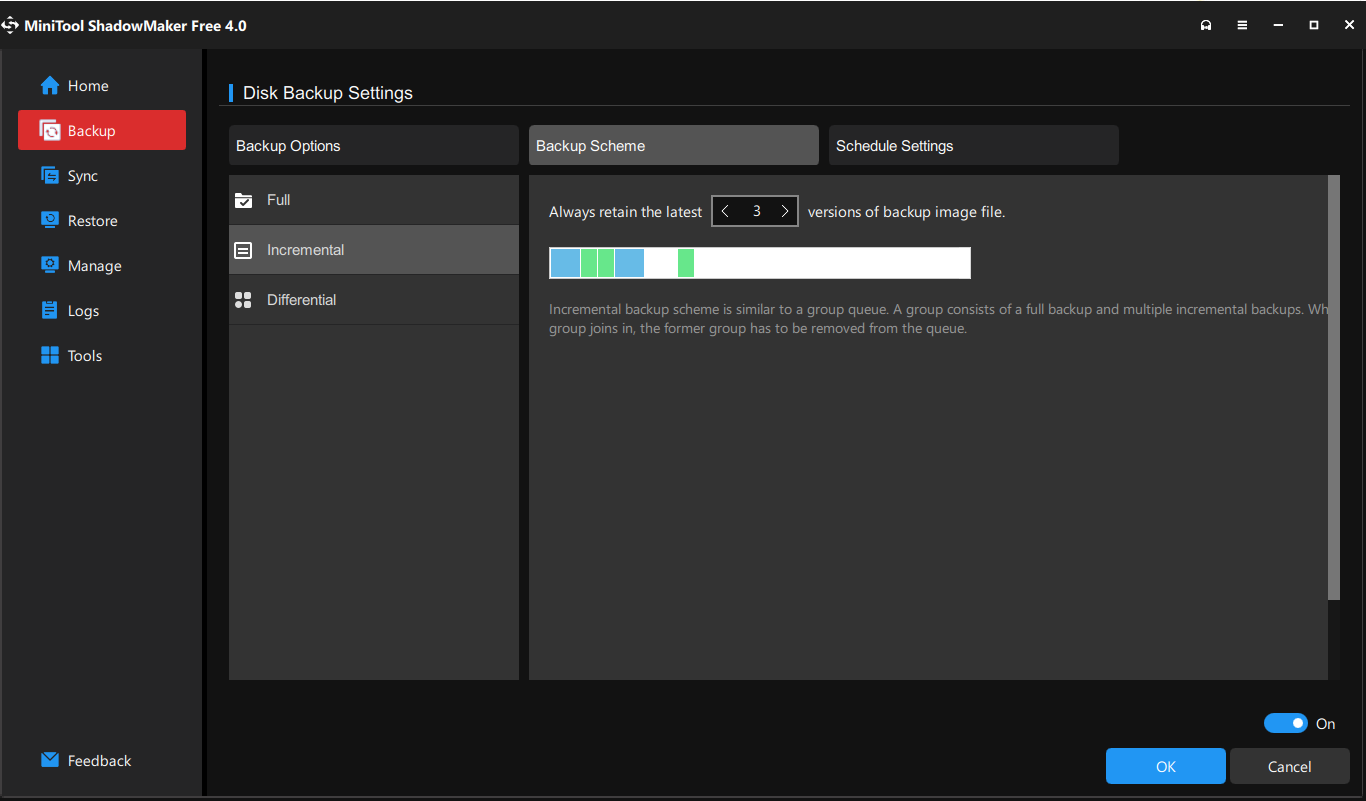
Apart from that, you can choose Options to configure your backup schedule and scheme. There are three backup schemes you can choose – Full, Incremental, Differential – and four schedule settings – Daily, Weekly, Monthly, and On Event.
Bottom Line:
This issue usually happens for multiple reasons and you may have a general picture of this “standard hardware security not supported” issue. The solutions are easy to follow and you can follow the above to resolve your concerns. However, it is still advised to back up your data in advance and that can help avoid most troubles.
If you have encountered any issues when using MiniTool ShadowMaker, contact us via [email protected].
User Comments :