This MiniTool guide explains Windows Modules Installer Worker (TiWorker.exe) high CPU or disk usage. To fix it, try setting Windows Modules Installer to manual, using Windows Update Troubleshooter, running SFC, performing a clean boot, and so on.
Understanding of Windows Modules Installer Worker
What Is Windows Modules Installer Worker
Windows Modules Installer Worker, also known as TiWorker.exe, is a core system process in Microsoft Windows. This process manages the installation, modification, and removal of Windows updates and optional components.
The key functions include:
- Update Management: Checks for available Windows updates and security patches, then downloads and installs them.
- System Maintenance: Cleans up the Windows Component Store (the C:\Windows\WinSxS folder) to free up disk space.
- Component Installation: Installs Windows features and system components, including the .NET Framework.
Windows Modules Installer Worker is primarily designed to run when the computer is idle. It starts automatically in the background, ensuring the system remains stable and updated.
How to See What Windows Modules Installer Worker Is Doing
It is essential to check what TiWorker.exe is doing, especially when it causes high CPU or disk usage. This confirms if it is actually performing updates, rather than a system issue.
Here are 2 common approaches to identify its activity.
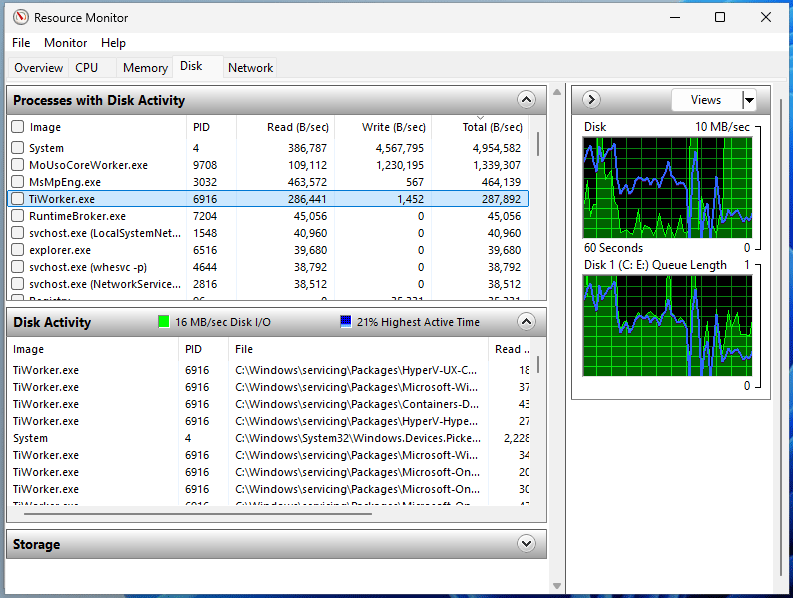
Option 1: Use Resource Monitor
The standard Task Manager can monitor your CPU, memory, disk, and network, but it does not show detailed disk activity. To view it, Resource Monitor can help.
Step 1: Right-click the taskbar and choose Task Manager.
Step 2: Go to the Performance tab.
Step 3: Click Open Resource Monitor on the bottom (Windows 10) or click three dots > Resource Monitor (Windows 11). Then, go to the Disk tab.
Step 4: Look for TiWorker.exe in the Processes with Disk Activity section.
Step 5: Under Disk Activity, check the File column to see which files are updated or modified.
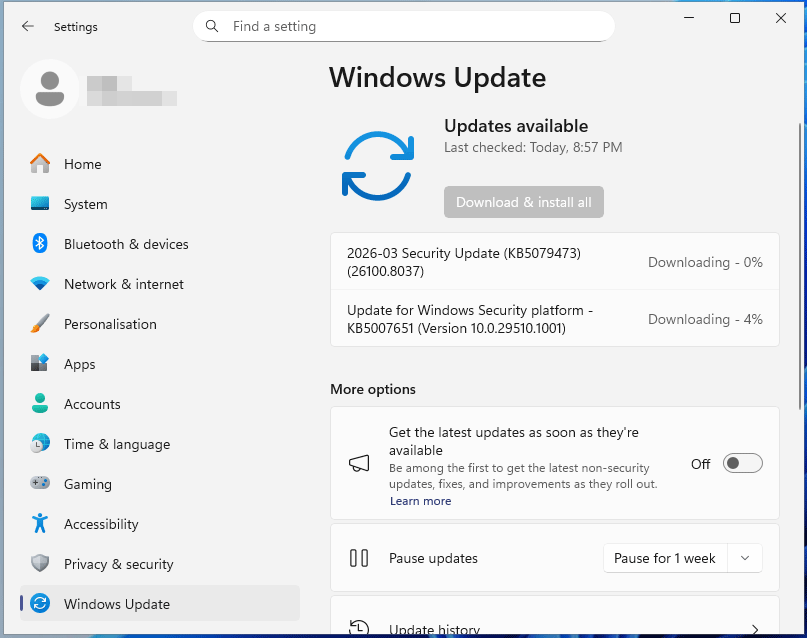
Option 2: Check Windows Update Status
Since Windows Modules Installer Worker is responsible for managing Windows updates, its activity usually correlates with the update settings.
Follow these steps to see if Windows is downloading or installing updates:
Step 1: Press Win + I on your keyboard to access Settings.
Step 2: Navigate to Windows Update (Windows 11) or Update & Security > Windows Update (Windows 10).
Step 3: Check the update activity.
How to Check if Windows Modules Installer Worker Is a Genuine System Process
Windows Modules Installer Worker is a safe, essential system process. However, malware sometimes disguises itself as TiWorker.exe to hijack your system. If the PC is experiencing constant, extreme slowdowns (high CPU/disk usage), it is crucial to verify its legitimacy.
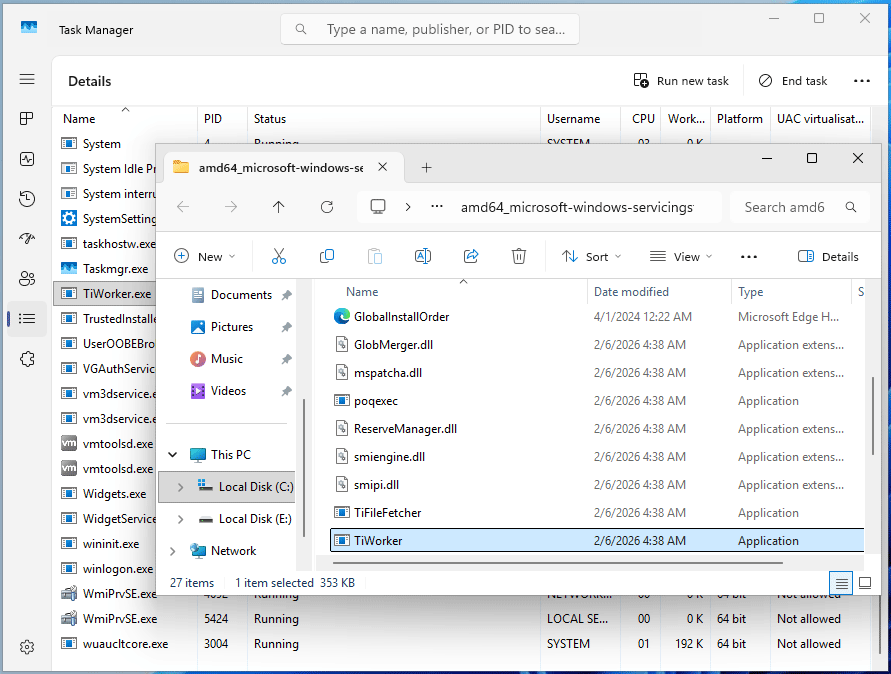
Step 1: Open Task Manager and go to the Details tab.
Step 2: Right-click TiWorker.exe and select Open file location.
Step 3: Check if the file is under C:\Windows\WinSxS. If not, the PC may be infected with a virus or malware.
After checking the file location, verify the signature:
Step 1: Right-click TiWorker in File Explorer and select Show more options > Properties (Windows 11) or directly choose Properties (Windows 10).
Step 2: Under Digital Signatures, confirm it is signed by Microsoft.
Should You Disable Windows Modules Installer Worker
Although this process often causes high CPU usage, it is essential to install, modify, and delete Windows updates and system components. Therefore, you should not permanently disable Windows Modules Installer Worker.
Otherwise, Windows fails to install updates, security patches, and optional components, leaving the computer vulnerable to threats.
Back Up Files to Avoid Data Loss
Since Windows Modules Installer Worker makes big changes to the operating system, backing up files is a critical safety measure. In some cases, system instability, data corruption, or file loss can occur due to this process.
The professional backup software for Windows 11/10/8/7, MiniTool ShadowMaker, is highly recommended. This utility provides all-in-one backup solutions, involving disk/partition/system/folder/file backup.
Importantly, MiniTool ShadowMaker allows for regular backups and differential and incremental backups, effectively keeping data safe and saving storage space.
Follow the instructions to run a file backup task:
Step 1: Plug an external hard drive into your computer, download and install MiniTool ShadowMaker.
MiniTool ShadowMaker TrialClick to Download100%Clean & Safe
Step 2: Launch this software and go to its Backup tab.
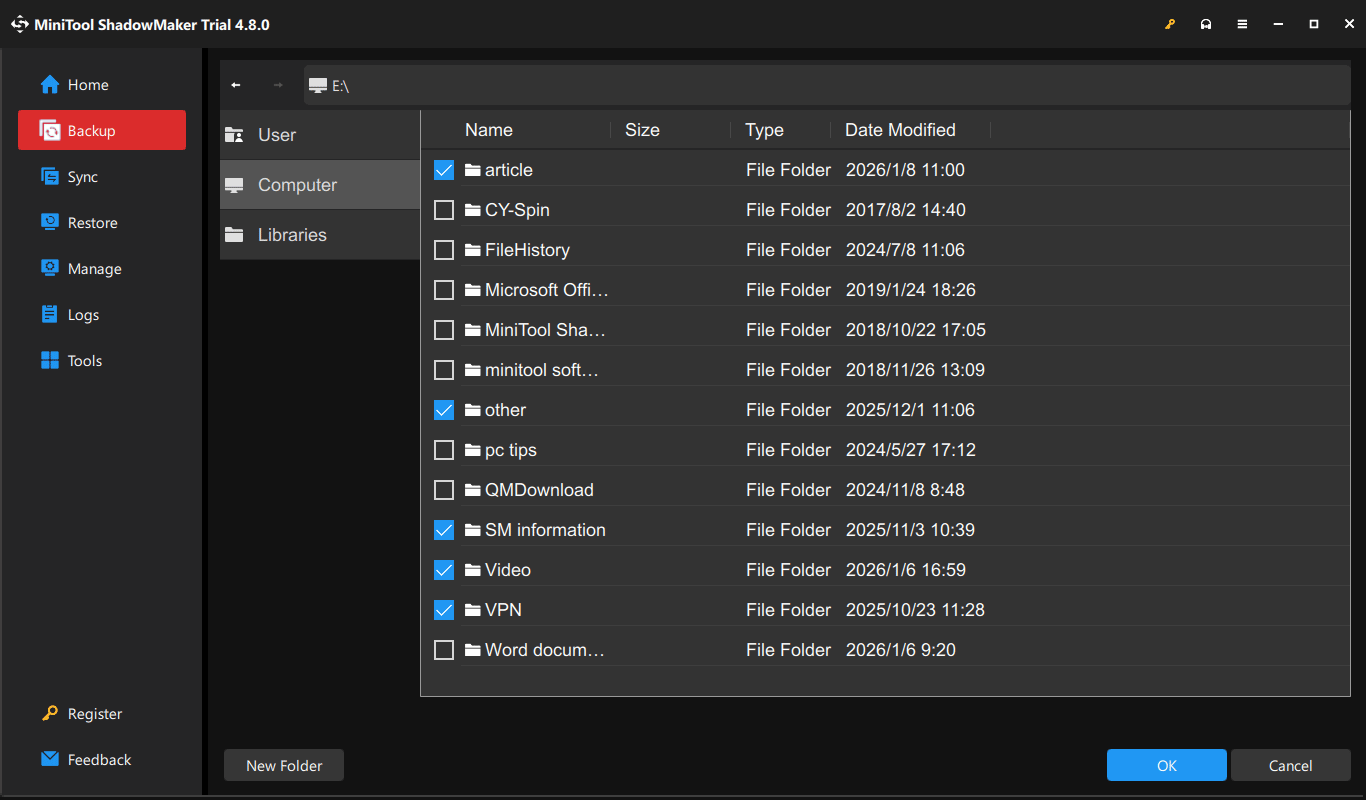
Step 3: By default, the tool backs up the system. To backup data, click SOURCE > Folders and Files, go to Computer, locate and select the files or folders you want to back up, and click OK.
Step 4: Select the DESTINATION section, choose the connected external drive, and click OK to confirm.
Step 5: To enable the automatic backup feature, click Options > Schedule Settings, toggle the option to On, and configure a backup plan.
Step 6: Click Back Up Now to execute the file backup task.
What Causes TiWorker.exe High CPU/Disk
Windows Modules Installer Worker can consume many system resources, including CPU and disk. Reportedly, the CPU usage often exceeds 50%, sometimes up to 100%; the disk usage often hits 100%.
It is crucial to learn why it is using so much disk and CPU. Common reasons include:
- Ongoing updates: Windows is installing a major cumulative update, which requires significant system resources.
- Scheduled maintenance: Windows may be running scheduled maintenance, resulting in high CPU and disk usage. The tasks may involve updating components, compressing old files, or indexing files.
- Corrupted system files: The SoftwareDistribution folder, responsible for storing update files, may be corrupted, causing the TiWorker.exe process to hang or work excessively. As a result, Windows Modules Installer Worker 100 disk usage and high CPU usage occur.
- Pending updates: The process attempts to retry installation constantly when there are failed or stalled updates, thereby consuming many system resources.
How to Fix Windows Modules Installer Worker High CPU/Disk
Key solutions to TiWorker high CPU/disk usage include setting the service to manual, running Windows Update Troubleshooter, performing SFC/DISM scans, deleting the SoftwareDistribution folder, and so on.
Method 1: Wait or Manually Check for Updates
Sometimes, the high CPU or disk usage appears temporarily when installing Windows updates. Wait for a few minutes or 1-2 hours until the installation process finishes.
Method 2: End the TiWorker.exe Process
Ending the TiWorker.exe process may temporarily stop active Windows updates to resolve Windows Modules Installer Worker 100 disk usage or high CPU usage. This is a temporary fix, as the process often restarts to complete pending tasks.
Step 1: In Task Manager, find and select TiWorker.exe under Details.
Step 2: Click End task to stop the process from running.
Method 3: Set Windows Modules Installer to Manual
When Windows Modules Installer Worker automatically runs in the background, it may consume significant CPU and disk resources.
To avoid this case, it is necessary to set the Windows Modules Installer service to manual, making the process run only when needed. This can effectively help mitigate high CPU or disk usage.
Follow these steps:
Step 1: In Windows 11/10 Search, type Services and press Enter.
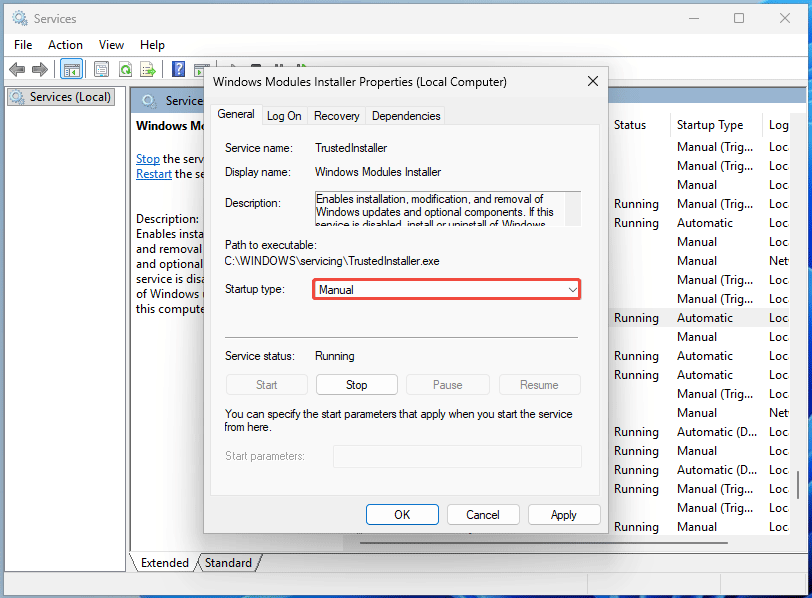
Step 2: Scroll down to find the Windows Modules Installer service and double-click it to open its Properties window.
Step 3: Set Startup type to Manual and click Apply > OK.
Method 4: Run Windows Update Troubleshooter
Windows Update Troubleshooter is designed to resolve some common update problems, such as stuck update processes and incorrect configurations. Running this tool can help if Windows Modules Installer Worker high disk or CPU usage is caused by update issues.
Step 1: Navigate to Settings.
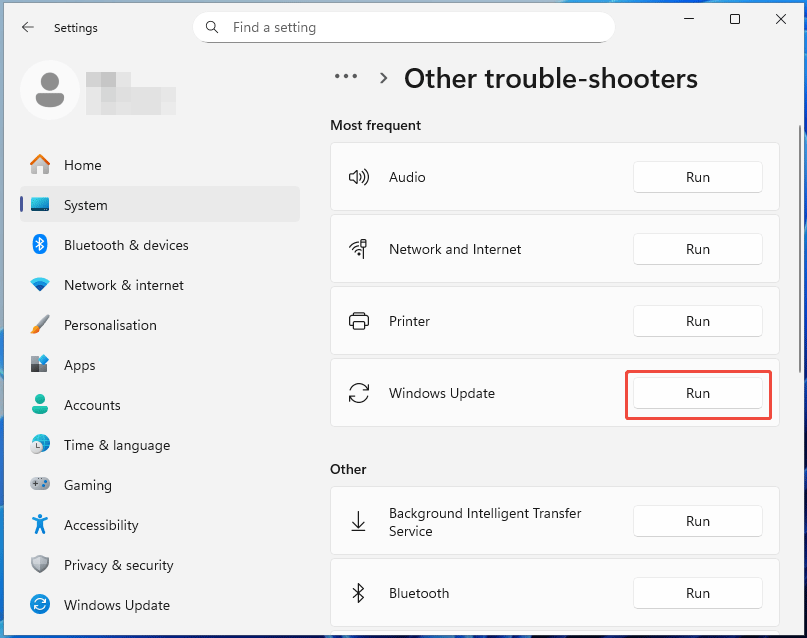
Step 2: In Windows 11, go to System > Troubleshoot > Other trouble-shooters. Then, click Run next to Windows Update.
In Windows 10, choose Update & Security > Troubleshoot > Additional troubleshooters. Next, select Windows Update and click the Run the troubleshooter button.
Step 3: The troubleshooter will detect update issues. Follow the on-screen instructions to fix the found problems.
In this way, the high CPU or disk usage may be addressed.
Method 5: Run SFC and DISM
Windows update files or other system files may get corrupted, causing the Windows Modules Installer process to get stuck in a loop, which in turn causes CPU overload.
Running SFC and DISM to repair the corrupted system files can enable Windows Modules Installer Worker to function correctly.
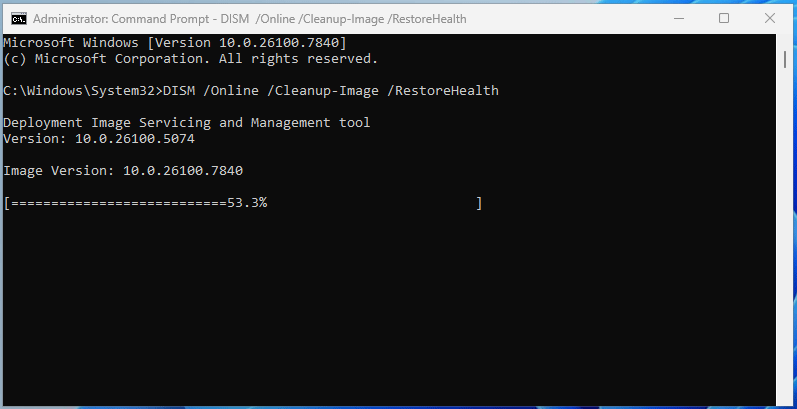
Step 1: Type cmd to Search, right-click Command Prompt, and choose Run as administrator.
Step 2: Perform the DISM scan through the command: DISM /Online /Cleanup-Image /RestoreHealth.
Step 3: Wait until the scan finishes. Then, type sfc /scannow and press Enter to run an SFC scan.
Step 4: Restart Windows and check if the issue disappears.
Method 6: Delete the SoftwareDistribution Folder
The SoftwareDistribution folder, located in C:\Windows, temporarily stores files downloaded during the Windows update process.
It can be damaged for some reason, causing TiWorker.exe high CPU/disk usage. Deleting it is an effective solution to address the issue.
Step 1: Run Command Prompt with admin rights.
Step 2: Execute the following commands to stop some services. Press Enter after each command.
net stop wuauserv
net stop bits
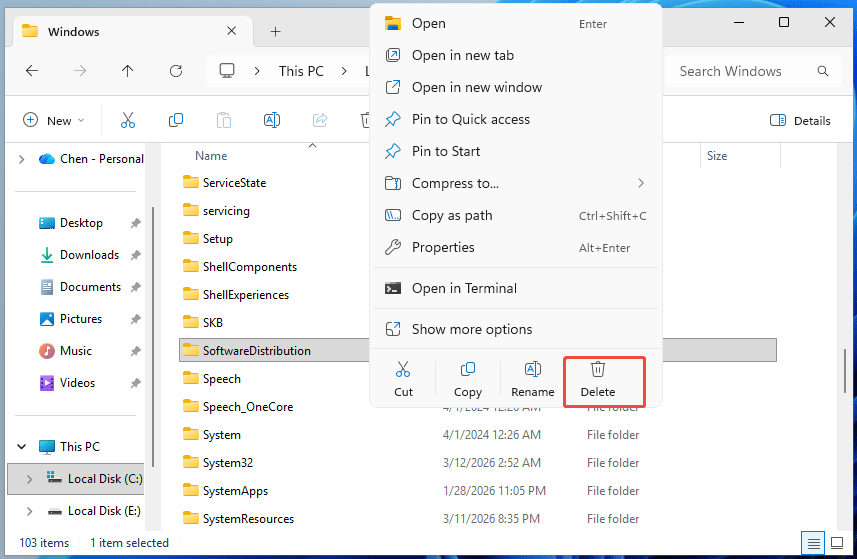
Step 3: Go to C:\Windows, right-click the SoftwareDistribution folder, and choose Delete.
Step 4: Go back to Command Prompt and run the following commands to restart the disabled services:
net start bits
net start wuauserv
Step 5: Restart Windows 11/10 to make all changes effective.
Method 7: Adjust Maintenance Schedule
Windows Modules Installer Worker often encounters high CPU or disk usage during automated maintenance. To eliminate the impact, adjust the schedule so that the process runs when the PC is idle.
Step 1: In the Search box, type Security and Maintenance and press Enter.
Step 2: Expand Maintenance and click Change maintenance settings.
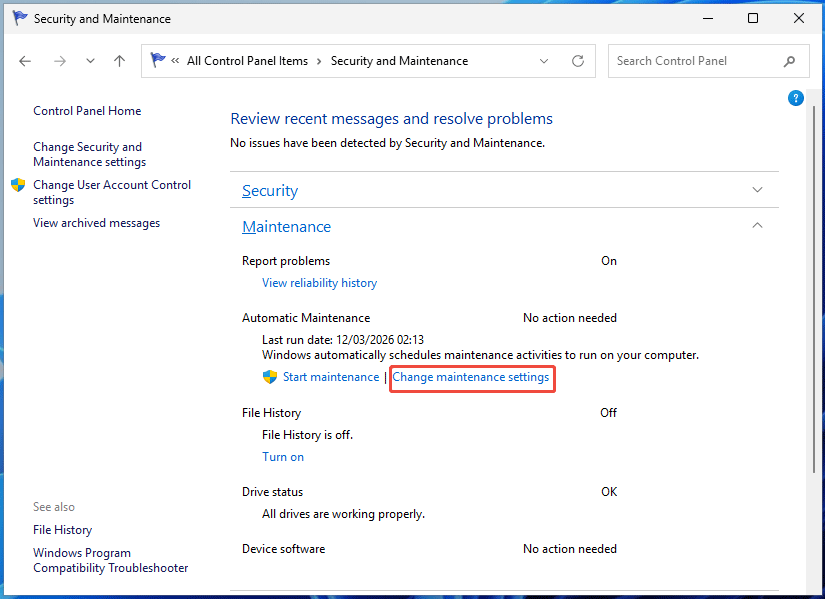
Step 3: Select a time when you are not using your PC and click OK.
Method 8: Perform a Clean Boot
A clean boot refers to starting Windows with minimal drivers and startup programs. It can help you determine whether third-party background services or startup apps are causing TiWorker.exe high CPU/disk usage.
This method has proven to be useful and strongly recommended by some forum users.
Follow the instructions:
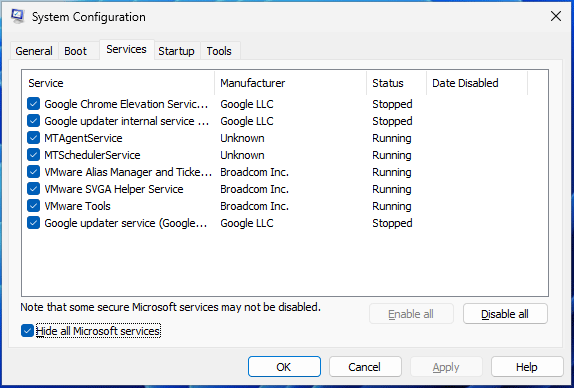
Step 1: Press Win + R, type msconfig, and click OK to open System Configuration.
Step 2: In the Services tab, select Hide all Microsoft services, and click Disable all.
Step 3: Navigate to Startup > Open Task Manager.
Step 4: Select each enabled startup item and click Disable. Then, exit Task Manager.
Step 5: Click Apply > OK to save the change.
Step 6: Choose Restart to reboot Windows to a clean environment.
Step 7: Check if Windows Modules Installer Workers still uses excessive system resources.
If the issue is addressed, identify which app or service is causing conflicts. Then, restart Windows to a normal state and uninstall that app or disable that service.
For more information, refer to the Windows clean boot guide.
Method 9: Enabled a Metered Connection to Limit Bandwidth
Enabling the metered connection is an effective solution to reduce system resource usage, especially targeting CPU and RAM usage, and network bandwidth.
Try this method to resolve the TiWorker.exe high CPU issue.
Case 1: You are using Wi-Fi.
Step 1: Go to Settings > Network & internet > Wi-Fi.
Step 2: Select the Wi-Fi network you’re currently using and turn on Metered connection.
Case 2: You are using a wired connection.
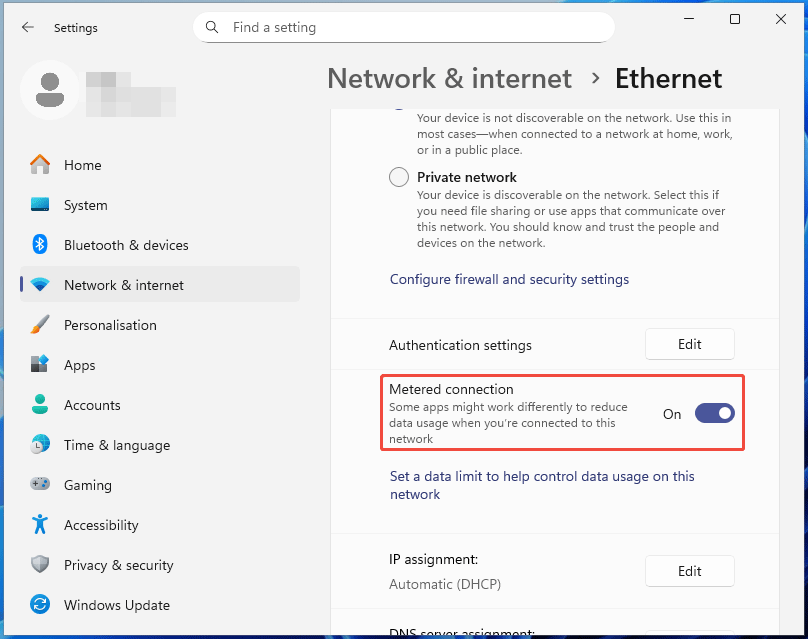
Step 1: Navigate to Settings > Network & internet > Ethernet.
Step 2: Click the network and enable Metered connection.
Check Task Manager and see if high CPU or disk usage is resolved.
Method 10: Run Windows Memory Diagnostic
If none of the methods can address your issue, there may be some issues with RAM. Running the built-in tool, Windows Memory Diagnostic, to identify the underlying memory problem.
This approach is recommended by some forum users.
Step 1: Press Win + R to open the Run dialog box.
Step 2: Type mdsched.exe and press Enter to open Windows Memory Diagnostic.
Step 3: Choose Restart now and check for problems (recommended).
Step 4: Windows will restart to a blue diagnostics screen. The Standard test automatically starts. To perform the Basic or Extended test, press F1 to enable the Options menu and choose one.
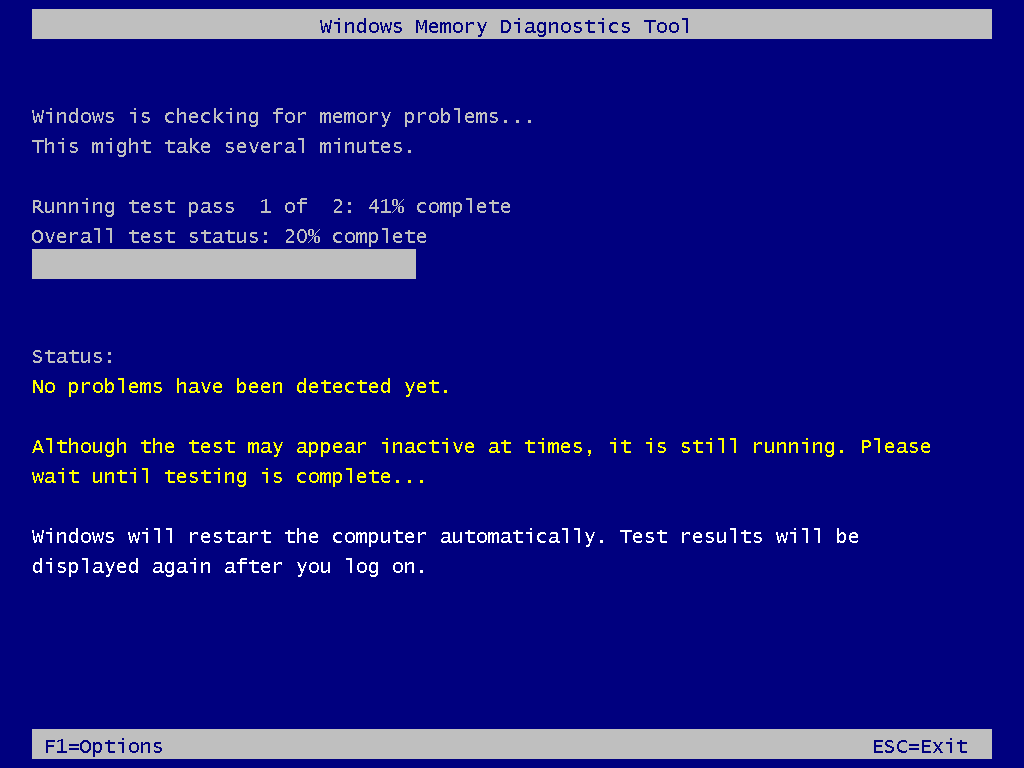
Step 5: After a memory test, Windows can display the results after logging in. If not, open Event Viewer, go to Windows Logs > System, and filter the MemoryDiagnostics-Results itemsin Source.
If needed, replace the RAM stick.
Bottom Line
Windows Modules Installer Worker is a legitimate, core system process that manages Windows updates and system components. It is not recommended to disable it, as this can stop Windows updates, leaving the PC vulnerable to threats.
To see what this process is doing, use Resource Monitor or check the update settings. If you suspect malware hijacks TiWorker.exe, follow the instructions above to check the file location and verify the digital signature.
Windows Modules Installer Worker high CPU or disk usage often occurs, causing significant disruption to your workflow. To resolve this issue, try these solutions in this post.
In terms of issues with MiniTool software for data backup, contact [email protected].
Windows Modules Installer Worker FAQ
1. A temporary spike when calculating and displaying the usage of all running processes.
2. Windows running resource-intensive background tasks.
3. A malware infection.
4. An incorrect power setting.
1. End high-resource tasks in Task Manager.
2. Disable unnecessary startup apps.
3. Perform a simple restart.
4. Run a virus scan with Windows Security.
5. Update device drivers.
6. Disable some services, such as SysMain, Windows Search, and Background Intelligent Transfer Service.
Step 2: Under Processes, click the CPU column to sort by usage (from highest to lowest).
1. Windows may be installing updates, running maintenance tasks, or indexing files.
2. There may be damaged Windows files.
3. Malfunctioning browser extensions can consume many system resources.
4. The graphics card driver is outdated or corrupted.
5. CPU may be overheating, causing high CPU usage.
About The Author

Position: Columnist
Vera has been working at the MiniTool Team for over 10 years as a technical editor and content writer. She mainly focuses on disk and partition management, data recovery, Windows backup and restore, and PC troubleshooting. Through in-depth software testing and hands-on experience, she has helped users solve a wide range of computer problems and better protect their data on Windows devices.
User Comments :