The Windows update taking forever issue can be triggered by insufficient disk space, corrupted system files, and other reasons. MiniTool offers some methods to help you fix it, including freeing up space, resetting Windows Update components, and other methods.
Windows updates provide security patches, bug fixes, performance improvements, and new features. Therefore, it is essential to keep Windows up-to-date. However, some people find Windows update taking forever on their PC.
For example, here is a user report from the Reddit forum:
Why do Windows updates take forever to download and install? Noticing that Windows updates lag like a mofo. Doesn't matter what system and what device I use, it's the same. It's not internet speed (over 600+mbps) on Spectrum...https://www.reddit.com/r/Windows10/comments/1moyybo/why_does_windows_updates_take_forever_to_download/
Have you also encountered the same issue? If so, continue reading to get the possible reasons and solutions to this issue.
What Causes Windows Update to Take Forever?
Various reasons may cause Windows update taking forever, including:
- Large and complex updates: Major feature updates can be very large, which involves installing large amounts of new files and requires more time for downloading and installation.
- Slow or unstable internet: A poor internet connection directly slows down the download process.
- Hardware limitations: Older computers or those with slow hard drives, insufficient RAM, or limited CPU speed will take longer to process updates.
- Software conflicts: Some third-party software, such as antivirus or firewall software, can interfere with the update process.
- Background processes: The unnecessary programs that are running in the background and other system processes will compete with Windows updates for resources and cause delays.
- Corrupted update and system files: Damaged update files or corrupted system files on your PC can cause the update to stall and fail, leading to repeated attempts.
- Insufficient disk space: Windows needs free space to download and unpack update files. If a drive is nearly full, updates can fail.
- Outdated or faulty drivers: Incompatible or outdated drivers can conflict with the new update and cause delays or failures.
- Fragmented hard drive: A fragmented hard drive can slow down the read/write operations needed for installation.
- External devices: Connected external devices like USB drives or external hard drives can sometimes cause issues with the update process.
Recommend: Back up Your Data to Avoid Data Loss
Before you try advanced methods to fix the Windows updates take forever issue, it is recommended that you back up your data first to avoid data loss.
To do that, MiniTool ShadowMaker is worth choosing. This Windows backup software offers a Backup feature to help you perform file backup and system backup with ease. Here’s how to do that:
Step 1. Download and install MiniTool ShadowMaker on your PC.
MiniTool ShadowMaker TrialClick to Download100%Clean & Safe
Step 2. Launch this app to enter the main interface and select Backup from the left pane.
Step 3. Go to SOURCE, choose Folders and Files, check the files that you want to back up, and then click OK.
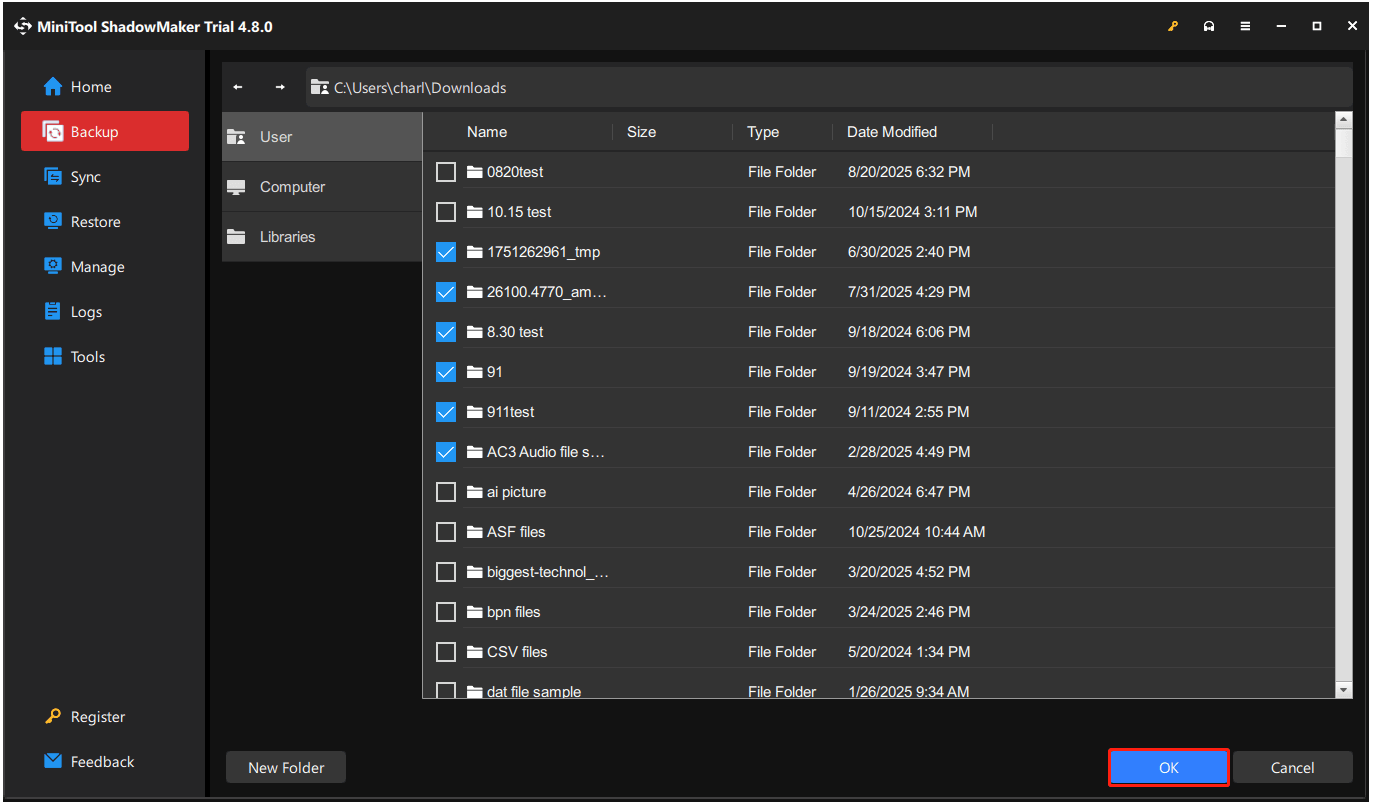
Step 4. You can see that the app assigns a backup folder to store the backup automatically. If you want to store them in another location, go to DESTINATION, choose a preferred location, and click OK.
Step 5. Click Back Up Now at the bottom right corner and click OK in the prompt Confirmation window.
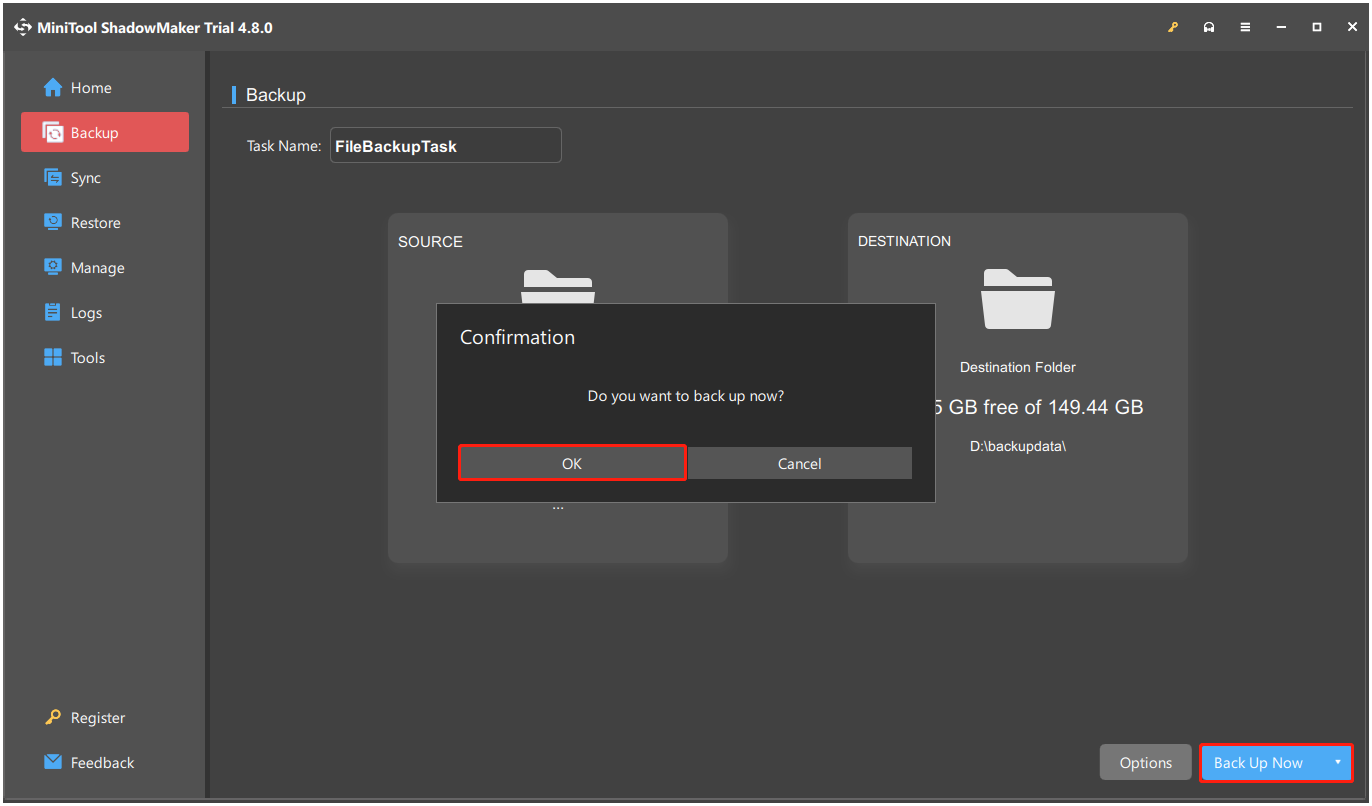
Step 6. The backup process will start, and you will enter the Manage tab. Once the process is ended, you can see some green words that notify you of the latest successful backup time.
How to Solve Windows Update Taking Forever?
If Windows updates take a long time, try checking the internet connection, running Windows Update Troubleshooter, restarting Windows update-related services, and other useful methods.
Here is the detailed breakdown:
Method 1. Restart Your PC
Sometimes, a simple restart can help you resolve temporary glitches. When Windows 10/11 update is taking forever on your PC, try forcing a shutdown by holding the power button for 10-30 seconds, then restarting the computer.
Next, try updating again to check if the issue is fixed. If not, continue and try other methods.
Method 2. Check Your Internet Connection
A slow or unstable network connection can cause downloads to take a long time. If you suspect this is the reason for Windows 10/11 update taking forever on your PC, check your internet connection to fix the issue. Here are some tips to improve the internet connection:
- Change to another faster connection
- Switch Wi-Fi to Ethernet, or vice versa
- Move your router closer to the PC
- Restart your router or modem
- Add an Internet extender
- Limit connected devices on the Internet
Method 3. Run the Windows Update Troubleshooter
Windows Update Troubleshooter is a built-in tool to help you fix issues with Windows updates. Therefore, try running the Windows Update Troubleshooter to fix the Windows updates taking a long time issue in Windows 10/11 with the following steps:
Step 1. Press Win + I to open Settings.
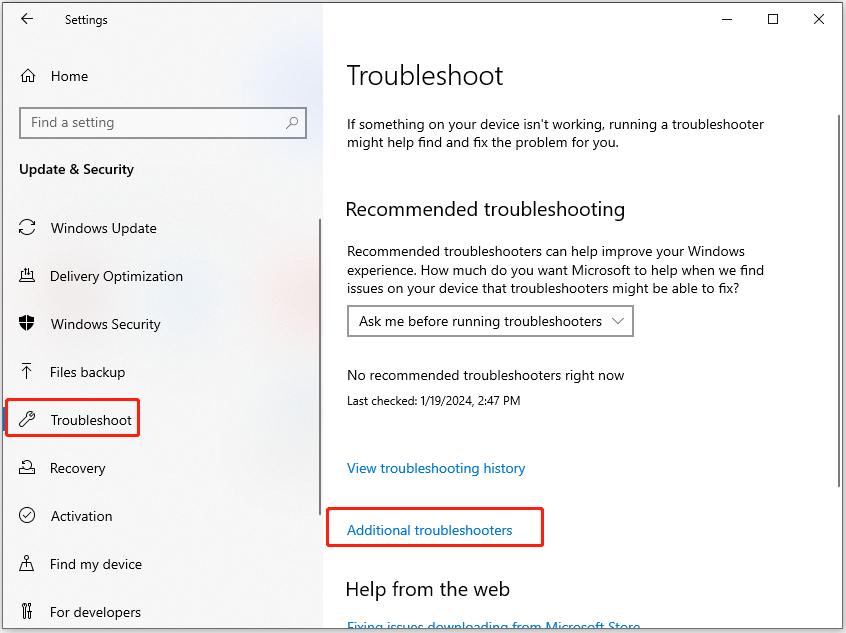
Step 2. Choose Update & Security and select Troubleshoot from the left panel. Then, click Additional troubleshooters.
Step 3. On the next page, find and select Windows Update. Next, click Run the troubleshooter.

Step 4. Wait for the troubleshooting process to finish.
Step 5. Restart your PC if prompted. Then, update Windows again and check if the issue has been resolved.
Method 4. Free up Your Disk Space
Windows updates need enough storage to install. Otherwise, Windows updates take forever. In this case, run Disk Cleanup to delete unnecessary files, junk files, and caches. Here’s how to do that:
Step 1. Press Win + S to open Search, type “disk cleanup” in the search box, and press Enter.
Step 2. Choose your system drive (usually C:) from the pop-up window and click OK.

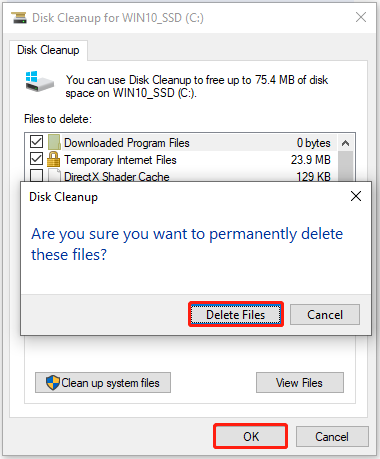
Step 3. Check the boxes of the file types you want to remove, click OK, and then select Delete Files to confirm to clear all these selected files.
If you want to perform a more thorough cleanup, do the following steps:
Step 1. In the Disk Cleanup window, click Clean up system files.
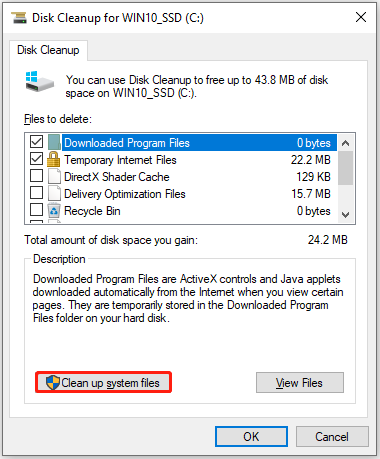
Step 2. Select the system drive again and click OK.
Step 3. Check the boxes of other files you want to remove and click OK.
Step 4. Click Delete Files in the pop-up window.
Once the cleanup process is done, check if the issue has been resolved.
Method 5. Restart the Windows Update Service
If any of the Windows update-related services are not running, the Windows update process will be influenced and run into issues, including the Windows update taking forever issue. In this circumstance, try restarting all the Windows update-related services to fix the issue:
Step 1. Press Win + Run to open Run, type “services.msc” in the box, and press Enter.
Step 2. In the Services window, double-click Windows Update from the list to open its properties window.
Step 3. From the Startup type field, select Automatic. Check the Service status. If it is stopped, click Start. Then, click Apply and OK to save the changes.
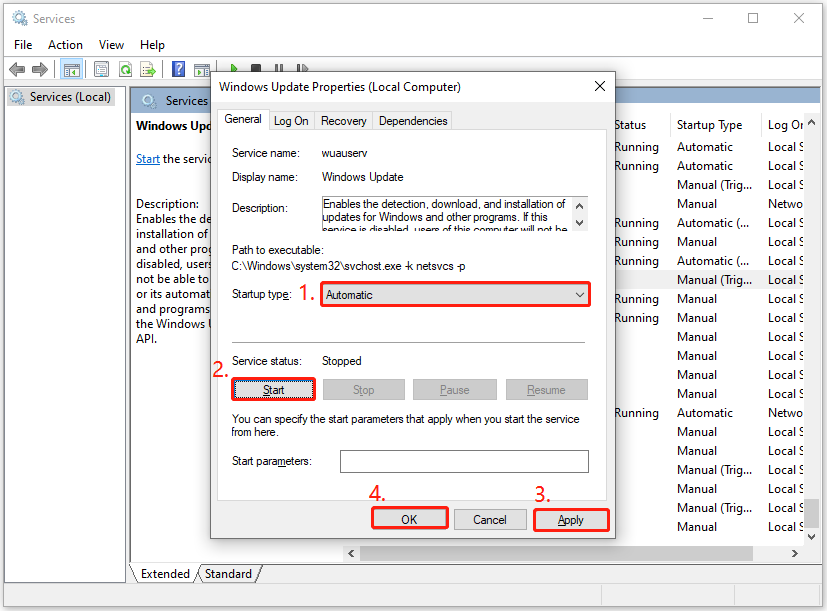
Step 4. Next, do the same operations with Cryptographic Services and Background Intelligent Transfer Service.
Once done, restart your PC and update Windows again to check if the error is fixed.
Method 6. Update Your Device Drivers
Sometimes, Windows updates take a long time due to outdated device drivers. In this circumstance, try updating device drivers to fix the issue. Here are the steps:
Step 1. Press Win + X to open the Quick Link menu and then select Device Manager from the list.
Step 2. In Device Manager, expand the category for the device you want to update, such as the Display adapters category. Then, right-click your graphics card driver and select Update driver.

Step 3. In the prompt window, select Search automatically for drivers.
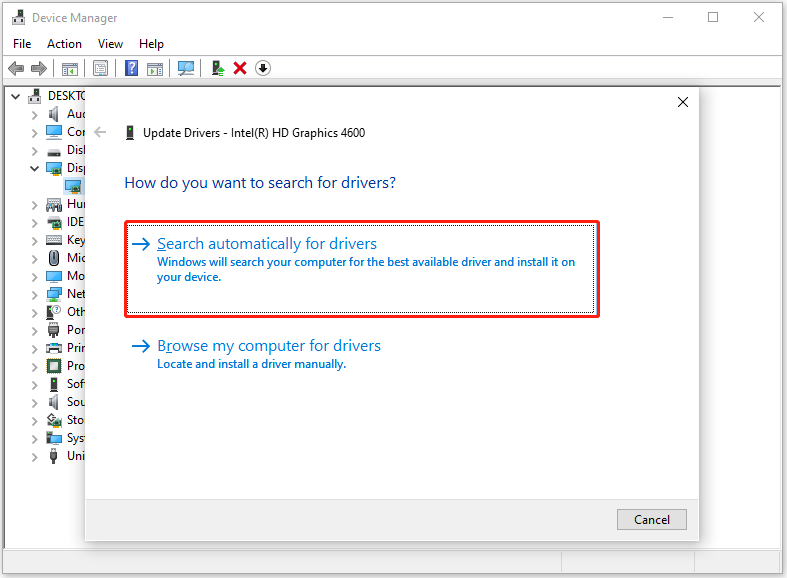
Step 4. Repeat the above steps to update other outdated drivers. Once done, check if the issue is resolved.
Method 7. Repair Corrupted System Files
Corrupted system files can easily cause the Windows update taking forever to download issue. In this situation, run SFC and DISM commands to fix the issue. Here’s how to do that:
Step 1. Open the Search window, type “cmd” in the search box, right-click Command Prompt under the Best match, and then select Run as administrator.
Step 2. In the elevated Command Prompt window, type “sfc /scannow” and press Enter to check for and repair corrupted system files.
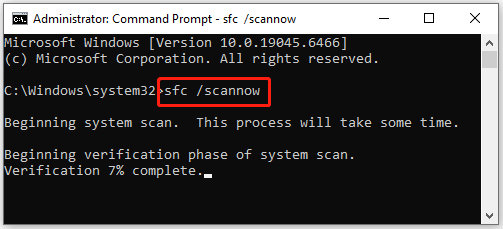
Step 3. After the SFC process is complete, execute the following commands to run DISM commands:
- DISM.exe /Online /Cleanup-Image /ScanHealth
- DISM.exe /Online /Cleanup-Image /CheckHealth
- DISM.exe /Online /Cleanup-Image /RestoreHealth
Once the process is ended, update Windows again and check if the error is fixed.
Method 8. Disable Startup Programs
Some unnecessary third-party applications are running in your background since you log in to Windows. These apps may also cause Windows updates to take a long time. In this situation, disable these apps in Task Manager:
Step 1. Press Ctrl + Shift + Esc to open Task Manager.
Step 2. Go to the Startup tab, right-click the program that you want to prevent from opening on startup, and select Disable.
Step 3. Once you have disabled all the unwanted apps, update again and check if the issue is fixed.
Method 9. Uninstall Unnecessary Programs
Some third-party programs may conflict with the system and cause Windows updates to take forever. In this case, try uninstalling unnecessary programs to fix the issue. Here’s the tutorial:
Step 1. Open the Search window, type “control panel” in the search box, and press Enter.
Step 2. Set View by to Large icons and select Programs and Features from the list.
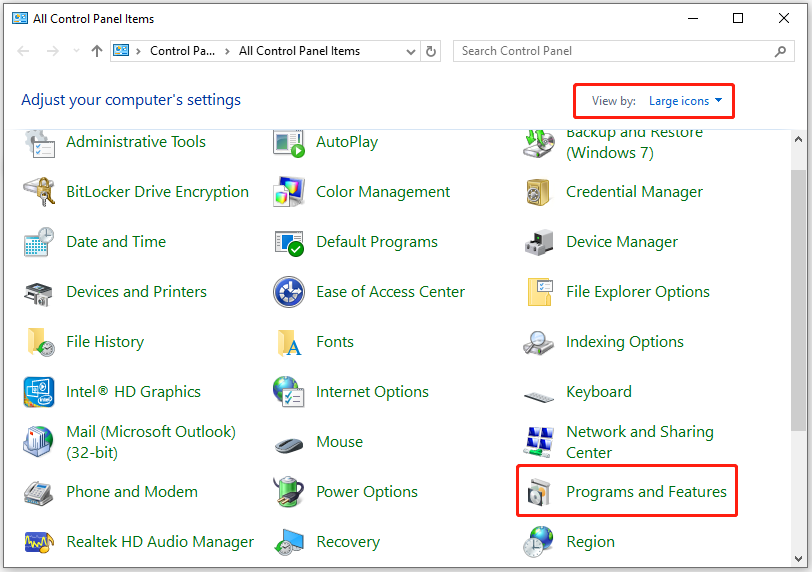
Step 3. Find the program that you want to uninstall from the app list.
Step 4. Right-click it and select Uninstall. Then, follow the on-screen instructions to complete the process.
Repeat the process to uninstall all unnecessary apps and check if the issue is fixed.
Method 10. Perform a Clean Boot
A clean boot starts Windows with a minimal set of drivers and startup programs, which helps determine if a third-party application is causing the conflict.
If disabling third-party startup programs doesn’t help you fix the Windows updates taking forever issue, try performing a clean boot to resolve the issue. Here’s the guide:
Step 1. Open Run, type “msconfig” in the box, and press Enter to open the System Configuration window.
Step 2. Select the Services tab, and check the Hide all Microsoft services option. Next, click Disable all, and then click Apply.
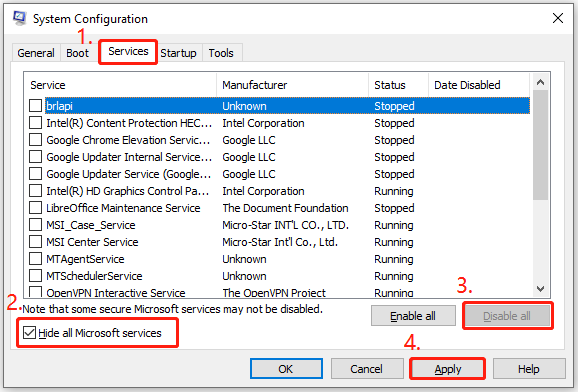
Step 3. Go to the Startup tab and click Open Task Manager.
Step 4. Right-click the applications you suspect and select Disable option from the menu.
Step 5. Exit Task Manager, click OK under the Startup tab. Then, when you restart the computer, it is in a clean boot environment. Now, try updating again and check if the issue has been resolved.
Step 6. If yes, it means that the culprit is third-party programs. Then, try to find out the culprit and boot into normal Windows.
Method 11. Delete Temporary Update Files
Some people report that they fix the Windows updates taking a long time issue by deleting temporary update files. If you want to have a try, please do the following:
Step 1. Open the Services window, find the Windows Update service, right-click it, and select Stop.
Step 2. Do the same to Background Intelligent Transfer Service.
Step 3. Press Win + E to open File Explorer, navigate to C:\Windows\SoftwareDistribution\Download. Then, delete all files in this folder.
Step 4. Open the Services window again, restart Windows Update and Background Intelligent Transfer Service.
After that, check if the issue has been resolved.
Method 12. Reset Windows Update Components
Resetting Windows update components can fix problems with downloading or installing updates. Therefore, if Windows updates take forever, try resetting your Windows update components to fix the issue.
Method 13. Perform System Restore
Performing a system restore can revert Windows to the status computer running normally. If you have created a restore point before you encounter this issue, try running System Restore to fix the issue. Here are the detailed steps:
- Open Settings, go to System > About.
- Select the System protection link on the right panel.
- In the new window, click the System Restore button.
- Select Next and select the restore point you want to use from the list.
- Click the Next button to move on.
- View the on-screen information and click Finish.
- Choose Yes to confirm the restore.
- Then the System Restore process begins. Wait for this process to be completed.
- Once done, your Windows will revert to the previous state before the issue occurred.

Method 14. Consider an In-Place Upgrade or a Clean Install
If none of the above methods can help you fix the Windows update taking forever to restart issue, consider an in-place upgrade or a clean install. Both of them will install a new OS and fix the existing issues.
Try an in-place upgrade first, as it keeps your files, apps, and settings. If the in-place upgrade does not work for fixing the issue, try performing a clean install of a totally new OS, which will wipe all files and programs.
Wrapping Things Up
After reading this post, you can not only know why Windows updates are taking forever and get some useful solutions, but also get a powerful backup tool, MiniTool ShadowMaker, to help you back up your data.
Furthermore, if you have any suggestions or issues with our software, contact us by sending an email to [email protected].
Windows Update Taking Forever FAQ
About The Author

Position: Columnist
Charlotte is a technology columnist with a strong focus on the Windows operating system, specializing in disk management, backup, and data recovery. She is passionate about analyzing computer errors, identifying root causes, and delivering practical solutions. In her free time, she stays updated on the latest developments in computer systems and hardware while continuously learning new technologies to broaden her expertise. Her writing style is clear and easy to understand, making complex technical topics accessible even to users with limited computer knowledge.
User Comments :