Mac (formerly known as Macintosh) refers to the personal computers that are designed, manufactured, and sold by Apple Inc. MacOS is one of the most popular operating systems in the world; it’s the main competitor of Windows.
Common Mac file system includes:
- APFS (Apple File System): the default file system used in macOS 10.13 and later versions.
- Mac OS Extended: the file system used in macOS 10.12 and earlier versions.
- FAT (MS-DOS) and exFAT: the system systems that are supported by both Mac & Windows.
The following content first discusses on APFS vs Mac OS Extended; after that, it will tell you how to format a hard drive for Mac in several different ways.
Part 1: Introduction to APFS and Mac OS Extended
In this part, I’ll first introduce APFS and Mac OS extended to you. Then, I’ll compare these two file systems used on Mac for you in brief. You may ask what are the differences between APFS and Mac OS Extended, right?
APFS vs Mac OS Extended
APFS or Mac OS Extended, which one should you choose?
- APFS refers to Apple File System, which is a proprietary file system used by Mac devices running macOS 10.13 or later. APFS is a better choice for solid state and flash drives.
- Mac OS Extended is a journaling file system used by macOS 10.12 or earlier. Mac OS Extended is a better for mechanical drives, or drives used on older macOS.
The Volume Does Not Contain A Recognized File System – How To Fix?
What Is APFS Format
APFS (the full name is Apple File System) is a proprietary file system released by Apple Inc. It can be used on different devices running macOS High Sierra (10.13) and later, iOS 10.3 and later, all versions of iPadOS, watchOS 3.2 and later, or tvOS 10.2 and later. APFS is a new file system which was originally designed by Mac to fix core problems of Mac OS Extended.
What Is Mac OS Extended
Mac OS Extended (Journaled) also known as HFS+, HFS Plus or HFS Extended, is actually a journaling file system released by Apple Inc. It was released in 1998 to replace HFS (Hierarchical File System, also known as Mac OS Standard or HFS Standard), which is the previous primary file system in Apple computers.
Two main advantages of HFS+ when compare to HFS are:
- It gives support to much larger files.
- It uses Unicode for naming items.
Part 2: Which Is Better, APFS or Mac OS Extended
APFS vs HFS+ vs HFS:
APFS file system was announced in June 2016 to replace HFS+ (also known as HFS Plus or Mac OS Extended); the latter was used on all Mac computers as the primary file system since 1998 to replace the previous HFS.

Choose APFS for SSDs & Flash Storage Devices
When compared to Mac OS extended, APFS has been optimized a lot in terms of encryption, so it’s more suitable for flash and solid-state drive storage. APFS becomes the default file system for both for SSDs (Solid State Drives) and flash drives.
- In 2016, APFS was first released by Apple to replace Mac OS Extended (the previous default file system on Mac); it carries all sorts of benefits you can found in Mac OS Extended.
- A partial specification for APFS was published by Apple in September 2018 to allow the read-only access to APFS drive on even unencrypted and non-Fusion storage devices.
But don’t worry, you can still use the APFS on mechanical and hybrid drives.

There are two main highlights in APFS.
1st: fast speed. Copying and pasting a folder on APFS drive can be finished in an instant since the file system points to basically the same data twice.
- There are huge improvements in metadata so that many actions can be performed quickly; for example, confirming how much space the target file/folder takes up on an APFS drive.
- The reliability is also improved a lot. Users don’t encounter corrupted files as often as they used to.
2nd: reverse compatibility. If you are running 2016’s macOS Sierra or the later versions of macOS, congratulations, you have both read and write access to APFS, HFS +, and HFS file system. However, for users who run an older Mac (or a Windows operating system), they are not allowed to write to APFS-formatted drives.
Pros & Cons of APFS
Main advantages of APFS:
- It’s able to create point-in-time snapshots for users.
- APFS allows users to encrypt the full disk by using a single or multi-key so as to enhance the security.
- The checksums are used to ensure the integrity of metadata.
- It creates new records, instead of overwriting the existing ones, in order to avoid metadata corruption; the records may be corrupted because of system crash or other reasons.
- The storage management of APFS is more efficient than HFS+, resulting in helping users get additional free space.
- Users don’t need to write changes twice by choosing APFS over HFS+; this will increase the system performance on some devices.
- The clones or multiple copies of the same file are allowed; it will only store the changes as deltas. This helps to reduce storage space greatly when users copy files, make revisions, or do other things.
- The APFS drive is generally more stable and reliable than the previous HFS+ or HFS drive.
Main disadvantages of APFS:
- Compression is not allowed on an APFS drive.
- It gives no support to the Fusion drives.
- The NVRAM (Non-volatile Random-access Memory) can’t be used even for data storage.
- The Checksums used are only available for ensuring integrity of metadata (that of user data can’t be guaranteed).
- You can only access the encrypted volumes from another other computer which runs macOS High Sierra.
- The biggest disadvantage of all seems to be: APFS wasn’t compatible with Time Machine for a long time in the past. Users of older Mac versions are told to make backups on Mac OS Extended drive unless they use a third-party backup tool rather than the built-in Time Machine.
Back up your Mac with Time Machine.
Choose Mac OS Extended Journaled for Mechanical Hard Disks
Mac OS Extended (HFS+) is the default file system for all Macs from 1998 to 2017, until the new APFS replace it. Till now, it’s still the default file system for both mechanical and hybrid hard drives. You should keep it unchanged while you install the macOS or format external hard drive Mac. The HFS+ is a better choice than APFS on even current mechanical and hybrid hard drives.
Besides, you should definitely choose Mac OS Extended when you reformat external hard drive Mac considering that it may be used on older Macs running El Capitan or earlier versions of macOS. As you know, the new APFS file system is not compatible with these old macOS versions.
Pros & Cons of HFS+
Main advantages of HFS+:
- It gives support to the Fusion drives (which can’t be supported by APFS).
- It gives support to all versions of Mac OS X and macOS.
- You can encrypt volumes and then access them from any version of Mac OS X and macOS.
Main disadvantages of HFS+:
- There’s no point-in-time snapshot for users.
- The nanosecond standard is not used for Timestamps.
- The native file support for other file systems is too limited.
- The support to Mac OS Extended will be stopped on February 6, 2040.
- No checksum is used for metadata integrity or user data integrity.
- You can’t have concurrent access to the file system by a process.
Please ask yourself the following questions when you choose between APFS and Mac OS Extended:
- Are you formatting the internal disk or the external hard drive on your Mac?
- Which macOS are you running? Do you prepare to install macOS High Sierra or later?
- Is the Time Machine backup or bootable installer included in your daily schedule?
- Are you preparing to use the disk on another Mac or even Windows computer?
Bonus Tip: Choose exFAT for Hard Drives Used on Both Mac & Windows
Though the file system of main system drive on Mac is confined to APFS and Mac OS Extended, you can still consider exFAT (or the older FAT) when you format an external hard drive on Mac.
How To Recover Data From RAW File System/RAW Partition/RAW Drive?
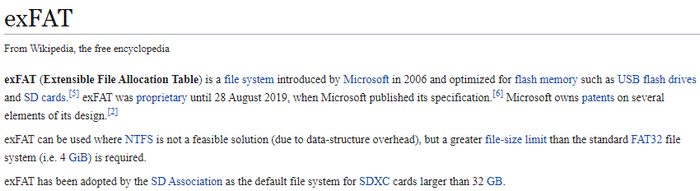
The most obvious benefit of using exFAT is that it can work with both Windows and macOS computers (you have both read and write access to the exFAT drive). Although there are solutions to read Mac formatted drive on Windows or read a Windows formatted drive on Mac, formatting drives to exFAT is still a convenient thing and an economical choice.
Part 3: How to Format Hard Drive for Mac
Users shouldn’t reformat the disk that built-in Mac causally unless they have special needs and they are professional enough. So this part will focus on how to format external hard drive for Mac by using the snap-in tool: Disk Utility (it can be used to format & manage both internal and external hard drives as well as disk images).
How to format an external hard drive for Mac? Please follow this guide.
Step 1: open Disk Utility on your Mac.
Go to the Applications -> select Utilities folder -> double click on Disk Utility.

Step 2: choose View -> Show All Devices.
Please click on the View icon in the upper left corner of Disk Utility window. After that, please select Show All Devices from the drop-down list.

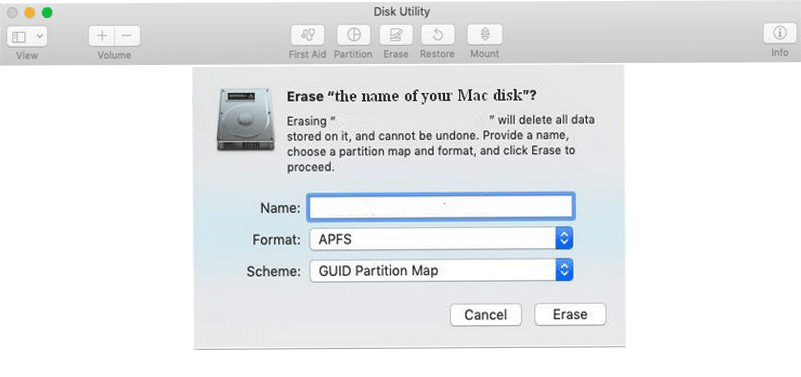
Step 3: erase/wipe the target disk.
Please connect the external hard disk in advance and make sure it’s appeared on Mac. Then, select the disk that you want to format from the left sidebar. After that, you should click on the Erase button in the right pane.
- Give the disk a Name (the maximum length is 11 characters).
- Select a proper file Format.
- Choose a proper Scheme.
- Click on the Security Options to choose how you’d like the drive to be formatted (optional).
- Click on the Erase button.
- Wait for the process to be finished.
- Click on the blue Done button to close the window.
You can now start to use the formatted disk. Please click here to know how to format a disk for Windows computers in Disk Utility on Mac.
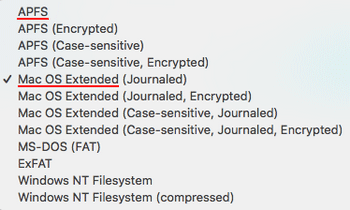
The file formats available for you to choose are:
- APFS
- APFS (Encrypted)
- APFS (Case-sensitive)
- APFS (Case-sensitive, Encrypted)
- Mac OS Extended (Journaled)
- Mac OS Extended (Journaled, Encrypted)
- Mac OS Extended (Case-sensitive, Journaled)
- Mac OS Extended (Case-sensitive, Journaled, Encrypted)
- MS-DOS (FAT)
- ExFAT
Click here to know more about the differences between these file formats.
That’s how to reformat a disk on Mac by using Disk Utility (the steps to reformat MacBook Pro are the same). Of course, there are also many third-party tools you can download to format the disk on your Mac.
How to Recover Formatted Hard Drive on Mac
Data recovery from mac formatted external hard drive:
- Download Stellar Data Recovery for Mac.
- Follow the wizard to install it properly.
- Launch the software right after installation.
- Make sure the formatted drive is connected to your Mac.
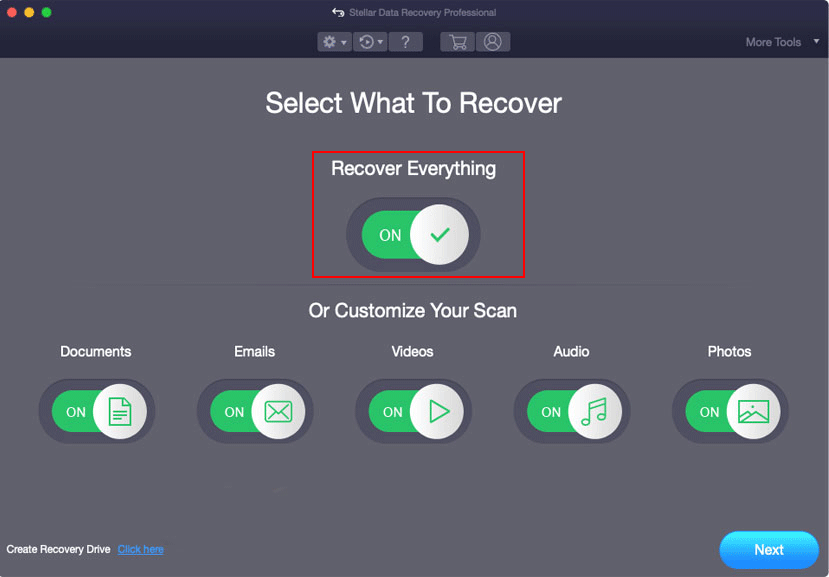
- Define the file type that you want to recover; you can select all types by enabling Recover Everything.
- Click on the Next button to continue.
- Choose the formatted disk/drive and click on the Scan button (enable Deep Scan to find more files).
- Wait until the scan is finished.
- Browse the scan results and choose what you want to recover.
- Click on the Recover button and select a safe place to store the recovered data.
Data Recovery for MacClick to Download100%Clean & Safe
Extended reading:
- [SOLVED] How To Recover Deleted Files On Mac | Complete Guide?
- [Solved] How to Recover Data from Crashed/Dead MacBook Pro Today?
Final Thoughts
Both APFS and Mac OS Extended are popular file systems supported by Mac computers. If you don’t know which one is more suitable for you, please read part 1 and part 2 carefully (the advantages & disadvantages of these two Mac file systems are included). Part 3 teaches you how to format a hard drive for Mac by using the snap-in Disk Utility; besides, it offers an easy method for recovering data from a formatted drive on Mac. Hope this can help you decide which one to choose: APFS or Mac OS Extended, and prevent your important data from getting lost.
User Comments :