If you search the internet, you’ll find numerous people care about this topic – DISM failed. This is a common error that can appear on any version of Windows system. So, what does this DISM error mean? How it will affect you? Can you fix it when DISM is not working? All these issues will be covered in this MiniTool post.
What Is DISM
DISM is the acronym for Deployment Image Servicing and Management; it is actually a command-line tool built into every Windows system. DISM is mainly used for mounting and servicing the Windows images (including the ones used for Windows Recovery Environment, Windows PE, and Windows Setup) before deployment. To put it simply, DISM is a basic Windows utility designed for network administrators to finish tasks like system image preparation, modification, and repair, when necessary.
What Does DISM Do
DISM can be used to fix some common problems. DISM command can be used to check and fix Windows system files and Windows images and corruption of the Windows image Component Store. Here gives some functions that DISM can make.
- Mount and get information about the Windows image (.wim) files or virtual hard disk (.vhd/.vhdx) files.
- Capture, split, or manage .wim files.
- Install, uninstall, configure, and update things like drivers, Windows features, packages, and international settings (in a .wim file or .vhd/.vhdx).
- Service a running operating system with the subsets of the DISM commands.
- Take the place of deployment tools, such as ImageX, PEimg, and Package Manager.
For more functions of DISM, please read this article: Repair Windows 10 Image with DISM and Other Useful Tips for DISM.
DISM Not Working & Failure
People are complaining on the internet that the DISM won’t run. When you try to repair the Windows image on Windows 10 by running “DISM /Online /Cleanup-Image /RestoreHealth” in the Command Prompt window, you may find the DISM not work. The DISM error 1910 “The object exporter specified was not found” could appear on your screen.
Some users said both the sfc /scannow and Dism /Online /Cleanup-image /RestoreHealth commands failed and they received 0x80240021 Failure DISM. See what you can do if DISM /Online /Cleanup-image /Restorehealth is stuck.
You can read the content below to find more methods to troubleshoot the issue.
How to Fix When DISM Failed
Some common error messages of DISM error:
- DISM failed no operation was performed: in the cases mentioned above, both users said their DISM failed and no operation was performed. You’re indeed able to fix this by using Windows 10 ISO file.
- DISM failed 0x8000ffff, 0x800f0954, 0x800f0950, 0x800f0907, 0x800f081f (The source files could not be found. Use the “Source” option to specify the location of the files that are required to restore the feature.): if you see error codes like this, you should use the install.wim file to start a DISM scan (after copying it from your Windows 10 ISO).
- DISM failure when attempting to copy boot files: some users said they have solved this error by cleaning up the system image components. You should try.
- DISM.exe failed validating command line, to load wim manager: if you are in the face of such problems, you should try to fix it by restarting the Windows update components, as many people said this method is helpful.
- Error Codes 2, 3, 11, 50, 87, 112, 1393, 1726, 1910, and so on.
- DISM failed while processing the command cleanup-image, add-package.
- DISM failed to load the provider, unload offline registry, flush file buffers, set the windows directory, mount the image.
- More waiting for you to discover…
# 1. Disable or Uninstall Antivirus or Security Programs
The antivirus software you have installed on your computer may cause a lot of problems such as compatibility issues, file loss, and the DISM error. The antivirus software of the security program is able to interfere with your system and intervene in any critical operation.
Therefore, if the DISM failed, I advise you to disable all the antivirus/security programs or uninstall them temporarily, and then repeat the DISM scan to see whether it works.
If this has helped to solve the DISM not working problem, you’d better consider changing the antivirus software or disabling the security features.
# 2. Disable Proxy on Your PC
Many users use proxy to protect their privacy from the public, but sometimes the proxy may interfere with system operation or lead to other problems. When you get the DISM error message, you can disable the proxy and then relaunch DISM to see if it works well.
Step 1: Press Win + I to open Settings.
Step 2: Choose Network & Internet.
Step 3: Shift to the Proxy option in the left pane.
Step 4: Turn off all the options in the right panel.
# 3. Run the Windows Update Troubleshooter
DISM errors can be caused by Windows Update in some cases. You can try this method when meet this problem.
Step 1: Press Win + I on the keyboard to open Settings.
Step 2: Choose Update & Security.
Step 3: Shift to the Troubleshoot option in the left pane.
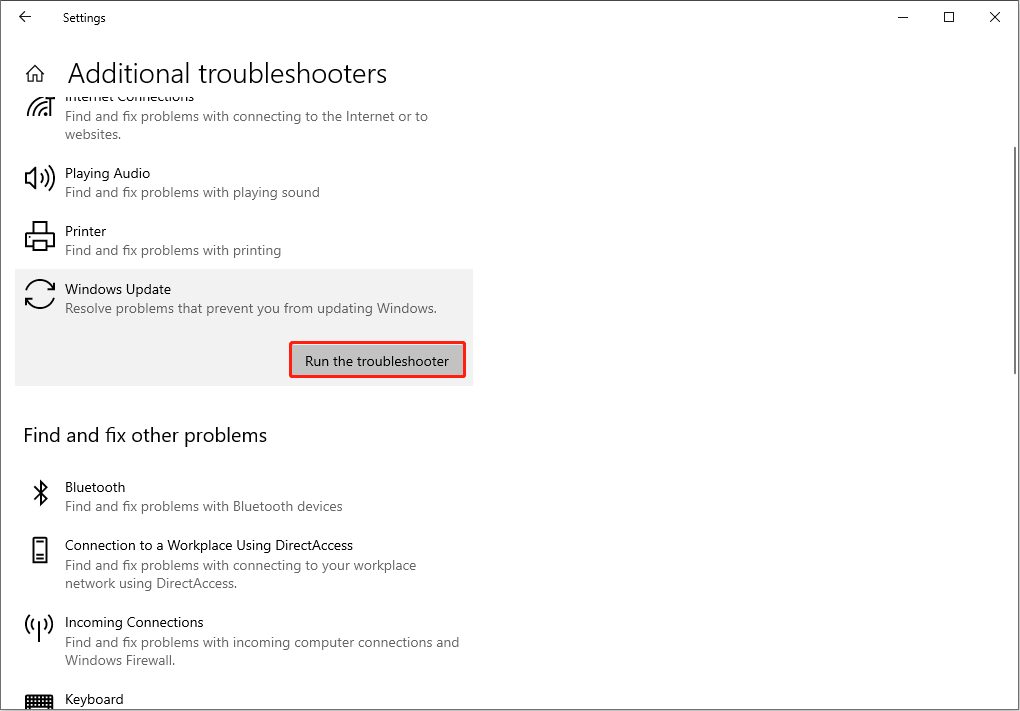
Step 4: Click Additional troubleshooters and then select Windows Update.
Step 5: Click on the Run the troubleshooter button.
Step 6: Follow the on-screen instructions to complete the rest process.
# 4. Run DISM Command in Clean Boot
This method works for cases where the DISM failed due to service conflict.
Step 1: Press Win + I to open Settings.
Step 2: Scroll down to the bottom and select Update & Security.
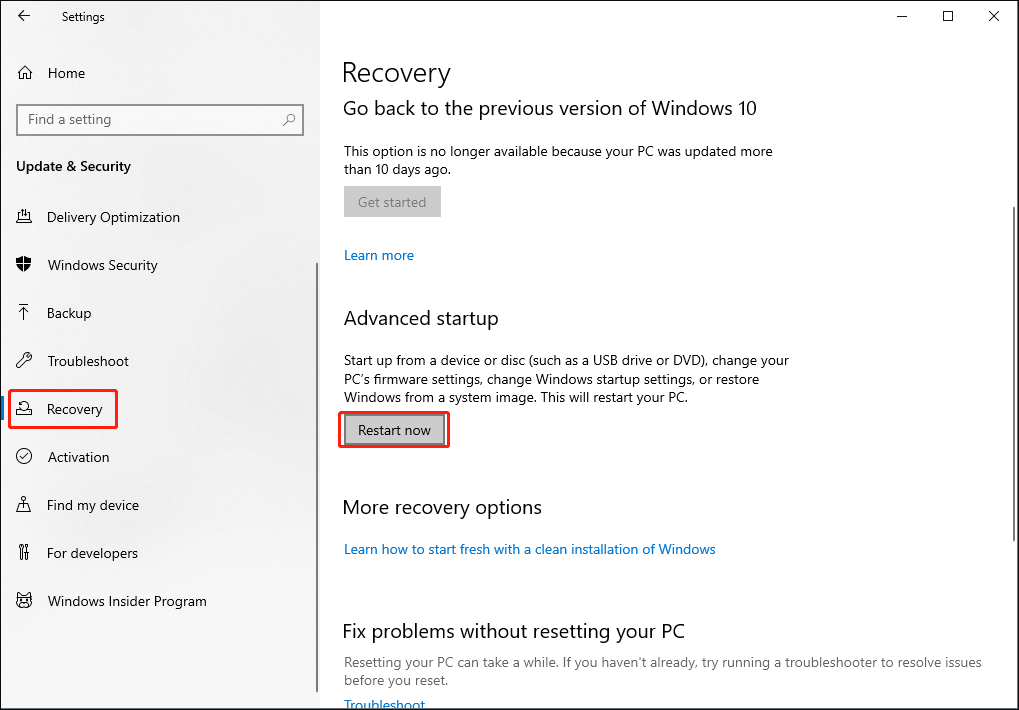
Step 3: Shift to the Recovery option in the left pane.
Step 4: Look for the Advanced startup section in the right pane. Then, click Restart now under it.
Step 5: Select Troubleshoot in the Choose an option window.
Step 6: Choose Advanced options, and then click Command Prompt.
Step 7: Choose your account to continue.
Step 8: Run the DISM command (for instance, DISM /Online /Cleanup-Image /CheckHealth) and see if it works or not.

# 5. Specify/Tweak Install.wim File
If you get an error message like “Can’t find the source files”, the most possible cause is the install.wim file’s wrong location or setting. You can follow the next steps to fix this issue.
Warning:
The DISM command is case-sensitive; you must confirm that your spell every word correctly before executing the command.
Case 1: Correct location of install.wim file:
1: Get the bootable disk or at least a Windows 10 ISO file. If you’re using an ISO file, please use it to create a bootable drive and remember its drive letter.
2: Press Win+ R and type cmd.
3: Press Shift + Ctrl + Enter to run as administrator.
4: Type this command into the Command Prompt window:
DISM /Online /Cleanup-Image /RestoreHealth /source:WIM:X:\Sources\Install.wim:1 /LimitAccess (* Please replace X with the drive letter).
5: Hit Enter on the keyboard and wait for the command to complete.
Case 2: Copy install.wim (from the bootable disk to local disk C:):
1: Insert the bootable disk into your computer or mount the ISO file.
2: Locate the install.wim file and then copy it to a local disk.
3: Paste the file to the local disk C: (here take drive C: as an example).
4: Run Command Prompt as administrator and type DISM /Online /Cleanup-Image /RestoreHealth /source:WIM:C:\Install.wim:1 /LimitAccess (C refers to the location where you paste the file).
5: Then, press Enter and wait for the command to finish.
Case 3: Uncheck Install.wim Read-Only
Some cases prove that the DISM error is caused by the Read-Only setting. You can change it with the following steps.
1: Right-click on the install.wim file and choose Properties on the context menu.
2: Switch to the General tab and uncheck the Read-Only option.
3: Click on the Apply button and OK button to confirm.
4: Now, run the DISM command by specifying the source again.
# 6. Clean up System Image Components
Step 1: Press Win + R and type cmd in the search bar.
Step 2: Click Shift + Ctrl + Enter simultaneously to run Command Prompt as administrator.
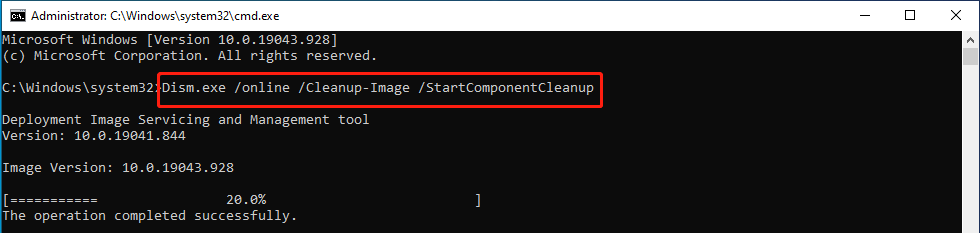
Step 3: Copy the command: Dism.exe /online /Cleanup-Image /StartComponentCleanup in the Command Prompt.
Step 3: Press Enter on the keyboard and wait for the command to finish.
Step 4: Restart your computer and try to perform the DISM scan again.
If this command failed, you can take your chances with the following commands:
- DISM /Online /Cleanup-Image /StartComponentCleanup
- DISM /Online /Cleanup-Image /AnalyzeComponentStore
- DISM.exe /online /Cleanup-Image /StartComponentCleanup /ResetBase
# 7. Reset Windows Update Service
DISM error, like no operation was performed error, is related to Windows Update Service. When it begins to update but the service doesn’t support and disturbs the normal operation of the system, a DISM error occurs. Therefore, you can try to reset Windows Update Service to fix the issue.
Step 1: Type Command Prompt in the search bar from the Start menu.
Step 2: Select Run as administrator at the right panel.
Step 3: Type net stop wuauserv and hit Enter.
Step 4: Wait for the command to complete.
Step 5: Repeat steps 3 and step 4 to run these commands in order:
- cd %systemroot%SoftwareDistribution
- ren Download Download.old
- net start wuauserv
- net stop bits
- net start bits
- net stop cryptsvc
- cd %systemroot%system32
- ren catroot2 catroot2old
- net start cryptsvc.
Step 6: Restart your computer.
Recover Lost/Deleted Data on Windows
Although DISM errors are seldom caused by hardware issues, we can’t rule them out completely. Thus, it is necessary to check your data and recover them if necessary. MiniTool Power Data Recovery, the best free data recovery software for Windows, should be mentioned.
MiniTool Power Data Recovery is devoted to providing a safe and green data recovery environment. There is no damage to your data during the restoration process. Besides, it supports you retrieve data from different data storage devices such as external hard drives, USB flash drives, memory cards, and so on.
To improve data recovery efficiency, it provides more specific scan selections like desktop, recycle bin, and selected folder. Why not try the free edition to recover your data first?
The free version of MiniTool Power Data Recovery allows you to recover up to 1 GB of data. If you need a larger data recovery capacity, please get an advanced edition through this page.
Step 1: Download MiniTool Power Data Recovery on your computer.
MiniTool Power Data Recovery FreeClick to Download100%Clean & Safe
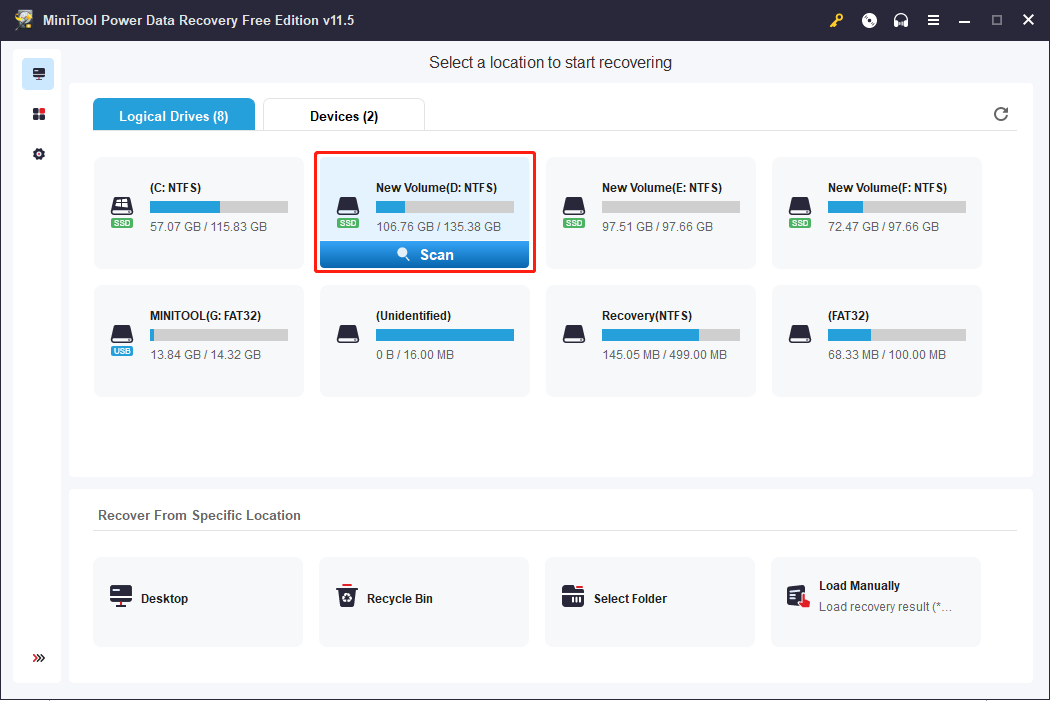
Step 2: Run the software and select a partition to scan. If you check the drive at one time, you can switch to the Devices tab to scan the entire disk.
Step 3: After the scan process is completed, browse the result page to find your desired files.
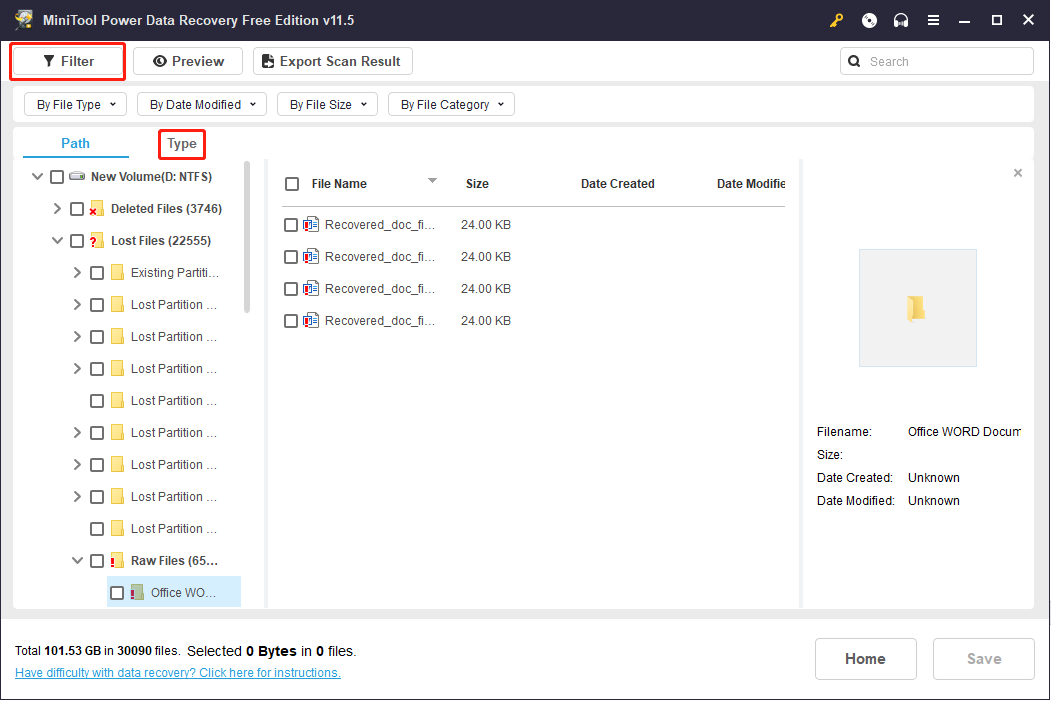
If there are numerous data that you can’t locate wanted files quickly, you can choose Filter or Type function to reduce the distraction choices by setting different conditions, for instance, the type, size, created time, etc. The Search function works a lot when you remember the file’s names. Additionally, before saving the files, you can preview them to avoid restoring the wrong data.
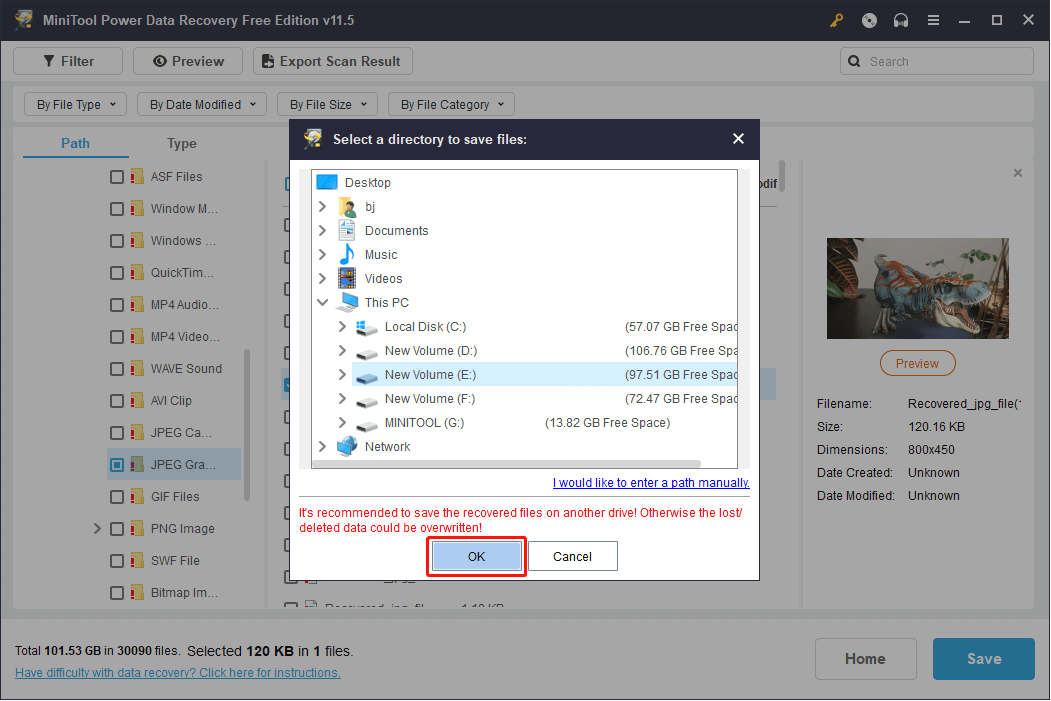
Step 4: Click the Save button and choose a storage path for the data.
Step 5: Click OK to confirm.
Final Words
DISM is a useful tool for repairing Windows images. When you find the DISM failed on your computer, don’t worry. You can try the methods mentioned in this post one by one to work out your problem. If finding your data lost or mistakenly deleted, please don’t hesitate to try MiniTool’s professional data recovery software.
MiniTool Power Data Recovery FreeClick to Download100%Clean & Safe
Please leave us a message via [email protected] if you are still in trouble or want to solve other disk and system problems.
User Comments :