What Is Windows on ARM?
Traditionally, Windows is running on devices that are powered by x86/x64 processors. This is well-known by users. But there is another situation: Windows can also run on machines that are powered by Arm processors.
Due to the power-frugal nature of the Arm architecture, the Arm-based PCs can have a longer battery life while delivering great performance. Arm Systems on Chip (SoC) often include other key features like a powerful CPU, GPU, Wi-Fi & mobile data networks, as well as Neural Processor Units (NPUs) for accelerating AI workloads.
Can Windows 11 Run on ARM?
Many users are currently using Arm-based computers. They want to know if Windows 11 can run on an Arm-based computer. As a new version of Windows, Windows 11 has new hardware and system requirements.
The requirements for the processor are 1 gigahertz (GHz) or faster with 2 or more cores on a compatible 64-bit processor or System on a Chip (SoC). In detail, Windows 11 supported processors include the following categories:
- Windows 11 supported Intel processors
- Windows 11 supported Qualcomm processors
- Windows 11 supported AMD processors
You see the Arm processor is not included. So if Windows 11 can run on Arm is a common issue. Here we will show a simple explanation.
Microsoft has released Windows Arm64 builds. This means that it has changed the limitations as per users’ requirements. This also means that you are allowed to install Windows 11 on an Arm64-based computer.
However, you may don’t know how to download and install Windows 11 on Arm with ISO. This is the thing we are also concerned about. In the following part, we will show you a detailed guide.
How to Download and Install Windows on Arm with ISO?
If you want to install Windows 11 on an Arm-based computer, you need to first download Windows 11 Arm ISO, then create a Windows 11 installation USB drive, and then install Windows 11 on a virtual machine.
Step 1: Download Windows 11 Arm64 ISO
Where to download a Windows 11 Arm64 ISO?
If you are a Windows Insider in the Windows Insider Program, you can download a Windows 11 Insider Preview Arm build, then use it to install Windows 11 on an Arm64-based computer.
Microsoft offers an official download link for Windows 11 on ARM Insider Preview builds. The file you can download is a VHDX file. But like installing Windows 11 Arm ISO file, you can install Windows 11 on an ARM (ARM64) VM in Hyper-V.
If you are not a Windows Insider, you need to first join the Windows Insider Program. Then, you can go to Windows 11 on ARM Insider Preview page to download a build for installation. You can find more useful information on that page.
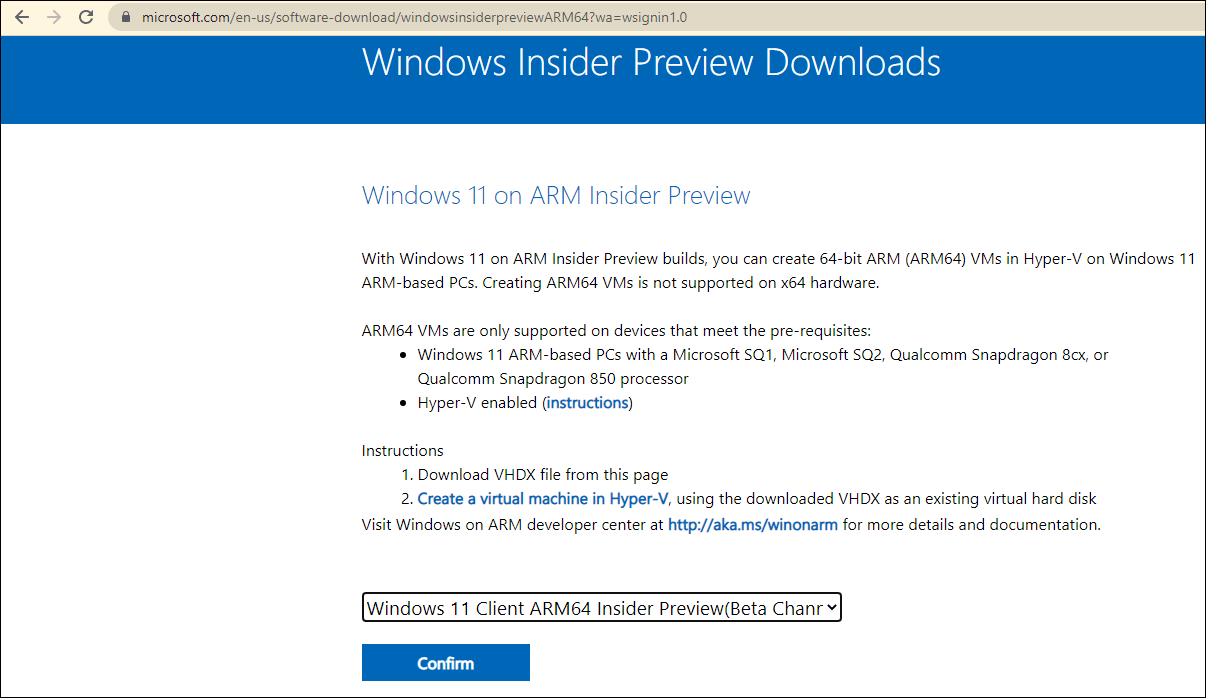
After you get a Windows 11 Arm64 ISO file for installation, you need to create a Windows 11 installation USB drive for installing Windows 11 on Arm with ISO file you have just got.
Step 2: Create a Windows 11 Installation USB Drive for Arm64 PCs
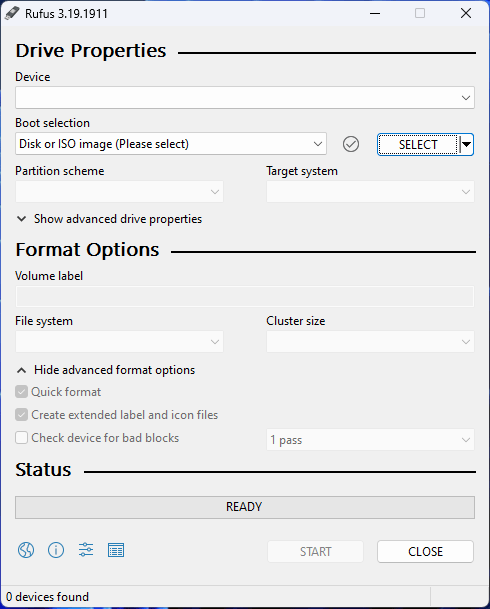
The universal method to create a Windows 11 installation USB drive using an ISO file is to use Rufus. This is also the way recommended by Microsoft. See how to download Rufus. Rufus version 3.19 enables you to install Windows 11 without a Microsoft account. This feature is worth trying.
After downloading Rufus on your device, you can directly open the downloaded files to open this tool to create a Windows 11 installation USB drive for Arm64-based computers.
Step 3: Install Windows 11 on a Virtual Machine
You can install Windows 11 on a virtual machine on an Arm-based PC. However, Creating ARM64 VMs is not supported on x64 hardware. ARM64 VMs are only supported on devices that meet the following requirements:
- Windows 11 ARM-based PCs with a Microsoft SQ1, Microsoft SQ2, Qualcomm Snapdragon 8cx, or Qualcomm Snapdragon 850 processor
- Hyper-V enabled
These are the steps to install Windows 11 on a virtual machine:
Step 1: Create a virtual machine in Hyper-V.
Step 2: Install Windows 11 using the Windows 11 installation USB drive you have created.
Windows Arm-based PCs FAQ
Main Benefits of Windows Arm-Based PC
- It can always be connected to the internet.
- Its battery life can go beyond all-day.
- You can turn it on instantly.
Limitations in a Windows Arm-Based PC
- Only drivers for hardware, games, and apps that are designed for Windows 11 Arm-based PCs can work on the device.
- Some certain games will not work on a Windows Arm-based PC.
- Apps that customize the Windows experience might have problems.
- Some third-party antivirus software will not be installed.
- Windows Fax and Scan isn’t available on a Windows 11 Arm-based PC.
Can I Run Programs That Are Not in Microsoft Store on My Windows Arm-Based PC?
Yes, you can install and run Windows apps that aren’t available in the Microsoft Store. But you should know that peripherals and devices only work if their drivers are built into Windows 11, or if the Arm64 drivers for the device have been released. You’d better make a confirmation in advance.
How to Get a Cellular Data Connection?
You can go to Settings > Network & internet > Cellular to enable the Cellular connection. However, if you can’t find Cellular under Network & internet, it usually means that your computer doesn’t have a physical SIM card slot or eSIM. In a situation like this, you will be unable to get a Cellular connection.
Some MiniTool Software That Is Worth Trying
MiniTool ShadowMaker: Back up Your Files on Windows
In theory, updating/upgrading the Windows system to the latest version will not delete files on your device. However, your files may get lost or the system may get crashed due to some accidental situation. To safeguard your computer, you’d better back up your files and system before you perform a Windows update. You can use MiniTool ShadowMaker, a free Windows backup software to do this job.
This software has a trial edition. You can try it for free within 30 days.
MiniTool ShadowMaker TrialClick to Download100%Clean & Safe
In this case, you should back up your computer to an external hard drive. So, you need to prepare an external hard drive that has enough free space to save your computer data and connect it to your PC.
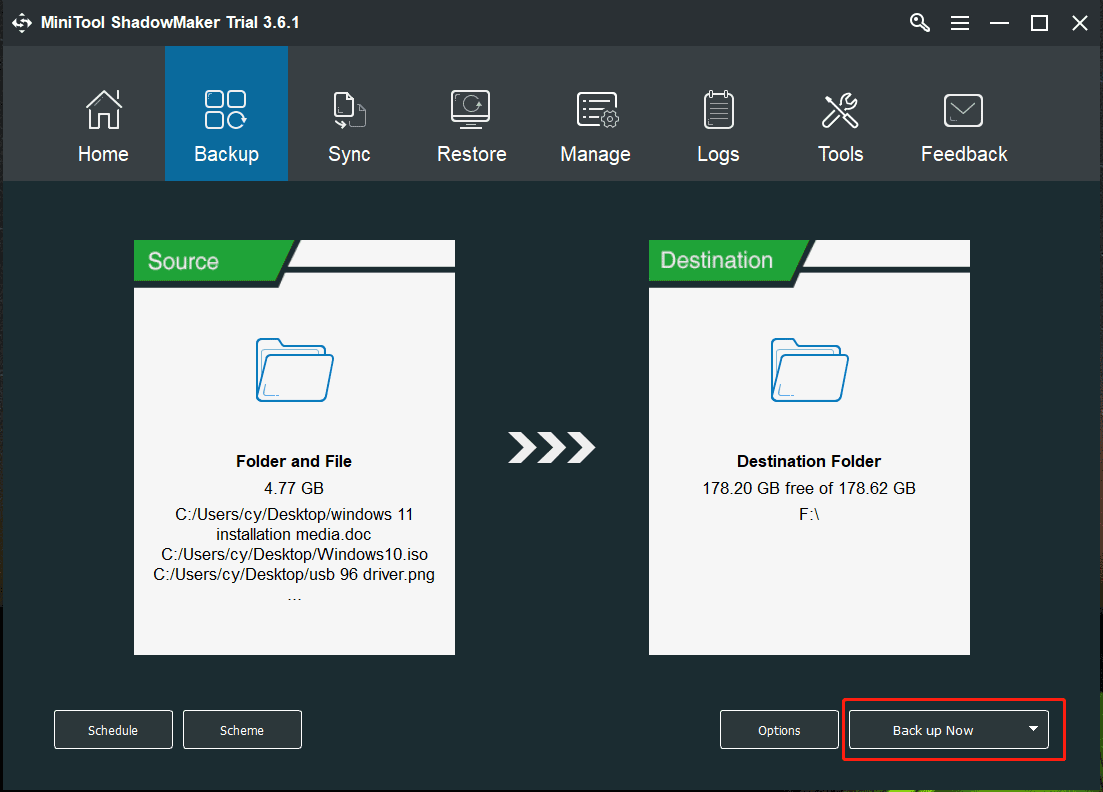
After downloading and installing this software on your Windows computer, you can open it, then select the source disk and the destination disk (the external hard drive), and click the Back up Now button to start backing up your PC.
MiniTool Power Data Recovery: Rescue Your Lost and Deleted Files
You may find some of your files are lost after updating/upgrading the Windows system. As long as these files are not overwritten, you can use a professional data recovery software like MiniTool Power Data Recovery to get them back.
This MiniTool free file recovery tool is specially designed to recover data from all kinds of data storage devices like computer internal hard drives, external hard drives, SSDs, SD cards, memory cards, USB flash drives, pen drives, and more.
This software also has a trial edition. You can first try it to scan the drive you want to recover data from, then check if your needed files are listed in the scan results.
MiniTool Power Data Recovery TrialClick to Download100%Clean & Safe
Here is how to use this software to find and recover your deleted or lost files.
Step 1: Download and install this MiniTool software on your computer.
Step 2: Open the software to enter its main interface.
Step 3: This software displays all logical drives it can detect under Logical Drives. You need to hover over the target drive and click the Scan button to start scanning that drive. If you forget which one is the drive that has previously saved the lost files, you can switch to the Devices section and select the whole drive to scan.
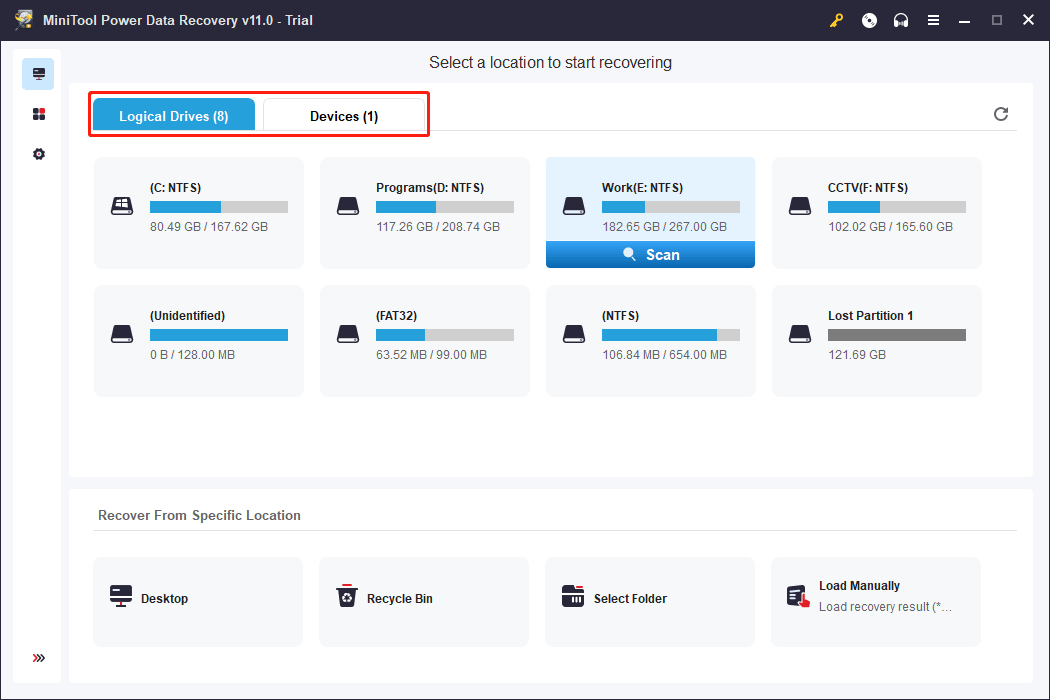
Step 4: After scanning, you can open each path to try to find your needed files. You can also switch to the Type section to find files by type.
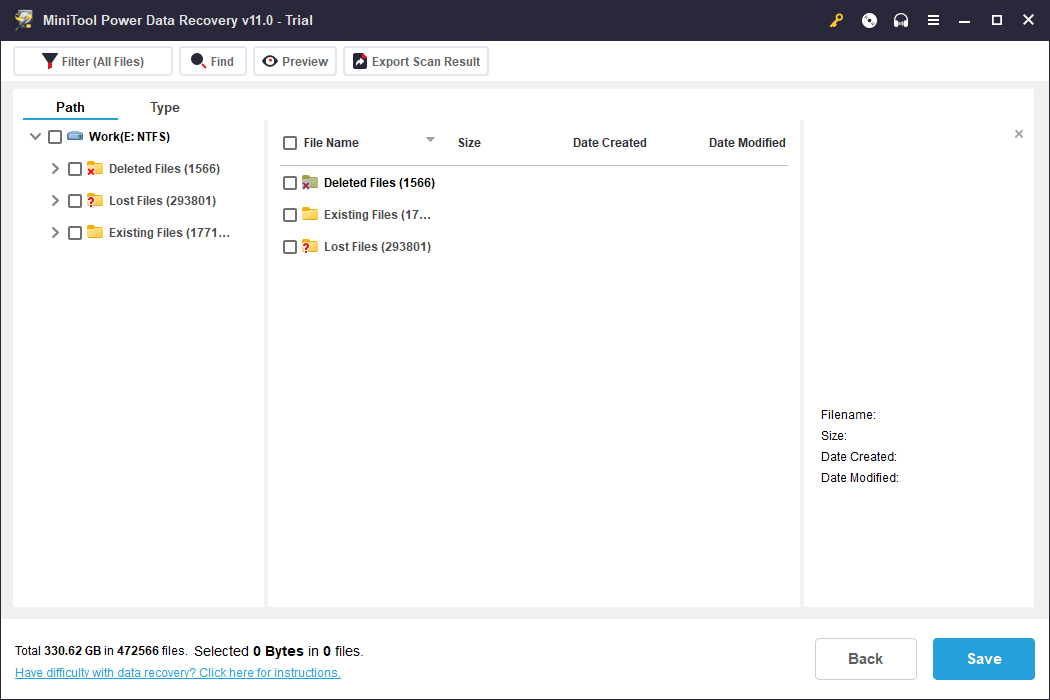
Step 5: If you want to use this software to recover your files, you need to upgrade it to a full edition. If you directly click the Register key on the scan result interface and enter the license key you get to get a full edition. After that, you need to select all your needed files at once, click the Save button, and select a suitable folder to save the selected files. The destination folder should not be the original location of the recovered files, otherwise, they might be overwritten and become unrecoverable.
Wrapping Things up
Want to install Windows 11 on an Arm-based computer? You need to first download Windows 11 Arm ISO file and then use it to create a Windows 11 installation USB drive. After that, you can install Windows 11 on a virtual machine on your Arm-based PC. You can find a full guide in this article.
If you have other issues that need to be solved or suggestions, you can let us know in the comment. You can also contact us via [email protected].
![Updated ISOs for Windows 11 and 10 Users [DOWNLOAD]](https://images.minitool.com/minitool.com/images/uploads/2023/05/latest-windows-11-10-isos-thumbnail.png)
User Comments :