If your error checking USB drive is stuck at 0%, 10%, or even 100%, try the five fixes provided in this MiniTool post. These proven solutions include using CHKDSK, using Safe Mode, updating or reinstalling the driver, using PowerShell, and formatting the drive.
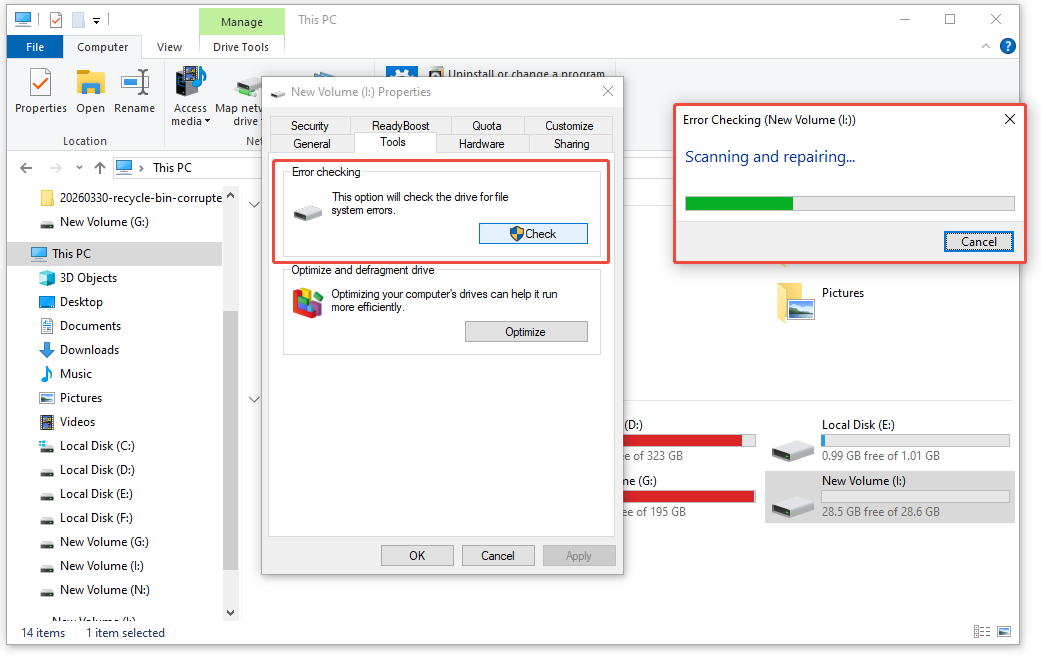
Imagine this: You connect your USB drive to a PC to access important files, only to be prompted by the “Error Checking” window saying “Scanning and repairing drive (X:)”.
However, the progress bar may not move at all, or it might get stuck at 10%, 50%, or 100%.
Sometimes, the process runs for hours without progress, and forcing the drive to eject can cause data corruption.
If you try to restart the PC or reformat the drive, it can heighten the risk of data loss. In this comprehensive post, we will talk about the “error checking USB drive is stuck” issue.
Problem: Error Checking USB Drive Is Stuck
The “Error Checking” feature is designed to scan the file system of a storage drive for logical errors, then repair them automatically.
The error checking stuck issue often occurs when Windows cannot resolve those problems.
This may cause a halted file transfer, an unresponsive File Explorer, or endless repair cycles.
What Causes Error Checking USB Drive Scanning and Repairing Stuck
When scanning and repairing USB drive is stuck at 100%, 10%, or 0%, it is usually due to one or more of the following factors:
#1. Corrupted File System of the USB Drive
File system corruption is common due to:
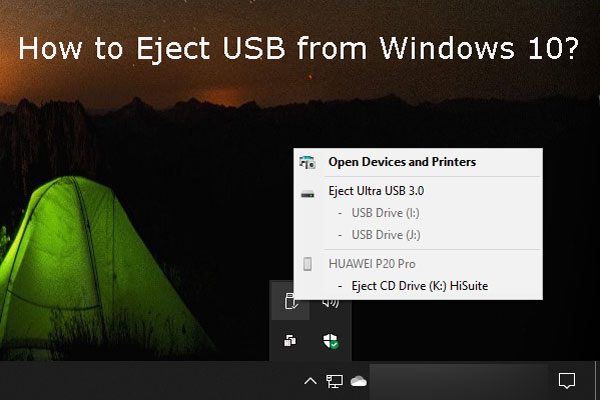
- Improper Ejection: Removing the drive without “Safely Remove Hardware” can disrupt the file allocation table.
- Malware/Virus Attack: Malware can change or delete critical file system entries, making it unreadable for error checking.
- Unexpected Shutdown: A power outage during file transfer can leave the file system inconsistent.
#2. USB Drive Hardware/Software Issues
Hardware problems can also cause errors:
- Faulty USB Port/Connection: Loose ports or damaged cables can hinder communication.
- Outdated/Corrupted Drivers: Missing or outdated drivers can break the communication link between the operating system and the USB hardware.
- Drive Overheating: Excessive usage can lead to overheating and hardware freezes.
#3. Windows System Glitches or Conflicts
Issues may arise from the Windows OS:
- Background Processes Interference: Resource-heavy programs may stall error checking.
- Pending Windows Updates: Corrupted Windows updates can disrupt disk error checking operations.
#4. Large Capacity or Slow USB Drives
For larger or slower USB drives, error checking takes longer, which may be mistaken for a “stuck” process.
First Step: Recover the USB Drive Data if It Is Inaccessible/Unfixable
If the USB drive is inaccessible or if error checking has been running too long, forcefully terminating the process may lead to irreversible data loss.
Therefore, before trying to resolve the “error checking USB drive is stuck” issue, data recovery is essential.
Why USB data recovery is important:
- The error checking process may try to fix the drive, which could potentially overwrite or delete corrupted files during the procedure.
- Reformatting the drive will delete all existing data permanently unless it has been recovered beforehand.
- Any physical damage to the drive can increase over time, making future data recovery impossible.
MiniTool Power Data Recovery is user-friendly software that recovers lost/deleted data from various storage devices, including USB drives, hard drives, SSDs, and so on.
It supports 2000+ file types, including documents, photos, videos, audio, and more. Besides, it works with all major file systems, like FAT32, exFAT, and NTFS.
Now, download and install this free data recovery tool to scan and preview your files, and recover up to 1 GB of data at no cost.
MiniTool Power Data Recovery FreeClick to Download100%Clean & Safe
Follow the instructions below to scan your USB flash drive and recover files.
Step 1. Scan the USB Drive
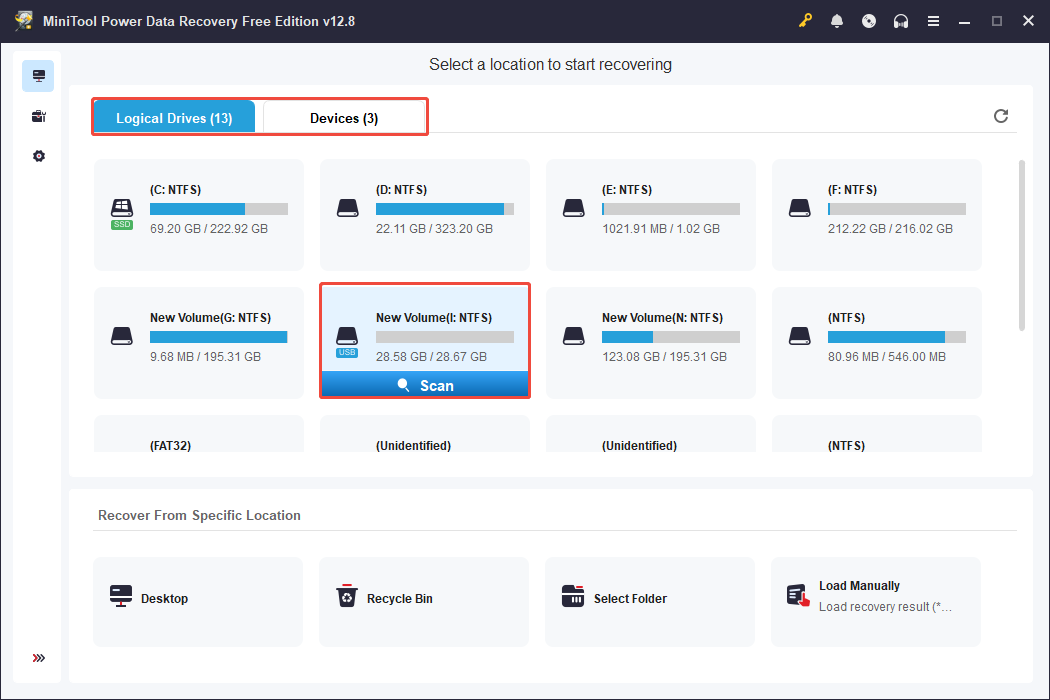
Launch the file recovery software to access the home page. Then, choose your USB drive from the Logical Drives or Devices section and click the Scan button.
- Logical Drives: Displays all existing, deleted, or lost partitions on your disks, with the USB flash drive partition marked by a USB icon.
- Devices: Shows physical disks attached to your computer, allowing you to find and scan your USB by its name and capacity.
Step 2. Locate and Preview the Desired Files
After the scan is complete, you can begin looking for the files you want to recover.
By default, you will be in the Path category area. In this tab, you can find folders for Deleted Files, Lost Files, and Existing Files.
To make it easier to locate the needed files, this tool also provides these features:
- Type: This section organizes all files by their type and format. This feature is helpful to recover a specific type of file, such as photos, documents, or videos.
- Filter: This feature allows you to narrow down files based on criteria like file type, last modified date, file size, and file category.
- Search: This allows you to perform a targeted search. Just type a complete or partial file name in the search bar located in the upper right corner and press Enter.
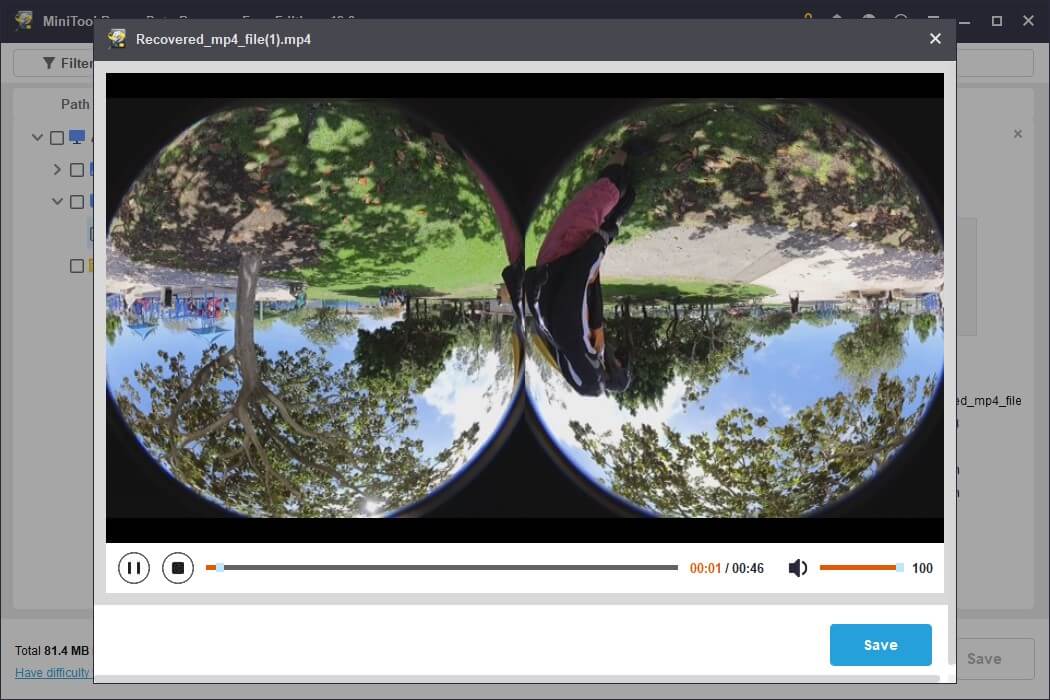
- Preview: Choose a file and click Preview to confirm if it is the one you intend to recover.
Step 3. Recover the Wanted Files
Check all the files you wish to recover, then click the Save button. In the new window, select a different location to save the recovered files and click OK.

Once you have recovered data from the USB drive, proceed to fix the error checking stuck issue on Windows.
How to Fix Error Checking USB Drive Is Stuck
Before diving into technical fixes, try these quick steps to resolve minor connectivity or timing issues:
Immediate Actions:
- Wait Patiently: For large USB drives, error checking may take 1-2 hours or longer for corrupted drives. Avoid closing the window or ejecting the drive prematurely.
- Change USB Port/Cable: Try a different USB port (preferably USB 3.0) or a new cable, as damaged connections can cause issues.
- Restart the PC: Restarting can fix temporary glitches or conflicts. After rebooting, attempt error checking again.
If these simple methods fail to resolve the issue, continue to try the following more complex solutions.
Fix 1. Run CHKDSK
The built-in Windows CHKDSK tool is the core of the error checking feature. If the error checking tool is freezing, running this tool may help resolve this issue.
Running it via Command Prompt gives you more control over the scan and repair process and can bypass the stuck graphical interface.
Here’s how to do it:
Step 1. Press Win + S to open the Windows search bar, type Command Prompt in the box, right-click it, and then choose Run as administrator.
Step 2. Type the following command and press Enter (replace I: with your USB drive letter):
chkdsk I: /f /r
- /f: Fixes logical errors on the drive.
- /r: Locates bad sectors and recovers readable information (this is a thorough scan and may take time for large drives).
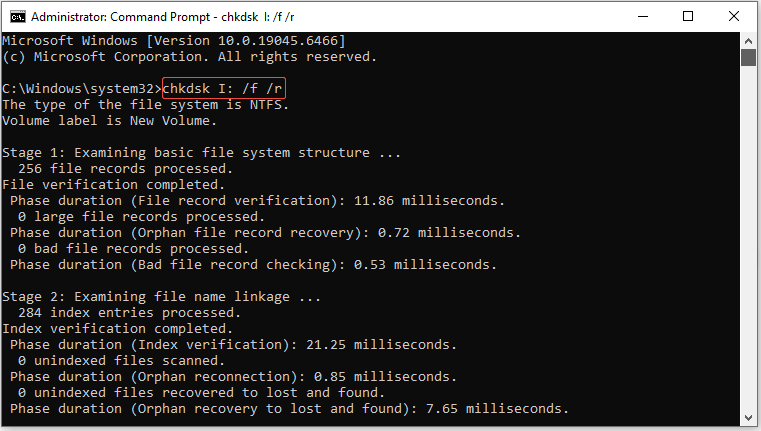
The CHKDSK process will run in the Command Prompt window, showing real-time progress.
Do not close the window until it finishes. Once it is completed, you will see a summary of the scan and repair results.
Step 3. After the process ends, type exit to close Command Prompt, then eject the USB drive using the “Safely Remove Hardware” option.
Step 4. Reconnect it to check if the error checking issue is resolved.
Fix 2. Use Safe Mode
To fix the error checking stuck issue, consider using Windows Safe Mode. This mode starts the PC with only essential services and drivers.
It may help eliminate disruptions caused by third-party applications or background processes that lead to the error checking process freezing.
Follow these steps to do it:
Step 1. Enter Windows Safe Mode:
- For Windows 11: Go to Settings > System > Recovery, then click Restart now under Advanced startup. After restarting, select Troubleshoot > Advanced options > Startup Settings, then click Restart. Press the key for Enable Safe Mode (usually 4 or F4).
- For Windows 10: Go to Settings > Update & Security > Recovery, then click Restart now. After restarting, follow the Windows 11 steps to enable Safe Mode.
Step 2. Once in Safe Mode, connect the USB drive to the PC. Press Win + E to open File Explorer, right-click on the USB drive, and select Properties.
Step 3. In the pop-up window, go to the Tools tab, then click Check under the Error checking section.
Step 4. If prompted to scan the drive, click Scan and repair drive.
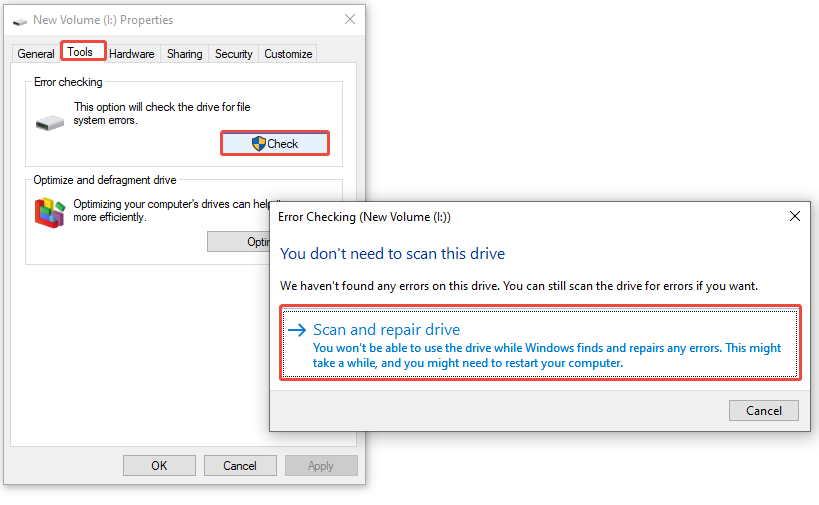
Wait for the process to complete. If the error checking does not get stuck in Safe Mode, the issue was likely caused by third-party software interference.
After the scan finishes, restart the PC to exit Safe Mode. Reconnect the USB drive and check if the issue is resolved.
Fix 3. Update/Reinstall the Device Driver
An outdated or corrupted USB device driver is a common cause of compatibility problems between Windows and the USB drive.
These issues may cause the error checking USB drive scanning and repairing to get stuck. To fix it by updating or reinstalling the driver:
Step 1. Press Win + X to open the WinX menu and select Device Manager from the list.
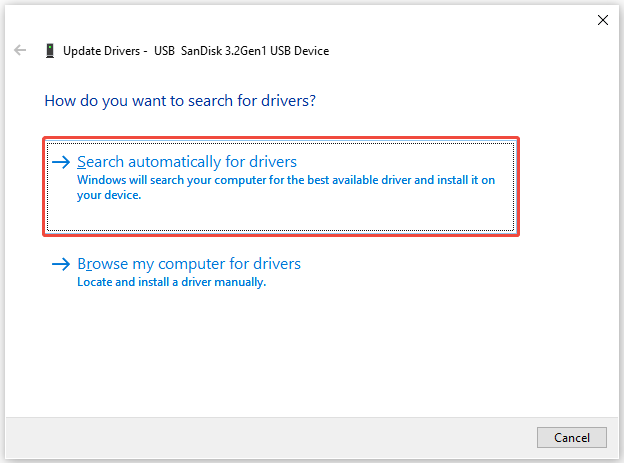
Step 2. Expand the Disk drives category to see all connected storage drives. Right-click on your USB drive and select Update driver.
Step 3. In the new window, choose Search automatically for drivers.
Windows will check for available driver updates and install them if found. Follow the on-screen instructions to complete the update.
Step 4. If Windows says “The best driver for your device is already installed,” right-click the USB drive again and select Uninstall device.
Step 5. Check the box that says Delete the driver software for this device (if available), then click Uninstall.
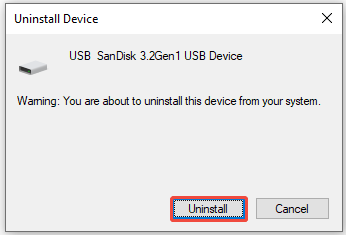
After uninstalling the driver, restart the PC. Windows will automatically reinstall the default USB driver when it restarts.
Reconnect the USB drive and try running error checking again.
Fix 4. Use PowerShell
PowerShell is a more robust command-line tool than Command Prompt, and it can also resolve drive file system errors by executing the appropriate commands.
Here’s how to use it:
Step 1. Enter Windows Safe Mode as mentioned in the above solution.
Step 2. In the Safe Mode, press Win + X to open the Power User menu, then select Windows PowerShell (Admin).
Step 3. Type the command Get-Volume and press Enter.
A list of all volumes will appear, including the USB drive (look for the Removable type). Note the DriveLetter of the USB drive.
Step 4. Type the following command and press Enter (replace “I” with your USB drive letter):
Repair-Volume -DriveLetter I -Scan
If errors are found, use the -FixOffline parameter to repair them offline (safer for the drive), replacing I with the correct drive letter:
Repair-Volume -DriveLetter I -OfflineScanAndFix
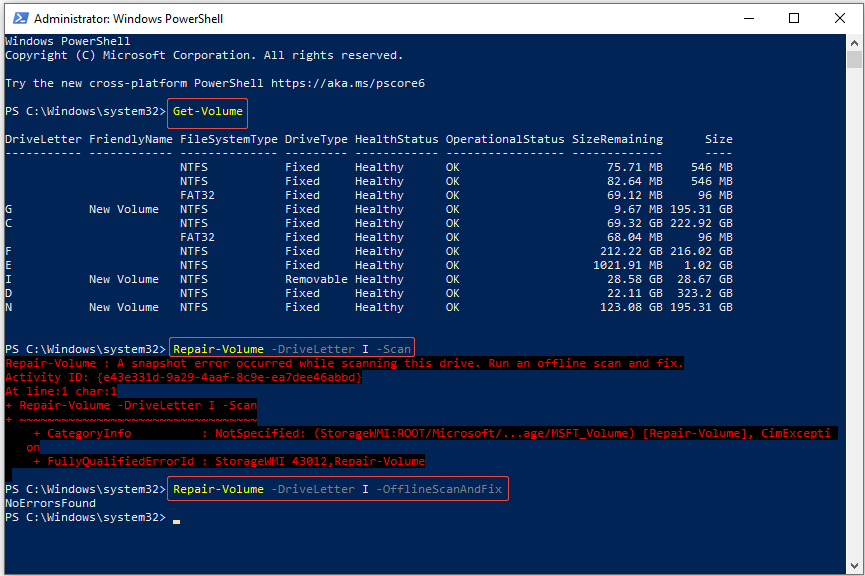
PowerShell will display the progress of the scan/repair. Once finished, check the USB drive to see if the issue is resolved.
Fix 5. Format the USB Drive
If all other fixes fail and the USB drive error checking still gets stuck, formatting the drive is the final solution.
Step 1. Press Win + X and choose Disk Management from the options.
Step 2. When the tool appears, locate the Removable disk, which represents the USB drive. Its size can also help you identify it.
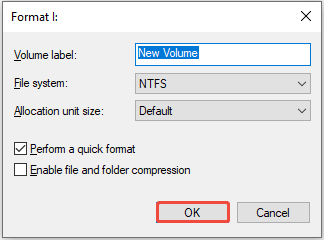
Step 3. Right-click on the partition of the USB flash drive and choose Format from the list.
Step 4. In the pop-up dialog, specify the volume label, file system, and allocation unit size.
Step 5. Decide whether to Perform a quick format, then click OK.
Step 6. Read the warning message and click OK to begin formatting the USB drive.
Final Words
When the error checking USB drive is stuck on your PC, try recovering USB data first using the professional data recovery software.
After data recovery, use the five solutions mentioned above one by one until the error checking problem is resolved.
If you need any help with MiniTool Power Data Recovery, please send an email to the support team via [email protected].
About The Author

Position: Columnist
Sandy became an English editor after graduation. She is devoted to finding effective solutions for diverse IT problems and provides articles on data recovery, data backup, and computer partitions and drives. In her spare time, she likes listening to music and playing games.
User Comments :