About MacBook Crashes
MacBook crashes can be frustrating because it interferes with your work or leisure activities and can result in data loss. We have summarized several possible reasons why this problem may occur below.
- Software issues: Sometimes, newly installed software or updates may not be fully compatible with the MacBook’s operating system. This can lead to conflicts that result in crashes. Software bugs or poorly optimized applications can also cause instability.
- Hardware malfunctions: Hardware failures, such as a failing hard drive, faulty RAM, or overheating components, can lead to system crashes. These issues may require diagnostic tests or component replacements to resolve.
- Insufficient RAM or storage: Running too many programs simultaneously or attempting to execute tasks that exceed the available RAM can cause the system to become overwhelmed, leading to crashes. Additionally, if the MacBook’s storage is nearly full, it can impact system performance and stability.
- Operating system errors: Errors within the macOS operating system itself can trigger crashes. This might include corrupted system files, misconfigurations, or conflicts between system processes.
- Overheat: MacBooks rely on thermal management systems to regulate temperature, but intense usage or blocked vents can cause it to overheat. When the system exceeds safe temperature thresholds, it may shut down abruptly to prevent damage, resulting in a system crash. To fix it, you can turn your Macbook to sleep mode to cool it down.
- Kernel panics: Kernel panics occur when the core of the operating system encounters a critical error from which it cannot recover. These errors can be caused by hardware issues, faulty drivers, or low-level software conflicts.
- Outdated firmware: Running outdated versions of macOS, or firmware can introduce vulnerabilities or compatibility issues that may result in crashes. Regularly updating software can help mitigate these risks.
- Human errors: Improper computer usage or configuration can also cause crashes. This might include force-quitting applications, modifying system settings without understanding the implications, or installing unauthorized software.
- Corrupted file system: File system corruption caused by improper shutdown or disk errors can lead to data corruption or system crashes. You can run the Disk Utility tool to detect and repair file system errors on the disk to ensure data integrity.
- Power issues: Fluctuations in the power supply or issues with the MacBook’s battery can cause instability or crashes, particularly if the system fails to receive consistent power or enters a low-power state unexpectedly.
How to Transfer Data From Crashed MacBook Pro
If you are in a hurry to use the data, how can you migrate data from dead MacBook Pro? Don’t worry, here are the solutions.
Method 1: Use Stellar Data Recovery for Mac
In general, using data recovery software for Mac to extract data from crashed MacBook Pro is the easiest and the most hassle-free way. Here, we recommend you use Stellar Data Recovery for Mac, which is a professional data recovery tool. This data recovery software is designed for Mac and allows you to restore various types of files, such as photos, audio files, videos, document files, emails, and so on.
This data recovery software allows you to recover your data from not only your Macbook Pro but also other Mac devices, HDDs, SSDs, and other storage devices. It deeply scans your disk, lists scanned data and supports preview of found files to satisfy seamless data recovery.
Data Recovery for MacClick to Download100%Clean & Safe
Before starting to extract data from crashed MacBook Pro, connect an external hard drive or flash drive to your Mac with an appropriate cable, and this is where your data will be transferred. Then choose the corresponding method according to your Mac chip to continue the recovery operation.
For M1, M2, and M3 chip systems:
Step 1: Get into the Recovery Mode by pressing and holding the Power/Touch ID button. Then select Options and choose Continue.
Step 2: When the macOS Recovery window appears, click Next. Then input your admin passwords and choose Continue.
Step 3: Ensure you have connected your Mac to an activated Wi-Fi network and continue the recovery. In the Recovery mode page, go to the Utilities menu and select Terminal.
Step 4: Type the following command in the terminal box and hit Return.
sh <(curl http://www.stellardatarecovery.co.in/StellarDataRecovery.xml)
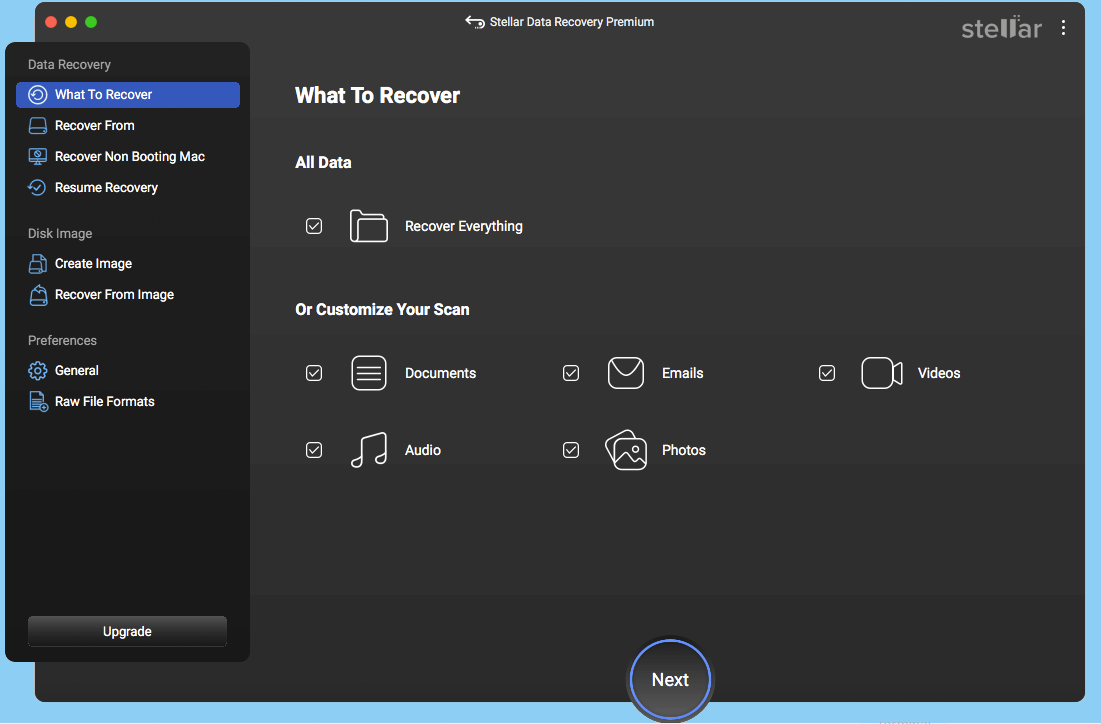
Step 5: Accept the License Agreement, and go to the What To Recover tab to choose which types of files to recover.

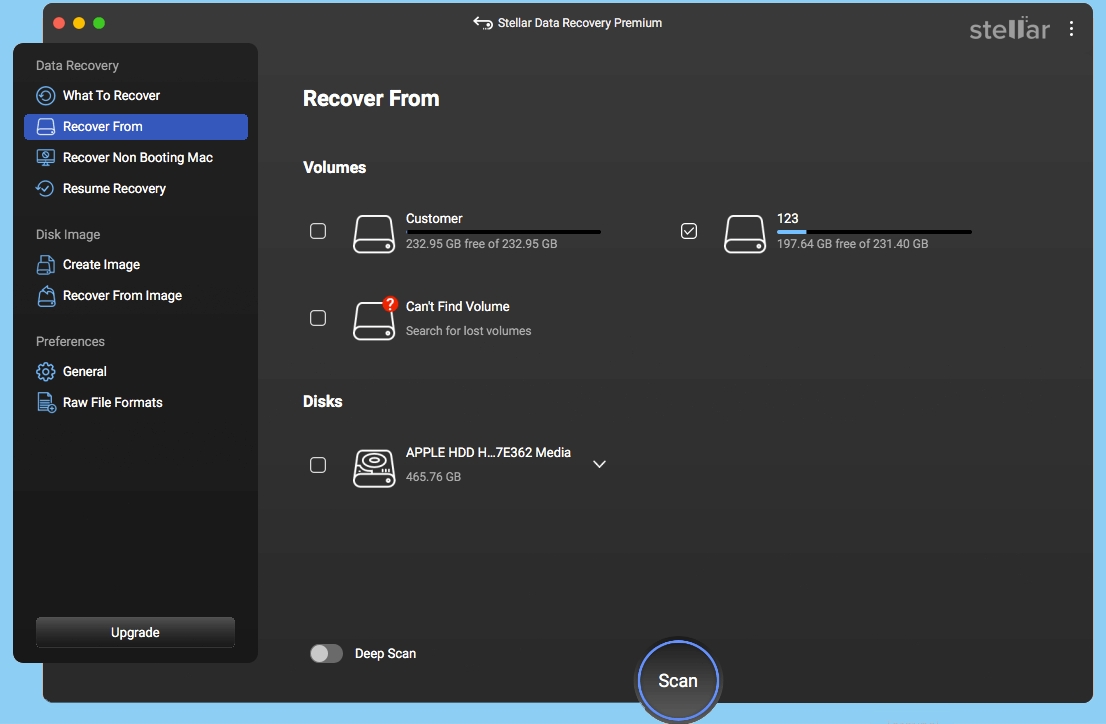
Next, go to the Recover From tab to choose which volume or disk to scan and click Scan.

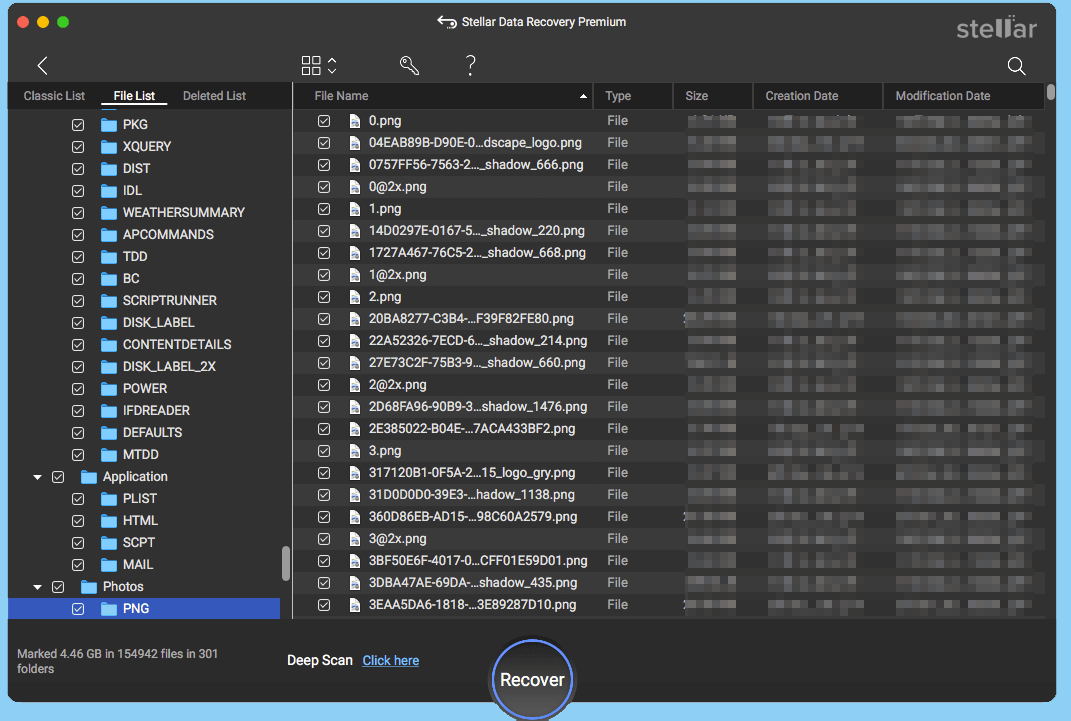
Step 6: Then this software will start its scanning process, and you need to wait for the scan to complete. Once it’s done, you can choose the files you want.
Step 7: Click Recover after selecting the required files. In the activation window that pops up, input your license key. If you don’t have one, you need to get one.

Step 8: Once the software is activated, continue the recovery. You are supposed to select a location to save these recovered files, and you can choose the external storage device connected to your Mac as the save location.
For T2 chip and other chip systems:
Step 1: Power on your Mac and immediately press Command + R to open Recovery mode.
Step 2: Connect your Mac to an available Wi-Fi network, and select Terminal in the Utilities menu.
Step 3: Input the following command and press Return.
sh <(curl http://www.stellardatarecovery.co.in/StellarDataRecovery.xml)
Step 4: Accept the License Agreement and choose the drive you want to scan.
Step 5: After the scan finishes, choose the files you want to recover and select Recover, then input the license key for this software into the Activation window.
Step 6: Continue to recover your files and save them to the external storage device connected to your Mac.
When you complete the above steps, your data should have been saved in the external storage device. You can connect this device to another Mac to check if the data is readable.
Method 2: Extract Data From the Crashed Mac With an External Hard Drive
Apart from taking the help of data recovery software, you can use an external hard drive to extract data from crashed MacBook Pro. In Recovery mode, macOS allows you to recover data from MacBook Pro hard drive by creating a disk image backup to copy your Mac data to an external hard drive.
Here is how to operate it.
- Connect an external drive to your dead Mac and boot into Recovery mode by pressing Command + R or pressing and holding Power/Touch ID.
- Choose Disk Utility and select the connected external drive from the list of devices on the left, then click the Erase button. Name your drive, choose the Mac OS Extended (Journaled) format and the GUID Partition Map scheme.
- Hit Erase to format the drive. Then click Macintosh HD on the left and then go to File > New Image > Image from Macintosh HD.
- Type a name for the backup in Save As. Click Where to choose your external hard drive as the destination drive and choose the read/write image format. Finally, select Save to create the backup image.
- Once the backup image is created, eject the drive from the crashed Mac and connect it to a working Mac to check your data.
Method 3: Migrate Data to Another Mac
Moreover, you can use a built-in feature called Target Disk Mode to extract data from crashed MacBook Pro to a working Mac device.
- Use a proper cable to connect the dead Mac to the functioning one.
- Simultaneously hold the T key and the Power button on the keyboard of the crashed Mac, and your dead Mac will be started in Target Disk Mode.
- Jump to the working Mac, and navigate to Finder > Locations > Network.
- Double-click the drive on your dead Mac, go to Connect As > Guest, and choose Connect.
- Now you can extract data from crashed MacBook Pro to the working one by dragging and dropping them.
How to Fix Macbook Pro Crash
After recovering data from the crashed Mac, you can try to fix the computer in the following three ways.
Fix 1: Reset System Management Controller (SMC)
The System Management Controller (SMC) is responsible for power management. You can reset SMC to resolve issues related to the power.
For MacBook with M1 chip:
- Shut down your MacBook.
- Wait for about ten seconds.
- Press and hold the Power button for at least 10 seconds.
- Release the Power button, then wait a few seconds.
- Press the Power button again to turn on your MacBook.
For MacBook with a T2 chip:
- Shut down your MacBook.
- Press and hold Option, Control, and Shift on the built-in keyboard for 10 seconds.
- Keep holding these keys and also press and hold the Power button for another 10 seconds.
- Release all keys and the Power button.
- Press the Power button again to turn on your MacBook.
Fix 2: Reset NVRAM & PRAM
Resetting the Parameter RAM (PRAM) or Non-Volatile Random Access Memory (NVRAM) can help resolve issues related to display, sound, and other settings on a Mac. Here’s how to reset the PRAM/NVRAM:
- Power off your Mac completely.
- Press the Power button to turn on your Mac.
- Immediately press and hold Option, Command, P, and R.
- Keep holding the keys for about 20 seconds. Your Mac might restart during this process.
Once the PRAM/NVRAM has been reset, your Mac settings related to display resolution, sound volume, time zone, and so on will be restored to default. You need to reconfigure these settings according to your preferences after the reset.
Fix 3: Repair Error With Disk Utility
Using Disk Utility in Safe Mode can help diagnose and repair disk-related issues on your Mac. Here’s how to access Disk Utility in Safe Mode:
- Press the Power button to turn on your Mac.
- Press and hold Power/Touch ID or press Command + R to start Recovery Mode.
- Once your Mac has started up in Safe Mode, input your user passwords.
- Click on the Finder to open it and go to the Applications folder, then open the Utilities folder.
- Double-click Disk Utility to launch it.
- In Disk Utility, select the disk you want to check from the list on the left-hand side.
- Click First Aid at the top of the Disk Utility window and choose Run to start the disk verification and repair process.
- After Disk First Aid completes its scan and repair process, review the results in the Disk Utility window.
If Disk Utility reports that the disk appears to go well or if it successfully repaired any issues, you can proceed to restart your Mac. But if you encounter persistent problems or Disk Utility is unable to repair the disk, you may need to consider seeking assistance from Apple Support.
Epilogue
Although MacBook crashing is a terrible thing, data recovery software for Macs like Stellar Data Recovery can handle it well. Besides, Apple also offers you some ways to fix Macbook crashing issues manually, and you can try those methods above to resolve your problem.
To prevent Mac from crashing, you can regularly maintain your Mac, such as keeping software up to date and practicing safe computing habits, which can help minimize the likelihood of crashes and ensure optimal performance.
![[FIXED!] Your Computer Restarted Because of a Problem on Mac?](https://images.minitool.com/minitool.com/images/uploads/2021/01/fix-your-computer-restarted-because-of-a-problem-mac-thumbnail.png)

User Comments :