In our daily computer use, USB flash drives are one of the most commonly used external storage devices. However, when you insert a USB drive and receive the “USB Device Not Recognized” error message, it can be frustrating.
Issue: USB Flash Drive Not Recognized
The “USB drive not showing up” error appears when Windows encounters a problem detecting a USB device. It’s often accompanied by the following symptoms:
- The device drive letter doesn’t appear in File Explorer.
- A yellow exclamation mark or “Unknown Device” appears in Device Manager.
- A pop-up message appears: “USB Device Not Recognized” or “Device Stopped (Code 43).”
Don’t worry. This post teaches you to solve this issue, getting your USB drive back to normal. First, let’s learn its causes.
Why Is My USB Flash Drive Not Recognized
When a USB flash drive is marked as unrecognized by the system, it’s usually due to a communication problem between the device and the system. Common causes include:
- USB flash drive hardware failure: A damaged flash chip, a broken circuit board, or a loose connector can cause the device to not be recognized properly.
- Driver issue: Windows cannot load or recognize the driver required for the device. The driver may be missing, damaged, or incompatible.
- USB port failure or insufficient power supply: Some USB ports, especially on older computers, may have unstable voltage and not provide sufficient power to the device.
- File system or partition table corruption: If the flash drive’s partition table or file system is corrupted, the system may not recognize it as a usable device.
- Abnormal system settings or updates: Some Windows updates may affect USB device recognition, or power management settings may disable USB ports.
- Device conflicts: When multiple USB devices are connected simultaneously, resource conflicts may occur, causing some devices to become unrecognizable.
Before You Do: Recover Data from an Inaccessible USB Drive
To ensure your data security, please recover data before starting troubleshooting. MiniTool Power Data Recovery can help you recover important files successfully and quickly.
Whether it’s accidental deletion, formatting, partition loss, or your USB flash drive has become RAW or inaccessible, MiniTool can perform a deep scan and attempt to recover data.
It offers excellent system compatibility, supporting Windows 11/10/8/8.1. This tool allows you to restore almost all file types, such as documents, pictures, videos, audio, and so on.
The clear interface and straightforward steps make it easy for beginners to quickly learn. This free data recovery software also gives you 1 GB of free recovery capacity. What are you waiting for? Download and install it now!
Step 1: Download the software and scan your USB drive
Click the following green button to download and install it on your computer.
MiniTool Power Data Recovery FreeClick to Download100%Clean & Safe
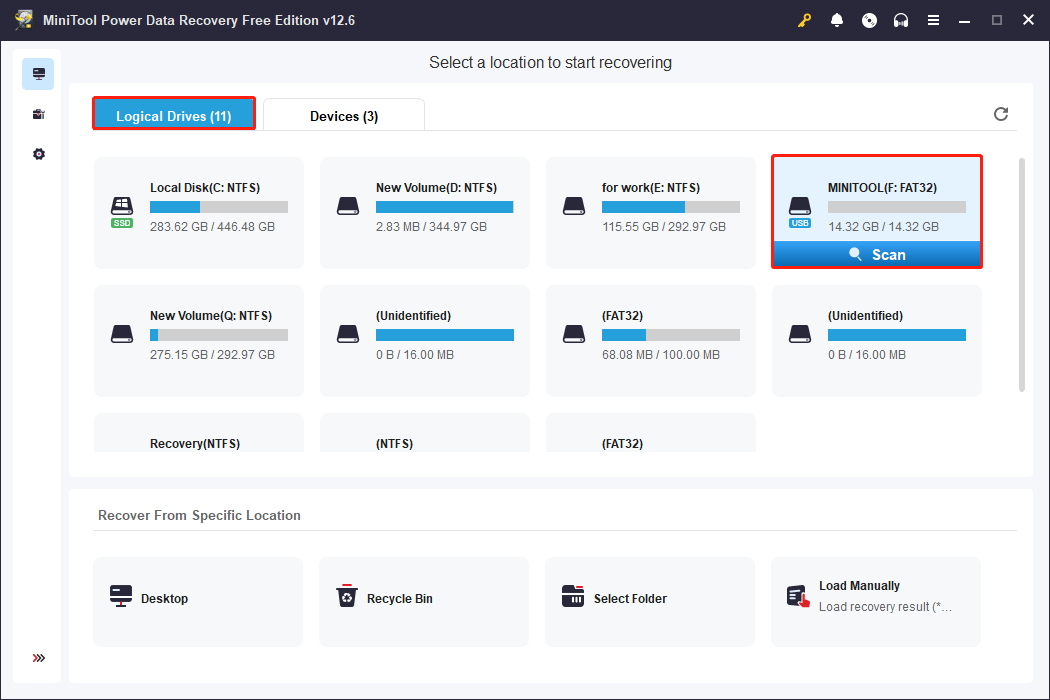
Once finished, launch the software. In the main interface, you can see all partitions under the Logical Drives tab. Find your USB drive, move your cursor to the section, and click Scan.
Step 2: Find the target files using Type, Filter, and Search
This scanning process will take some time. For more complete recovery results, do not interrupt it. After it ends, you can start browsing the scan results under the Path tab.
If you want to find files according to the file structure, this feature is best for you. If not, try the following ones.
MiniTool Power Data Recovery provides three practical features: Type, Filter, and Search. They can help you quickly locate the files you want to recover in massive scan results.
- The Type feature classifies the scanned files by type, such as documents, pictures, audio, videos, compressed files, etc. You can click Type and expand All File Types to quickly browse a certain type of file without having to search one by one in the entire file tree.
- The Filter function allows you to filter by file type, modification date, file size, and file directory. It allows you to set up four corresponding filter conditions at once to quickly narrow down the scope.
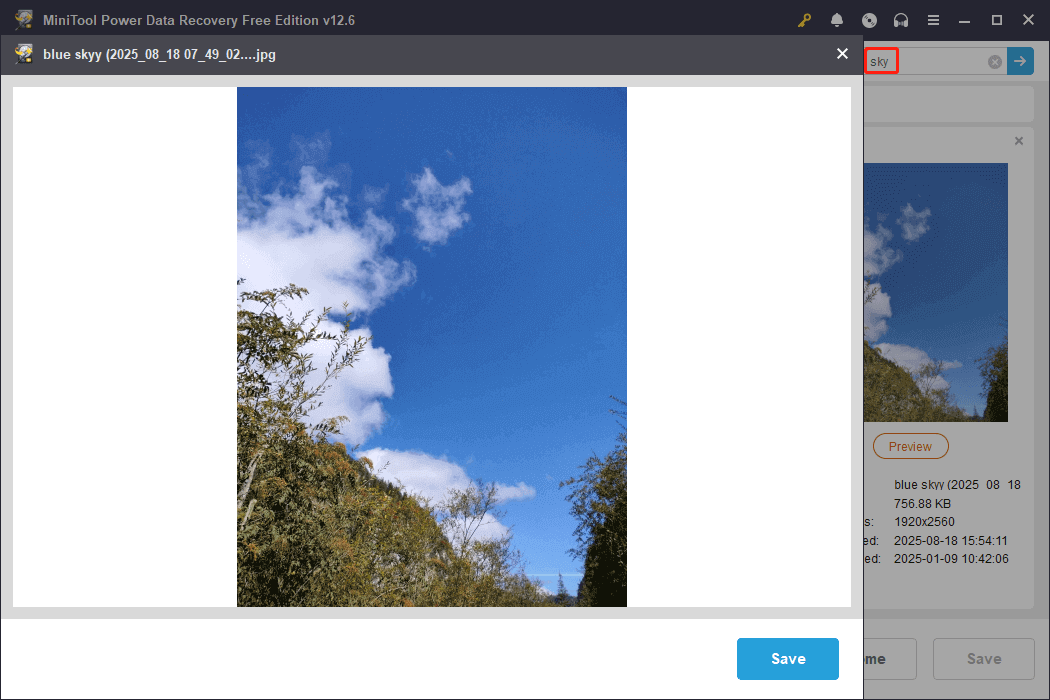
- The Search feature supports directly finding specific files by entering the file name or keywords. If you remember the full or partial file name, just enter it in the search box and press Enter; MiniTool will locate the relevant files.

Step 3: Preview the files before recovery
After locating the file, it is best to enable the Preview feature. This allows you to verify the file’s contents are complete and confirm that it’s the file you’re recovering.
This feature supports common file formats, including images, documents, and audio files, making you confirm file availability before recovery and avoid wasting recovery capacity or time.
Simply double-click the target files one by one, and the preview window will pop up, allowing you to view the file easily.
Step 4: Tick all the files and save them to a safe destination
Now, it’s time to save files. Tick all the files you need and click the Save button. In the destination window, choose a path to store your recovered files.
After selecting, hit OK to start the recovery process. When the files are retrieved completely, a window will pop up. You can see the size of the recovered files and the remaining free recovery capacity.
Once this free recovery capacity is used up, you need to upgrade to a full edition to continue recovering files.
How to Fix the USB Flash Drive Not Recognized Issue
After recovering important files, you can proceed with USB troubleshooting with confidence. To make it easier for you to understand, I will divide the solutions into hardware troubleshooting and software troubleshooting.
- Check the USB drive, port, and drive’s power
- Try another port and computer
- Update or reinstall USB drivers
- Assign a drive letter
- Run Hardware and Devices troubleshooter
- Reinstall USB controller
- Disable Selective Suspend
- Format it to FAT32
Step 1: Hardware Troubleshooting on an Unrecognized USB
Fix 1: Check the USB Drive and Port
Physical damage or a poor connection may cause the “USB not showing up” issue. Therefore, you can check the USB flash drive and port first. This operation will quickly determine whether the problem lies with the hardware or system settings, avoiding unnecessary software repairs.
Fix 2: Try another USB Port and Computer
If your USB drive isn’t physically damaged, you can try using a different USB port or a different computer.
This can help determine if the problem lies with the USB drive itself or with the port, drivers, or system settings on your current computer.
Fix 3: Check the USB Drive’s Power
Some USB flash drives and external hard drives require a stable power source to function properly. If the port isn’t receiving enough power, the device may not be recognized by the system. This makes checking the power source crucial, especially when using a USB hub or an older computer.
Step 2: Software Troubleshooting on an Unrecognized USB
Fix 1: Update or Reinstall USB Drivers
Updating or reinstalling USB drivers is a critical step in resolving the issue. If the drivers are corrupted, outdated, or incompatible, the system will not be able to correctly recognize and load the USB device.
Update USB drivers:
Step 1: Press Win + X keys and choose Device Manager.
Step 2: Expand Disk drives, right-click your card, and choose Update driver.
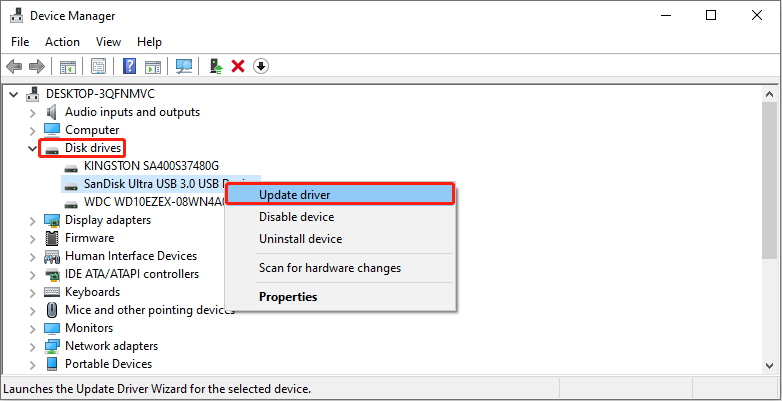
Step 3: In the pop-up window, select Search automatically for drivers.
If an available update is detected, it will be installed automatically. When you see the “The best drivers are already installed” message, you can reinstall the driver.
Reinstall USB driver:
Step 1: Open Device Manager and expand Disk drives.
Step 2: Right-click your card and select Uninstall device.
After reinstalling it, restart your computer. During this process, Windows will install the new driver for you automatically.
Fix 2: Assign a Drive Letter
When a USB device isn’t recognized, manually assigning a drive letter through Disk Management can restore access to the device.
- If the USB flash drive shows as “Unallocated”, try to create a new volume.
- If the USB flash drive shows no drive letter, assign the drive letter.
Create a new volume:
Step 1: Press Win + X and choose Disk Management.
Step 2: Right-click your drive and choose New Simple Volume.
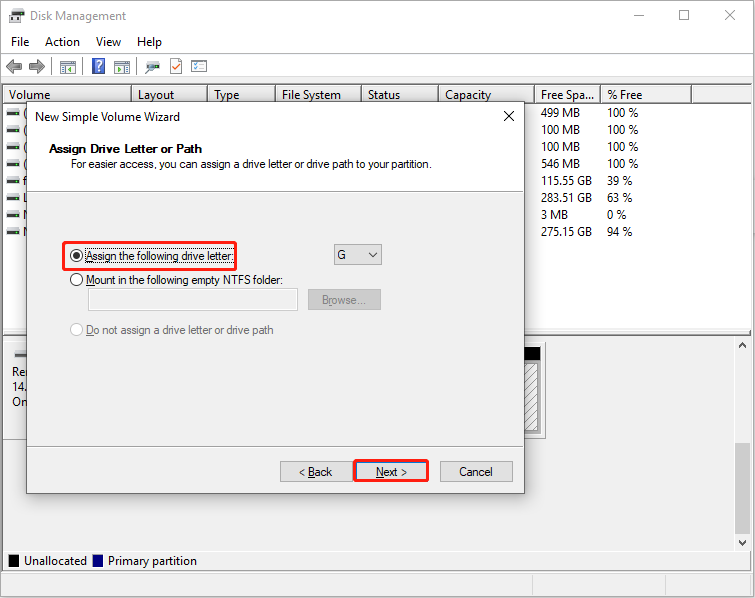
Step 3: Click Next twice until you enter the Assign Drive Letter or Path page.
Step 4: Choose an unused letter from the Assign the following drive letter menu and click Next.
Step 5: On the next page, set the file system and volume label, and click Next.
Step 6: Finally, click Finish to close the wizard.
Assign a drive letter:
Step 1: In Disk Management, right-click your drive and choose Change Drive Letter and Paths.
Step 2: Click Add. Select a letter from the Assign the following drive letter list, and then click OK > Yes.
Fix 3: Run Hardware and Devices Troubleshooter
When the problem of USB device not recognized Windows 10 appears, you can try running the Hardware and Devices troubleshooter. It can detect and fix common issues such as driver errors, USB class filter anomalies, device conflicts, or incorrect system settings.
Step 1: Open Command Prompt as administrator
Type cmd in the Windows search bar, right-click Command Prompt, and choose Run as administrator.
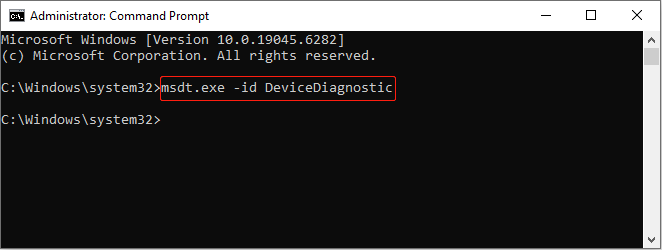
Step 2: Run the command
Type msdt.exe -id DeviceDiagnostic in the prompt window and press Enter. The Hardware and Devices window will show.
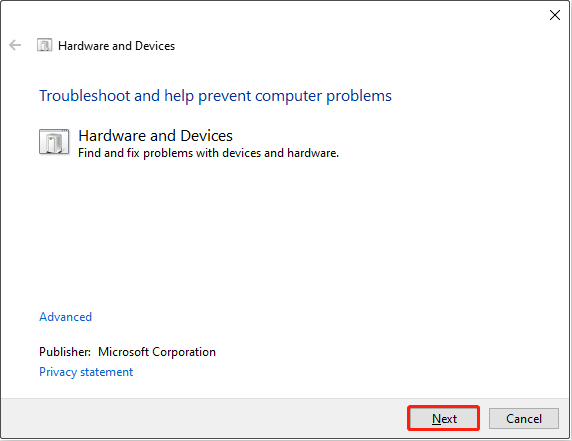
Step 3: Start the troubleshooter
Click Next,and the system will automatically scan and attempt to repair hardware problems, including USB devices.
Fix 4: Reinstall USB Controllers
If the USB controller driver is damaged, misconfigured, or incompatible with the system, it may cause recognition failure. In this case, you can reinstall the USB controller, which can refresh the hardware connection and restore device recognition.
Step 1: Open Device Manager and expand Universal Serial Bus controllers.
Step 2: Right-click the USB controller and select Uninstall device.
Step 3: Carefully uninstall other controllers if needed, then restart to reinstall automatically.
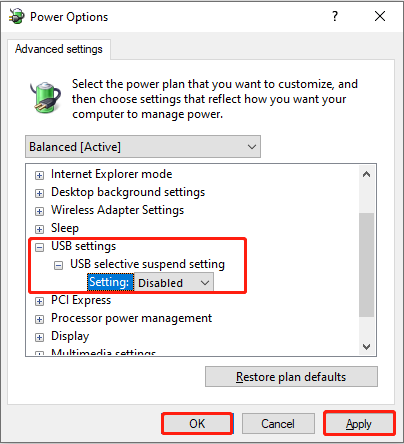
Fix 5: Disable Selective Suspend
If you enable Selective Suspend, the system automatically shuts down USB ports when idle to save power. This power-saving mechanism can sometimes cause unstable device connections or prevent devices from waking up. Disable it to keep USB ports powered and stable.
Step 1: Open the Control Panel and choose Power Options.
Step 2: Click Change plan settings > Change advanced power settings.
Step 3: Expand the USB settings > USB selective suspend setting.
Step 4: Change the state to Disabled and click Apply > OK.
Fix 6: Format Your USB Drive to FAT32
A final solution is to format the drive with the FAT32 file system. This helps improve compatibility, especially with older operating systems or certain embedded devices.
FAT32 is a widely supported standard format that is more easily recognized and loaded by different platforms than NTFS or exFAT.
With Disk Management:
Step 1: Open Disk Management, right-click your USB drive, and choose Format.
Step 2: Set the volume label, and choose FAT32 from the File system list.
Step 3: Click OK to confirm the change.
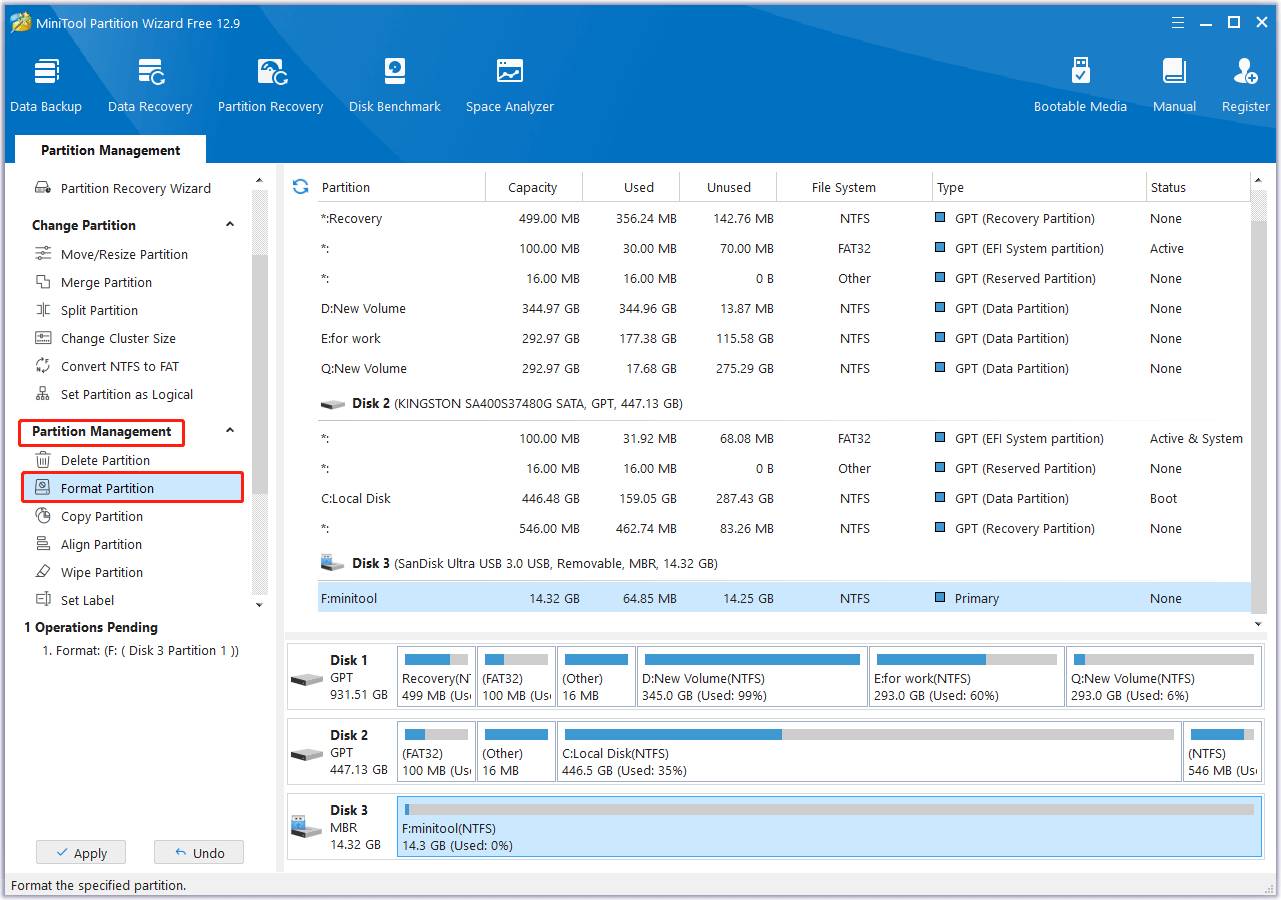
With MiniTool Partition Wizard:
MiniTool Partition Wizard is a partition management software. You can use it to format, delete, and merge partitions. And it allows you to undo your changes. This tool is easy to use and is perfect for formatting your USB.
Step 1: Download and install MiniTool Partition Wizard, and then open it.
MiniTool Partition Wizard FreeClick to Download100%Clean & Safe
Step 2: Select the USB drive and click Format Partition under Partition Management.
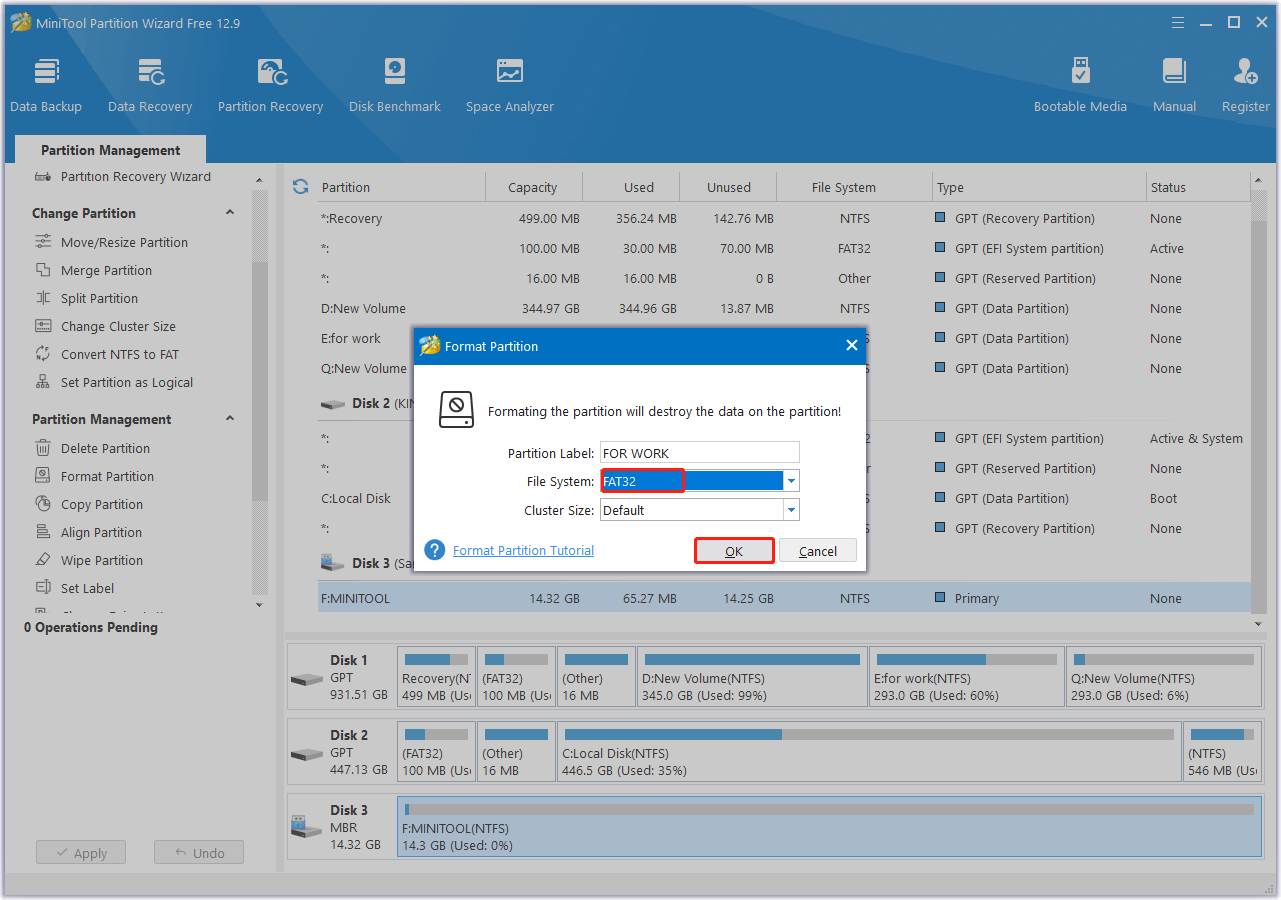
Step 3: Type a new partition label and choose FAT32 as the file system.
Step 4: Click OK. In the main interface, click Apply.
Final Words
Solving the problem of “USB flash drive not recognized” is not complicated. Just follow the right steps.
First, use MiniTool Power Data Recovery to recover data from an unrecognized USB drive. Then, try the above methods to fix the issue, such as changing the port, updating the driver, assigning the drive letter, formatting it, etc.
If you have any questions about MiniTool products, please send them to [email protected].
About The Author

Position: Columnist
Chelsea graduated from university with a major in English. She has a strong interest in English writing. It is this passion for writing that led her to become an English editor. Her articles mainly focus on data recovery and other computer industry news. As an energetic and outgoing girl, Chelsea enjoys listening to music, singing, riding bikes, and eating in her spare time.
User Comments :