Keeping files in specific folders is a good way to organize your data in an orderly manner, making it easier to locate files without wasting time searching through your disk.
However, sometimes you accidentally delete some files in this folder or the entire folder, and want to get them back quickly.
Like what the user below is going through right now:
Is there a way to recover data from one specific folder in a 4 TB external hard drive? I know the specific folder that the file was in, and not much has been done inside the folder since it was deleted. When I try to use Recuva to search in just one folder, it tries to scan the entire drive, which takes days. Any suggestions?www.reddit.com
This is where this post comes in to help you effectively recover files from a specific folder. Additionally, we will show you some practical tips to help you prevent data loss in the future.
What Factors Influence the Success of File Recovery from a Specific Folder?
First, let’s analyze the factors that influence your overall data recovery chances. By doing this, you can take appropriate measures based on the circumstances to enhance the success rate of file recovery.
Factor I. Situations Leading to Data Loss (Causes for Files to Be Deleted from a Specific Folder)
It is important to understand the cause of data loss, as it influences the recovery approach you should use. Below are several potential causes:
| Data Loss Scenarios | Data Recovery Chances |
| Computer Formatting | The success of data recovery is determined by the type of format you choose (Quick format vs. full format). If you didn’t perform a full format or overwrite data, you could recover files from a folder. |
| Accidental Deletion | If you unintentionally delete files or folders, the faster you act, the higher your chances of recovering your files. |
| Hard Drive Corruption | If your hard disk with logical errors and Disk Management detects it, you can scan the corrupted hard drive and recover lost data. |
| Virus/Malware | Malicious viruses and software can attack or corrupt files. However, you can still recover files by virus attack. |
| Physical Damage | If the damage is too severe and you can’t access the hard disk, you need to seek help from a data recovery service center. In this case, you can’t use DIY file recovery methods, which may cause secondary damage to the data. |
Factor II. Time
Time plays an important role.
If you deleted the files quite a while ago and carried out several read/write actions on the impacted disk since then, the likelihood of recovering the data along with the original folder structure is minimal.
Factor III. Types of Storage Devices
Here’s a drill-down into various kinds of storage media along with their data recovery outcomes:
| Storage Device | Data Recovery Outcomes |
| HDD (Hard Disk Drive) | As long as you didn’t perform a full format and the hard drive does not have physical damage, hard drive data recovery is possible. However, it’s important to take action swiftly to avoid overwriting any files. |
| SSD (Solid State Drive) | The TRIM feature significantly affects SSD data recovery. It runs after file deletion to free up space. You can disable TRIM on internal SSDs, but not on external ones, as it’s not supported via USB. Consequently, your chances of data recovery depend on the time since deletion and TRIM status. |
| Other removable media (USBs and memory cards, including SD, SDHC, SDXC, CF, etc.) | The situation is the same for other removable storage devices as it is for HDDs. |
Factor IV. Capabilities of Data Recovery Software
The software you select for data recovery plays a crucial role in whether you can recover deleted files from a specific folder.
Here are some important aspects to keep in mind when selecting a professional data recovery tool:
- Natively Supported File Systems: Check if the data recovery software can recover data from various file systems like NTFS and FAT32.
- Update Frequency: Look for a changelog or release schedule to ensure the developers provide regular updates, as improved scanning algorithms enhance recovery chances.
- Performance & Scope: Ensure the software supports various file formats and storage devices (SSDs, HDDs, memory cards, USB flash drives) for effective data recovery.
- User-Friendly UI: Choose intuitive applications that allow for easy recovery with just a few clicks, avoiding complex command-line interfaces.
After learning the factors of successful data recovery, let’s check how to recover files from a specific folder.
Method 1. Use Ctrl + Z
Ctrl + Z is a widely used keyboard shortcut that undoes the most recent action taken in various software applications. It is highly effective for returning data to its earlier state.
Therefore, if you accidentally delete files from a folder, just press Ctrl + Z in the folder to bring them back.
However, this approach may not always be effective, especially if you have carried out numerous actions or if you have rebooted your computer. In this case, try the next solution!
Method 2. Check the Recycle Bin
The Recycle Bin recovery method works best when you’ve recently deleted the files or used common deletion methods such as using the Delete key or choosing Delete from the right-click options, as these actions typically send files to the Recycle Bin.
To restore files from the Recycle Bin, follow these steps:
Step 1. Open the Recycle Bin on your desktop.
Step 2. Search for the deleted files, select them, right-click, and then choose Restore. This action will return the deleted files to their original location.
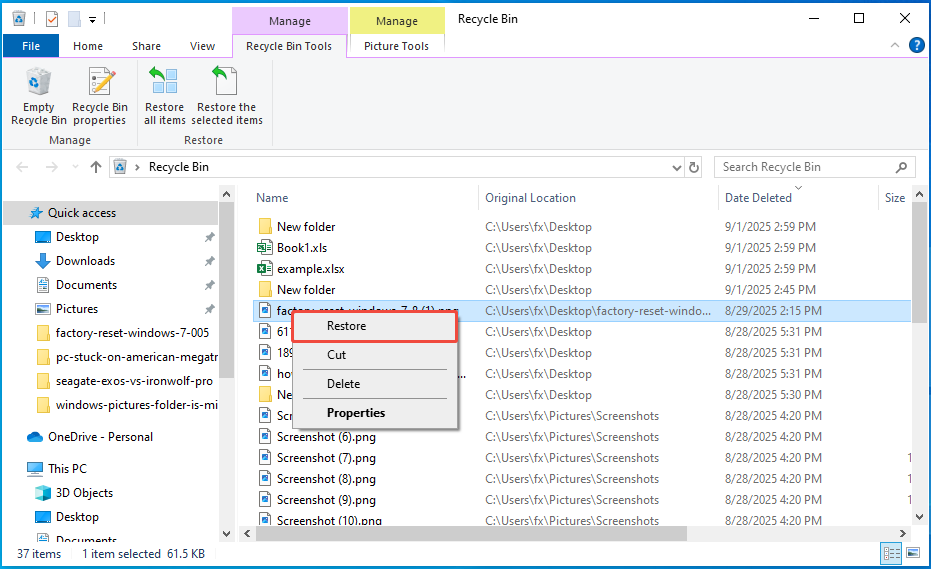
If you’d prefer to restore them to a different location, you can simply drag and drop them.
How can you recover files from a specific folder if they are not located in the Recycle Bin? Are there any tools available that enable efficient recovery of data from a specific folder?
Keep reading to find these powerful tools.
Method 3. Use the File History
File History is a built-in feature in Windows that automatically backs up files from your libraries.
Unlike the Recycle Bin, which only holds items that have been recently deleted, File History creates regular backups of your files over time, giving you the ability to recover deleted or corrupted files.
How to use File History to restore your files from a specific folder? Follow the instructions below:
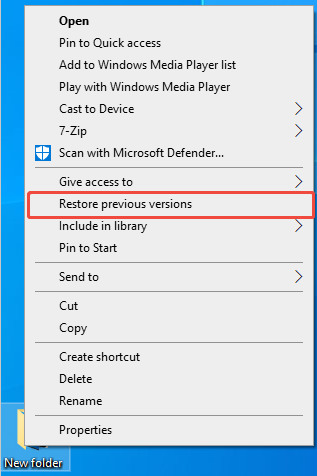
Step 1. Go to the folder where the deleted files were stored. Next, right-click on that folder and select Restore previous versions.
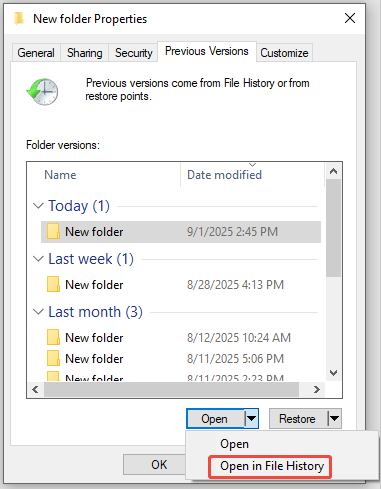
Step 2. A pop-up window will appear displaying all the available previous versions of your files. Choose one and select Open in File History to view it.
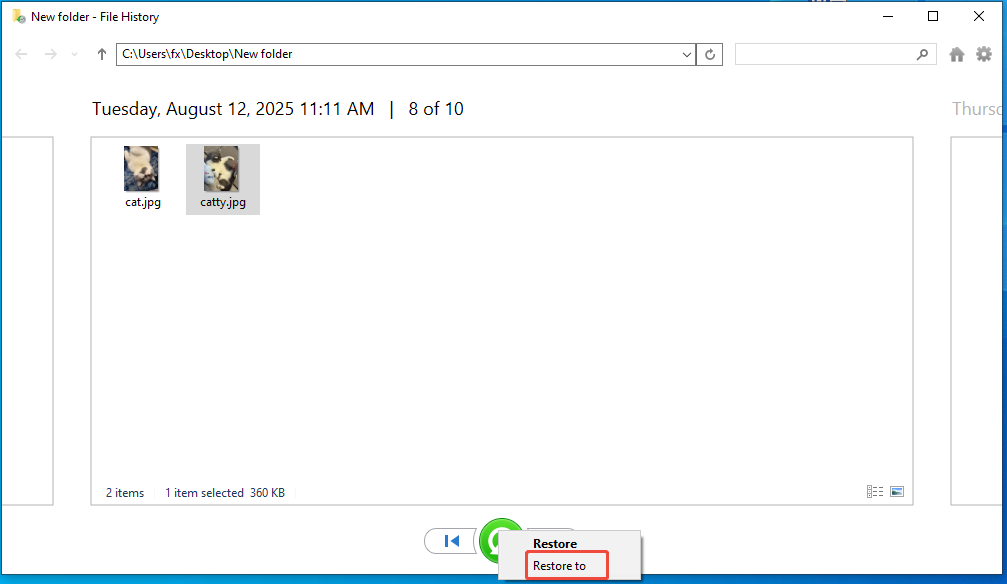
Step 3. Right-click the green button and select Restore to. Then pick a location to save the retrieved files.
Method 4. Use Windows File Recovery
If you did not enable File History before the files were deleted, File History won’t help. In this case, try using Windows File Recovery, a command-line data recovery application.
It is a free command-line utility from Microsoft intended for users of Windows 11/10 to restore deleted files.
Follow the instructions below to recover files using Windows File Recovery.
Step 1. Download and install the Windows File Recovery app from the Microsoft Store.
Step 2. Access the Start menu, type Command Prompt, right-click it, and select Run as administrator.
Step 3. Type winfr and press Enter. All syntax and command options for the tool will be displayed.
Step 4. Type the command using the following format:
winfr source-drive: destination-drive: [/mode] [/switches]
- source-drive: The drive from which you wish to recover files.
- destination-drive: The drive where the recovered files will be stored.
- [/mode]: Indicates the recovery mode. The regular mode serves as the standard recovery option for non-corrupted NTFS drives, while the extensive mode provides a more in-depth option that works with all file systems.
- [/switches]: Represents optional switches for added control, such as specifying file names and paths, etc.
For instance, to retrieve the documents from the G drive to the H drive using the regular mode:
Winfr G: H: /regular /n \Users\username\Document\
When prompted with Continue? (y/n), press Y on your keyboard to initiate the process.
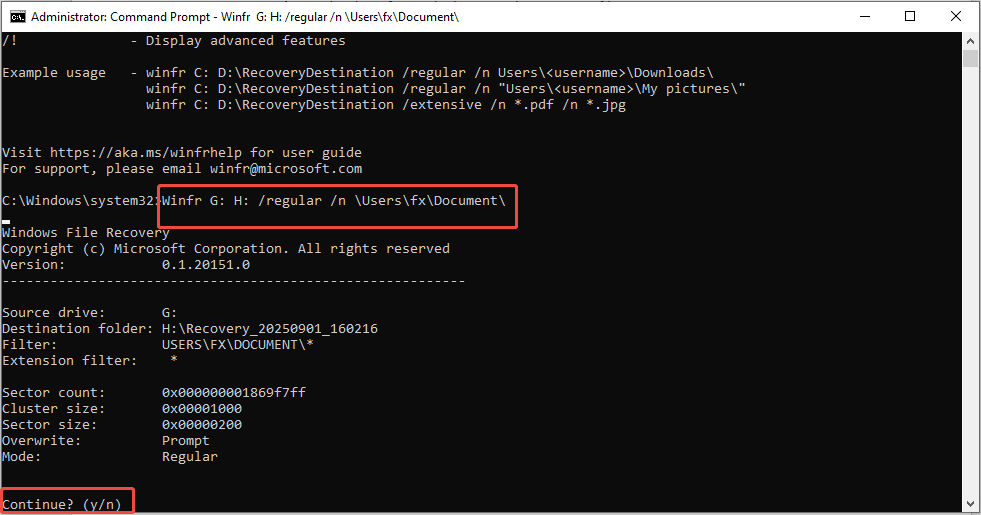
Step 5. Then, go to the destination drive to check the Recovery folder.
Method 5. Use MiniTool Power Data Recovery
While the Windows File Recovery tool is useful, its command-line interface might be intimidating for many users, and it only supports a limited range of recovery scenarios.
For a more intuitive and accessible option that addresses a wider variety of data loss cases, MiniTool Power Data Recovery may be the ideal choice.
This free data recovery software features a simple interface and is straightforward to operate.
Here are some powerful features:
- It scans your computer, allows you to preview the files, and saves them to a desired location.
- It can retrieve documents, images, videos, audio files, and numerous other data types.
- It can recover up to 1 GB of files without charge.
- Etc.
Download MiniTool Power Data Recovery Free and use it to recover deleted files from a specific folder.
MiniTool Power Data Recovery FreeClick to Download100%Clean & Safe
Step 1. Scan the Target Folder
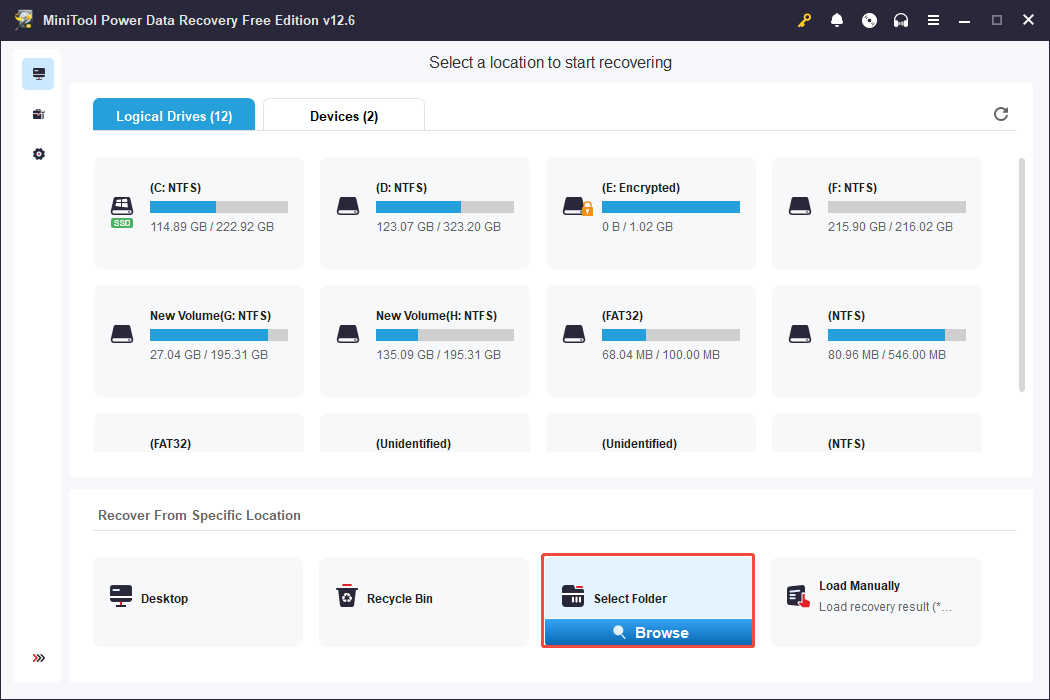
Open MiniTool Power Data Recovery to access its main interface. In this interface, you need to choose the location where the deleted files were stored for scanning.
To recover files from a specific folder, you can go to the Recover From Specific Location section under the Logical Drives tab.
This section allows you to search a specific area, like the desktop, the Recycle Bin, or a specific folder.
Move your cursor to Select Folder and click the Browse button. In the pop-up window, select the anted folder and click the Select Folder button.
Step 2. Locate and Preview Files
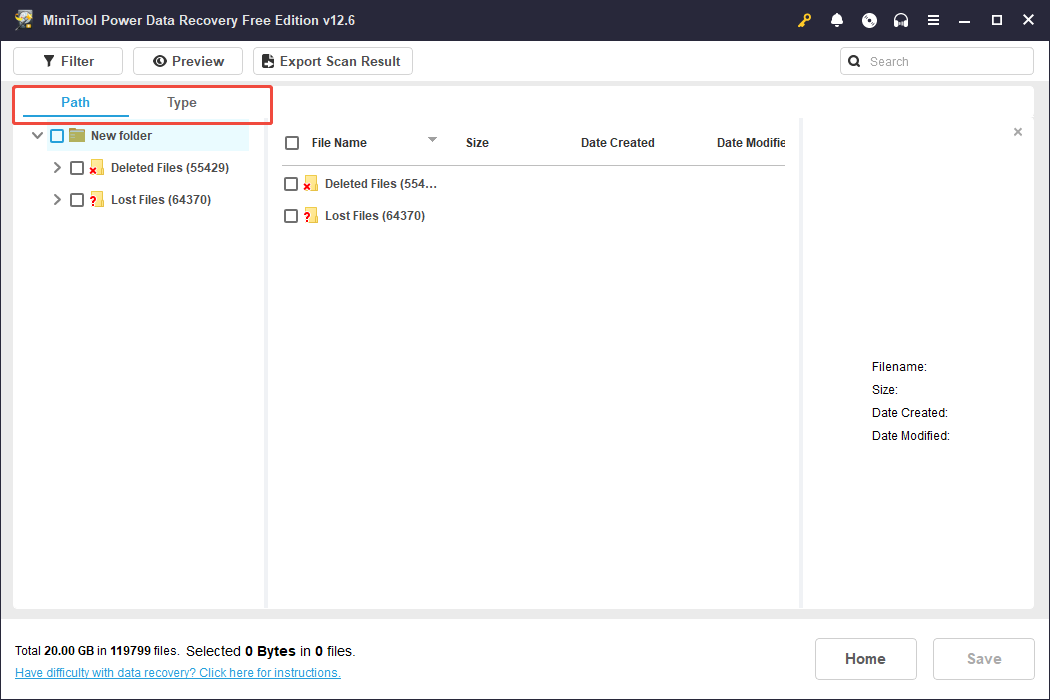
Once the scanning is finished, review the discovered files under Path or Type and identify the files you wish to recover.
- Path: In a specific folder, this section will show you the Deleted Files folder and Lost Files folder. You can depend on your data loss situation to determine which folder to expand.
- Type: Categorizes files by their type. Use this if you are looking to recover a specific file type.
Still encountering a large number of files? Use Filter or Search to swiftly find what you need.
- Filter: Establish filtering criteria such as file type, size, modification date, and file category to display only the files that suit your requirements.
- Search: Type in a keyword from the file name to quickly find the desired file among the recovery results.
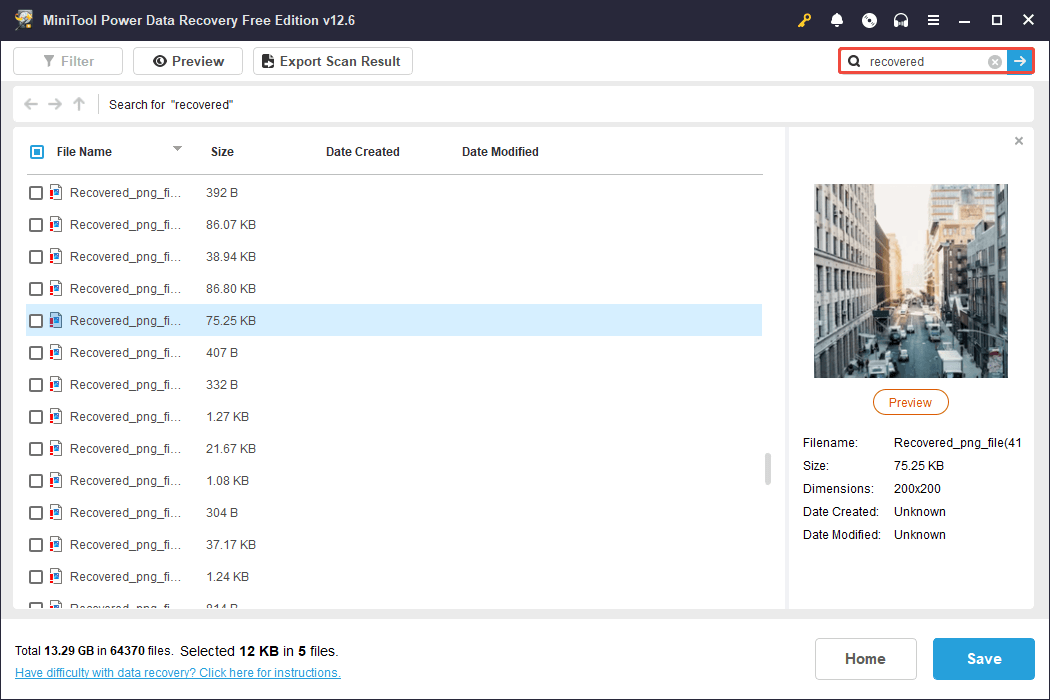
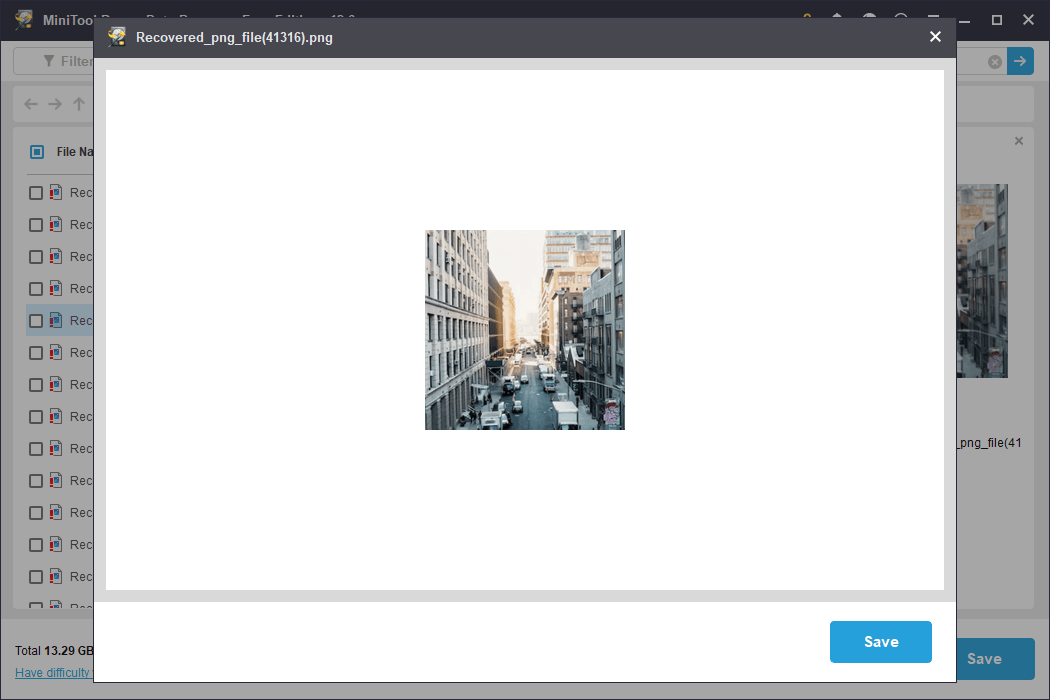
Before recovery, this MiniTool file recovery software provides a preview function. You can double-click on each target file to preview its content.
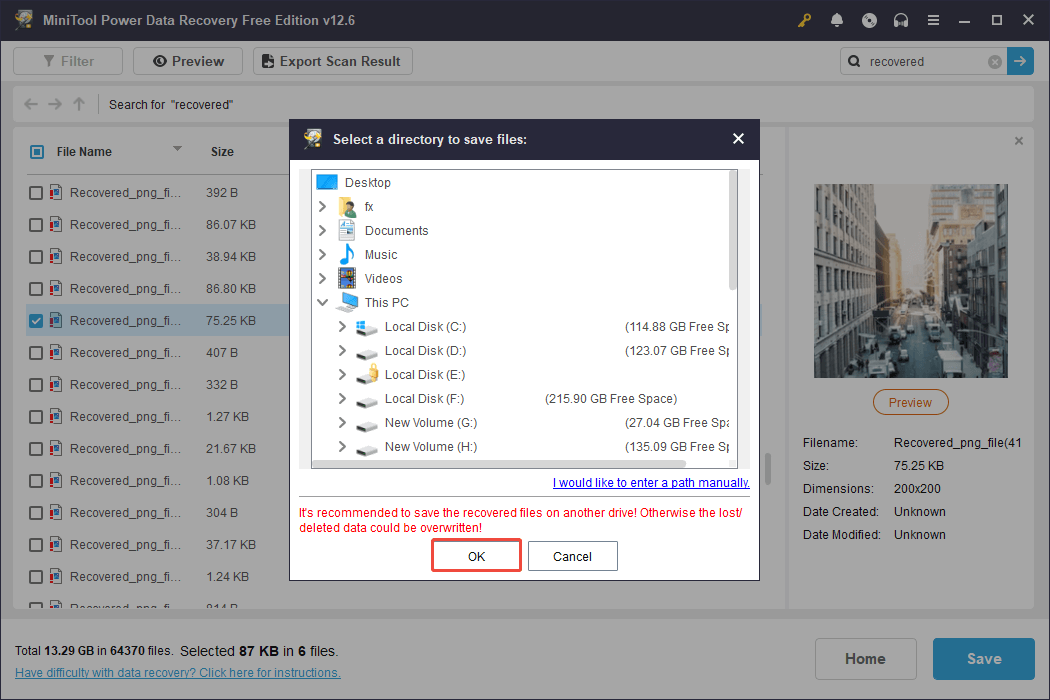
Step 3. Save the Desired Files
Tick the checkboxes next to all required files, and click Save. In the pop-up window, select a location separate from the original location and click OK to start recovering.
Bonus Tips for Preventing File Loss
Here are some useful tips to help you prevent data loss:
Carefully perform file operations: Verify before deleting any files and avoid making careless cuts or moves. Do not disrupt the file transfer process.
Inspect your hardware: Use professional tools to monitor the health of your hard drive, which helps avoid data loss from disk failures.
Activate antivirus protection: Keeping Windows Defender or other security software active can safeguard your files from virus attacks.
Create backups of your files: Use File History to automatically create copies. Alternatively, employ trustworthy data backup software like MiniTool ShadowMaker to back up files.
MiniTool ShadowMaker TrialClick to Download100%Clean & Safe
Final Words
If you haven’t begun the process of recovering your files, it’s important to start immediately. The sooner you take action, the greater your chances of a successful recovery.
Whether you are proficient in data recovery or not, you can discover ways to recover files from a specific folder above.
After you have retrieved your files, make sure to store them correctly and adhere to the precautionary advice mentioned earlier to avoid future data loss.
Should you encounter any problems or have any questions while using MiniTool products, please send an email to the support team at [email protected].
About The Author

Position: Columnist
Sandy became an English editor after graduation. She is devoted to finding effective solutions for diverse IT problems and provides articles on data recovery, data backup, and computer partitions and drives. In her spare time, she likes listening to music and playing games.
User Comments :