Looking for a detailed laptop repair guide? You’ve come to the right place. This MiniTool tutorial outlines the most common laptop issues and corresponding solutions. The problems cover boot failures, performance issues, overheating, Internet problems, system errors, and so on.
Laptops have become an essential tool in our daily lives, whether for work, study, or entertainment. While they are powerful, they can run into problems over time like any other electronic device.
These problems vary widely, from slower browser response or minor software crashes to serious boot failures or performance slowdowns.
The good news is that most common laptop issues can be fixed easily without visiting a repair shop.
This guide covers the most frequent laptop problems you may encounter, including boot errors, performance issues, Internet connectivity problems, software errors, and so on.
Read on to learn how to handle the majority of laptop repair situations on your own.
#1. Laptop Won’t Turn On
Laptop not turning on is one of the most common issues. It may occur due to system glitches, corrupted files, improper shutdowns, or other problems.
If your laptop won’t boot into the desktop, the first step is to rescue your important files to avoid permanent data loss.
After that, you can try solutions such as running Startup Repair or performing a System Restore to repair the computer. Keep reading to get detailed instructions.
Before Repair: Rescue Your Files
To recover files from an unbootable laptop, you can try two methods:
- Boot into Safe Mode and transfer your files to an external hard drive or cloud storage.
- If Safe Mode does not work, create a bootable media and use it to rescue your files.
Now, try these methods in order.
Case 1. Boot Into Safe Mode and Transfer Files
How to boot in Safe Mode?
Step 1. Boot Into Windows Recovery Environment (WinRE):
- Hold the Power button for about 10 seconds to force the computer to shut down.
- Press the Power button again to start it. During startup, hold the Power button for 10 seconds to turn it off.
- Repeat this process 3 times, and the system should automatically boot into WinRE.
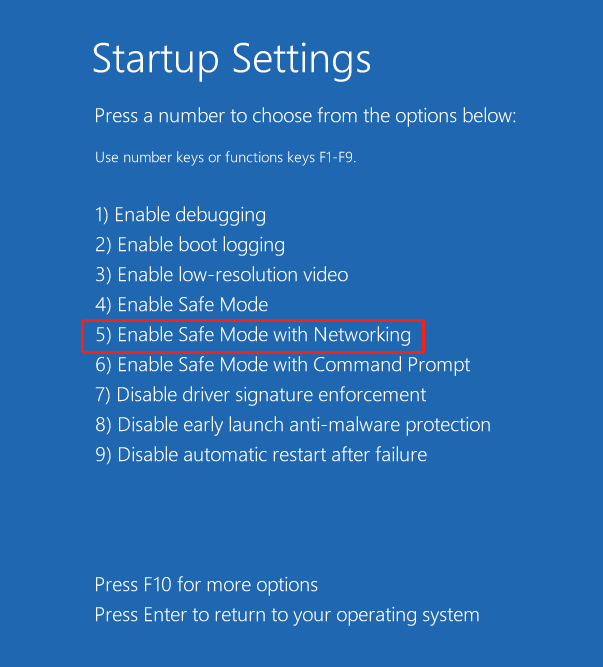
Step 2. Click Troubleshoot > Advanced options > Startup Settings > Restart.
Step 3. Press 5 or F5 on your keyboard to enter Safe Mode with networking.
Step 4. Now, connect an external drive to your computer and transfer your laptop files to that drive by copying and pasting them.
Alternatively, you can sign in to your OneDrive or Google Drive account via a web browser and upload important files to the cloud.
If you are unable to enter Safe Mode, use the next recovery solution.
Case 2. Use MiniTool Power Data Recovery
MiniTool Power Data Recovery is a professional data recovery tool for Windows 11/10/8/8.1. With the Bootable Media Builder feature in this tool, you can create a bootable recovery drive to start your computer, scan the disk, and recover lost files.
The software supports recovering a wide range of file types, including documents, photos, videos, audio, emails, archives, and more.
MiniTool Power Data Recovery FreeClick to Download100%Clean & Safe
Now, follow the steps below to create the bootable drive and recover files.
Step 1. Connect the USB drive to the functioning computer.
Step 2. Launch the MiniTool file restore tool. On the main interface, click the Disc icon, and choose WinPE-based media with MiniTool plug-in.
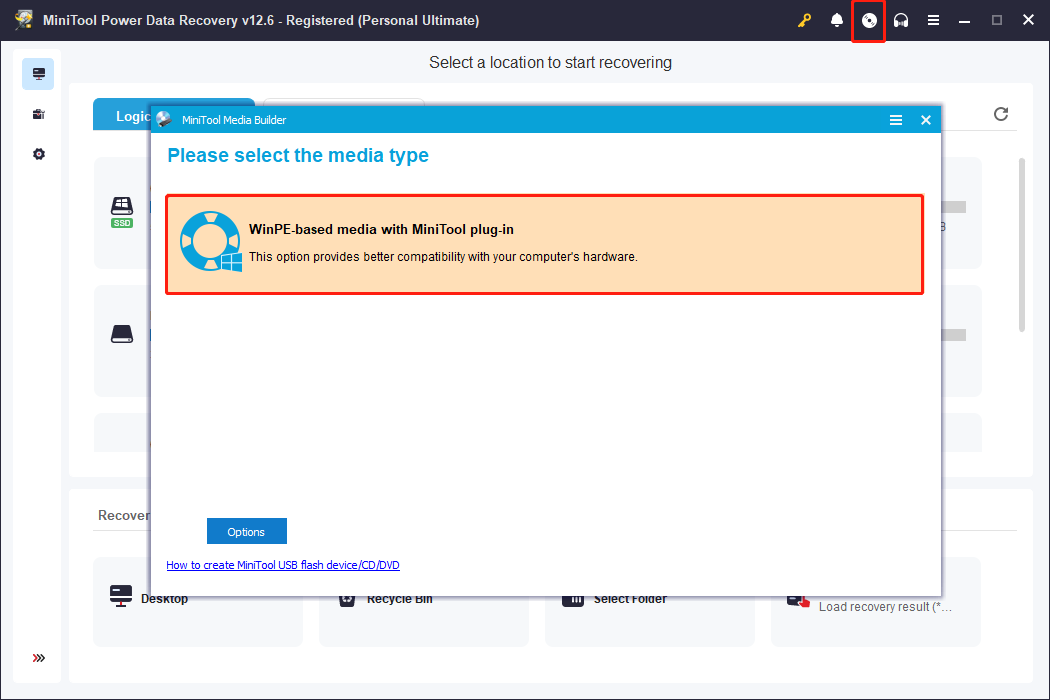
Step 3. Follow the on-screen instructions to create a bootable USB drive.
Step 4. Insert the USB drive into the problematic laptop. Then, restart the laptop, and during startup, press F2, F12, Esc, or Del to enter BIOS.
Step 5. Go to the Boot tab and change the boot order to boot from the burned USB drive. Then follow the prompts on your screen to launch MiniTool Power Data Recovery.
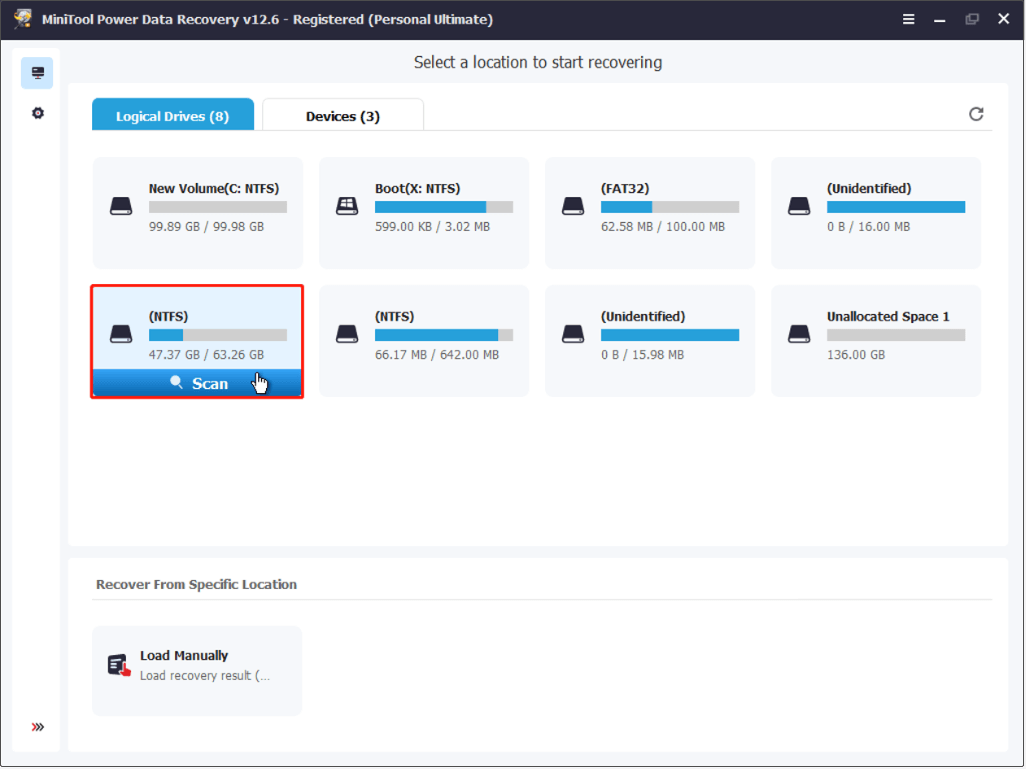
Step 6. On the home page of the software, select the drive from which you need to recover files and click Scan. Usually, only files on the system drive may be affected, so I choose to scan the system drive.
Step 7. After scanning, browse your files under Path or Type. Path lists files by original folder structure, while Type organizes files according to file type and data format.
Moreover, the Filter and Search features can help you locate wanted files faster.
- Filter can help filter files by file type, modification date, file size, and file category.
- Search allows you to search for a specific file. Simply type the keywords of the file name in the search box and press Enter.
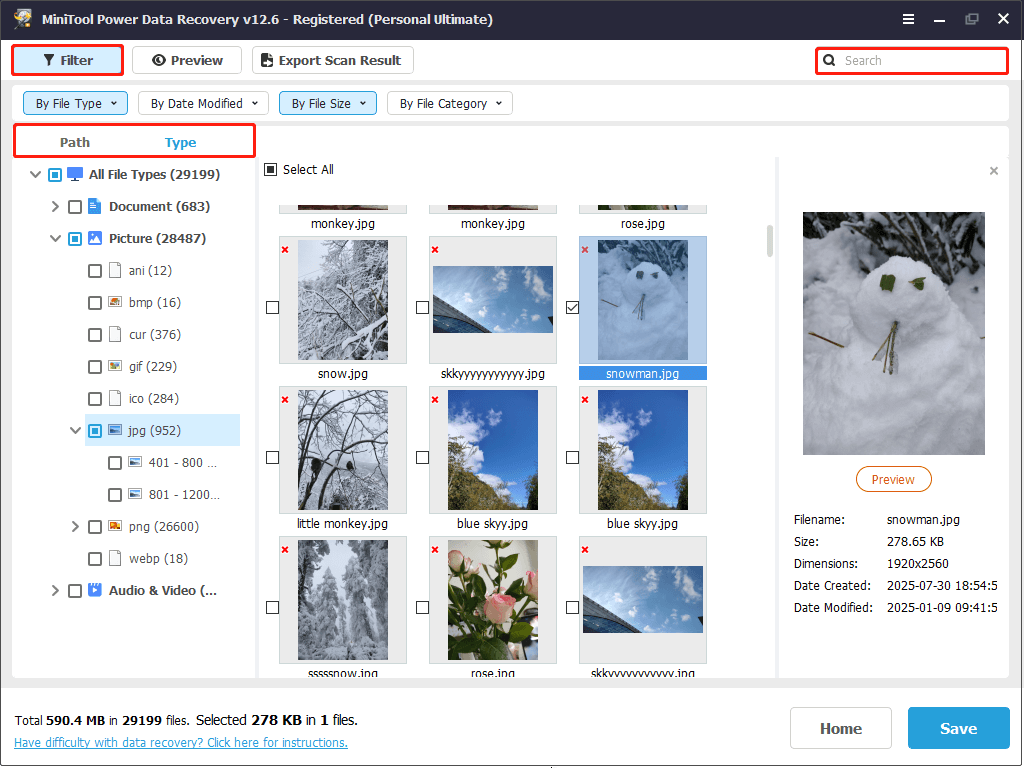
Besides, you can double-click each file to preview its content before recovery.
Step 8. Tick all the wanted files and click Save. In the new window, choose an external drive and click OK to store the ticked files.

Once your files are rescued, you can now learn how to fix a laptop that won’t turn on. Simply follow the solutions below.
Fix 1. Do a Hard Reset
Sometimes, a laptop won’t turn on due to only minor system glitches. In such cases, performing a hard reset can fix the issue by forcing a complete shutdown and draining residual power.
Here is how to do a hard reset.
Step 1. Shut down your laptop, then unplug the AC adapter and all other external devices from it.
Step 2. Press and hold the Power button for 15 ~ 20 seconds to drain the residual power.
Step 3. Reconnect the AC adapter, then turn on your computer and check if it boots normally.
If the computer still cannot boot, try the next method.
Fix 2. Run Startup Repair
Startup Repair is a built-in utility used to scan your system and repair common startup issues. When your laptop runs into boot failures, run the repair tool.
Step 1. Enter WinRE.
Step 2. Click Troubleshoot > Advanced options > Startup Repair.
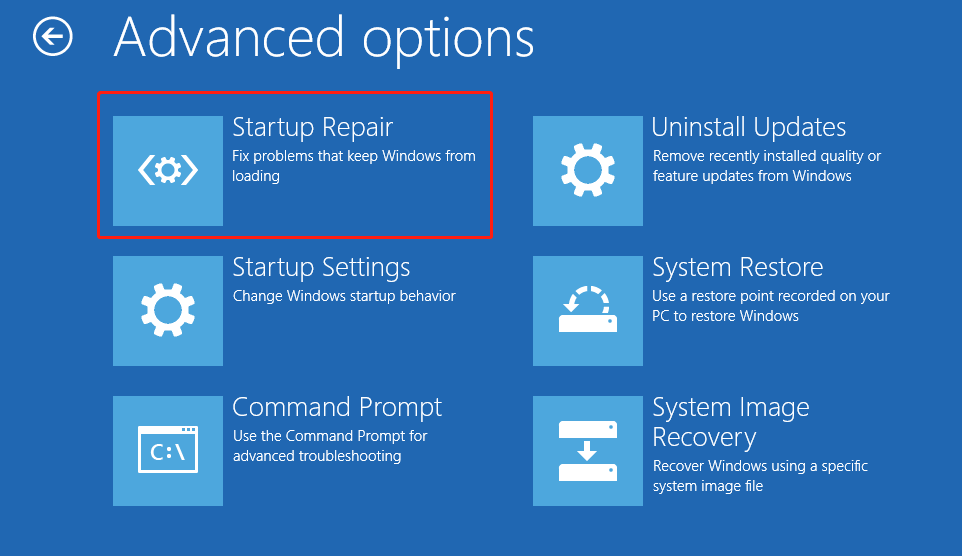
Startup Repair will start to diagnose and repair damaged system files, corrupted boot configuration data, and registry errors.
When it is done, your system should be back to normal. If not, try the next solution.
Fix 3. Do a System Restore
System Restore is a feature that saves snapshots of your system’s configuration as restore points. When your system encounters issues, you can use it to revert your laptop to a previous working state.
How to perform a System Restore? Follow the steps below.
Step 1. Enter WinRE.
Step 2. Select Troubleshoot > Advanced options > System Restore.

Step 3. In the Restore system files and settings window, click Next.
Step 4. Choose a restore point and hit Next > Finish.
What if there is no available system restore point? Then you may consider the last resort.
Fix 4. Perform a Fresh Installation
Reinstalling Windows from scratch removes all files on the system drive and can help resolve deep system issues. So, if none of the above solutions help, consider this option.
Step 1. Create a Windows installation media.
Step 2. Connect the installation media to your non-functional laptop. Then enter the BIOS and boot from the USB drive.
Step 3. Follow the Windows Setup wizards to complete the reinstallation process.
This is all about how to repair a laptop that won’t start normally.
#2. Laptop Running Slow and Freezing
Laptop slowness is another common issue that many users face. It can be caused by various factors, such as insufficient disk space, too many startup programs, or insufficient RAM.
Faced with a slow laptop, try freeing up storage space, disabling unnecessary startup programs, or upgrading the RAM.
Fix 1. Free Up Disk Space
To improve your laptop’s performance, ensure there is sufficient free space on the C drive.
To free up space, you can run Disk Cleanup or manually delete unnecessary files. Or, you can store some large files in an external hard drive instead of the laptop’s internal disk.
If your C drive is not full, your laptop may run slow because too many apps launch at startup.
Fix 2. Disable Startup Programs
If many programs automatically start when you boot up your laptop, they will consume system resources and slow down performance.
To speed up the laptop, disable unnecessary startup programs through Task Manager.
Step 1. Right-click Start and choose Task Manager.
Step 2. Go to the Startup tab, select the app you want to disable, and click Disable.
Step 3. Repeat the process to disable all unnecessary startup items, then check if your computer’s performance has improved. If not, the issue may be related to your RAM.
Fix 3. Upgrade Your RAM
When your system runs out of available RAM, it may become slow, especially when you use heavy applications. Adding more RAM can improve overall performance and reduce freezing.
Search online for your laptop model to check if it supports RAM upgrades. If yes, purchase a compatible RAM module and replace the existing one or add it to an available slot.
If you are not familiar with this process, consider seeking professional help.
#3. Laptop Overheating
Many Reddit posts complain about laptops overheating, especially when playing games or processing videos. This can be caused by blocked fans, dust buildup, or improper power and system settings.
To fix it, clean the fans, adjust power settings, or disable Turbo Boost.
Fix 1. Clean the Vents and Fans
Dust and debris can block your laptop’s vents and fans, causing the computer to overheat. To prevent this, regularly clean them using compressed air or a soft brush.
In addition, avoid using your laptop on your bed or other soft surfaces that can block airflow and cause overheating.
After ensuring proper airflow, it is also important to use appropriate power settings.
Fix 2. Adjust Power Settings
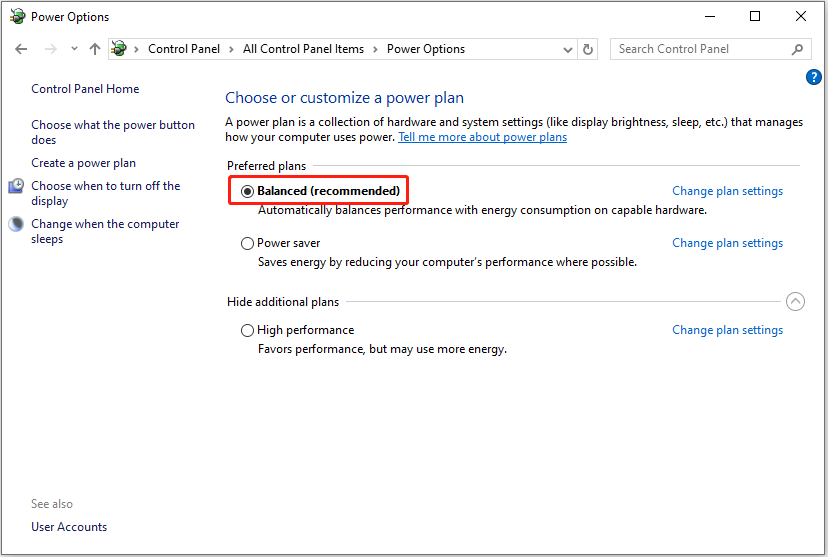
Using the High-performance power plan consumes a lot of energy and may cause overheating. In this case, you can switch to the Power-saving or Balanced power plan to reduce heat output.
Here is how to do that.
Step 1. Open the Control Panel.
Step 2. View the listed items by Large icons or Small icons, and then click Power Options.
Step 3. Tick Balanced or Power saver from the options.
If the overheating issue persists, continue with the following method.
Fix 3. Turn off Turbo Boost
Turbo Boost allows your processor to run at higher speeds, but it generates extra heat. Disabling Turbo Boost can help lower temperatures. Here is how to disable it.
Step 1. Type Choose a power plan in Windows search and click the best match option to open it.
Step 2. Click Change plan settings next to the selected power plan.
Step 3. Click Change advanced power settings.
Step 4. Expand Processor power management > Processor performance boost mode, and then choose the Disabled option.
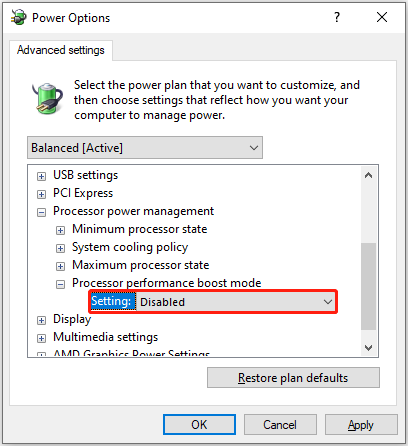
Step 5. Click Apply > OK to apply it.
What if the Processor performance boost mode does not appear? Change the registry values.
Step 1. Press Windows + R, type regedit, and press Enter.
Step 2. Go to this location:
Computer\HKEY_LOCAL_MACHINE\SYSTEM\CurrentControlSet\Control\Power\PowerSettings\54533251-82be-4824-96c1-47b60b740d00\be337238-0d82-4146-a960-4f3749d470c7
Step 3. In the right panel, double-click Attributes and change its value data to 0.
Step 4. Save the change, and the Processor performance boost mode option should appear.

#4. Laptop Won’t Connect to the Internet
Network issues can be caused by improper computer settings, outdated drivers, or other reasons.
If your laptop can’t access the Internet, start by restarting the computer and Wi-Fi router to resolve temporary glitches. If it does not help, try the fixes below.
Fix 1. Turn off Airplane Mode
If Airplane Mode is enabled, your laptop cannot connect to Wi-Fi or mobile networks. So, make sure the Airplane Mode is disabled.
Click the Network icon in the taskbar, then toggle Airplane Mode to Off.
Some older laptops have a physical Airplane Mode button, often near the ports. If your laptop has one, switch it to turn off Airplane Mode.
If your computer still cannot access the Internet after turning off Airplane Mode, try the following fixes.
Fix 2. Run Network Troubleshooters
Windows offers built-in network troubleshooters to diagnose and fix common network connection issues. When your laptop cannot connect to Internet, run these troubleshooters.
Step 1. Press Windows + I to open Settings.
Step 2. Click Update & Security > Troubleshoot > Additional troubleshooters.
Step 3. Expand Internet Connections and click Run the troubleshooter to find and fix Internet issues.
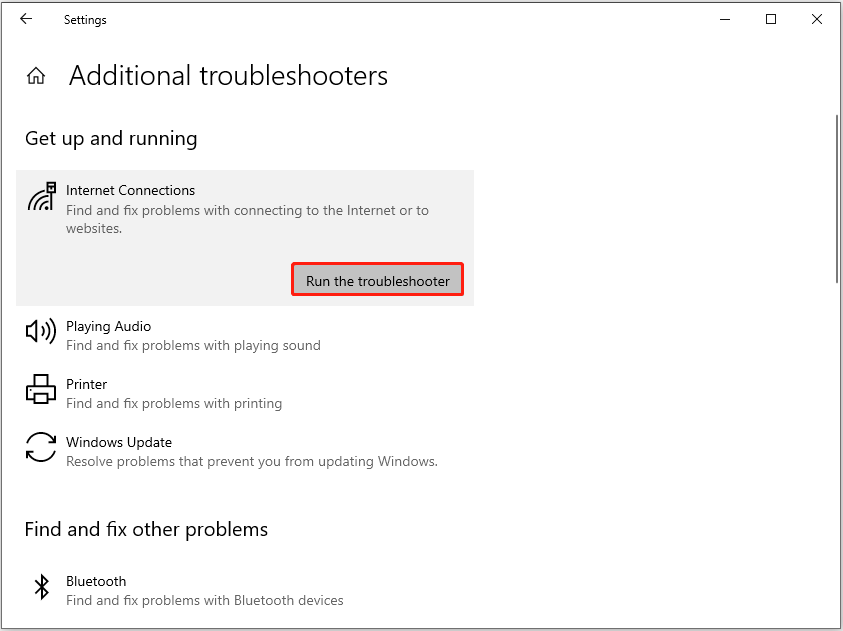
Step 4. If this troubleshooter does not fix the problem, scroll down the page and run the Network Adapter troubleshooter to repair adapter issues.
After the process finishes, check if you can access the Internet. If not, proceed with the next fixes.
Fix 3. Reinstall Network Drivers
Corrupted or outdated network drivers can lead to connectivity issues or slow network performance. Under this circumstance, reinstalling the driver can fix the problem.
Here is how to reinstall network drivers.
Step 1. Right-click Start and choose Device Manager.
Step 2. Expand Network adapters.
Step 3. Right-click your network adapter and choose Uninstall device. Then click Uninstall to confirm.
Step 4. Restart your computer, and Windows will reinstall the driver automatically.
If the problem is not related to the driver, try the final solution.
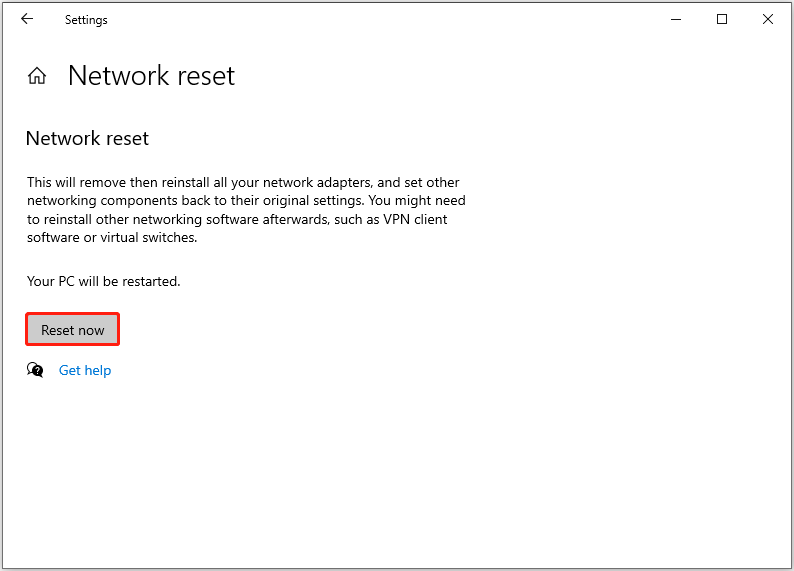
Fix 4. Do a Network Reset
A network reset removes all installed network adapters and their settings, and then reinstalls them to their default configurations. It is considered an effective solution to fix persistent connection issues.
Follow the steps below to reset the network.
Step 1. Open Settings and click Network & Internet.
Step 2. In the right panel, click Network reset.
Step 3. Carefully read the on-screen prompts, and then click Reset now.
Once the reset process is completed, you should be able to connect to the network again.

#5. Keyboard or Touchpad Not Working
A keyboard or touchpad becoming unresponsive can also be very frustrating. This issue may occur due to debris blocking the keys, the touchpad being disabled, or driver problems.
To fix it, start by cleaning the keyboard and touchpad. Then ensure that the touchpad is enabled and the driver is up to date.
Fix 1. Clean the Keyboard and Touchpad
To clean your keyboard and touchpad, turn off the laptop first. Then, turn it upside down and gently shake it to remove any loose debris. Finally, use compressed air to clean dust from the keys and touchpad.
After cleaning, try typing and using the touchpad. If the touchpad is still not working as it should, check if it is activated.
Fix 2. Enable the Touchpad
You can easily activate your touchpad through system settings.
Step 1. Open Settings and click Devices.
Step 2. Go to the Touchpad tab and switch the Touchpad button to On.
Fix 3. Update the Keyboard Driver
The keyboard driver may malfunction and cause the keyboard to stop working, particularly after a problematic Windows update. To resolve this, update the keyboard driver.
Step 1. Use the touchpad to navigate to Ease of Access > Keyboard. Then toggle the switch under Use the On-screen Keyboard to On.
Step 2. Right-click Start and select Device Manager.
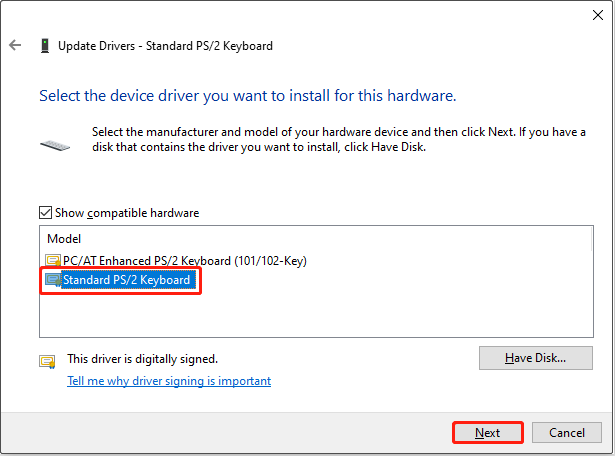
Step 3. Expand Keyboards, right-click the target keyboard, and choose Update driver.
Step 4. Select Browse my computer for drivers.
Step 5. Choose Let me pick from a list of available drivers on my computer.
Step 6. Select Standard PS/2 Keyboard and click Next. Now you can test if the keyboard works again.
#6. System Errors and Software Problems
Besides the issues above, you may face other laptop problems, often related to the operating system or software. This section provides several possible solutions for those cases.
Fix 1. Run DISM and SFC
DISM and SFC are Windows command-line tools that can scan and repair corrupted system files. Running them can fix many system-related issues that cause your laptop to malfunction.
Here is how to execute DIM and SFC commands.
Step 1. Type cmd in the Windows search box, right-click Command Prompt, and select Run as administrator.
Step 2. In the Command Prompt window, type DISM.exe /Online /Cleanup-image /Restorehealth and press Enter.
Step 3. Once DISM finishes, type sfc /scannow and press Enter to execute the SFC scan.
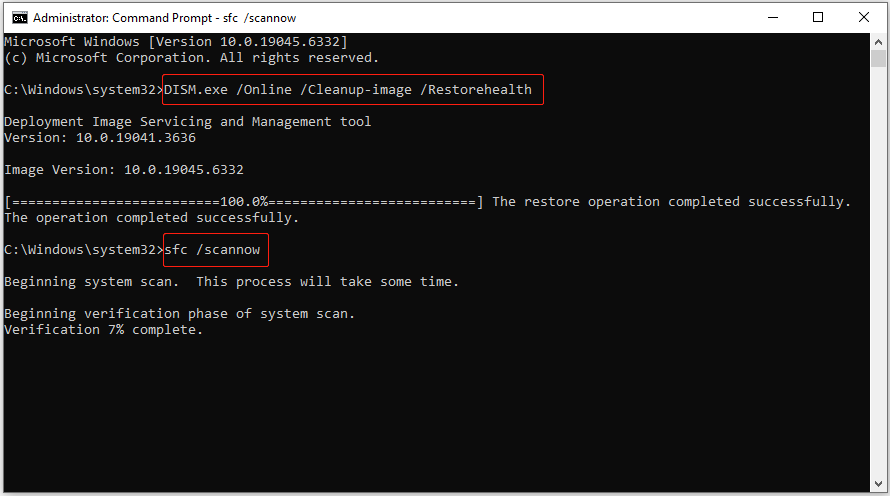
After the scan completes, you will see the results. Several different messages may appear. Refer to the official DISM and SFC guide to understand what each message means and what actions you should take.
Fix 2. Scan for Viruses
Virus infection is one of the most common problems on laptops and can be the root cause of many errors. When it comes to computer repair, scanning for and removing viruses is an essential step.
Here is how to use Windows Defender to scan your laptop for viruses.
Step 1. Open Settings and click Update & Security.
Step 2. Go to the Windows Security tab, and click Virus & threat protection in the right panel.
Step 3. Click Scan options, select a scan method, and click Scan now.
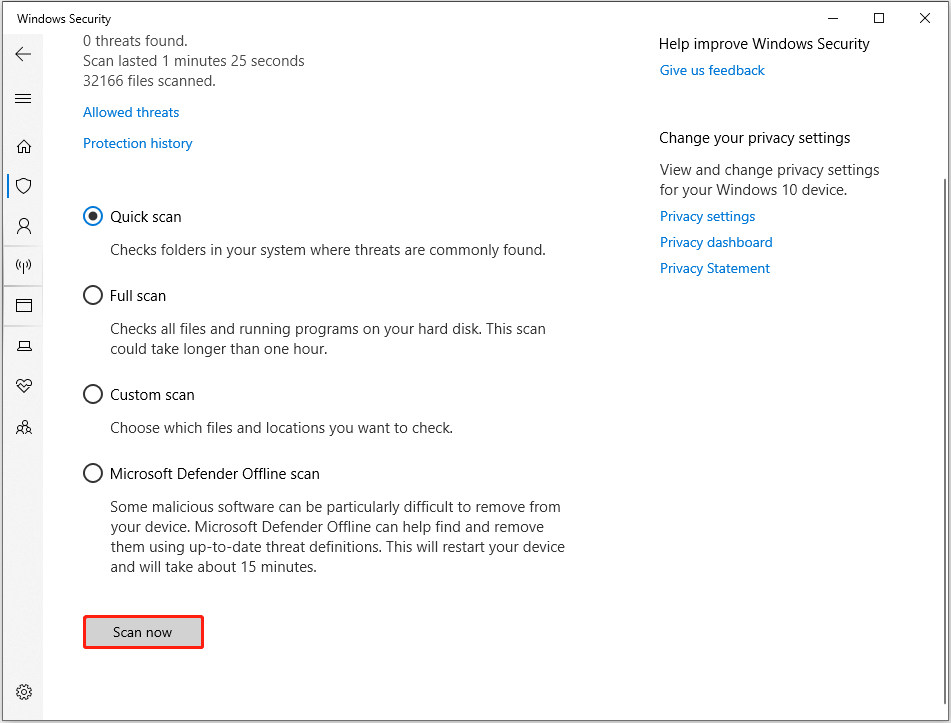
Once the scan is done, you will be notified if any viruses or suspicious files are found. If yes, you may need to quarantine or delete them manually. Simply follow the on-screen instructions.
Fix 3. Check for Windows Updates
Keeping the system up to date is essential for maintaining stability and fixing known bugs. Many problems, such as driver errors or system glitches, can be resolved by installing the latest updates.
How to update Windows? Here are the steps.
Step 1. Open Settings and choose Update & Security.
Step 2. In the Windows Update section, click Check for updates. If there is any available update, download it.
Step 3. Restart the computer to install the update.
Fix 4. Run CHKDSK
Sometimes software or system errors are caused by hard disk issues. Running CHKDSK can help detect and repair file system problems and bad sectors on the disk.
Refer to the steps below to run CHKDSK.
Step 1. Run Command Prompt as an administrator.
Step 2. Input chkdsk [drive letter]: /f /r /x and press Enter.
- /f: Finds and fixes file system errors on the disk.
- /r: Locates bad sectors and recovers readable information.
- /x: Forces the drive to dismount first, and then fix errors.
Replace [drive letter] with the letter of the drive that may be experiencing issues. For example, to repair the H drive, input chkdsk H: /f /r /x and press Enter.
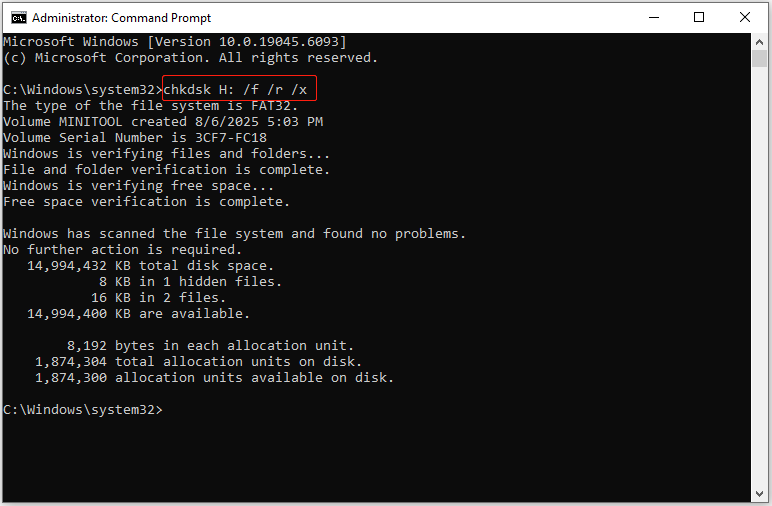
After the scan finishes, review the messages to see if any errors were found and fixed. Then restart your computer and check whether the laptop problem has gone.
Bottom Line
This guide is suitable for HP laptop repair, as well as Dell, ASUS, and other laptop brands, covering the most common issues and their corresponding solutions.
Check the section that matches your case and follow the outlined methods to fix your computer. If all the DIY methods do not work, search on Google for “laptop repair near me” to find a local repair center. Then you can contact the center or visit it to get professional repair assistance.
For any issues while using MiniTool Power Data Recovery, please contact the support team at [email protected].
About The Author

Position: Columnist
Shirley holds a bachelor’s degree in English and has been an editor at the MiniTool Team for many years. She specializes in IT-related content, with a focus on data recovery, file backup, disk management, and other technical topics. She is committed to delivering clear, accurate, and practical solutions to help users resolve common computer issues.
User Comments :