This post teaches you how to open Terminal on Mac, namely, open the Mac command prompt app, on your Mac computer. You’ll also learn some basic Mac Terminal commands and functions and how to recover deleted/lost data on Mac in this post. MiniTool software provides professional data recovery tools, disk partition manager, video editor, video converter, and more.
Like Windows Command Prompt utility, macOS also has a built-in command prompt tool named Terminal that lets you access some useful commands. If you want to open Terminal on Mac, so as to use Mac Terminal commands to do some operations in your macOS, you can learn how to open it with one of the 5 ways below.
This tutorial not only provides 5 ways to allow you to open command prompt utility on Mac, but also introduces basic Mac Terminal commands and how to use Terminal on Mac. You can also learn how to recover data on Mac.
How to Open Terminal on Mac – 5 Ways
- Open Terminal on Mac via Spotlight Search
- How to Open Terminal on Mac with Finder
- Use Launchpad to Open Mac Terminal
- Launch Terminal Command Prompt on macOS with Siri
- Get to Command Line on Mac with Shortcut
How to Open Terminal (Command Prompt) on Mac – 5 Ways
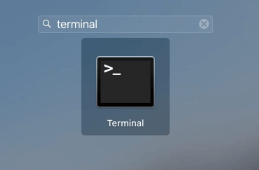
Way 1. Open Terminal on Mac via Spotlight Search
Step 1. You can click the magnifying glass Spotlight icon at the upper-right corner of Mac screen. Alternatively, you can also press Command + Space keyboard shortcut to open Spotlight.
Step 2. Type terminal in the search box, and double-click Terminal application under Top Hit in the result list to open command prompt on Mac.


Way 2. How to Open Terminal on Mac with Finder
Step 1. Open Finder app on your Mac computer by clicking the smiling face at the bottom of Mac screen.
Step 2. In Finder app, you can click Applications in the left column. In the right window, you can click Utilities folder, then scroll down to find and double-click Terminal app to access Mac command prompt.
Way 3. Use Launchpad to Open Mac Terminal
Step 1. Click the sliver rocket-like icon in the Dock to open Launchpad on your Mac. Alternatively, you may also press Fn + F4 keyboard shortcut to open Launchpad.
Step 2. Find and click Other folder, and double-click Terminal to launch CMD on Mac. Alternatively, you can also type terminal in the search box at the top, and click Terminal app to open it.
Way 4. Launch Terminal Command Prompt on macOS with Siri
You can click the Siri button on the menu bar to open Siri. Then you can speak to Siri and say “open terminal” to it. The AI Siri app will open command prompt on Mac for you.
Way 5. Get to Command Line on Mac with Shortcut
Step 1. If you need to frequently access Terminal application on Mac, you can create a shortcut for Terminal app to quickly access it every time.
Right-click Terminal icon, or press Control button when clicking Terminal icon.
Step 2. Select Options, and click Keep in Dock option. Then the Terminal icon will be always in the Dock. You can quickly launch it whenever you want by clicking Mac Terminal shortcut.
Basic Mac Terminal Commands and Functions
1. Change directory in Terminal command line
- cd – home directory
- cd ~ – home directory
- cd <folder> – change the directory to the target folder, e.g. cd Documents
- cd/ – go to root of the drive
- cd – – go to the previous directory or folder you last browsed
- . – move up to the parent directory
- ./.. – move up two levels of directory
2. Display directory contents in Terminal
- Is – the command for listing the name of files and subdirectories in a directory. For example, you can type cd Documents command, press Return, and then type Is command and press Return. You can see all files in your Documents folder.
- Is –S – display the files by size
- Is –It – list files by modification time (recent ranks first)
- Is –la – list detailed directory contents incl. hidden files in it

3. Manage files and directories
- open <file name> – open a file
- mkdir <folder name> – create a new folder
- mkdir “<folder name>” – create a new folder with a space in the folder name
- rmdir <folder name> – delete an empty folder
- rm –R <folder name> – delete a folder and contents in it
- rm <file name> – permanently delete a file
- rm –f <file name> – force delete a file
- rm <file1> <file2> – delete multiple files without any confirmation
- cp <file name> <folder name> – copy a file to the folder
You can use Mac Terminal commands to easily remove unnecessary files and folder to free up space on your Mac. Alternatively, you can also use free MiniTool Partition Manager to analyze and release free space with its built-in Space Analyzer feature.
4. Show hidden files in Finder
- defaults write com.apple.finder AppleShowAllFiles TRUE
If you want to hide the files again, you can replace “TURE” with “False” in the command above.
5. Change default file type for screenshots on Mac
- defaults write com.apple.screencapture type file-extension
For instance, you can type defaults write com.apple.screencapture type PNG, and press Return to change the default file type of Mac screenshots to PNG.
6. View and clear Terminal commands history
- history – check Terminal command history
- history – display previously typed commands with the last n items
- history –c – delete command lines history in Mac Terminal
- Ctrl + R – search through previously used command lines
7. Common Mac Terminal shortcuts
- Ctrl + A/E – go to the beginning/end of the line you’re currently typing on
- Ctrl + U/K – clear the line before/after the cursor
- Ctrl + W – delete the word before the cursor
- Ctrl + C – kill whatever you’re running
- Option + →/← – move cursor one word forward/backward
- Ctrl + F/B – move cursor one character forward/backward
- Ctrl + _ – undo the last command
- Ctrl + L – clear the screen
For more useful Mac Terminal commands, you can check: The Mac Terminal Commands Sheet.
8. How to recover deleted files with Terminal command
Step 1. Follow one of the 5 ways above to open Terminal on Mac.
Step 2. Type the following command lines to recover deleted files from Trash. Remember to hit Return key after typing each command.
- cd .Trash
- Is
- mv filename ../ (replace filename with the exact file name of the file you deleted)
However, Mac Terminal command-line app cannot restore files if you emptied the Trash on Mac.
If you’ve emptied the Trash, then you can use third-party professional data recovery software for Mac to recover permanently deleted files from Mac computer.
How to Recover Deleted/Lost Data on Mac – Another Option
Stellar Data Recovery for Mac, one of the best Mac data recovery software, is able to recover permanently deleted files, photos, videos, audio, email, etc. from all kinds of Mac computers like MacBook Pro/Air, iMac, etc.
In addition, this top data recovery tool for Mac also allows you to recover any deleted/lost data from external HDD, SSD, SD card, USB, and more. Formatted/corrupt/lost/encrypted drive data recovery is also supported.
If your Mac computer crashed, you can also use this program to create a bootable recovery USB to recover data from crashed, non-booting Mac computer.
The big merit of Stellar Data Recovery for Mac is it also contains built-in video repair and photo repair modules.
You can go to MiniTool download center and download Stellar Data Recovery for Mac on your Mac computer, and follow the steps below to recover deleted/lost files on Mac.
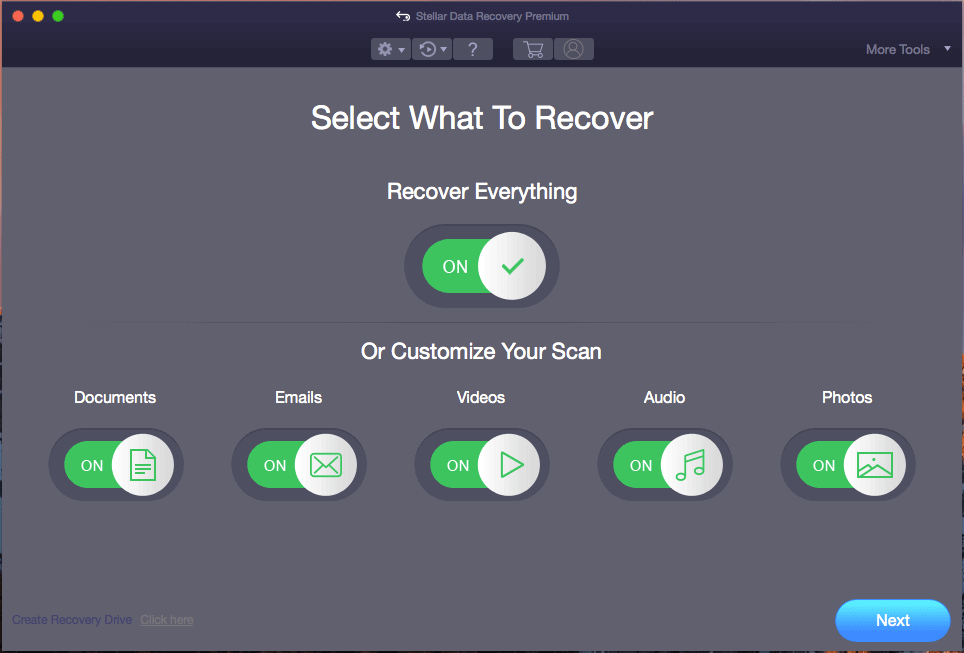
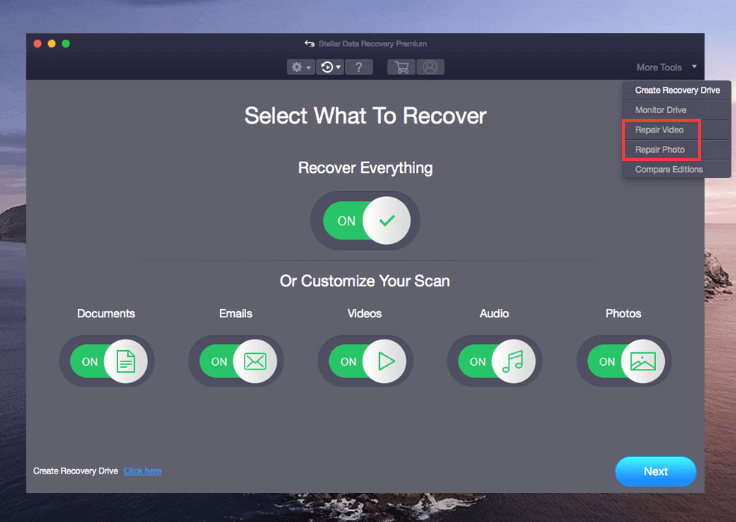
Step 1. Select file type to recover
After you download and install this 100% Mac data recovery software on your Mac. Launch it.
On the main UI, you can select which file type you want to scan and recover. After chosen, you can click Next.
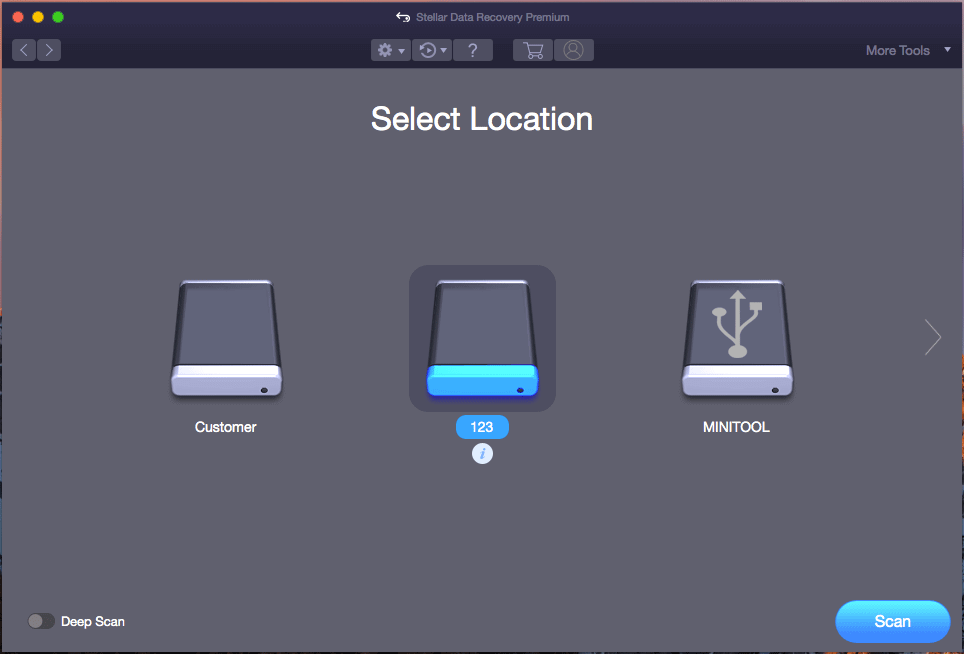
Step 2. Select location to scan
Next you can choose the target volume or drive, and click Scan button to start scanning.
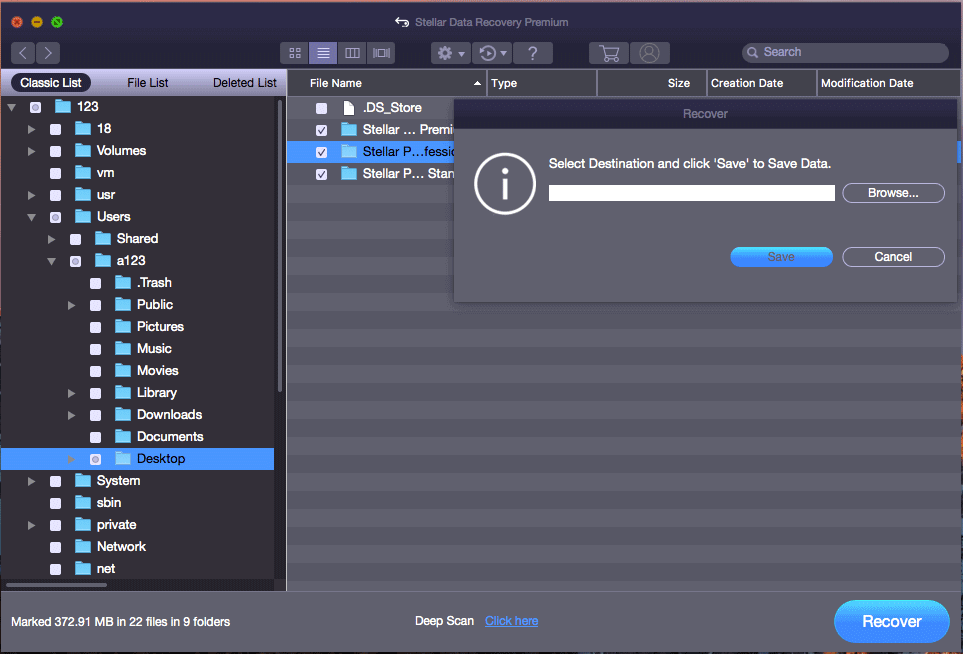
Step 3. Preview and recover files
When the scan finishes, you can check the scan result, find wanted files and click Recover button. Choose a new destination path and click Save button to store the recovered files.
Step 4. Optionally repair files
If you find some recovered files are corrupt, you can further use this Mac data recovery tool to repair corrupt files after recovery. It support repairing corrupt photos and videos.
Stellar Data Recovery for Mac provides three editions: Professional, Premium, and Technician. To check their differences and pick your preferred edition, you can check: Stellar Data Recovery for Mac Edition Comparison page.
If you are a Windows user, you should go to a professional free data recovery software for Windows to help you restore deleted/lost data.
Conclusion
This post introduces how to open Terminal on Mac in 5 ways, gives a list of useful Terminal commands, and explains how to recover deleted/lost files on Mac.
If you have any questions about how to recover data on Windows or Mac, please contact [email protected].
Open Terminal Mac FAQ
Also read: Learn about the common causes of hard drive data loss and the steps you can take to recover data from hard drive.
User Comments :