File loss on Windows can occur for many reasons, such as accidental deletion, disk corruption, or system malfunction.
The Command Prompt offers multiple powerful commands that can help you recover missing or lost data.
If you are unfamiliar with the Command Prompt, read on to find a clear explanation of its functionality.
An Overview of Command Prompt
Command Prompt (CMD) is a traditional command-line tool built into Windows. It allows you to interact directly with the system through plain text commands.
This tool is used for file management, system diagnostics, network configuration, disk repair, data recovery, and automated scripting.
Compared to a graphical interface, CMD is closer to the system’s underlying layer. It can be useful when the interface fails to start normally, or when precise control or advanced tasks are required.
Therefore, it remains an important tool for system administrators, technicians, and advanced users.
When the graphical interface is inaccessible or files are permanently deleted, CMD provides a more powerful alternative.
The following section provides several effective methods to help you recover files using CMD.
How to Recover Files Using CMD
The Command Prompt allows you to scan and recover files from your disk with more direct and higher-privilege access after they have been lost.
Use the command line to check disk status, view directory structure, and confirm whether files have been hidden, corrupted, or accidentally deleted. Now, start to recover deleted files using Command Prompt.
Approach 1: Run the Attrib Command to Show Hidden Files
Hidden files can give the illusion that they’re missing, but that’s not the case. Therefore, the first thing to do is check if the files are hidden.
Running the attrib command can display files hidden by the system, malware, or incorrect file attributes. This makes them visible again in File Explorer.
Here is how to show hidden files using the attrib command.
Step 1: Type cmd in the Windows search bar, right-click Command Prompt, and choose Run as administrator.
When prompted by UAC, click Yes to continue.
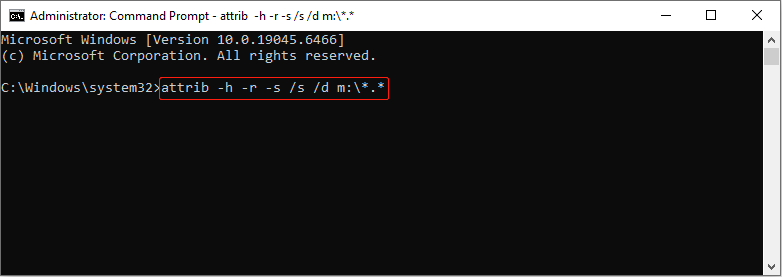
Step 2: Type attrib -h -r -s /s /d m:\*.* and press Enter. Replace m with the drive letter of your drive.
- -h: Remove the Hidden attribute.
- -r: Remove the Read-only attribute.
- -s: Remove the System attribute.
- /s: Apply the operation to matching files in the current directory and all subdirectories.
- /d: Allows the attrib command to modify directory attributes. Without this switch, only file attributes are affected.
When the process finishes, navigate to the M drive to check if the files appear. If they are still missing, try the following solutions to recover them.
Approach 2: Recover Files from the Recycle Bin Using CMD
If your Recycle Bin is inaccessible, CMD can be used as an alternative method to open it and recover files from it.
Step 1: Open Command Prompt as an administrator.
Step 2: Type Start Shell:RecycleBinFolder and press Enter. The Recycle Bin folder will open.
Step 3: Find and select the target files, right-click them, and select Restore.
The files will be restored to their original location. If you have emptied the Recycle Bin, then attempt the following methods.
Approach 3: Execute the CHKDSK Command
The CHKDSK command scans the disk’s file system structure. It repairs directory errors, corrupted index entries, and abnormal file records caused by system crashes or file system corruption.
When these structures are repaired, files that were previously invisible or inaccessible may become readable again. Here is how to run CHKDSK.
Step 1: Open Command Prompt with administrative privileges.
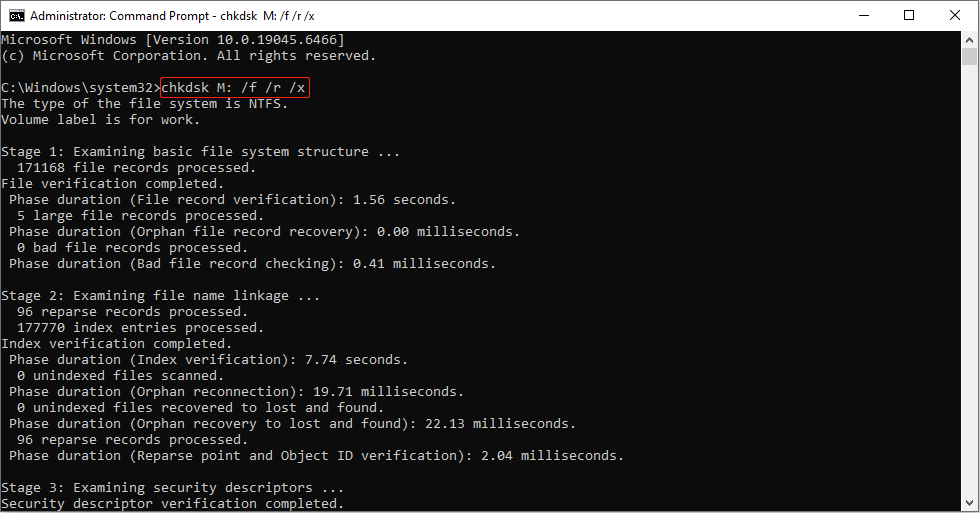
Step 2: Type chkdsk M: /f /r /x and press Enter. M should be replaced by the drive letter of your drive.
- /f: Fix errors on the disk.
- /r: Locate bad sectors and recover readable information. /r includes all the functions of /f, plus additional analysis of physical disk errors.
- /x: If necessary, force the volume to be unmounted first. /x also includes the functionality of /f.
When the process ends, check your files. If it doesn’t work, try Windows File Recovery.
Approach 4: Use the Windows File Recovery Tool
Windows File Recovery is a command-line file recovery tool officially released by Microsoft. It can directly scan the disk for deleted, lost, or corrupted file records.
The tool offers both quick and deep scan modes, along with flexible file type filters.
It can find recoverable data even when the Recycle Bin is emptied, the file system is corrupted, or ordinary methods fail.
Step 1: Download and install Windows File Recovery on your computer.
Step 2: Type Windows File Recovery in the Windows search bar and press Enter.
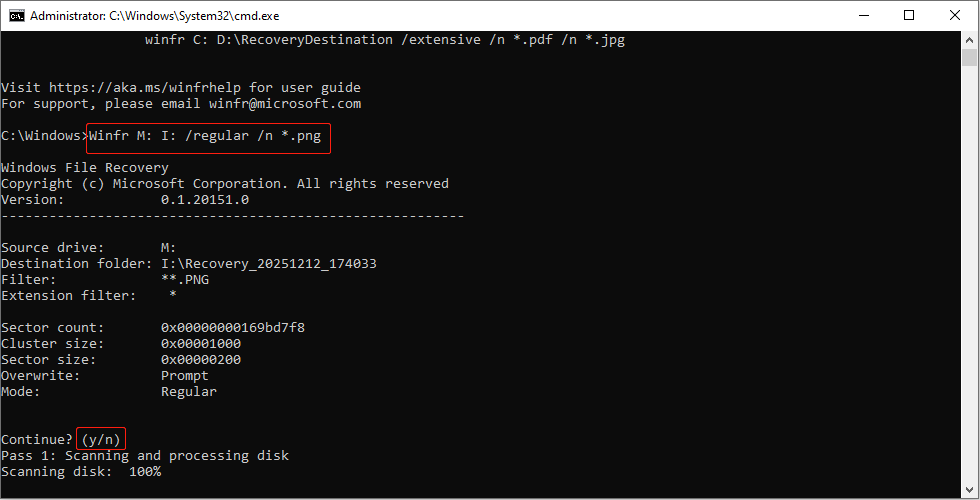
Step 3: In the command line window, type winfr <source drive>: <target drive>: /recovery-mode /n *.<filter> and press Enter.
- winfr: Start Windows File Recovery.
- <source drive>: Represent the drive where the deleted file was located.
- <target drive>: Specify the drive where the recovered file will be saved (must be different from the source drive).
- /recovery-mode: Use the regular mode for recently deleted files on NTFS drives. Use the extensive mode for all file systems.
- /n *.<filter>: Customize the search terms, including filename, file path, file type, or wildcards.
For example, to recover PNG files from M: to I: using the regular mode, type Winfr M: I: /regular /n *.png and press Enter. When prompted to continue, type Y to recover files.
When the recovery process ends, open the I drive to check the recovered files.
See Also: How to Recover Deleted Partitions Using CMD?
CMD Alternative: MiniTool Power Data Recovery
If the above commands fail, try MiniTool Power Data Recovery. It offers a fully graphical user interface, allowing you to complete scanning and recovery without entering any commands.
If you are not familiar with commands and parameters, then this tool is your best choice. Knowing its features helps you use it more efficiently.
MiniTool can extract data from formatted disks, RAW partitions, damaged partitions, and even lost partitions. It covers many complex scenarios that command-line tools cannot handle.
This software is compatible with various storage devices, including hard drives, USB flash drives, SD cards, and more. And it is fully compatible with Windows 11/10/8.1/8.
This tool supports recovery of various file systems, such as NTFS, FAT32, and exFAT, and various file types, such as documents, pictures, videos, audio, and emails.
It uses a read-only scanning method to ensure that it does not cause secondary damage to the original disk. This further enhances the security of data recovery.
With a clean interface and simple operation, it is easy for both beginners and professionals to use. The free edition provides a 1 GB free recovery quota.
Now, follow the steps below to recover deleted files.
Step 1: Download the software
Click the green button to download and install MiniTool Power Data Recovery Free on your computer.
MiniTool Power Data Recovery FreeClick to Download100%Clean & Safe
Step 2: Launch the software and choose a scan location
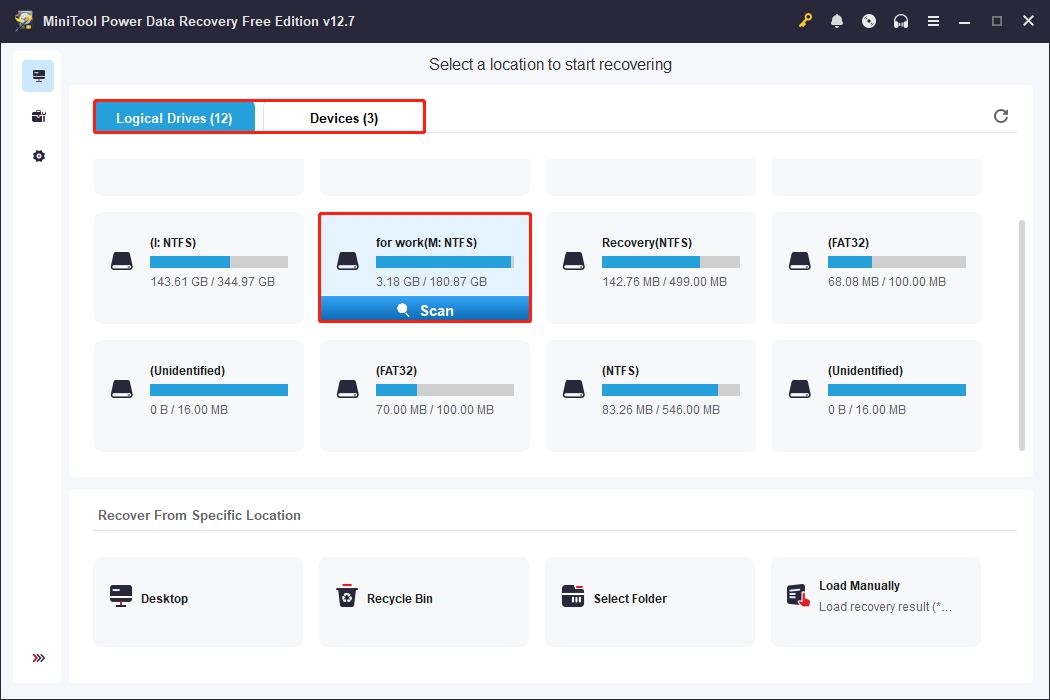
Launch MiniTool Power Data Recovery. When entering the main interface, you will see several modules that let you select where to scan for lost data.
- The Logical Drives tab shows all the partitions, including existing partitions, lost partitions, and unallocated space. You can scan the specific partition instead of scanning the entire hard drive.
- The Devices tab lists all physical disks connected to your computer. It’s suitable for more severe data loss situations. The scan scope is larger, but it also takes longer.
- The Recover From Specific Location tab breaks down common data loss scenarios into several independent entry points. It involves the Desktop, the Recycle Bin, and a folder.
Now, find the target partition, disk, or the specific location and click Scan. The scan will begin.
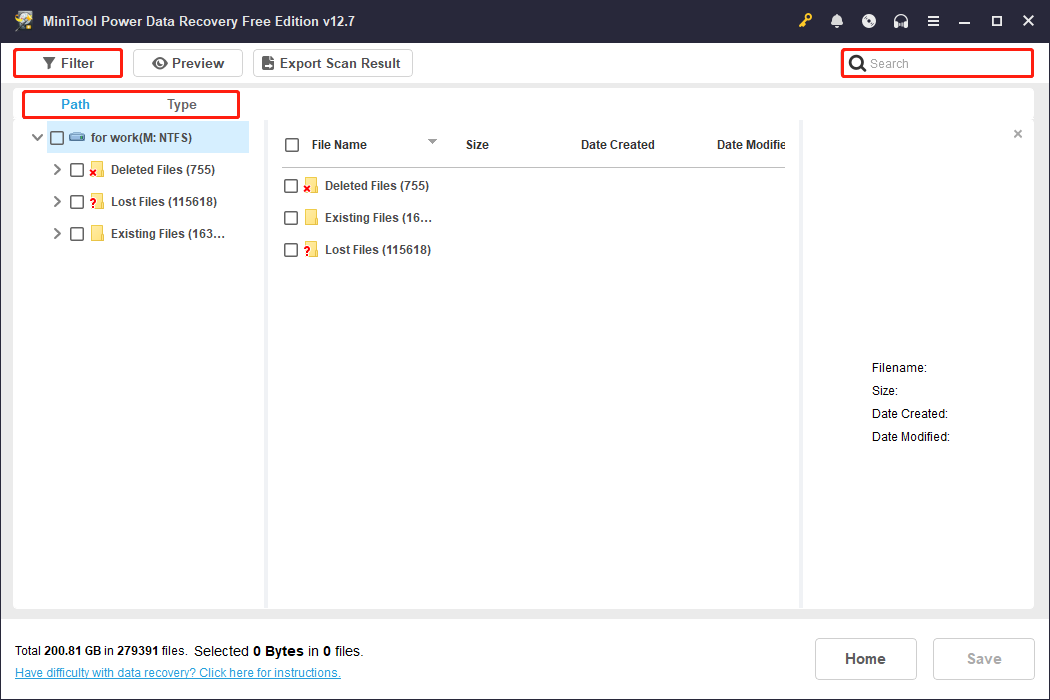
Step 3: Find the target files using Path, Type, Filter, and Search
Wait patiently for the scan process to complete. When it ends, it’s time to browse and locate the target files. Here are some built-in features to help you find them quickly.
- The Path feature displays scan results in the original folder structure. It allows you to browse data layer by layer according to the original directory where the files were located.
- The Type feature categorizes files by file type, such as pictures, videos, documents, audio, with different file formats under each type.
- The Filter feature provides multi-dimensional filtering options, such as file type, modification date, file size, and file category. It helps you further narrow down the search.
- If you remember the file name or part of the name, using Search is the fastest way. It allows you to directly enter the filename in the scan results for precise searching.
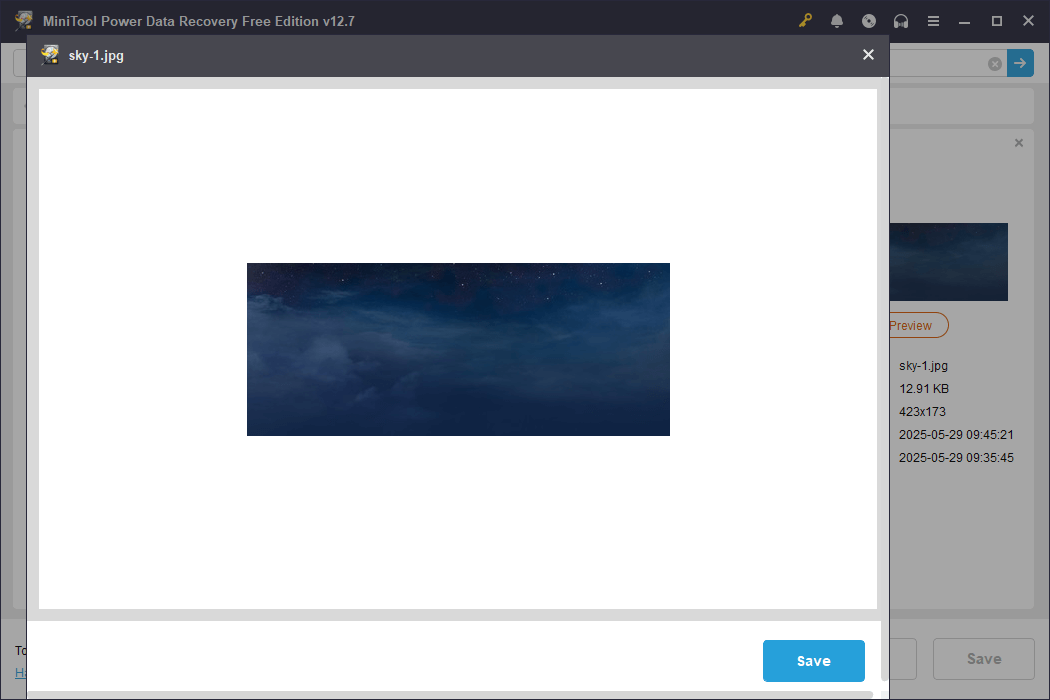
Step 4: Preview the required files using the Preview feature
After the target files are found, preview them to confirm if they are needed. The Preview feature supports various file formats, including pictures, documents, videos, audio, and text.
Double-click the file you want to view, and a preview window will pop up. Once you’ve confirmed, close the window and proceed to the final step.
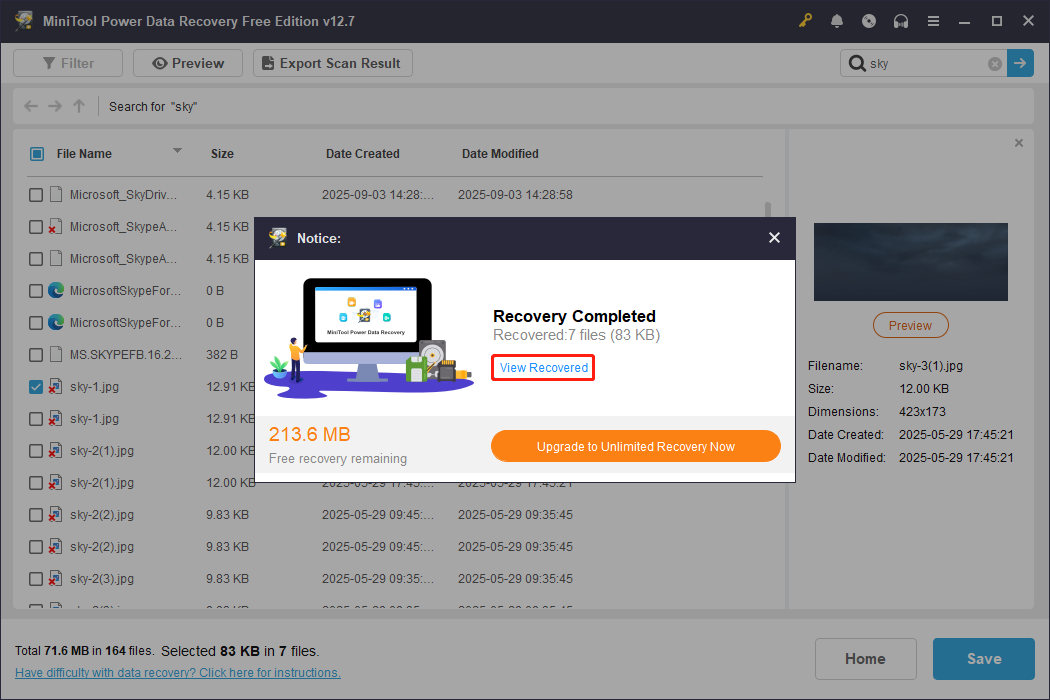
Step 5: Recover the needed files to a new and safe location
Check all the needed files. Then, click Save and select a safe storage path different from the source disk to save the recovered data. Finally, click OK to start the recovery process.
When the Recovery Completed window pops up, click the View Recovered button to check your recovered files.
After recovering deleted files, take a look at why your files get lost and how to protect them in your daily life.

Why Did Your Files Get Lost
Here are some common causes for file loss:
- Accidental deletion: You manually or accidentally deleted the file or emptied the Recycle Bin.
- File hidden: System properties or viruses may cause the file to be marked as hidden or a system file.
- Disk errors or corruption: Bad sectors on the hard drive, file system corruption, sudden power outages, etc., may render the file unreadable.
- Software or system update cleanup: Some programs or Windows updates automatically clean up temporary files or caches, accidentally deleting important data.
- Virus or malware attack: Malicious programs may delete, encrypt, or hide files.
- Improper storage device removal: USB flash drives or external hard drives were not safely ejected, resulting in file corruption or loss.
- Sync conflicts: Version conflicts with cloud syncing services (OneDrive, Google Drive, etc.) may cause files to be replaced, rolled back, or moved.
- External factors such as power outages and natural disasters: Sudden power outages, lightning strikes, floods, and fires can all damage the equipment and cause data loss.
How to Prevent Data Loss
To ensure your data security, take the following measures:
- Exercise caution when deleting or formatting: Confirm the path, drive letter, and filename to avoid accidental deletion or formatting.
- Back up regularly: Back up important files to an external hard drive, NAS, or cloud storage, ensuring at least two copies.
- Use reliable storage devices: Choose stable hard drives, SSDs, or USB flash drives and check their health regularly.
- Use antivirus software and keep it updated: Prevent viruses and ransomware from deleting, encrypting, or damaging files.
- Safely eject removable devices: Prevent file corruption or loss due to incomplete write operations.
- Avoid forced shutdowns or sudden power outages: Prevent data loss due to file system corruption or interrupted write operations.

Final Thoughts
Recovering files using CMD relies on Windows’ built-in tools’ direct access to the disk structure. Whether using attrib, CHKDSK, or Winfr, these methods can provide crucial help when the graphical interface is unavailable.
However, CMD recovery commands cannot solve all data loss problems. At this time, combining them with data recovery software like MiniTool Power Data Recovery is a more reliable option.
If you need further assistance with the MiniTool product, contact us at [email protected] anytime.
About The Author

Position: Columnist
Chelsea graduated from university with a major in English. She has a strong interest in English writing. It is this passion for writing that led her to become an English editor. Her articles mainly focus on data recovery and other computer industry news. As an energetic and outgoing girl, Chelsea enjoys listening to music, singing, riding bikes, and eating in her spare time.
User Comments :