Here is how to do a Recycle Bin/Trash recovery on Windows/Mac. Besides this, it also guides you to recover permanently deleted files after emptying the Recycle Bin or Trash using backup files, File History (Windows), and data recovery software.
Deleting files is a very common thing. However, when you accidentally delete the files you want, how can you get them back? There are many ways to recover files, and the one you choose depends on the state of your files after deletion.
Where Do Deleted Files Go on Windows/Mac
Deleted files on Windows/Mac typically go through one of the following destinations, depending on how they were deleted:
1. Normal deletion: Goes to the Recycle Bin/Trash
If you press the Delete key or right-click and select Delete, the file will be moved to the Recycle Bin/Trash, where files still occupy disk space but can be restored at any time. Only after emptying them are files marked as overwritten, effectively freeing up space.
2. Permanent deletion: Disappears immediately (Only for Windows)
If you delete files by Shift + Delete, the file is permanently deleted and doesn’t go to the Recycle Bin. The file may remain on your hard drive for a while, but it won’t be visible to you.
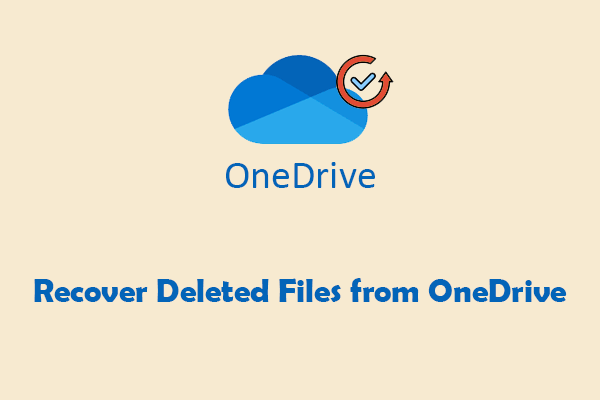
3. Cloud sync: OneDrive or other cloud services
Suppose your files are synced to OneDrive or other cloud services (like Google Drive or Dropbox). In that case, deleting them may also delete the cloud copy or move it to the cloud service’s Recycle Bin or deleted files area (for example, OneDrive has its own Recycle Bin).

Recycle Bin Recovery on Windows/Mac
Here is a quick video guide:
Both Windows and Mac have a folder for storing deleted files. The following content teaches you to recover files from each of them.
Restore Deleted Files from Recycle Bin on Windows
The Recycle Bin is a system folder in Windows that temporarily stores deleted files and folders from local disks. It allows you to recover accidentally deleted items before they are permanently removed from the disk.
Here are some detailed steps to recover deleted files from Recycle Bin:
Step 1: Open Recycle Bin
Double-click the Recycle Bin icon on your desktop to open it.
Step 2: Restore the deleted files
Scroll down the list or search the file name to find the target files. Once found, select them all, right-click the selected area, and choose Restore.
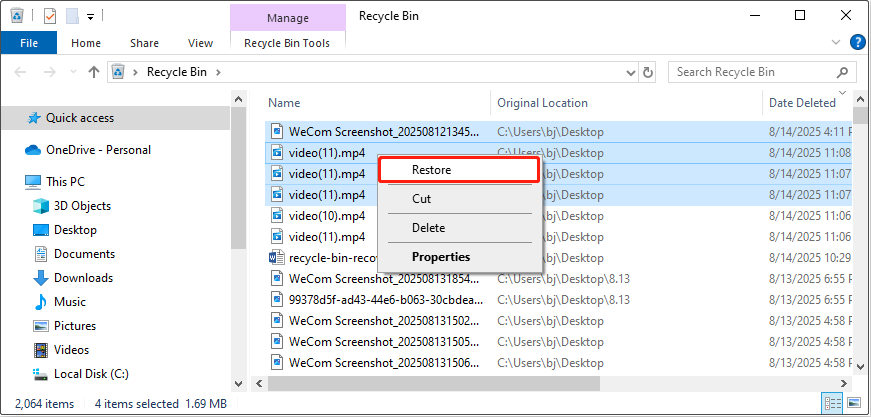
The files will be restored to the original location. Go and check them.
Put Back Deleted Files from Trash on Mac
The Trash on a Mac is similar to the Recycle Bin on Windows. It gives you a chance to recover files you accidentally deleted as long as you haven’t emptied it.
Here is how to recover deleted files from Trash:
Step 1: Open the Trash
In the Dock at the bottom of your screen, you’ll see a trash can icon. Click it to open the Trash and view the files inside.
Step 2: Retrieve the needed files
Browse the list to confirm that the files you want to restore are still there. Right-click the file and select Put Back. The file will automatically be restored to the original location.
Alternatively, you can drag the file from the Trash to the Desktop or another folder.
If you have emptied the Recycle Bin or Trash, the following methods can help you recover permanently deleted files successfully.
Restore Deleted Files From Backup
If you have a backup of your files, you can restore the deleted files from it first. If it is a local backup, directly open the backup storage device, and copy and paste the files to the location you want.
If you are backing up to the cloud, refer to the following steps. Here we take Google Drive as an example.
Step 1: Open your browser, access Google Drive, and log in to your Google Account.
Step 2: Click My Files or Backup on the left, and find the file or folder you want to restore.
Step 3: Right-click the file and select Download. The folder will be downloaded as a .zip file and must be extracted before use.
Recover Deleted Files After Emptying the Recycle Bin on Windows
What if you don’t have a backup? Try File History or professional data recovery software to recover deleted files from an empty Recycle Bin.
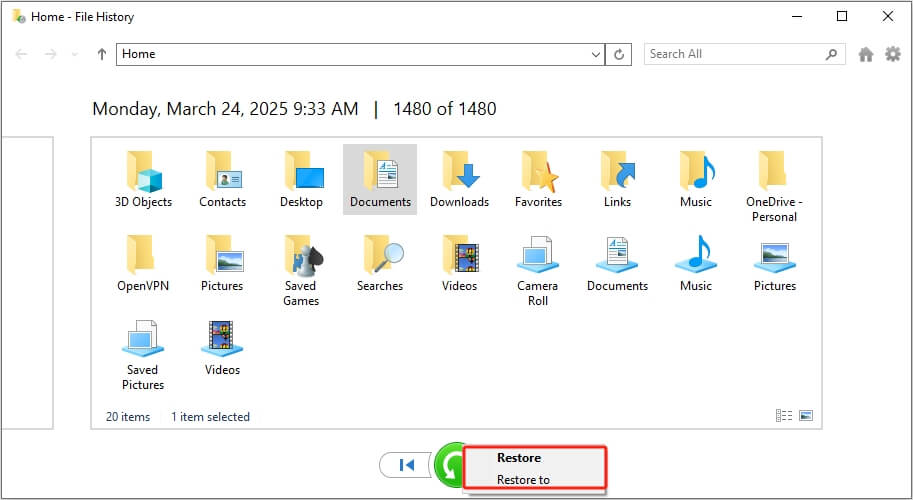
Way 1: Restore Files With File History
File History is an automatic backup feature built into Windows. It saves copies of your files so you can restore them if they’re lost, accidentally deleted, or modified incorrectly. Once enabled, it regularly backs up the folders you specify.
Step 1: Type File History in the search bar and click Restore your files with File History.
Step 2: Browse or search for the file version you want to restore.
Step 3: Click the green Restore button to restore the file to its original location. If you want to restore to a different location, right-click the button and choose Restore to.
Step 4: In the new window, choose a location to store the file and click Select Folder. Once done, the File Explorer will pop up where you can see your recovered file.
Way 2: Use MiniTool Power Data Recovery
If the above method cannot work, data recovery software can help you recover deleted files. Here, I recommend MiniTool Power Data Recovery Free to you.
It features a Recycle Bin recovery module that scans only the Recycle Bin area to retrieve deleted files. Even if files have been deleted or emptied, this tool can still locate residual data through sector-level scanning. It greatly increases the recovery success rate.
This software can recover almost all file formats, including documents, images, videos, audio, and compressed files. It is compatible with Windows 11/10/8/8.1
By the way, this Recycle Bin recovery software gives you free recovery capacity for 1 GB of files. Download and install it to do a free Recycle Bin recovery.
MiniTool Power Data Recovery FreeClick to Download100%Clean & Safe
Step 1: Launch the software and scan the Recycle Bin
Double-click the MiniTool Power Data Recovery icon to open it. After loading all the disk information, the main interface will show.
This Local Drives section lists all the partitions, including existing partitions, deleted partitions, and unallocated spaces. Select your drive and click Scan to scan for data.
Also, in the Recover From Specific Location section, it allows you to scan the desktop, the Recycle Bin, or a specific folder. Click Scan on the Recycle Bin panel.

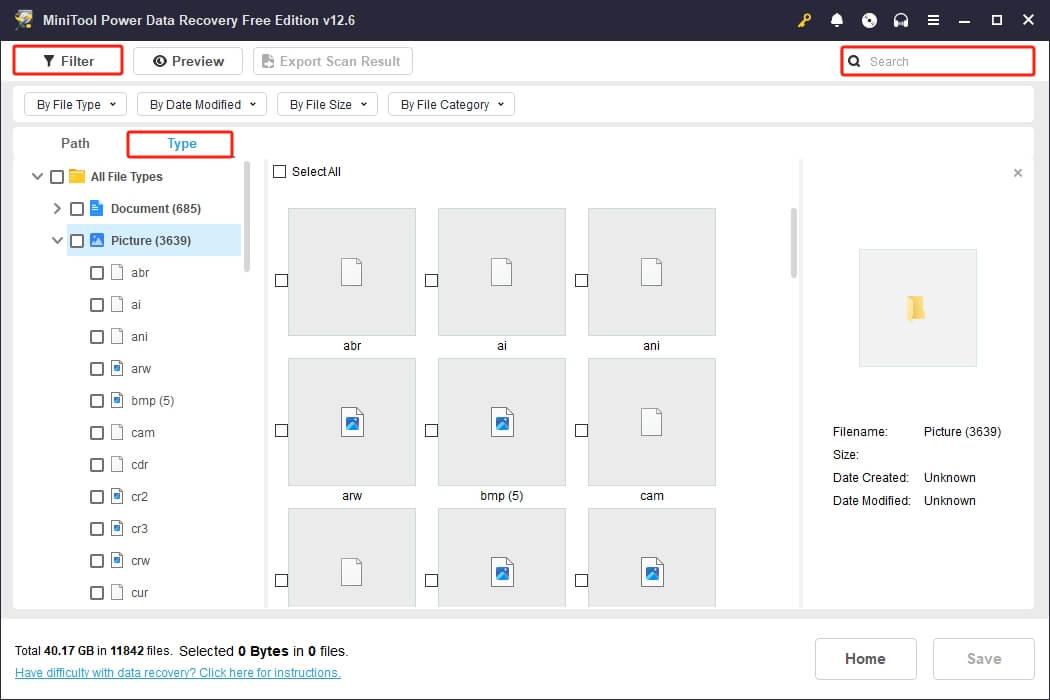
Step 2: Find the required files using Type, Filter, and Search
This scan process may take some time. You need to wait patiently for it to complete. When it’s done, all files are listed under the Path tab. It allows you to browse by original folder structure.
It is a little hard to find the wanted files using this feature. Try the following features to precisely locate the files you want to recover.
- Type: Automatically group scan results by file type, such as photos, audio, and video. This is a good option if you only want to find a certain type of file.
- Filter: It allows you to set multiple filters at once, such as file type, file size, modification date, and file category. Click Filter to set your conditions.
- Search: Type the file name or keyword in the search box and press Enter. The target files will show up.
Step 3: Preview and save files
To ensure the accuracy of the recovery, preview the file before recovery. Select the file and click the Preview button, or double-click the file.
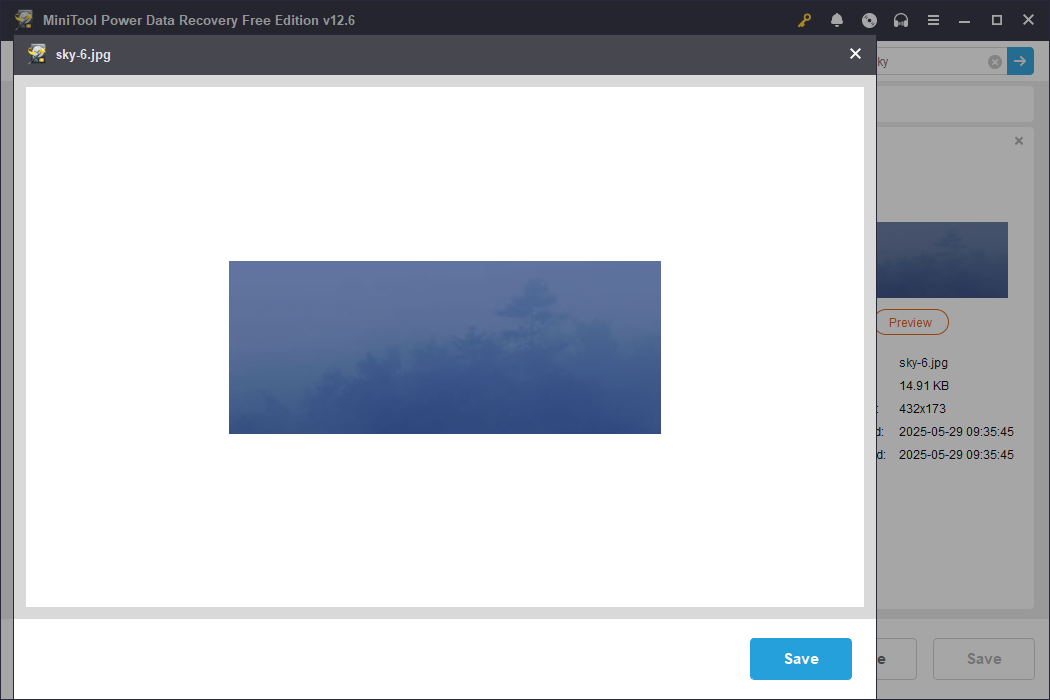
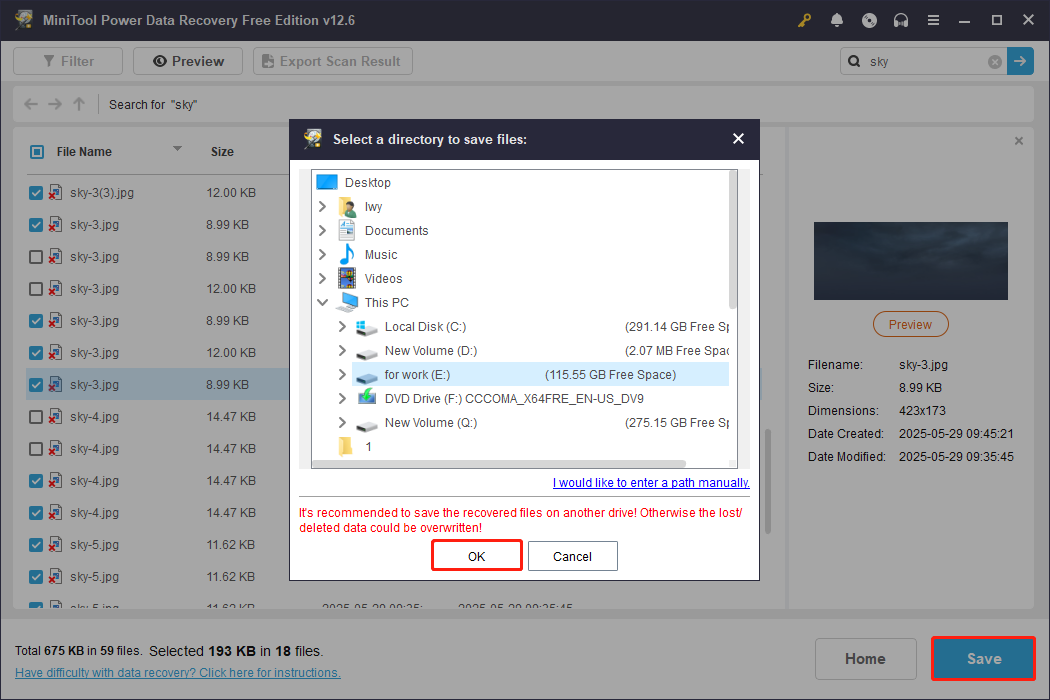
Confirm the file to be recovered and check it, then click the Save button. In the pop-up box, select a new path to store the recovered file, and finally click OK to start the recovery process.
Recover Deleted Files After Emptying the Trash on Mac
Stellar Data Recovery for Mac is designed specifically for macOS users and has powerful file recovery capabilities. And it explicitly supports recovering files from the emptied Trash.
Even if a file is permanently deleted, Stellar still has a chance to recover it as long as the data hasn’t been overwritten.
What’s more, this software can recover files from file systems like exFAT, FAT32, NTFS, etc. It also supports recovery from devices like MacBook, iMac, SD cards, USB flash drives, external hard drives, etc.
Follow the steps below to complete a Mac trash recovery:
Step 1: Download and launch Stellar Data Recovery for Mac on your computer.
Data Recovery for MacClick to Download100%Clean & Safe
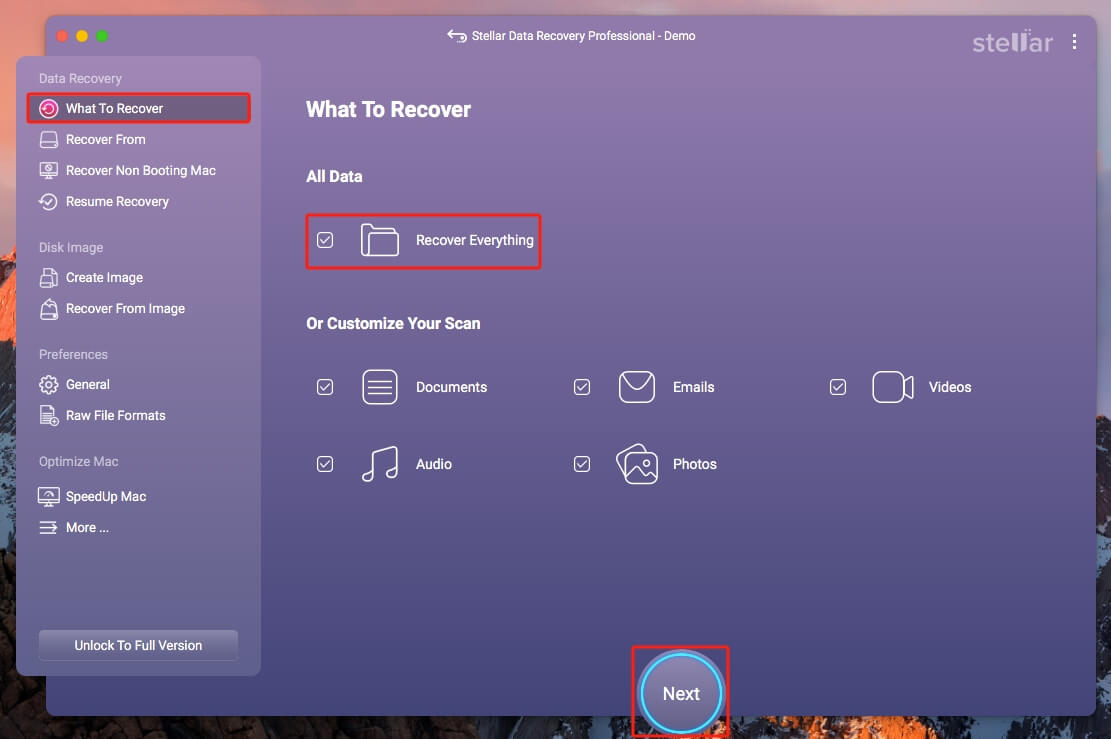
Step 2: In the What to Recover section, tick Recover Everything and click Next.
Step 3: In the Recover From section, select the volume where your deleted files are stored and click Scan.
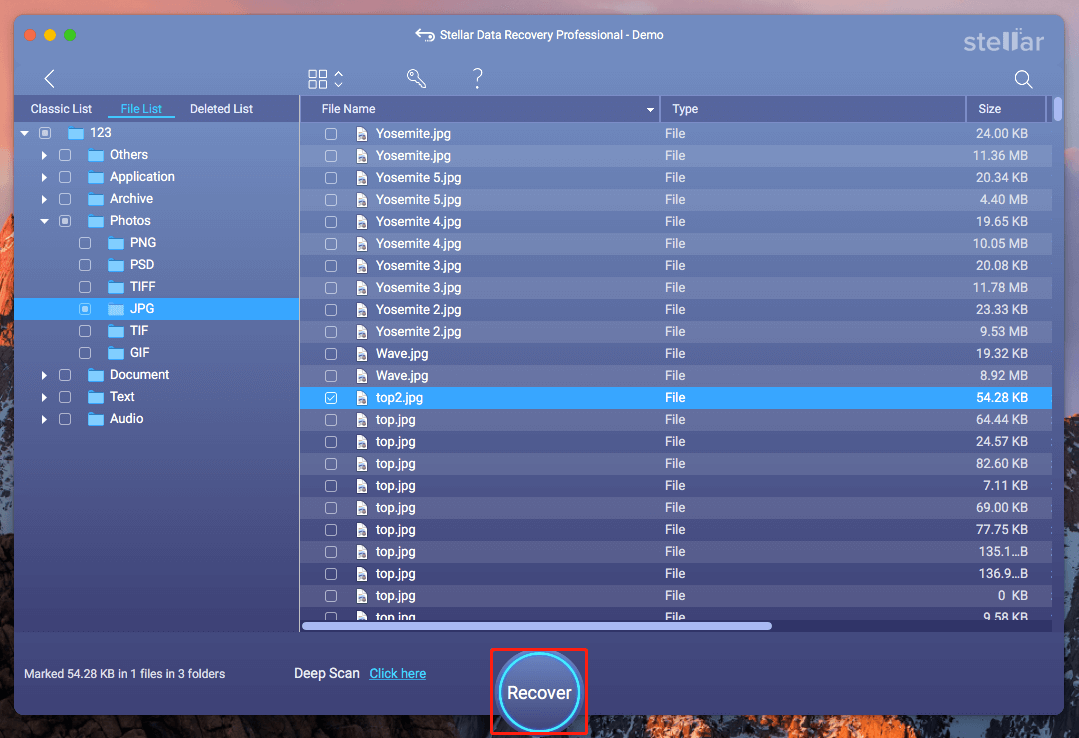
Step 4: When the scan process ends, find and tick all the required files. And then click Recover. In the activation window, input your license key. If you don’t have one, you need to get one.
Step 5: Once the software is activated, select a new location to store the recovered files.
About Recycle Bin/Trash Empty
After completing the Recycle Bin and Trash recovery, let’s take a look at something about emptying these two folders.
How to Empty Recycle Bin (Windows) or Trash (Mac)
Emptying the Recycle Bin or Trash deletes the files you’ve moved there. Once you do this, the files can’t be restored using native system functions. Here’s how to empty the Recycle Bin and Trash on Windows and Mac.
Empty the Recycle Bin on Windows:
Method 1: Use the Desktop Icon
Step 1: Find the Recycle Bin icon on the desktop.
Step 2: Right-click it and select Empty Recycle Bin.
Step 3: Click Yes in the pop-up window.
Method 2: Through File Explorer
Step 1: Press Win + E keys to open File Explorer.
Step 2: Type Recycle Bin in the address bar, and press Enter.
Step 3: Click Recycle Bin Tools > Empty Recycle Bin in the top toolbar.
After confirming, all files will be permanently deleted.
Empty the Trash on Mac:
Method 1: Via the Dock
Step 1: Find and click the Trash icon in the Dock at the bottom of the screen.
Step 2: Right-click the icon and select Empty Trash.
Step 3: In the confirmation prompt, click Empty Trash.
Method 2: With the Finder
Step 1: Open Finder and click Trash on the left.
Step 2: Select Finder > Empty Trash from the menu bar. Or click the Empty button in the upper-right corner.
Why Do You Need to Empty the Recycle Bin/Trash
Why should you empty the Recycle Bin or Trash? Here are some of the functions you can learn about. Then, empty them based on your needs.
1. Free Up Disk Space
Although files in the Recycle Bin/Trash appear deleted, they’re still occupying hard drive space. Emptying them frees up this space, especially for large files, which can free up several gigabytes.
2. Protecting Privacy and Security
If deleted files contain sensitive information (such as ID cards, contracts, or password-protected documents), they can still be recovered even if they’re in the Recycle Bin/Trash. Emptying them reduces the risk of data leakage, especially on public or shared computers.
3. Preventing Accidental Restoration of Old Files
Sometimes you might accidentally restore old files from the Recycle Bin or Trash. Emptying them prevents you from restoring things you shouldn’t.
4. Organize your files regularly
Emptying your Recycle Bin/Trash regularly helps develop good file management habits. Avoid mistakenly assuming certain files are permanently deleted.
Final Words
Now, you should know how to perform Recycle Bin Recovery on Windows and Trash Recovery on Mac, and how to restore deleted files using your previous backups or MiniTool Power Data Recovery. Try these methods to safely restore your important data and ensure nothing gets lost.
For any questions, please contact us at [email protected].
About The Author

Position: Columnist
Chelsea graduated from university with a major in English. She has a strong interest in English writing. It is this passion for writing that led her to become an English editor. Her articles mainly focus on data recovery and other computer industry news. As an energetic and outgoing girl, Chelsea enjoys listening to music, singing, riding bikes, and eating in her spare time.
User Comments :