Do you know Google Chrome has a screenshot tool that enables you to take a full or partial screenshot of the web page? Now, this tool has been improved and it has more new features to edit the screenshot you just take. How to get and use these new and advanced features? MiniTool Software will introduce this tool in detail.
About the Chrome Screenshot Tool
Microsoft Edge has a “Web capture” tool, which allows you to take a screenshot in Edge and simply edit the screenshot. This inspires Google to improve the Chrome screenshot tool. And here it comes.
Google Chrome is available on Android, iOS, Windows 11, Windows 10, macOS, and ChromeOS. Chrome for Android has a handy screenshot tool. To bring a better user experience, Google is adding more useful and attractive features to Chrome for Windows, macOS, and ChromeOS. The Chrome screenshot tool is better than Microsoft Edge’s Web capture tool because it has more editing features.
Edge’s Web Capture Tool VS. Chrome Screenshot Tool
If you are using Microsoft Edge’s Web capture screenshot tool, you can only edit the screenshot using the Windows Inking feature. The edit features are limited.
However, the Chrome Screenshot Tool is more flexible. This tool is part of the Share menu in Chrome. After taking a screenshot, the image will be displayed in a single window with many editing options. You can see the available editing features from the following screenshot.

You can zoom in and out of the screenshot, select an area, and add emoji & text to the screenshot. You can also crop the screenshot according to your requirements.

Well then, how to screenshot in Chrome using this tool? Currently, this tool is only available in Google Chrome Canary. If you want to use this tool, you need to download Chrome Canary first.
How to Use the Chrome Screenshot Tool?
Move 1: Download and Install Google Chrome Canary on Your Device
No matter which device you are using, you can use these steps to download and install Chrome Canary:
Step 1: Go to https://www.google.com/intl/en_hk/chrome/canary/.
Step 2: Click the Download Chrome Canary button to download the .exe file on your device.
Step 3: Open the downloaded .exe file and follow the on-screen instruction to install Chrome Canary on your computer.
Move 2: Enable the Screenshot Feature in Chrome Canary
However, the screenshot feature in Chrome is not enabled by default. So, you need to enable it in advance.
Step 1: Open Google Chrome Canary.
Step 2: Go to chrome://flags.
Step 3: Search for screenshot using the search box on the top.
Step 4: You will see two search results: Desktop Screenshots and Desktop Screenshots Edit Mode, then enable them.
Step 5: Click the Relaunch button to restart Chrome Canary.

Move 3: How to Take a Screenshot on Google Chrome?
Here, we will show you how to screenshot in Chrome Canary using this tool and edit the screenshot as per your requirements.
Step 1: Go to the page you want to screenshot.
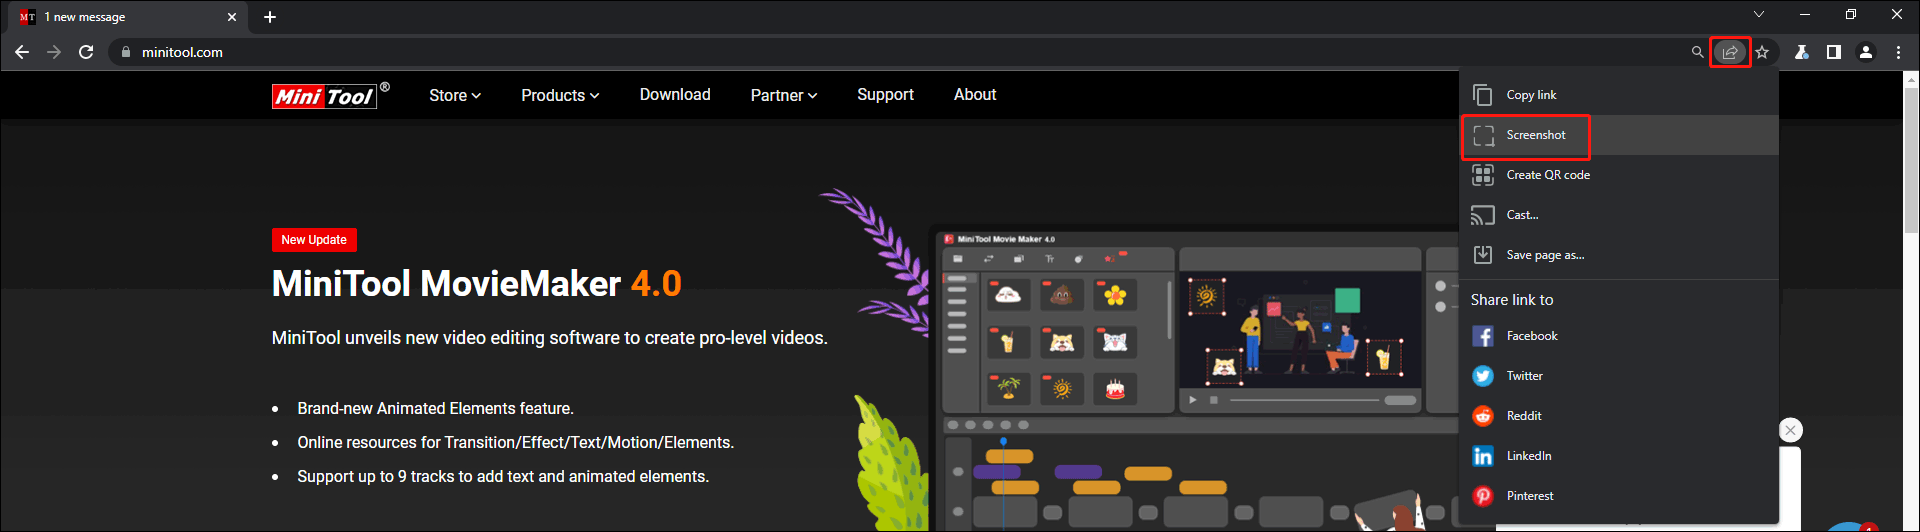
Step 2: Click the Share button in the Omnibox (the search bar in Chrome).
Step 3: Click Screenshot from the dropdown menu.
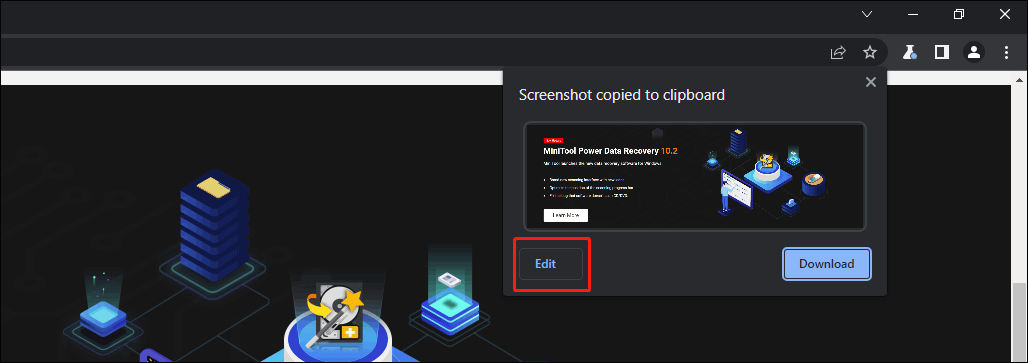
Step 4: Select the area you want to screenshot.
Step 5: Click the Edit button from the pop-up interface.
Step 6: A new page will open with the edit controls. You can edit your screenshot according to your requirements.
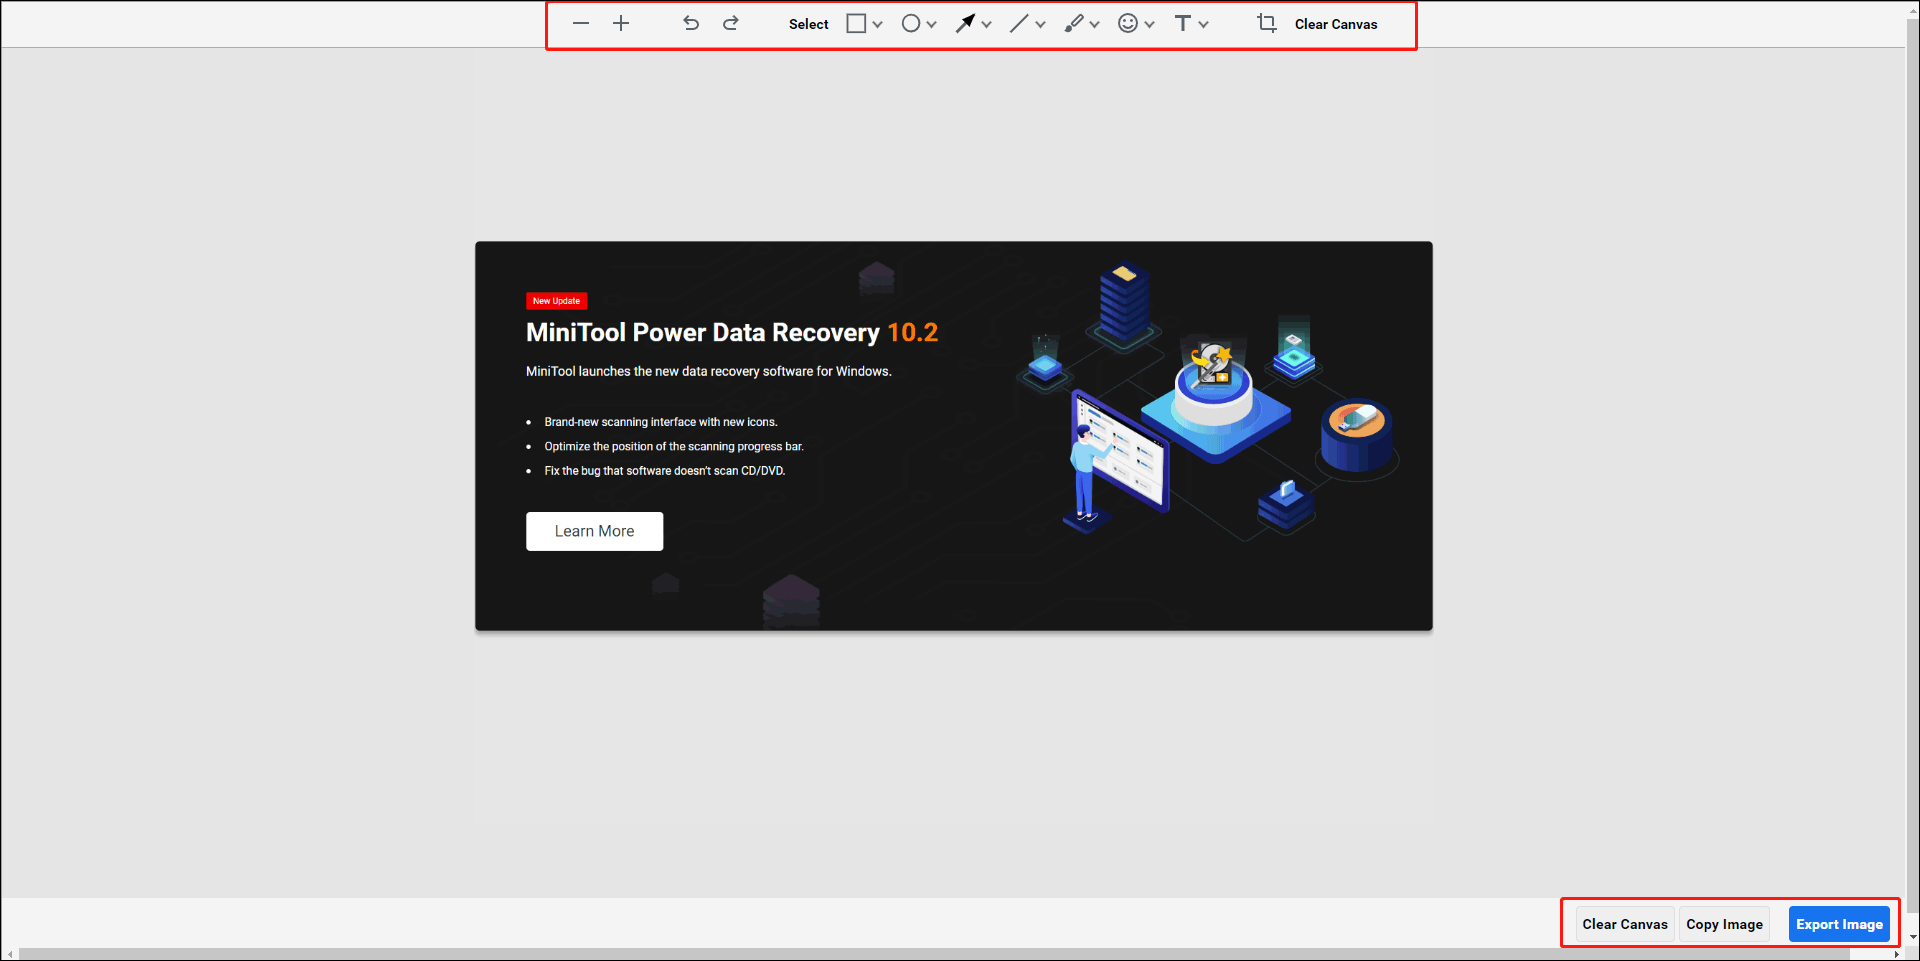
Step 7: After editing, you can click the Export Image button to download the screenshot to the Chrome default download folder unless you manually change the download location.

How to Recover the Deleted Screenshots on Windows 11/10?
If you delete the screenshots by mistake, you can use professional data recovery software to get them back. You can use MiniTool Power Data Recovery, a free file recovery tool.
This software is specially designed to recover files from all types of data storage devices on all versions of Windows. As long as the deleted files are not overwritten by new data, this software works to get them back. It has a trial edition. You can use it to scan the drive that previously saved the deleted screenshot and see if this tool can find the needed files. If yes, you can use a full edition to recover all files without limits.
MiniTool Power Data Recovery TrialClick to Download100%Clean & Safe
About The Author

Position: Columnist
Stella has been working in MiniTool Software as an English Editor for more than 8 years. Her articles mainly cover the fields of data recovery including storage media data recovery, phone data recovery, and photo recovery, videos download, partition management, and video & audio format conversions.
User Comments :