In general, Windows users use Disk Cleanup to free up disk space in daily use. This tool will delete older and unnecessary files so as to release more free space for you. But recently, you should be more carefully when using it on Windows 10 October 2018 Update since it may clear your Downloads folder.
Toll now, the annoying file deletion bug found recently on Windows 10 October 2018 Update has been fixed by Microsoft (at least for the testers currently). Now, there comes another file deletion issue – Disk Cleanup empty Downloads folder (also on the Windows 10 October 2018 Update).
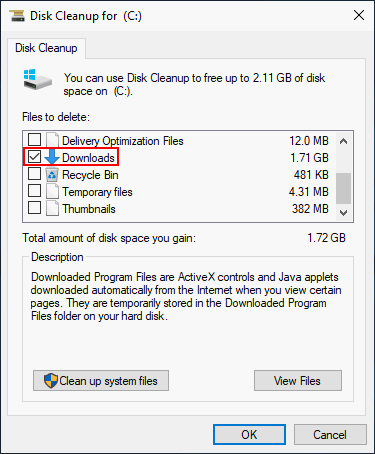
Disk Cleanup Will Empty Your Downloads Folder
Too many temporary and unnecessary files will not only occupy disk space, but also influence the computer responding speed. That’s why people are prone to start Disk Cleanup, the built-in cleaning tool in Windows, to remove those unnecessary files. This even becomes a necessary after you installed the Windows 10 October 2018 Update on computer.
Downloads Folder Is Checked by Default
I advise you to back up the Downloads folder before starting Disk Cleanup. Why? That is simply because the Downloads folder has been added as an additional location by Microsoft and it will be checked by default during Disk Cleanup. Files saved here can be removed easily. If you don’t want to lose them, you’d better make a backup in advance.
The routine of using Disk Cleanup:
- Start the tool.
- Check all the default options of computer.
- Click on the OK button to start the cleanup process.
If you use the Disk Cleanup in the same way on a Windows 10 October 2018 Update, you will clean Downloads folder as well. As I said before, the Downloads folder is added as a new option quietly by Microsoft, so it will be checked to clear.
Disk Cleanup in Windows 10 October 2018 Update Is Dangerous
Definitely, this design is convenient for those people who want the folder to be given a totally clean since it is only used for temporary files. However, for other people who want to keep hold of the files saved in the Download folder, it’s dangerous.
For a long time, Windows users have been accustomed to using Disk Cleanup for space release and they won’t change the default check of options before clicking on the “OK” button. The addition of Downloads folders in the Disk Cleanup makes it necessary to make sure that “Downloads” is not checked before the cleanup process begins.
To prevent this design from turning into a nightmare for those people who aren’t expecting it to delete Download folders, you have to examine the listed boxes carefully (figure out which ones are checked to make sure that Downloads isn’t one of them).
Here’s how to recover deleted files in Windows 10 easily.
View & Uncheck Downloads during Disk Cleanup
4 Ways to Open Disk Cleanup
Step one: to uncheck the Downloads folder, you should first open Disk Cleanup by the following ways. (Besides, you can download other disk cleanup tools to delete temporary files and remove history.)
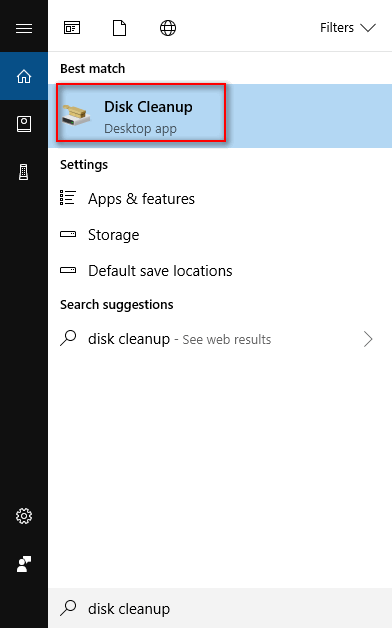
- Click on the search box located in the left side of taskbar and input “disk cleanup”; then, click on Disk Cleanup from the search result.
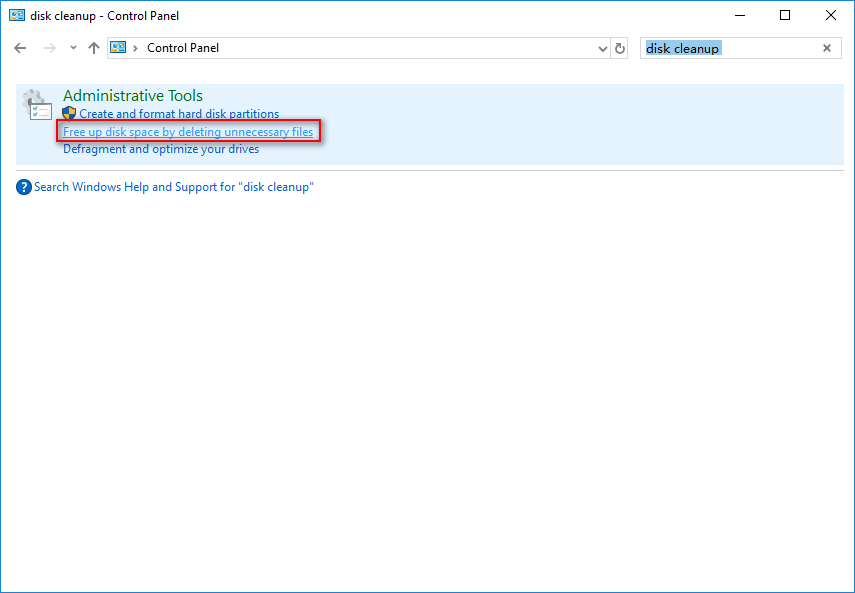
- Start the Control Panel and input “disk cleanup” to the search box; then, click on the “Free up disk space by deleting unnecessary files” option.
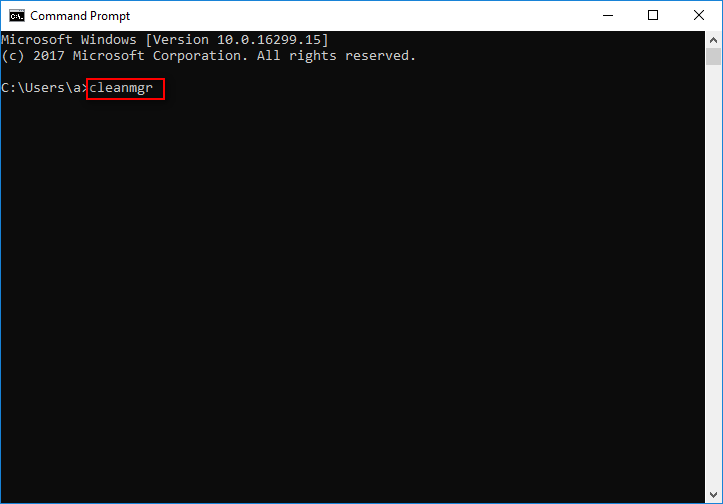
- Open Command Prompt and type “cleanmgr” & press “Enter”.
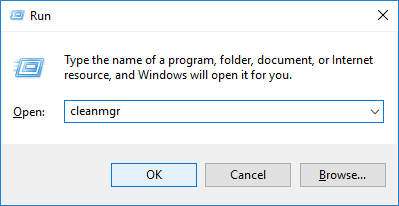
- Open run dialogue by pressing “Windows” + “R”; then, type “cleanmgr” and click on the “OK” button.
This post tells all about how to recover data after diskpart clean:
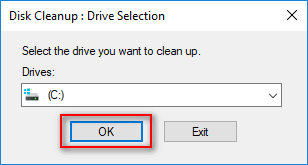
Step two: click on the “OK” button in the “Disk Cleanup: Drive Selection” window.
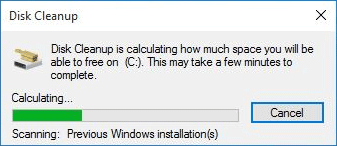
Step three: wait for the calculating process.
Step four: be sure to uncheck “Downloads” in “Disk Cleanup for Fast (C:)” window. And then, click on the “OK” button to confirm and start cleanup.
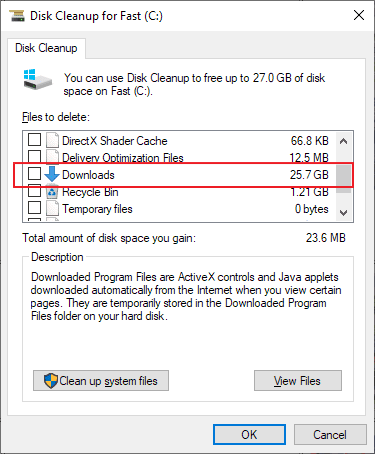
You can repeat step one to step four to recheck Downloads if you want.
User Comments :