Get an error saying disk 1/2/3/4/N has been surprise removed when you check Event Viewer in Windows 11/10? The event ID is 157. What should do to fix this issue? Take it easy and go to find solutions from the post written by MiniTool.
Event ID 157 Disk Has Been Surprise Removed
Event Viewer is a component of the Windows operating system. Via it, administrators and users can view the event logs of applications and system messages including errors, warnings, and information messages.
Event ID 157 is a common issue. When you check your Event Viewer, you may receive a warning that says “Disk X has been surprise removed” and the event ID is 157. The disk can be disk 1, 2, 3, 4, or anyone else.
Usually, the issue appears in Windows 11/10 when the communication between the system and that disk is disrupted. Fortunately, you can take some measures to remove “disk 1 has been surprise removed” or the event ID 157 on another disk. Let’s look through some ways from the following part now.
Fixes for Disk Has Been Surprise Removed Windows 11/10
Check the Disk Physically
On your computer, there may be a loose port/cable or faulty hard disk, leading to event ID 157 disk has been surprise removed. You can go to physically check the connection of the hard drive. If it is not the issue, try other ways.
Update Storage Spaces Controller Driver
The storage spaces controller driver is responsible for your storage drive ports like the SATA ports. If the controller driver is corrupt or outdated, an error like disk has been surprise removed may appear on Windows 10/11. Try to update the driver now.
Step 1: Press Win + X to choose Device Manager.
Step 2: Expand Storage controllers, right-click the storage spaces controller and choose Update driver.
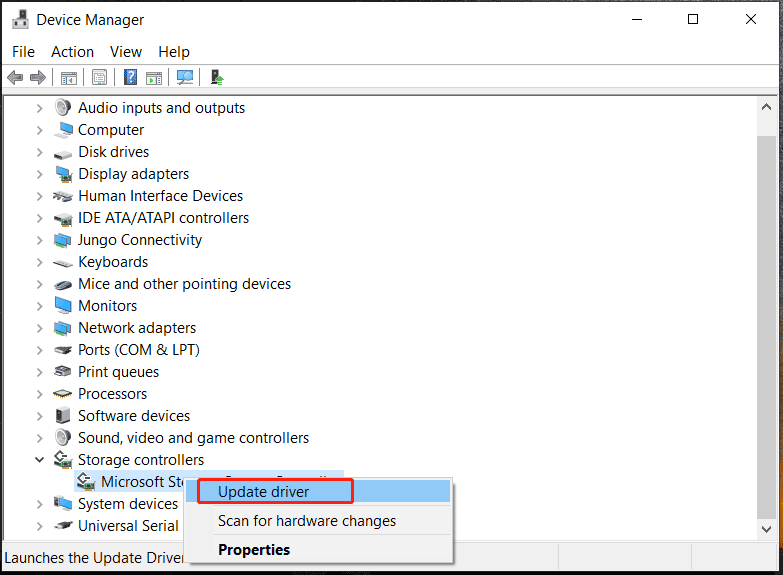
Step 3: Click the first option called Search automatically for drivers. Then, Windows will search for the updated driver and install it on your machine by itself.
Run a CHKDSK Scan
If the hard disk has some internal issues, the warning of disk has been surprise removed may happen on Windows 11/10. You can run a CHKDSK scan to solve the issue.
Step 1: Type cmd to the search box, right-click Command Prompt, and select Run as administrator.
Step 2: In the CMD window, type CHKDSK N:/f/r/x and press Enter. Here N means the driver letter of the problematic hard drive.
Modify Registry
In Windows Registry, there is an item called TimeOutValue that may trigger the warning – disk 1 has been surprise removed. You can modify it to fix the issue.
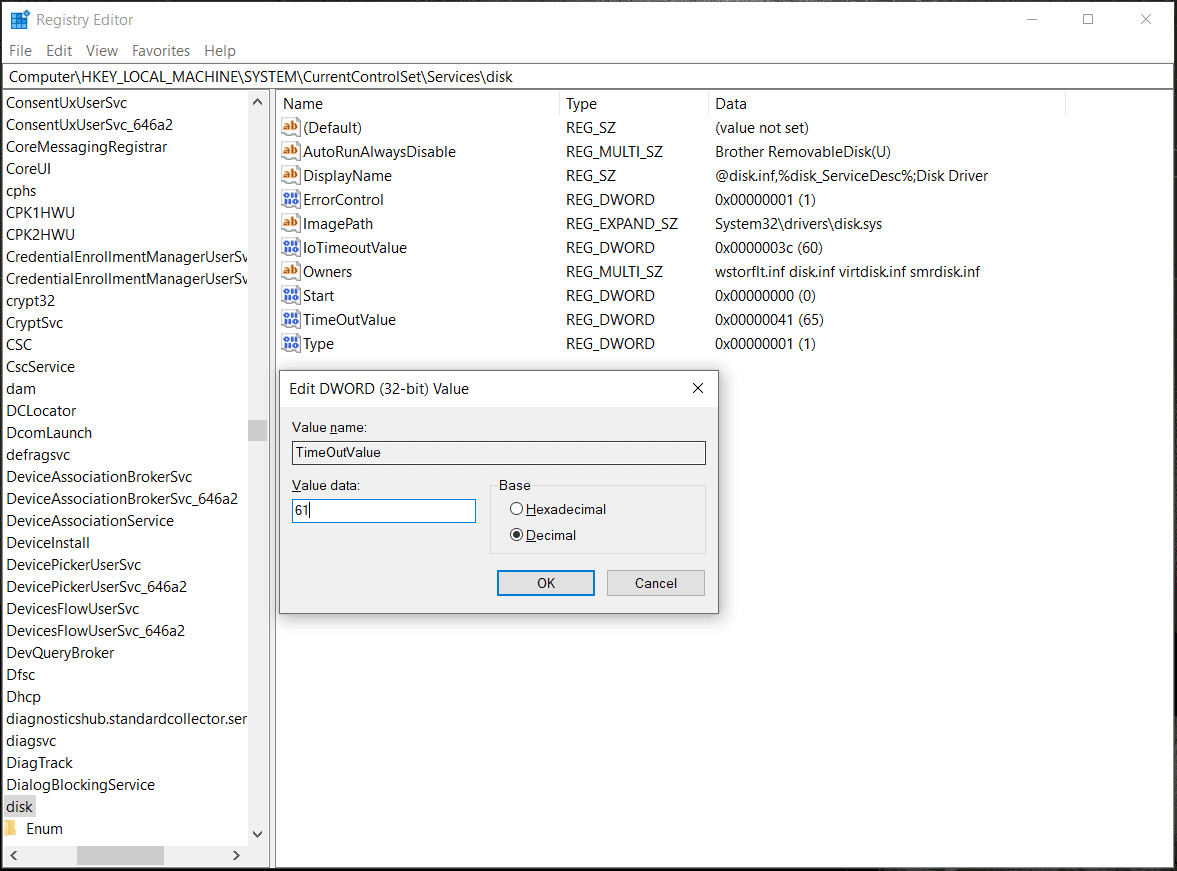
Step 1: Type regedit to the search box and Registry Editor to open the app.
Step 2: Navigate to this path: Computer\HKEY_LOCAL_MACHINE\SYSTEM\CurrentControlSet\Services\disk.
Step 3: Double-click on TimeOutValue from the right pane and set the value data to 61. Also, set Base to Decimal.
Change Drive Letter
If you have installed Windows 11 or 10 recently and you see the error of disk 2 has been surprise removed in Event Viewer, you can try to change the drive letter. Sometimes the drive letter may be lost after a clean install. This may be helpful to fix the issue.
Step 1: Choose Disk Management after pressing Win + X.
Step 2: Right-click the drive that has an issue and choose Change Driver Letter and Paths.
Step 3: Click Change or Add (if there is no driver) to assign a driver to the partition.
Clean Boot the PC
In a clean boot, Windows can run with a minimum set of required programs and drivers. This can help to find the third-party app that causes the error.
Step 1: Type system configuration to the search box and click the app to open it.
Step 2: In the General tab, check Selective startup and Load system services.
Step 3: In Services, check Hide all Microsoft services and click Disable all.
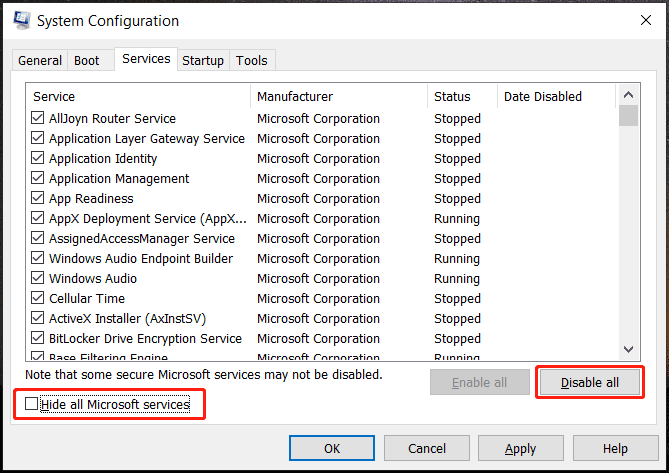
Step 4: Click Apply > OK.
Bottom Line
These are almost solutions to fix event ID 157 disk has been surprise removed from Windows 11/10. Try them now. If you find some other useful workarounds, leave a comment below to let us know.
About The Author

Position: Columnist
Vera has been working at the MiniTool Team for over 10 years as a technical editor and content writer. She mainly focuses on disk and partition management, data recovery, Windows backup and restore, and PC troubleshooting. Through in-depth software testing and hands-on experience, she has helped users solve a wide range of computer problems and better protect their data on Windows devices.
User Comments :