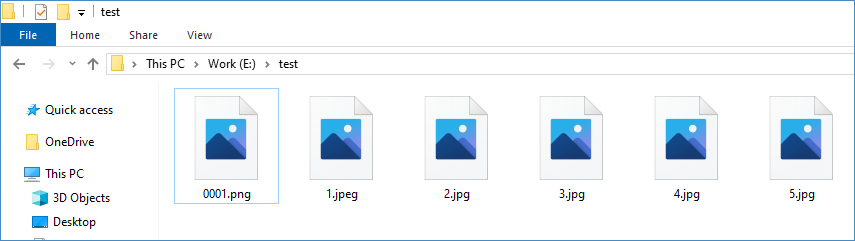
If the photo preview feature is enabled on your Windows 10 computer, you can preview the pictures’ thumbnails in a folder. If this feature is disabled unknowingly, you will ask: how do I get pictures to show in a folder on Windows 10? In this post, MiniTool Software will show you how to enable thumbnail preview to make you see the picture thumbnails again in a folder.
The photo preview feature is enabled by default on your Windows 10 computer. Thus you can preview pictures in a folder on Windows 10. This is a convenient feature. But you may disable it inadvertently. Then you can’t see the thumbnails of the pictures in a folder.
If you encounter this issue, you may ask: how do I get pictures to show in a folder? It is an easy job. The following is a guide.
How do I Get Pictures to Show in a Folder?
How do I enable thumbnails in Windows 10 for pictures? You can follow these steps:
1. Open File Explorer.
2. Access the folder you want to preview the pictures in it.
3. Click View on the top menu and then go to Options > Change folder and search options.

4. Switch to the View section and then uncheck Always show icons, never thumbnails under Files and Folders. However, if that option has been already unchecked, the picture thumbnail may be corrupted. If you encounter this problem, you can skip to the next part to search for a solution.
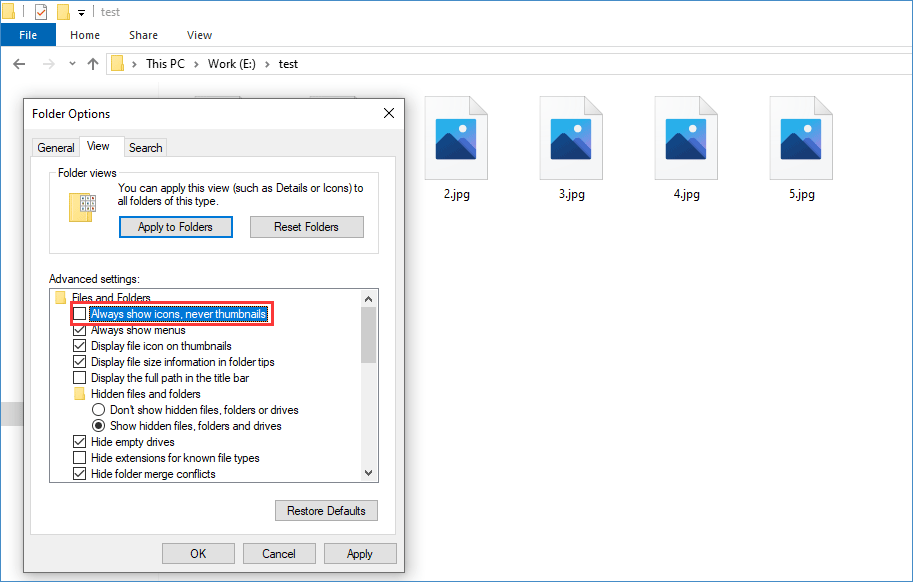
5. Click Apply.
6. Click OK to save the change.
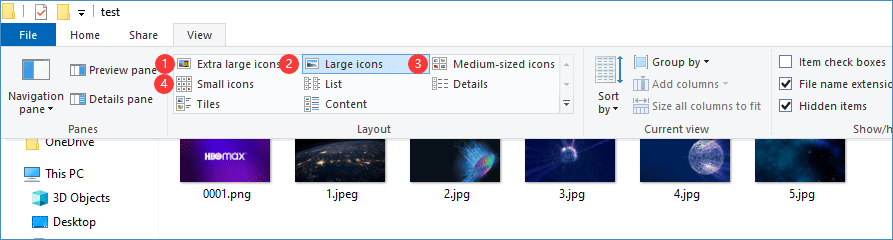
After enabling thumbnail previewing, you can click View and select Extra large icons, Large icons, Medium-sized icons, or Small icons to preview the pictures’ thumbnails. This can help you easily find the pictures you want to use.
How to Fix Corrupted Picture Thumbnails?
Windows 10 can keep the cache of the thumbnails of the files you open in File Explorer. If you can’t use the above method to enable picture thumbnails, your picture thumbnails cache is likely damaged. You can use Disk Clean-Up to fix this issue.
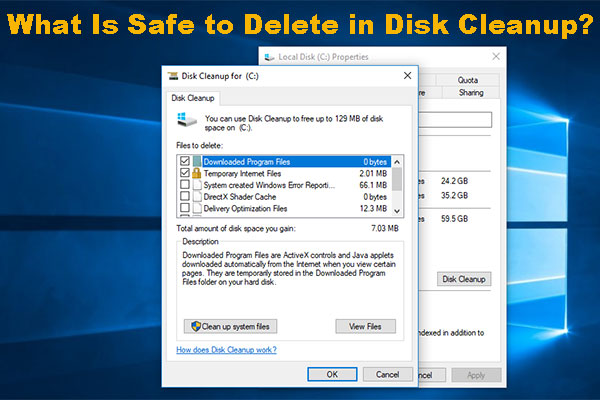
1. Search for disk clean-up using Windows Search.
2. Select the first search result to open Disk Clean-up.
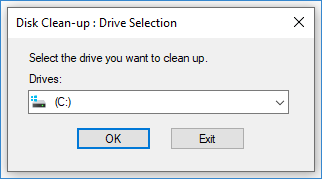
3. Make sure the drive C is selected and then click OK.
4. Under Files to delete, you need to scroll down to find the Thumbnails Normally, it is selected by default. If not, select it to continue.
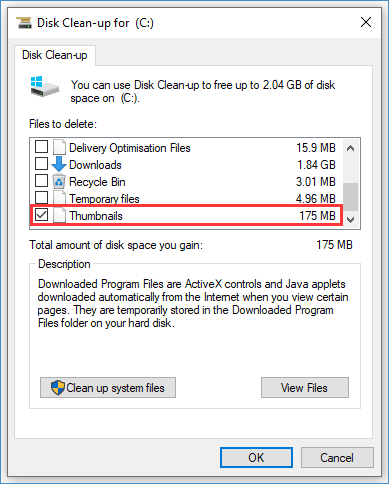
5. Click OK.
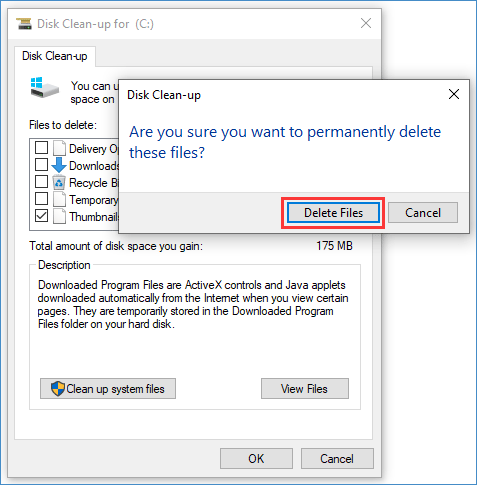
6. Click Delete Files on the pop-up interface to start the deleting process.
When the deleting process ends, the window will automatically close. Then, you can set your computer to display the thumbnails of the pictures in a folder.
Reading here, you should know how to make your computer display the pictures’ thumbnails in a folder on Windows 10.
Bonus: Recover Your Lost Data
When using Disk Clean-Up to delete some files, you may lose some important files by mistake. If you want to rescue your lost data, you can try MiniTool Power Data Recovery, a free file recovery tool.
As long as your lost data is not overwritten by new data, this software can work to recover them. It has a trial edition. You can use it to scan the drive you want to recover data from and then see whether you can find your needed files. If yes, you can use a full edition of this software to recover them without limits.
MiniTool Power Data Recovery TrialClick to Download100%Clean & Safe
The following two articles show you in which situations this software can work:
Full Solutions to Do Hard Drive Recovery via MiniTool
SD Card Recovery – Recover Files from SD Card in Multiple Cases
About The Author

Position: Columnist
Stella has been working in MiniTool Software as an English Editor for more than 8 years. Her articles mainly cover the fields of data recovery including storage media data recovery, phone data recovery, and photo recovery, videos download, partition management, and video & audio format conversions.
User Comments :