When the Windows Update Delivery Optimization (WUDO) feature is enabled on your Windows 10 computer, you can get or send Windows updates between the neighboring computers or the computer in the same network. But, not all of you want to use this feature. How to stop Delivery Optimization in Windows 10? MiniTool Solution will show you a step-by-step guide in this post.
Do You Want to Turn off Delivery Optimization in Windows 10?
The Windows Update Delivery Optimization (WUDO) feature has been introduced since Windows 10. Do you know what can this feature do for you?
This feature allows you to get Windows updates from or send updates to the neighboring computers or devices on your same network. What does this mean? If this feature is enabled on your computer, you will be able to get the Windows updates much faster than ever before. But, you also need to pay for it and even the bandwidth bill is higher relatively.
Currently, Microsoft has improved this WUDO feature of Windows 10. You can even use this feature to send some apps and updates that you have downloaded with Delivery Optimization to other machines.
You can find that this feature is really useful in some cases. But, not all of you want to use it. Perhaps, you don’t need to use this Windows Update Delivery Optimization feature due to some reason and you want to prevent your Windows from using the bandwidth.
Windows allows you to enable and disable Delivery Optimization. Do you know how to do this job? In the following guide, we will walk you through on how to stop Delivery Optimization. If you have this requirement, you can keep on reading.
How to Stop Delivery Optimization?
It is very easy to turn off Delivery Optimization. You can follow these steps to do the job:
- Press the Windows button and the X button at the same time to call out the Win+X
- Select Settings from the Win+X
- Select Update and Security.
- Stay at the Windows Update section and then select Advanced Options under Update settings.
- Drag down the mouse to the bottom and you will see the Choose how updates are delivered
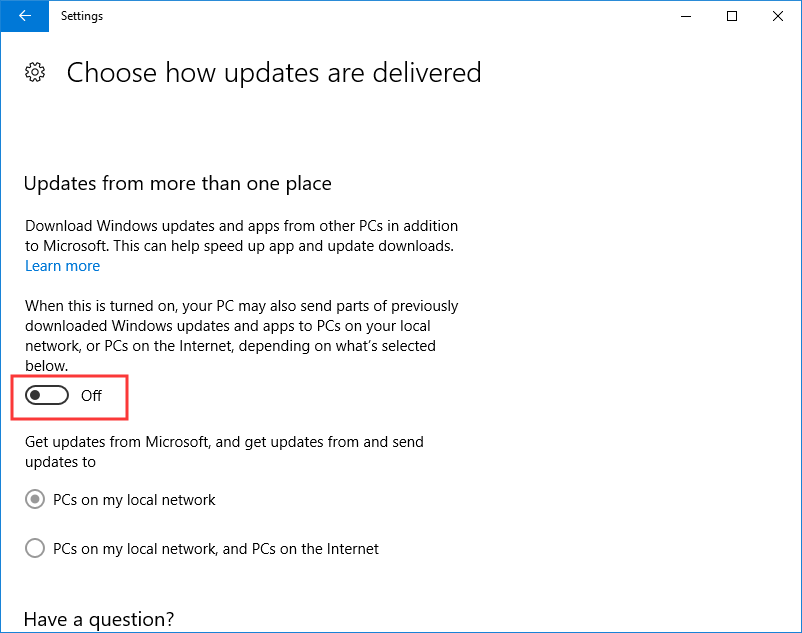
- You will see that the button under the Update from more than one place section is turned on. To disable Delivery Optimization, you need to turn the button to OFF. Then, you can see that PCs on my local network and PCs on my local network, and PCs on the Internet become grey.

After these simple steps, you can find that the Windows Update Delivery Optimization (WUDO) feature is disabled.
If you want to use it again to get Windows updates much faster, you can repeat the above steps to turn on Delivery Optimization.
Attention
Although you can manually stop Delivery Optimization using the above steps, you may find that this feature is automatically enabled again after you update your Windows OS. Don’t worry. This is normal. Due to this situation, you need to take the time to check this setting to guarantee that this feature is turned off.
User Comments :