When Microsoft Print to PDF is missing in Windows 10, you can get some useful solutions and specific details from this article on MiniTool.
Can you find the Microsoft Print to PDF that comes with Windows 10 on your computer? If not, there may be some problem or you have accidentally uninstalled the program. If you want to restore this feature, the following content may give you some help.
What Is Microsoft Print to PDF
Microsoft Print to PDF is a virtual PDF printer that comes with the official version of Windows 10, which can convert files or web pages into PDF files in the form of virtual printing. Using it to print PDF documents is one of the easiest ways to create PDF documents.
Fix Microsoft Print to PDF Missing Issue
When you urgently need to convert various documents to PDF but are unable to find Microsoft Print to PDF on the computer, please try the following methods.
Method 1: Add Microsoft Print to PDF Using Windows Features
You can first try to turn on the Microsoft Print to PDF feature through Windows Features. Because this is the easiest method to fix the issue “Microsoft Print to PDF is missing”. Here are the detailed instructions:
Step 1: Right-click the Start button to select Settings.
Step 2: Select Apps under Windows Settings part.
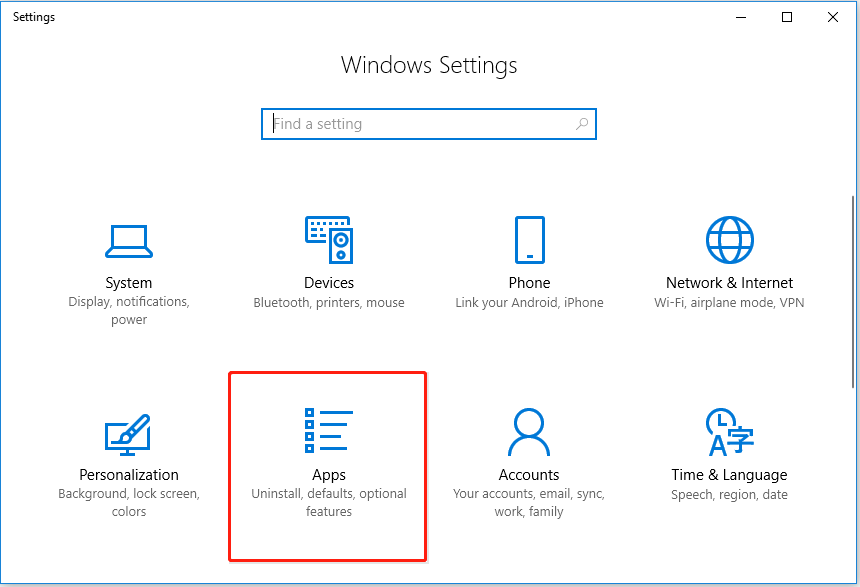
Step 3: Select Programs and Features on the right side of the Apps and features tab.
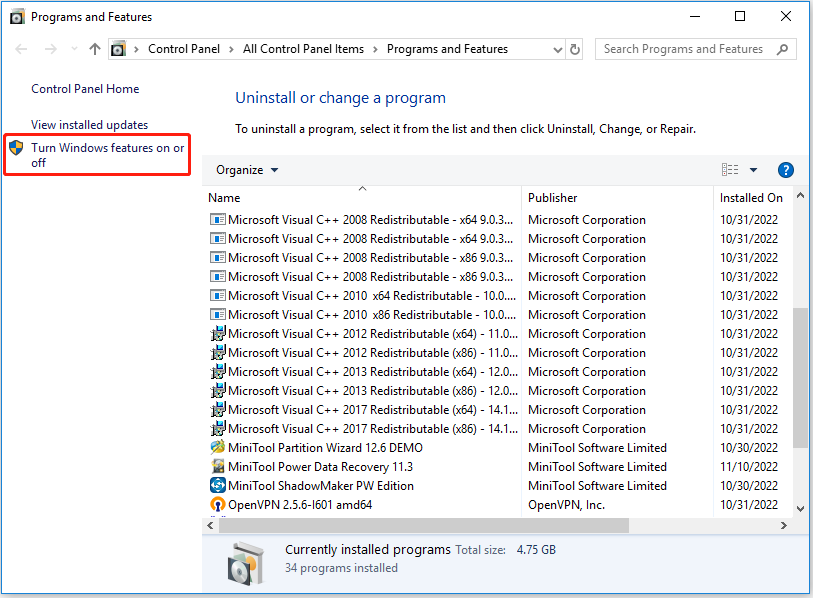
Step 4: Select the Turn Windows features on or off in the window.
Step 5: Check Microsoft Print to PDF and click OK to install this feature.
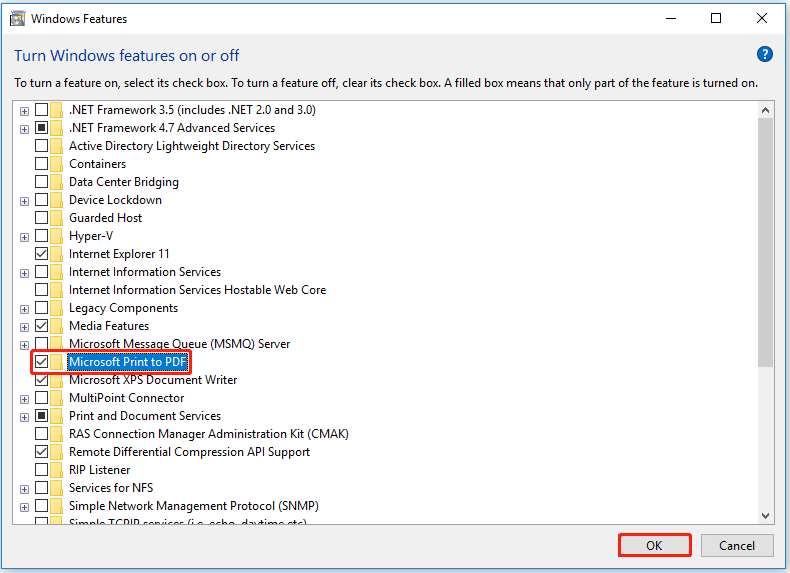
Step 6: Wait for the installation to complete and restart your computer to check if the problem “Microsoft Print to PDF is missing” is resolved.
Method 2: Add Microsoft Print to PDF by Adding Printers
If the method of using Windows features to open Microsoft Print to PDF does not work for you, you can try the second method by following the steps below:
Step 1: Use the keyboard shortcut Windows + I to open Settings and go to the Devices section by clicking it.
Step 2: Move to the Printers and scanners tab and click Add a printer or scanner.
Step 3: Wait for the computer to load for a while and select The printer that I want isn’t listed.
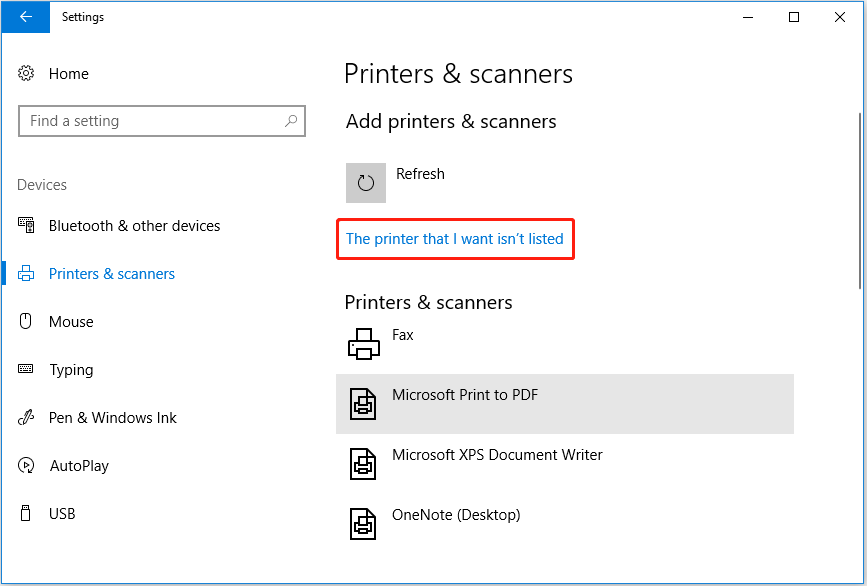
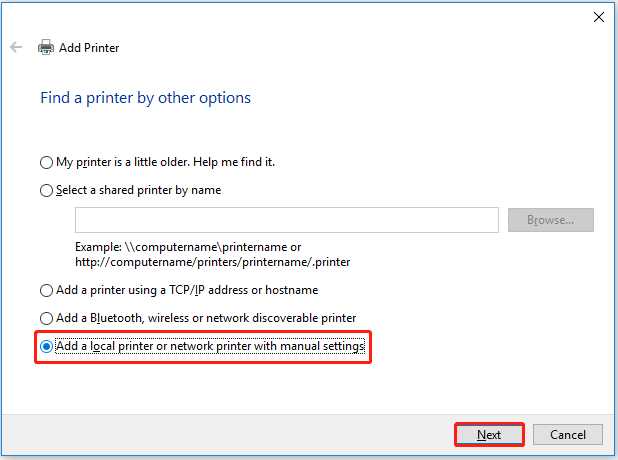
Step 4: Select Add a local printer or network printer with manual settings and click Next.
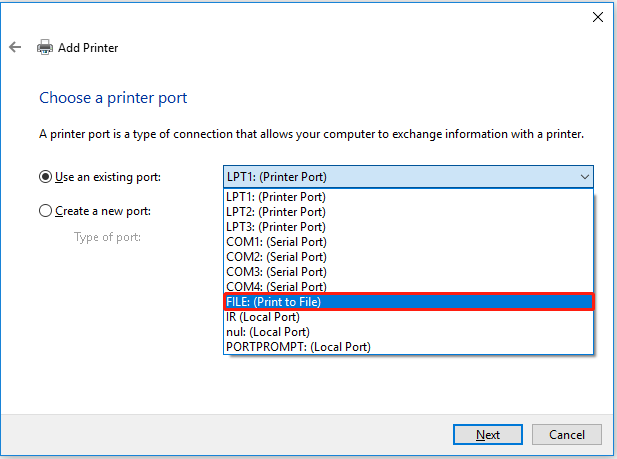
Step 5: Choose the Use an existing port option. Then click the drop-down arrow on the right side to select FILE (Print to File) or PORTPROMPT: (Local Port) and click Next.
Step 6: Choose Microsoft under the Manufacturer section, and choose Microsoft Print to PDF under the Printers section.

Step 7: Give the new printer a name and click OK to save.
Step 8: Restart your device to confirm whether Microsoft Print to PDF exists.
Method 3: Add Microsoft Print to PDF Using PowerShell
If the above two methods do not apply to your computer, there is another method. Please follow the instructions:
Step 1: Type Windows PowerShell in the Windows search box, and right-click it to select Run as Administrator.
Step 2: Click Yes to allow this app to make changes to your computer.
Step 3: Type this command in the window: Disable-WindowsOptionalFeature -online -FeatureName Printing-PrintToPDFServices-Features and press Enter.
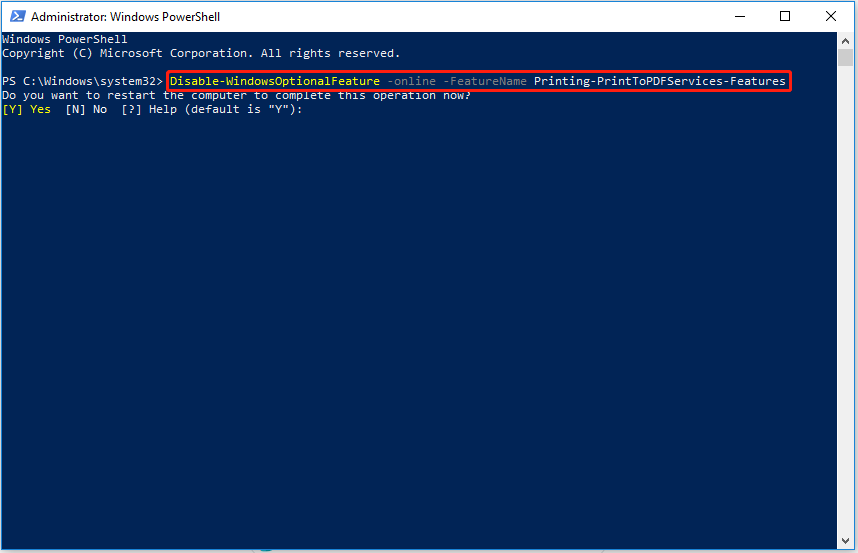
If prompted to restart your computer to apply the changes, you should type Y and press Enter. Then re-enter Windows PowerShell and execute the following command.
Step 4: Type this command: Enable-WindowsOptionalFeature -online -FeatureName Printing-PrintToPDFServices-Features and press Enter.
Step 5: The process of using Windows PowerShell to reset the Microsoft Print to PDF is complete.
Recommended articles:
Bottom Line
If your Microsoft Print to PDF is missing in Windows 10, I believe you can solve this problem after reading this article. If you have a simpler and more convenient method, welcome to discuss it with us so that more users will be benefited. For more tips about Microsoft printers, please visit MiniTool News Center.
![[Fixed]: Computer Freezes When Trying to Print Windows 10/11](https://images.minitool.com/minitool.com/images/uploads/2023/06/computer-freezes-when-trying-to-print-thumbnail.png)

User Comments :