This essay discussed by MiniTool Software mainly introduces eight solutions to open Windows Memory Diagnostic tool in Windows 11. It organizes those solutions with an order easiness. Yet, in general, all the methods are not complex.
The Windows Memory Diagnostic tool is used to troubleshoot computer problems. When your PC runs slow, stuck, freezes, hangs, turns to a blue screen, or reboots itself, it is necessary to make use of this utility to figure out whether the issue is caused by memory or not.
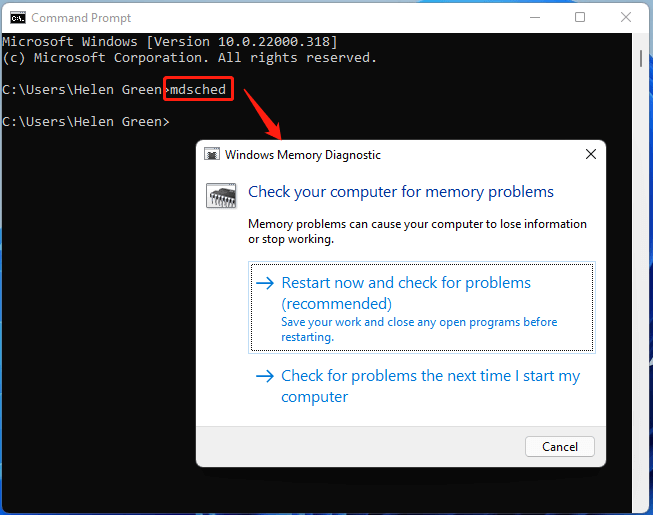
There are two options for checking your computer for memory problems.
- Restart now and check for problems
- Check for problems the next time I start my computer
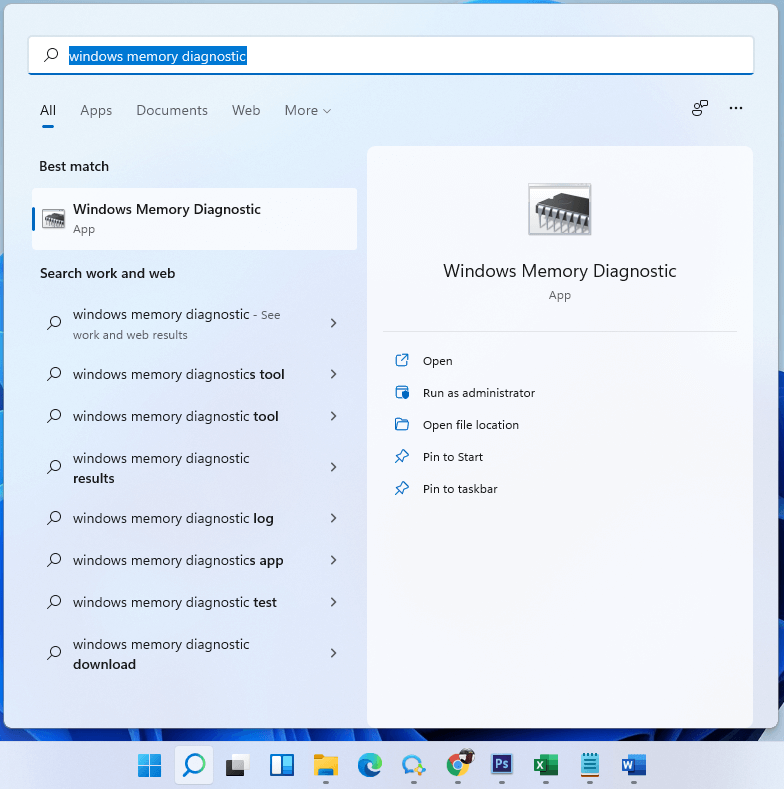
#1 Open Windows 11 Memory Diagnostic Tool with Search
Firstly, you can launch Windows Memory Diagnostic by searching it in Windows Search. You can also use “mdsched” term to find the Memory Diagnostic application.
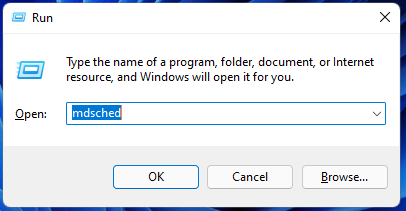
#2 Launch Windows 11 Memory Diagnostic by the Run Box
Secondly, you can rely on the Windows Run dialog to run the Memory Diagnostic app. Just press the Windows + R shortcut to start Windows Run, input “mdsched”, and click OK.
#3 Start Windows 11 Memory Diagnostic Tool Through CMD
Thirdly, you are able to trigger Windows Memory Diagnostic Tool in Win11 using a command prompt (CMD). Open Windows 11 command prompt by searching, input “mdsched”, and press Enter.
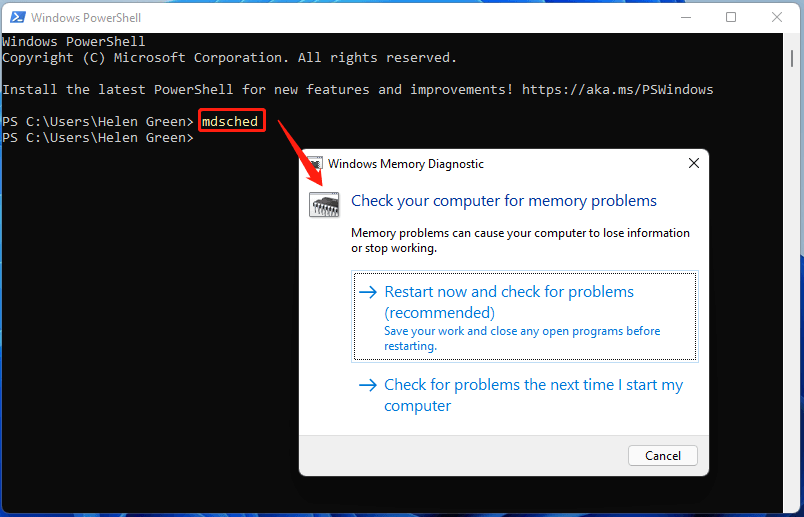
#4 Trigger Windows Memory Diagnostic Tool Within PowerShell
Similarly, use the same command in Windows PowerShell to initiate Windows Memory Diagnostic. Launch Windows 11 PowerShell by searching, type “mdsched”, and press Enter.
#5 Run Windows Memory Diagnostic via Windows 11 File Explorer
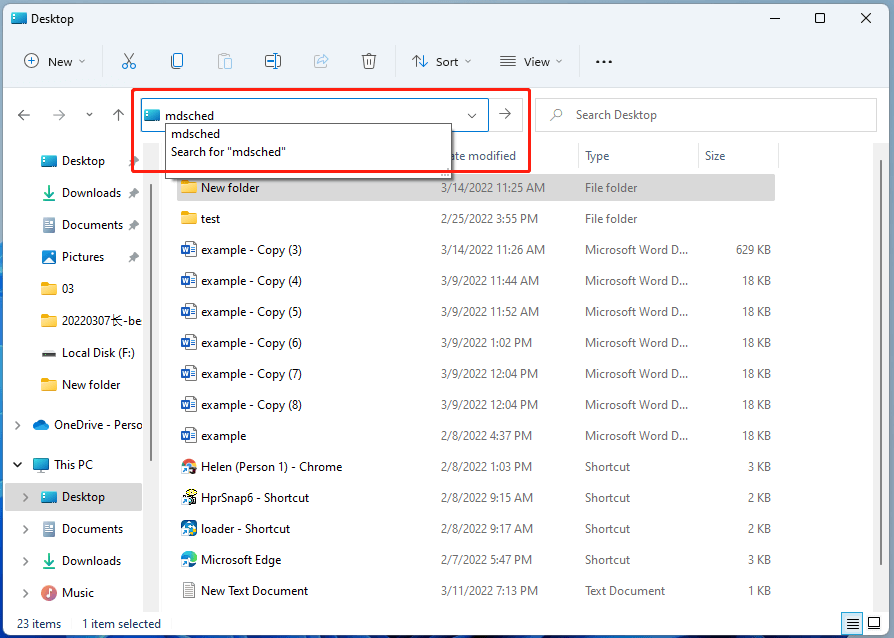
Besides, you can open the Memory Diagnostic tool by Windows 11 Explorer. Just key in “mdsched” in the address bar of File Explorer and press Enter.
#6 Open Windows Memory Diagnostic Using Windows Tools
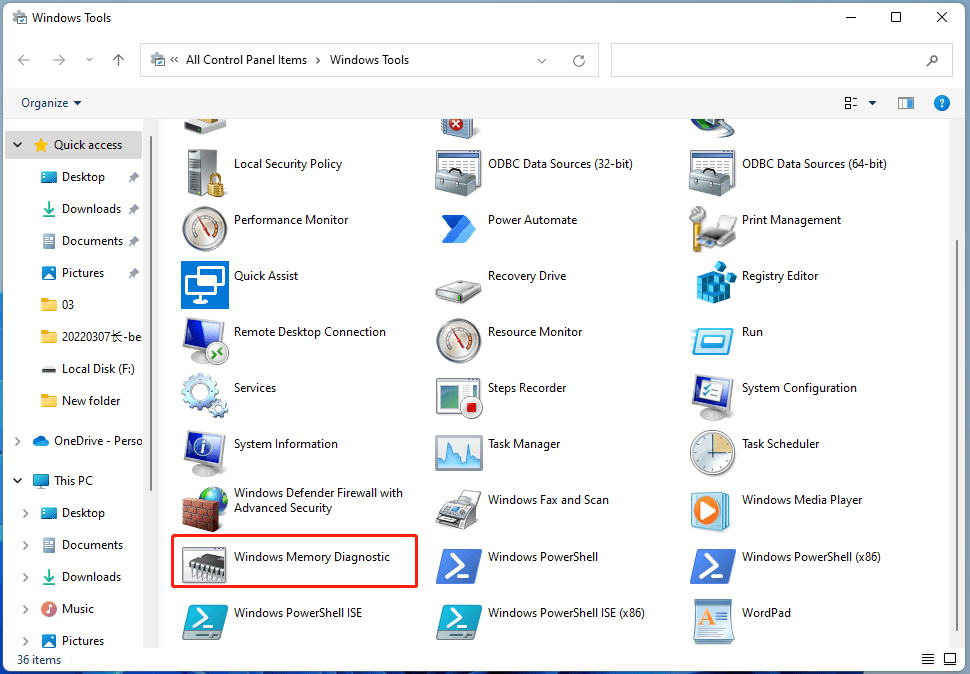
Moreover, you can find and launch Windows Memory Diagnostic in Windows 11 Tools app. Go to Control Panel, view its items by icon, and launch Windows Tools there. Then, in the Windows Tools window, find Windows Memory Diagnostic and double-click it to open it.
#7 Launch Windows 11 Memory Diagnostic in Task Manager
Furthermore, you can open Windows Memory Diagnostic tool under Task Manager.
- Open Windows 11 Task Manager using the Search utility.
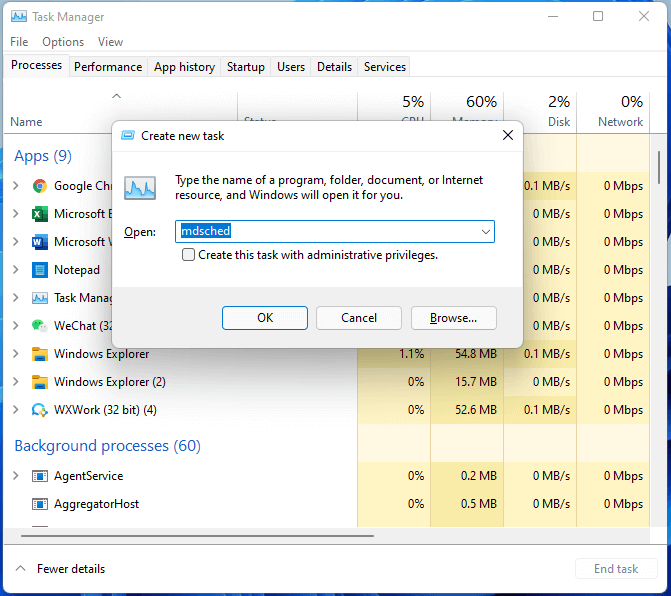
- When it is launched, click File > Run new task.
- In the new popup, input “mdsched” and click OK.
#8 Open Windows Memory Diagnostic by Creating Shortcut
Lastly, you can create a desktop shortcut to help yourself launch Windows Memory Diagnostic tool.
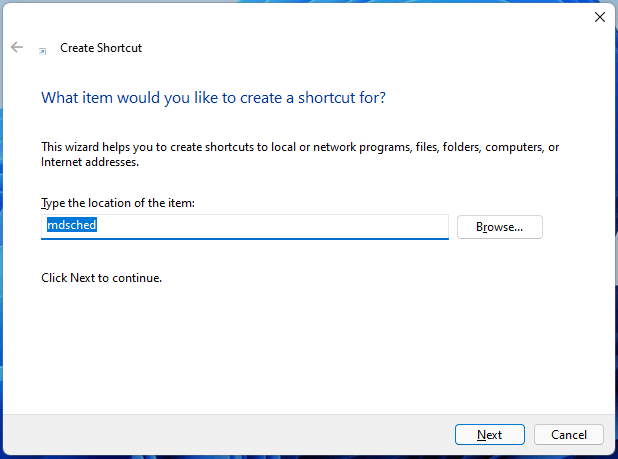
- Right-click on your desktop and select New > Shortcut.
- In the pop-up window, type “mdsched”.
- Next, assign a name to the new shortcut.
- Finally, click Finish.
Windows 11 Assistant Software Recommended
The new and powerful Windows 11 will bring you many benefits. At the same time, it will also bring you some unexpected damages such as data loss. Thus, it is strongly recommended that you back up your crucial files before or after upgrading to Win11 with a robust and reliable program like MiniTool ShadowMaker, which will assist you to protect your increasing data automatically on schedules!
User Comments :