You may want to remove printer drivers from your Windows 10 or Windows 11 computer, but you don’t know how to do this. Don’t worry! In this post, MiniTool Software will introduce 3 ways that can help you completely uninstall printer drivers on Windows 10/11.
Should I Remove Printer Drivers on Windows 10/11?
When you connect your Windows 10/11 computer to a printer, a new printer driver will be installed on your device. At times, you just use a printer once, but a printer driver is left on your device. So, you may want to remove printer drivers Windows 10/11. You can delete a printer by removing the printer driver from your PC. In this post, we will talk about printer removal Windows 10/11 issues.
There are three ways to uninstall printer drivers Windows 10/11: one is to use the Settings app, the second way is to use the Print Management, and the third way is to use Windows PowerShell.

How to Remove Printer Drivers Windows 10/11?
- Way 1: Remove printer drivers via the Settings app
- Way 2: Delete printer drivers using the Print Management
- Way 3: Uninstall printer drivers with Windows PowerShell
Way 1: Remove Printer Drivers via the Settings App
Step 1: Press Windows + I to open the Settings app.
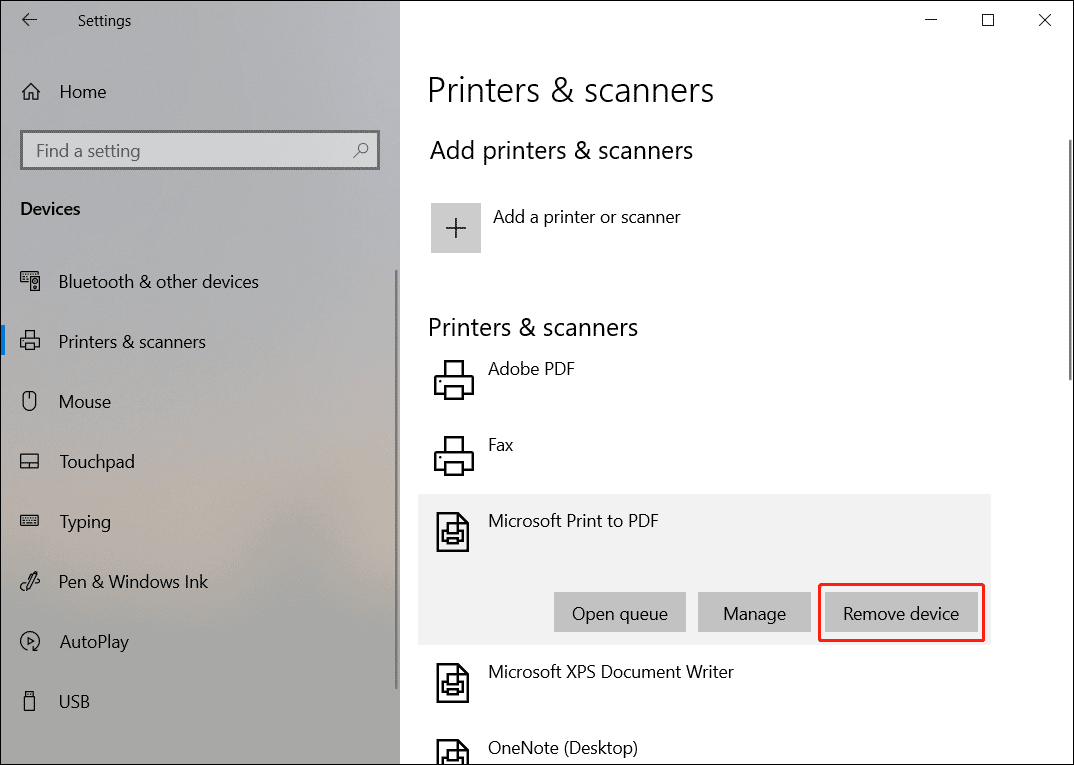
Step 2: Click Devices and then select Printers & scanners from the left menu.
Step 3: Click the printer you want to remove. Then, click the Remove device button to remove that printer driver from your computer.
Step 4: Click the Yes button to confirm the operation.
Repeat step 3 to step 4 to uninstall other printer drivers from your Windows 10/11 computer.
Way 2: Delete Printer Drivers using the Print Management
Step 1: Click the search icon from the taskbar and search for Control Panel.
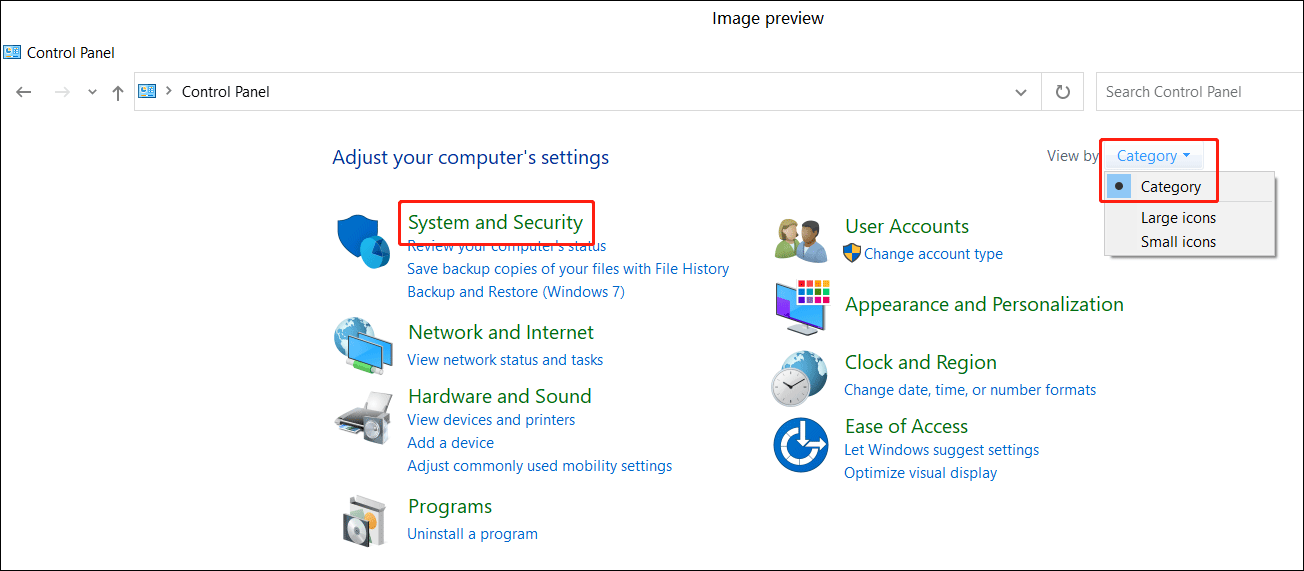
Step 2: Click Control Panel from the search results to open it.
Step 3: Set to view by category. Then, select System and Security.
Step 4: Click Administrative Tools.
Step 5: On the next page, click the Print Management option to continue.
Step 6: On the Print Management interface, expand Custom Filter and then select All Drivers.
Step 7: Find the print driver you want to delete and right-click it. Then, select Remove Driver Package.
Step 8: Click the Yes button to confirm the operation.
Repeat step 7 to step 8 to uninstall other printer drivers from your Windows 10/11 computer.
Way 3: Uninstall Printer Drivers with Windows PowerShell
Here is how to delete a printer using Windows PowerShell”
Step 1: Click the search icon from the taskbar. Then type powershell into the search box.
Step 2: Right-click Windows PowerShell from the search result and select Run as administrator to run Windows PowerShell as administrator.
Step 3: The Windows PowerShell interface will appear. Type the following command to Windows PowerShell and press Enter.
Get-PrinterDriver | Format-List Name
This will list all the printer drivers that have been installed on your PC
Step 4: Type the following command and press Enter to remove the printer driver from your computer:
Remove-PrinterDriver -Name “Your-Printer-Name”
Here, you can find the target printer driver name from the driver list in step 3.
Then, you can repeat this method to remove all other printer drivers you want to uninstall.

Printer Removal
When you don’t need to use a printer driver, you can feel free to use one of the methods mentioned in this post to remove printer drivers Windows 10/11. There is no need to worry about this operation. When you connect to a new printer, the driver will be automatically installed on your device.
Here, we also introduce a useful tool that can help you recover your lost and deleted files: it is MiniTool Power Data Recovery, professional data recovery software. You can use this software to scan the drive that has previously saved your files and then recover then to a suitable location.
MiniTool Power Data Recovery TrialClick to Download100%Clean & Safe
Should you have other issues, you can let us know in the comments.
About The Author

Position: Columnist
Stella has been working in MiniTool Software as an English Editor for more than 8 years. Her articles mainly cover the fields of data recovery including storage media data recovery, phone data recovery, and photo recovery, videos download, partition management, and video & audio format conversions.
User Comments :