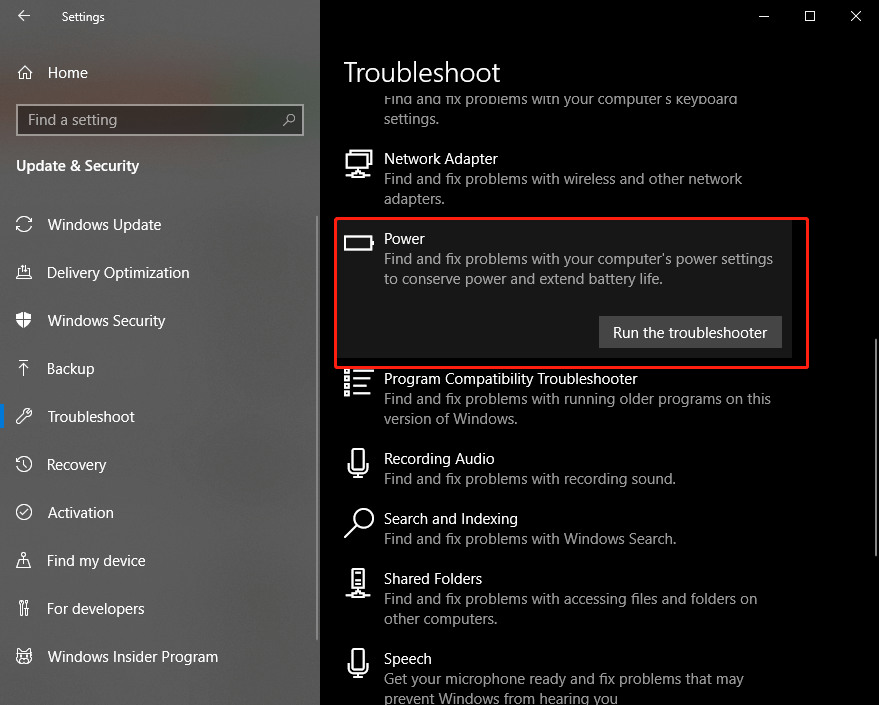
The Power Troubleshooter in Windows 11/10 helps you troubleshoot Windows power issues automatically. It can detect your system settings and fix problems with power usages, timeout and display settings, etc.
Where to Find Windows 11/10 Power Troubleshooter
For Windows 11
- Press Windows + I to open Windows Settings.
- Under System tab, you can click Troubleshoot in the right window.
- Click Other troubleshooters.
- Scroll down to find Power option and click the Run button next to it.
For Windows 10
Click Start -> Settings -> Update & security -> Troubleshoot -> Power, and click Run the troubleshooter button.

The Windows 11/10 power troubleshooter will automatically run to find fix problems with your computer’s power settings to conserve power and extend battery life.
You can choose the option to let it automatically scan and fix the problems with your power settings or choose another option to let you decide whether to apply the fix when detecting problems.
Other Tips to Fix Power Problems in Windows 11/10
Aside from running Windows power troubleshooter to fix power settings issues, you can also try the other tips below to fix Windows power/battery problems.
Fix 1. Update Windows 11/10. Click Start -> Settings -> Windows Update -> Check for updates to update your system. For Windows 10, you need to click Update & Security in Settings to access the Windows Update screen.
Fix 2. Update the battery driver on Windows 11/10. Click Start, type device manager, and click Device Manager to open it. Expand the Batteries category, right-click your battery and select Update driver. Choose the first option to let your system detect and install the newer driver automatically.
Fix 3. Change power plan settings to Balance plan. Click Start, type control panel, and select Control Panel to open it. Click Hardware and Sound. Click Choose a power plan under Power Options. Make sure you choose the Balanced power plan.
Best Free Data Recovery Software for Windows 11/10
If you mistakenly deleted some files and empty the recycle bin, you can use a professional data recovery program to easily recover the permanently deleted files.
MiniTool Power Data Recovery is a top free Windows data recovery program. This tool helps you recover any deleted or lost files from Windows PC or laptop, USB flash drive, memory card, external hard drive, SSD, etc. You can use it to recover data from various data loss situations and recover data from a formatted/corrupted hard drive.
Download and install MiniTool Power Data Recovery on your Windows computer and check the simple guide below for data recovery.
MiniTool Power Data Recovery FreeClick to Download100%Clean & Safe
- Launch MiniTool Power Data Recovery.
- On the main UI, you can select the target drive under Logical Drives and click Scan to scan the drive immediately. Alternatively, you can also click the Devices tab and select the whole device and click Scan. If you don’t know the specific location, you can select the entire device or hard disk to scan.
- Let the scan process finish. You can check the scan result to find the wanted files. Check the needed files and click the Save button to choose a new location to store the recovered files.

User Comments :