What Is Windows 10 Test Mode?
Windows 10 Test Mode is a temporary Windows State which allows you to perform certain tests on software and drivers not approved by Microsoft. Developers can evaluate the real-time performance and examine how the code holds up in daily use.
This mode is designed for professional developers and if you are a normal user, you had better turn off Test Mode Windows 10 because Windows won’t perform any security check when this mode is enabled.
How to Enable Test Mode Windows 11/10?
If you need to enable Test Mode Windows 10, there are two ways for you.
Way 1: Enable Windows 10 Test Mode via CMD
Before you enable Test Mode Windows 10, you must make sure Secure Boot is disabled or else you cannot activate it successfully.
Step 1. Type cmd in the search bar to locate Command Prompt and right-click on it to choose Run as administrator.
Step 2. Copy & paste the following command in the command window and hit Enter.
bcdedit.exe -set TESTSIGNING ON

Step 3. After this process is complete, there will be a message saying that Test Mode is activated and you’ll see a watermark in the lower-right corner of the screen.
Way 2: Enable Windows 10 Test Mode via Settings
Step 1. Press Win + I at the same time to open Windows Settings,
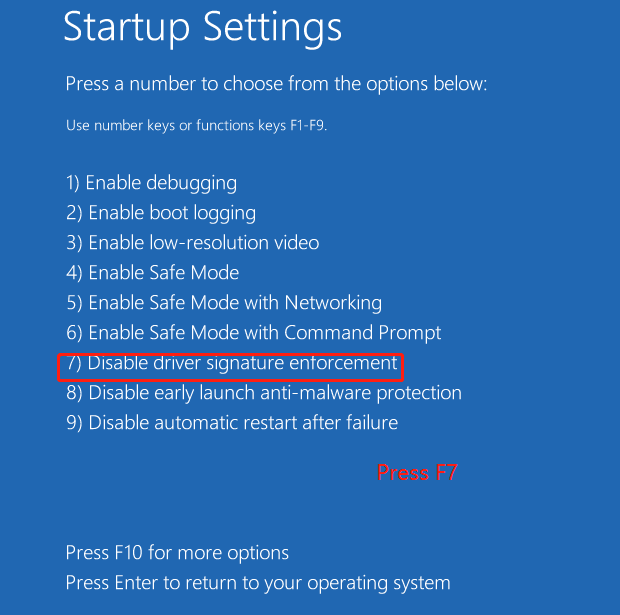
Step 2. Go to Update & Security > Recovery > Restart now under Advanced startup.
Step 3. After your PC restarts, go to Troubleshoot > Disable driver signature enforcement under Startup Settings (Press F7) > Restart. Now, you can install unsigned drivers.
How to Disable Test Mode Windows 11/10?
Once you activate Test Mode in Windows 10/11, every time you restart your PC, you will continue being in it. As a result, you must disable it manually when you don’t need it anymore.
Step 1. Go to Command Prompt and run it as administrator.
Step 2. Run the following command:
Bcdedit.exe -set TESTSIGNING OFF
Step 3. Wait for the confirmation message on the console and then reboot your device. Now, it will start from the normal mode.
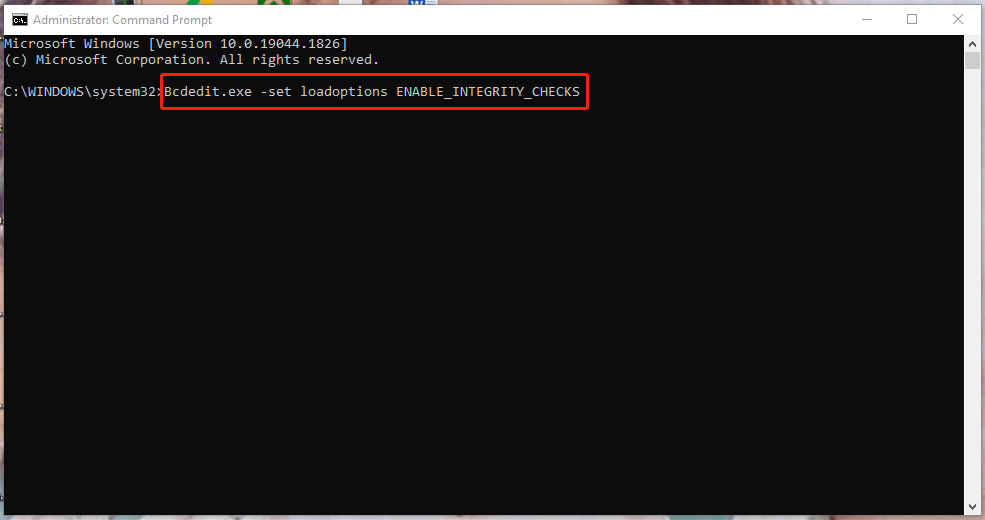
If you receive a message that shows that Windows need special permissions to disable Test Mode, you can run this command with administrator rights:
Bcdedit.exe -set loadoptions ENABLE_INTEGRITY_CHECKS
Then, copy & paste this command and hit Enter:
Bcdedit.exe -set TESTSIGNING OFF
How to Remove Test Mode Watermark?
As shown above, when you enable Test Mode Windows 10/11, a watermark will appear in the lower-right corner of the screen. If you want to remove the watermark without disabling Test Mode, here’s how to do it:
Step 1. Download Universal Watermark Disabler.
Step 2. Find the downloaded zip file and double-click it.
Step 3. Click Install & Yes to install this application.
Step 4. When the prompt crops up, it will inform you to sign out to remove the test mode watermark. Save all the changes you make and hit OK.
Step 5. Sign back into Windows and the watermark is gone.
About The Author

Position: Columnist
Aurelie is a passionate soul who always enjoys researching & writing articles and solutions to help others. Her posts mainly cover topics related to games, data backup & recovery, file sync and so on. Apart from writing, her primary interests include reading novels and poems, travelling and listening to country music.