Auto HDR not working is a common problem in Windows 11. If you are encountering this issue, how can you get rid of this situation from your PC? Go to read this post on the MiniTool website and you can find some useful and simple ways to fix it.
Auto HDR Not Working Windows 11
Auto HDR (High Dynamic Range) is a video or imaging technique that can help to well show the lights and darks in a digitally reproduced scene. In video gaming, Auto HDR brings an increased range of color and luminance to give a more immersive and realistic experience.
In Windows 11, this feature can automatically help to adjust your videos and photos so that you can get the best possible image.
However, in some cases, Auto HDR won’t work properly in Windows 11. The main reason is the use of incompatible DisplayPort or HDMI. And the fixes are not complicated and you can follow these ways below.
Fixes for Auto HDR Not Working Windows 11
Make Sure Auto HDR Is Supported and Enabled
If your PC doesn’t support Auto HDR, the feature doesn’t work. Besides, you should also make sure this feature is enabled.
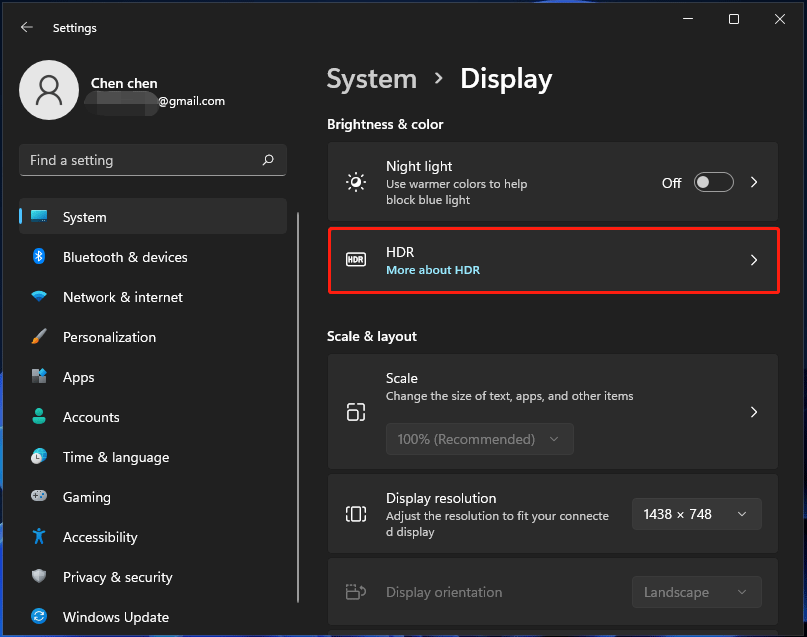
To check if your HDR is supported in Windows 11, you need to open the Settings app, go to System > Display > HDR and expand Display capabilities to see if your system supports HDR. If yes, enable this feature. To enable Auto HDR, turn on the toggle of Use HDR. Then, ensure Auto HDR is enabled.
Install a Color Profile for Your Monitor
Many Auto HDR issues can be fixed by a color profile installation and this can stop you from endlessly tweaking the monitor’s brightness and contrast settings. To fix the Auto HDR not working issue, you can also have a try.
How to do this fix? Follow the instructions below:
Step 1: Click the Windows icon and choose Settings to open the app.
Step 2: Type Color Management to the search box in Settings, press Enter and click the result.
Step 3: Choose your monitor from the drop-down menu under the Device section, check Use my settings for this device and click Add.
Step 4: Click Browse and choose the file you have downloaded.
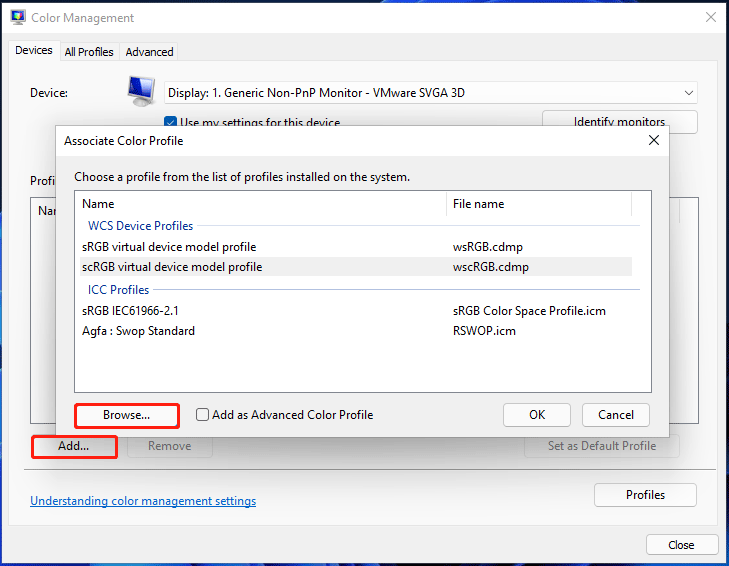
Step 5: Choose the new color profile and click Set as Default Profile.
Check Your Display and HDMI Port
Windows 11 Auto HDR not working can happen due to an incompatible HDMI cable that doesn’t support HDMI 2.0b. Make sure you use the required HDMI cable and this feature can work properly. If you cannot see the HDR stream option, this may be because the monitor cannot support this particular technology.
Check If PC Meets Requirements of Auto HDR
To use Auto HDR successfully, you should make sure the PC meets the hardware requirements:
- The monitor should support HDR10 and have a resolution of 1080p or more (max brightness of 300 nits or more is recommended).
- DisplayPort 1.4 or HDMI 2.0 or higher is required.
- The integrated or dedicated GPU should support PlayReady 3.0.
Final Words
Is Auto HDR not working on your Windows 11 PC? How can you fix this issue to get richer colors and more visual details on the computer? After trying these ways above, you can use Auto HDR properly.
About The Author

Position: Columnist
Vera has been working at the MiniTool Team for over 10 years as a technical editor and content writer. She mainly focuses on disk and partition management, data recovery, Windows backup and restore, and PC troubleshooting. Through in-depth software testing and hands-on experience, she has helped users solve a wide range of computer problems and better protect their data on Windows devices.
User Comments :