It is easy to upgrade Windows 10 to 11 if you follow the pro guide from MiniTool. In this guide, you can find 4 free ways to perform the upgrade: via Windows Update, ISO, Installation Assistant, and a bootable USB drive.
Quick Answer
| Question | Answer |
| Can you upgrade Windows 10 to Windows 11 for free? | Yes. Eligible Windows 10 PCs can upgrade to Windows 11 for free. |
| What is the safest upgrade method? | Windows Update is the easiest and safest option for most users. |
| Will upgrading to Windows 11 delete files? | No. An in-place upgrade can keep files, apps, and settings. |
Why Should I Upgrade to Windows 11 from Windows 10
Whether you should upgrade Windows 10 to 11 depends on your needs, but it is recommended to upgrade.
This is primarily because the countdown to Windows 10 end of life approaches. Besides, Windows 11 offers several enhancements to improve the user experience.
Windows 10 End of Life (EOL)
The end-of-support date is October 14, 2025. After that date, Microsoft will no longer offer security updates, feature updates, bug fixes, and technical assistance for Windows 10.
This means continuing to use this system will leave your PC exposed to various security threats like malware. As a result, data loss and data breaches often happen. Moreover, the system may not be compatible with new software.
Advantages of Windows 11
The new OS has several merits compared with Windows 10, including:
- Refresh user interface: The redesigned UI is more user-friendly. For example, the Start menu, Taskbar, etc., help in easy navigation.
- Improved performance: Windows 11 is optimized for faster boot times, better resource management, and smoother overall performance.
- Improved Security: Security features like TPM 2.0 and Secure Boot keep Windows 11 safer.
- Enhanced gaming experience: Windows 11 uses DirectStorage and Auto HDR to improve gaming performance.
In addition, Android app integration, AI-powered features, better multitasking, etc., make Windows 11 a good choice.
![[6 Aspects] Windows 11 vs Windows 10: What Are the Differences?](https://images.minitool.com/minitool.com/images/uploads/2021/06/windows-11-vs-windows-10-thumbnail.png)
To enjoy the new operating system, it is strongly recommended to upgrade from Windows 10 to Windows 11.
Here is a quick comparison of Windows 10 vs Windows 11:
| Feature | Windows 10 | Windows 11 |
| Support end date | October 2025 | Ongoing |
| Security | Standard | Enhanced—improved TPM 2.0 and Secure Boot protection |
| Gaming features | Standard | Auto HDR and DirectStorage |
| Interface | Traditional | Modern redesigned UI |
| AI features | Limited | More AI integration |
Can I Upgrade Windows 10 to 11?
This answer depends on whether your computer is eligible for an upgrade to Windows 11. First, check the minimum system requirements.
Windows 11 System Requirements
On Microsoft, you can notice Windows 11 has high system requirements, as shown:
- RAM: 4GB memory
- Processor: 1 GHz or faster with 2 or more cores, and appearing on the list of approved CPUs
- Storage: 64 GB or larger storage device
- Graphics card: Compatible with DirectX 12 or later with WDDM 2.0 driver
- System firmware: UEFI, Secure Boot capable
- Display: High definition (720p) display that is greater than 9” diagonally, 8 bits per color channel
- TPM: Trusted Platform Module (TPM) version 2.0
- Internet connection: Microsoft account and internet connectivity required for setup
To upgrade Windows 10 to 11, make sure your computer meets these minimum system requirements.
You can check some PC specifications by searching for System Information in Windows Search and pressing Enter. To check if the machine has TPM, follow the guide on Windows 11 TPM check. To check the DirectX version, type dxdiag to Run (press Win + R), and click OK.
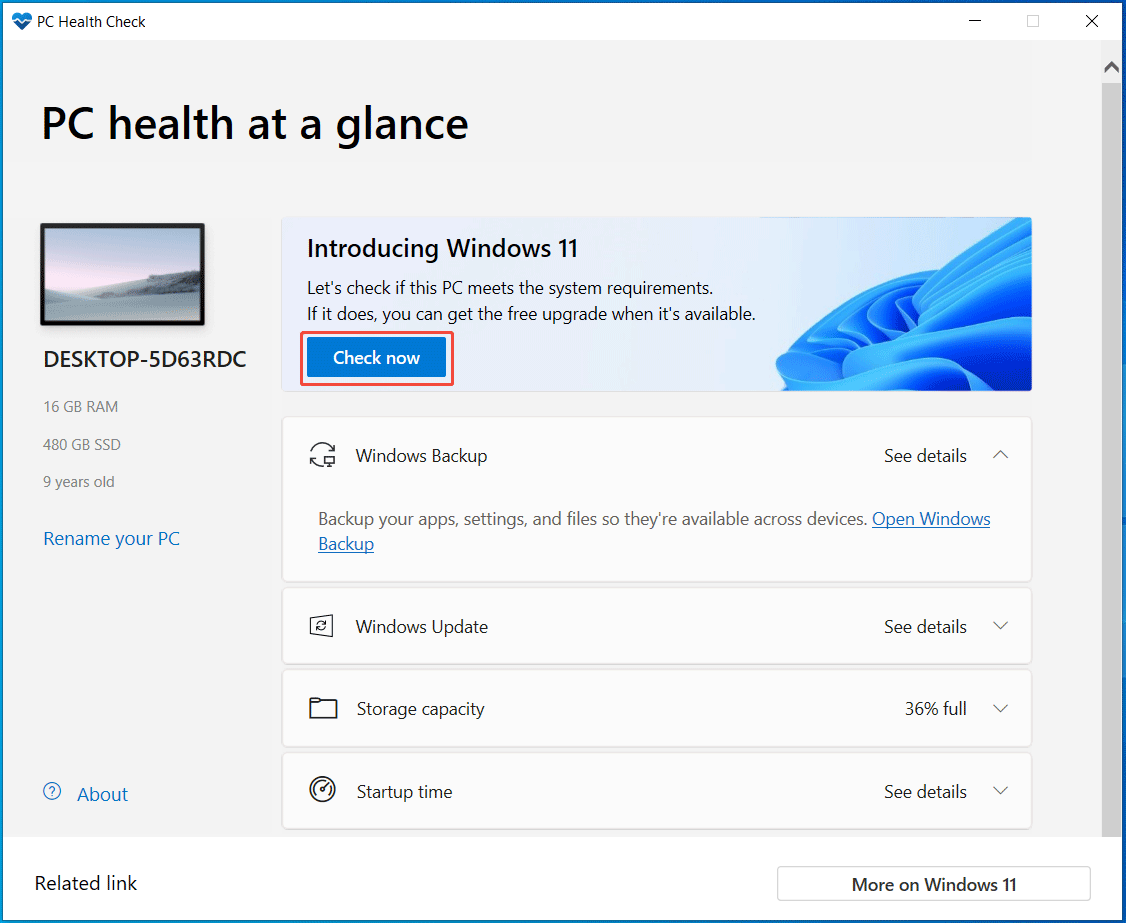
If you are looking for a quick way to know if the PC can meet the requirements, use PC Health Check.
PC Health Check for Windows 11 Compatibility
Microsoft offers a professional tool called PC Health Check to perform a Windows 11 compatibility check. Just take these steps:
Step 1: Download PC Health Check from Microsoft, install and run it in Windows 10.
Step 2: Click Check now. It shows you the results.
If your PC is eligible, try to perform the Windows 10 to 11 upgrade. Follow the instructions below to back up data first and then try one way for the upgrade.
Back Up Files Before Upgrading to Windows 11
In Windows 10, you save many important files. In theory, upgrading Windows 10 to 11 via Windows Update, Installation Assistant, and ISO won’t delete your files. However, you should know that something may go wrong, and data loss can occur.
Backing up data before any major system change is always the safest step. It’s better to be safe than sorry!
Moreover, upgrading to Windows 11 via a clean installation (Option 4 below) will delete files. So, it is necessary to make a data backup.
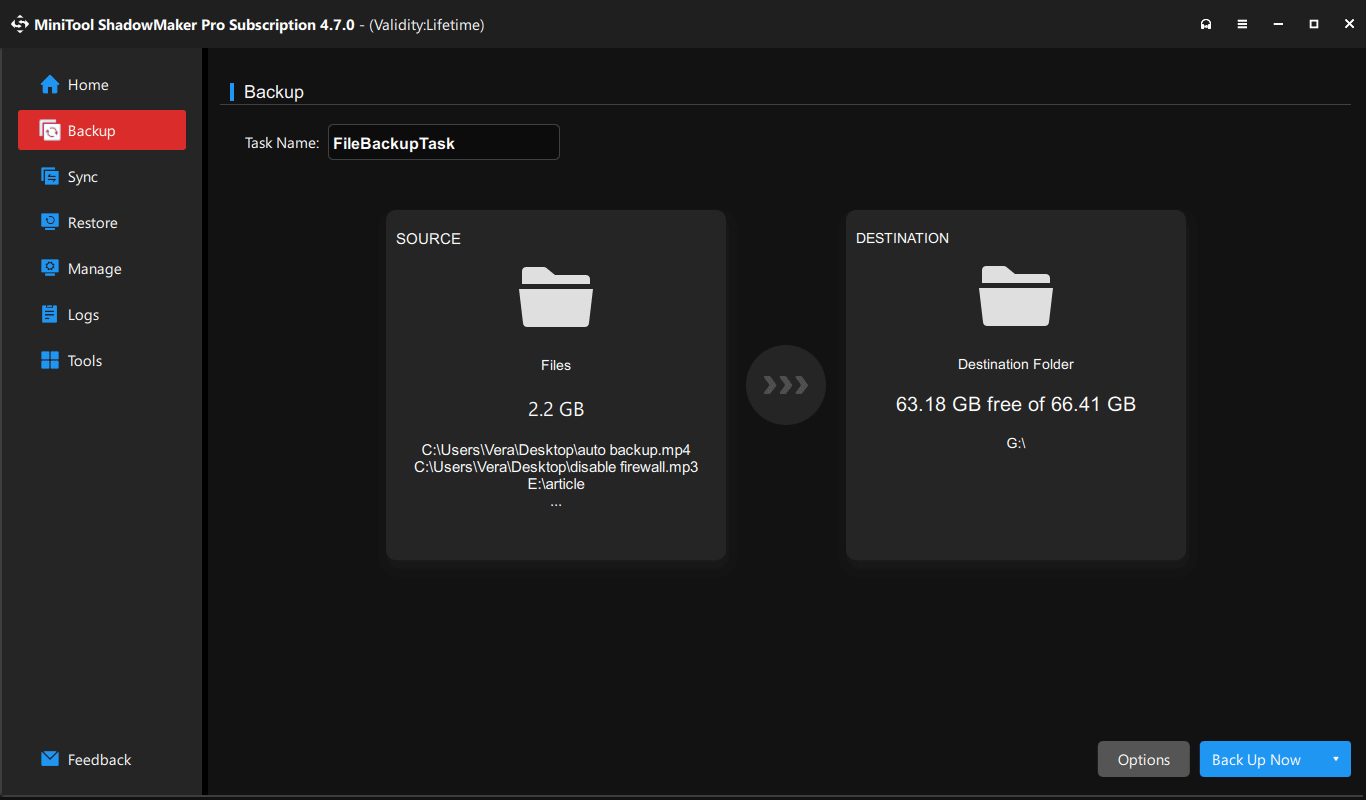
Tools like MiniTool ShadowMaker can create a full backup for files and folders to prevent data loss.
You can use it to back up:
- personal documents
- photos and videos
- downloaded files
- important work data
- system settings
MiniTool ShadowMaker TrialClick to Download100%Clean & Safe
Step 1: Connect an external or USB drive to the Windows 10 computer.
Step 2: Launch MiniTool ShadowMaker to its Backup page.
Step 3: To back up important files, navigate to SOURCE > Folders and Files > Computer. Then, tick the items you wish to back up and click OK.
Step 4: Hit DESTINATION to choose the connected USB drive or external drive.
Step 5: Begin the file backup by clicking Back Up Now.
After getting ready for Windows 11, it is time to run the upgrade task.
Let’s explore how to upgrade Windows 10 to 11 without losing data.
How to Upgrade Windows 10 to Windows 11
| Method | Keep Files | Best For | Difficulty |
| Windows Update | Yes | Most users whose PCs are eligible | Easy |
| Installation Assistant | Yes | PCs that support Windows 11 but do not receive the upgrade through Windows Update; Faster upgrade | Easy |
| ISO File | Yes | Users who need to bypass Windows Update delays and upgrade offline | Medium |
| Bootable USB Drive | Optional | Clean installation | Advanced |
Option 1: Upgrade Windows 10 to 11 via Windows Update
This is the easiest and safest method.
According to Microsoft, you can wait until Windows Update tells you that the upgrade is ready for the device. Then, upgrade to Windows 11 from Windows 10.
Follow these steps to check and upgrade:
Step 1: Navigate to Start > Settings.
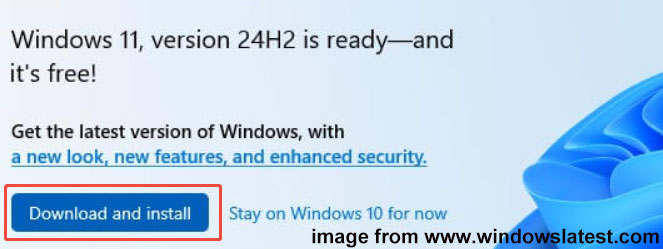
Step 2: Hit Update & Security > Windows Update > Check for updates.
Step 3: If Windows 11 is ready for your device, you see a banner in Windows Update, saying “Windows 11, version 24H2 is ready-and it’s free”. Just click the Download and install button to continue.
Step 4: Accept the software license terms and begin installing Windows 11.
Step 5: Windows Update refreshes to show the installation status. Follow the on-screen instructions to continue the upgrade by restarting the system.
Sometimes Windows Update doesn’t tell you Windows 11 is ready, although the device meets the hardware requirements. The possible reasons are:
- The upgrade isn’t ready to install yet.
- A known compatibility issue may block the update.
In this case, try other methods.

Option 2: Run Windows 10 to 11 Upgrade via Installation Assistant
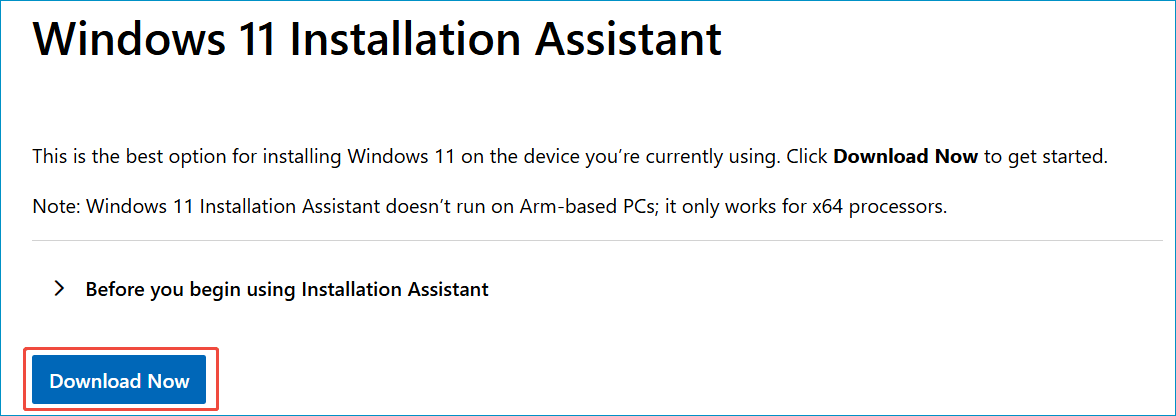
Microsoft provides the Windows 10 to 11 upgrade tool, Installation Assistant. This tool verifies if the device meets system requirements and simplifies the upgrade process.
Here is how to upgrade Windows 10 to 11 via Installation Assistant.
Step 1: Download Windows 11 Installation Assistant from Microsoft.
Step 2: Double-click on the .exe file to open this upgrade tool.
Step 3: This tool will verify if the PC is compatible with Windows 11. If yes, click the Accept and install button to proceed with the installation.
Step 4: It begins downloading and installing Windows 11. Then, a window prompts you to restart. Just hit Restart now.
Step 5: The computer restarts to continue the upgrade. After that, sign in to the system to complete the final setup. Then, you get a fresh Windows 11.
Option 3: Upgrade from Windows 10 to 11 via ISO
In addition, you can upgrade Windows 10 to 11 without losing data using an ISO file of Windows 11. During the process, you are allowed to keep personal files and apps.
Here is how to run the upgrade:
Step 1: Download Windows 11 ISO
- Also, access the Windows 11 download page.
- Go to the Download Windows 11 Disk Image (ISO) for x64 devices section.
- Select Windows 11 (multi-edition ISO for x64 devices) and hit Confirm.
- Choose the product language and confirm it.
- Click the 64-bit Download button to begin downloading ISO.
Step 2: Mount ISO
- Find the downloaded ISO file, right-click on it, and choose Mount.
- Run the setup.exe file from the virtual drive.
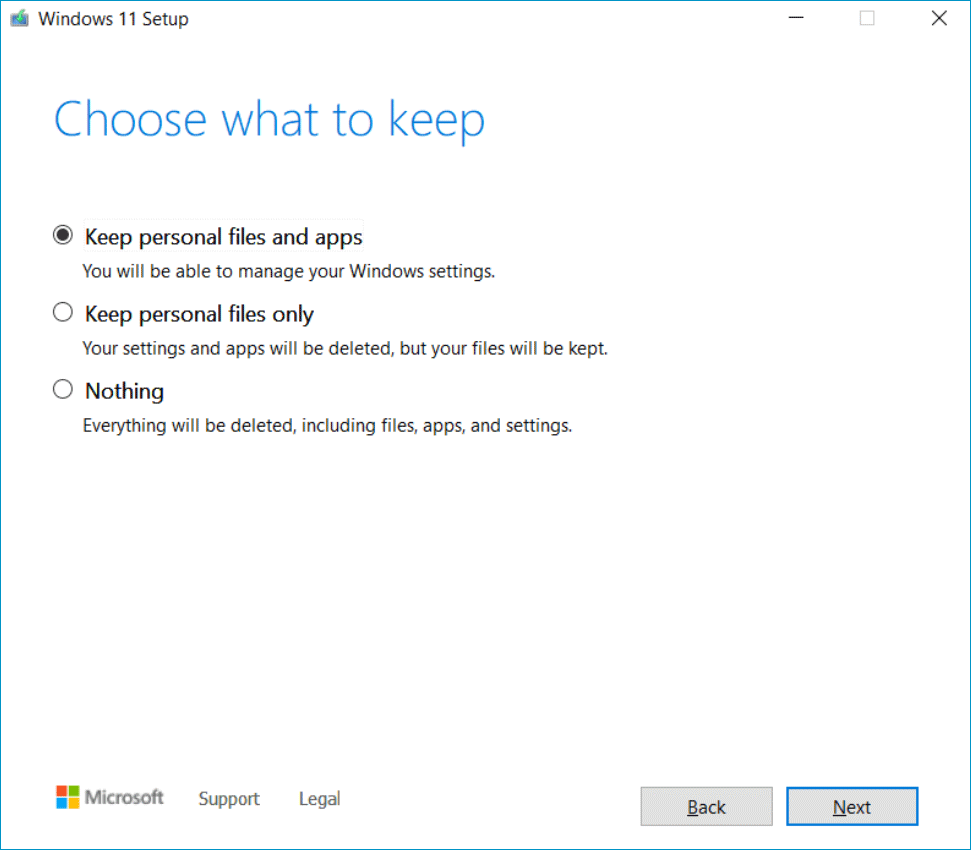
Step 3: Perform Windows 10 to 11 Upgrade
- In the Windows 11 Setup window, click Next to continue. Or, hit Change how Setup downloads updates, tick Not right now, and proceed.
- Accept the license terms after checking for something.
- Confirm if everything is ready to install. Next, click the Install button to begin the installation of Windows 11.
Option 4: Upgrade to Windows 11 from Windows 10 via USB
To upgrade from Windows 10 to 11, a bootable USB drive can help. That drive enables you to perform a clean installation of Windows 11 for an upgrade.
Step 1: Create a Bootable USB Drive
- Download Windows 11 Media Creation Tool and launch it.
- Accept the applicable notices and license terms.
- Select a language and Windows edition.
- Tick USB flash drive and choose your drive.
- Follow the on-screen prompts to finish the bootable USB creation.
Step 2: Boot PC from USB
- Restart Windows 10 and press Del, F2, or another boot key to access the BIOS menu.
- Set the USB drive as the first boot order.
- Save the setting and boot to the Windows 11 Setup interface.
Step 3: Install Windows 11 from USB
1. Configure language settings and keyboard settings as per your preferences.
2. Select a setup option: Install Windows 11. Be sure to tick I agree everything will be deleted including files, apps, and settings. Then, click Next.
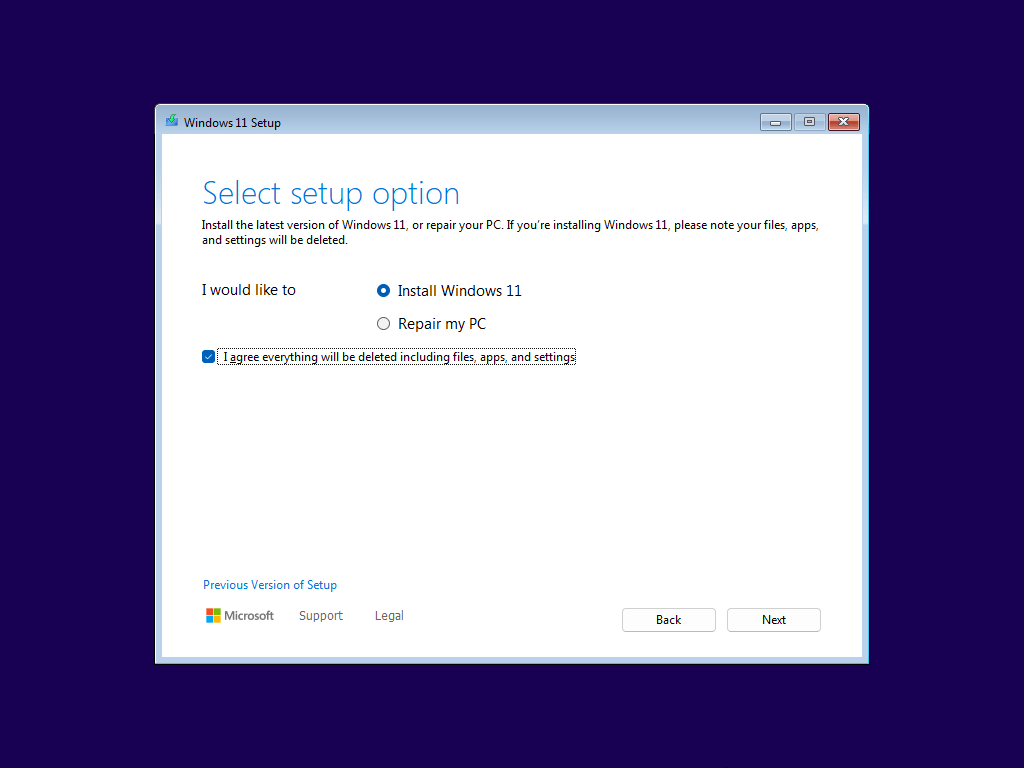
3. Click I don’t have a product key.
4. Choose the Windows edition you wish to install.
5. Accept license terms.
6. Pick a drive where Windows 11 is installed.
7. Follow the on-screen instructions to complete the installation and setup.
Now, your system is upgraded to Windows 11 from Windows 10. Enjoy the new OS!
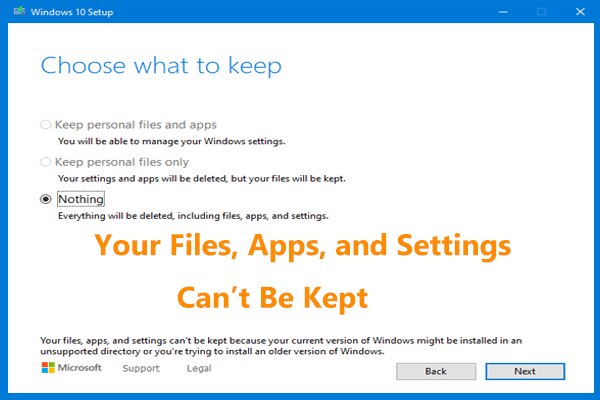
Upgrade Windows 10 to 11 on Unsupported Hardware
The above methods focus on how to upgrade Windows 10 to Windows 11 on an eligible PC. So, what if the computer hardware doesn’t meet the system requirements?
To do this thing:
Step 1: Download Windows 11 ISO.
Step 2: Download and run Rufus.
Step 3: Connect a USB drive to the PC.
Step 4: Choose the ISO file and make some settings. Then, hit START.
Step 5: Customize Windows installation to bypass requirements for RAM, Secure Boot, and TPM 2.0.
Step 6: Begin burning the ISO file to your USB drive.
Step 7: Install Windows 11 from the bootable USB drive by following the steps in Option 4.
To know details, refer to this guide on how to install Windows 11 24H2 on an unsupported PC.
Common Windows 11 Upgrade Problems
| Problem | Recommended Fix |
| TPM 2.0 not detected | Enable TPM in BIOS |
| Secure Boot unsupported | Switch to UEFI mode in BIOS |
| Not enough storage | Free up disk space |
| Installation stuck | Disconnect external devices; restart the Windows Update service; perform a clean install |
Bottom Line
Why upgrade Windows 10 to 11? Can you perform the upgrade? How to upgrade to Windows 11 from Windows 10 without losing data? Now, you can find answers to these questions in this comprehensive guide.
Just follow the instructions above to check for Windows 11 compatibility, back up data, and then easily upgrade to the new OS. Then, enjoy a better user experience.
Upgrade Windows 10 to 11 FAQ
1. Higher system requirements
2. Compatibility issues with older software and hardware
3. An adjustment period required for users accustomed to the Windows 10 layout
4. Potential stability issues and bugs
5. Feature removal
About The Author

Position: Columnist
Vera has been working at the MiniTool Team for over 10 years as a technical editor and content writer. She mainly focuses on disk and partition management, data recovery, Windows backup and restore, and PC troubleshooting. Through in-depth software testing and hands-on experience, she has helped users solve a wide range of computer problems and better protect their data on Windows devices.
User Comments :