Now, Windows 10 does not allow users to set the registered owner and organization information by themselves any more during the installation. However, there is a way to change computer ownership Windows 10. This post shows you the step-by-step guide.
How to Change Computer Ownership Windows 10
Now, the Windows registered owner and organization information is set by default and you cannot change them any more during the installation process. And the operating system will use the default information. For example, if you are using the Microsoft account, the email address will be chosen by default. Or in most situations, it is shown as Windows User.
So, when you install and activate Windows, the license is technically under your name or whoever owns the computer.
Thus, you may want to know whether there is a way to change registered owner and organization information.
Of course, the answer is positive. You can change registered owner and organization information Windows 10 in the Registry Editor. Here, we will walk you through how to change them with the step-by-step guide.
Step 1: Press Windows key and R key together to open Run dialog.
Step 2: Type regedit in the box and click OK to continue.
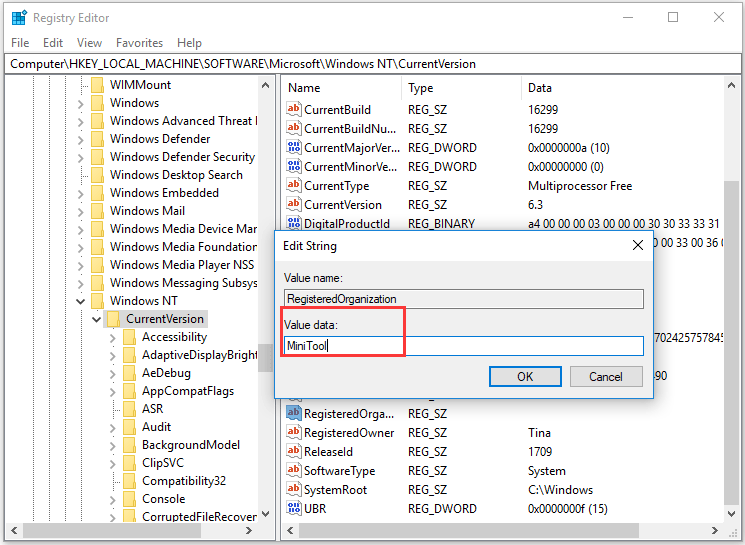
Step 3: Then navigate to the CurrentVersion folder based on the following path.
HKEY_LOCAL_MACHINE\SOFTWARE\Microsoft\Windows NT\CurrentVersion
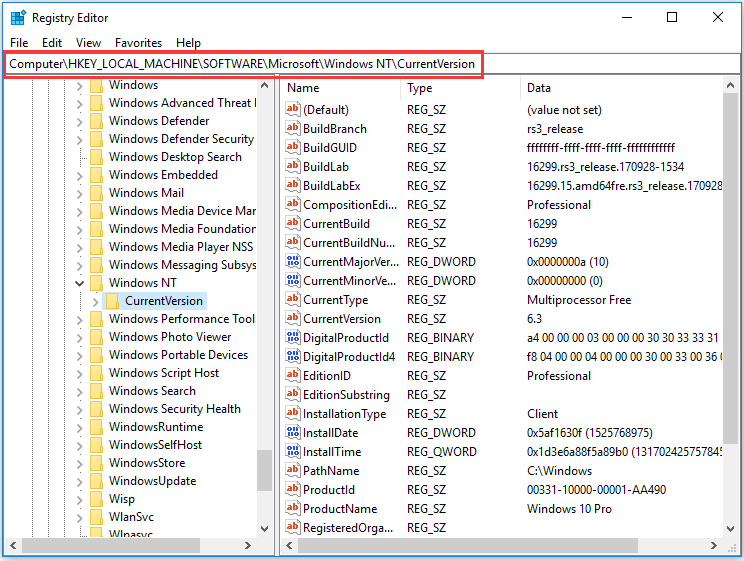
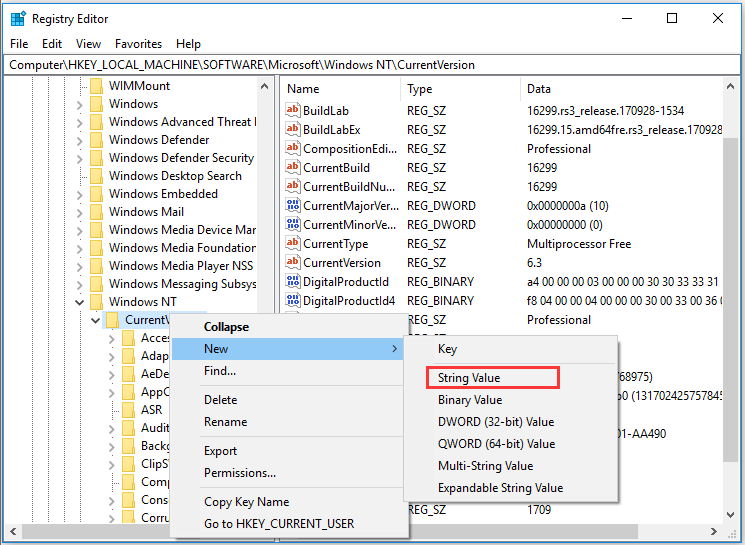
Step 4: Expand this folder and look for the RegisteredOwner String Value. If you don’t have it, please create a new one firstly. Thus, right-click the CurrentVersion folder and choose New to continue. Then choose String Value to continue.
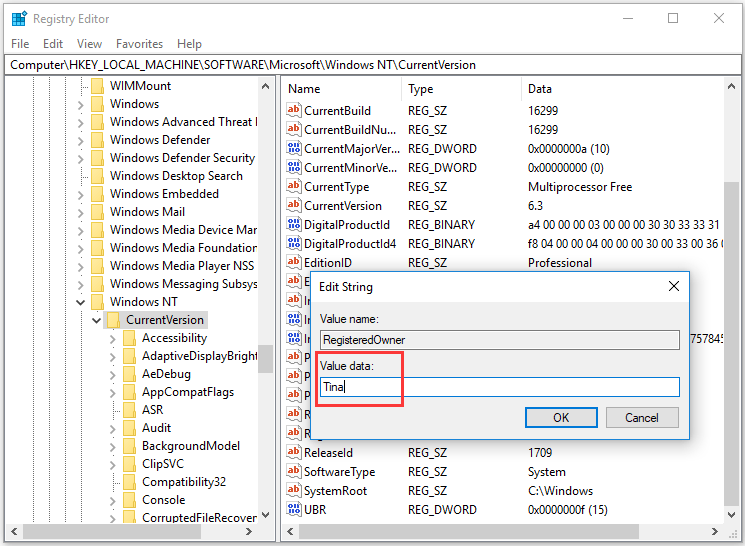
Step 5: Name the new string value key as the Registered owner and hit Enter to continue.
Step 6: Double-click the RegisteredOwner key and enter the registered owner information, which usually is just your name. Then click OK to continue.
Step 7: Look for the RegisteredOrhanization String Value. If there is no, you need to create a new one and name it as the RegisteredOrganization and hit Enter to continue. You can refer to the steps listed above.
Step 8: Then double-click it and enter the organization name. Click OK to continue.
When you have finished all steps, close the Registry Editor window and reboot your computer to take effect.
Then you can press Windows key and R key to open Run dialog again. Input the winver and click OK to continue. Then you can see the registered owner and organization information have been changed.

In fact, besides the method we mentioned in the above section, you can also take advantage of third-party tool to change computer ownership Windows 10. You can search for online to look for a tool to change registered owner and organization information.
Some Things You Should Know about Windows Versions
Final Words
To sum up, this post has shown you how to change registered owner and organization Windows 10. If you have the same demand, try this way. But before continuing, you had better create a system image in advance.
User Comments :