This post explains how to customize the Quick Access Toolbar in File Explorer in Windows 10. To recover deleted or lost files from Windows 10 or other storage devices, you can use MiniTool Power Data Recovery, a professional data recovery software that is compatible with Windows.
File Explorer’s Quick Access Toolbar contains a set of commands you use most open in File Explorer. If you want to access your frequently accessed commands and options in File Explorer, you can customize File Explorer Quick Access Toolbar in Windows 10. Learn how to do it below.
How to Customize File Explorer Quick Access Toolbar
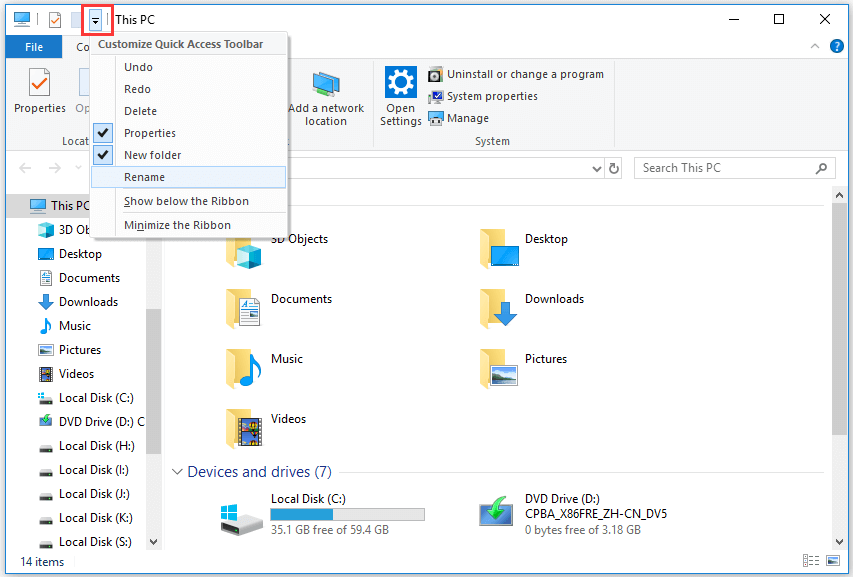
The Quick Access Toolbar of File Explorer is located at the top and displays a set of commands. It also includes a customizable drop-down menu that displays all default commands and ribbon options.
To Change the Position of Quick Access Toolbar
You can click the drop-down icon of the Quick Access Toolbar, and choose Show above the Ribbon or Show below the Ribbon to change the position of File Explorer’s Quick Access Toolbar.
To Add or Remove Commands from File Explorer Quick Access Toolbar
You can click on the Quick Access Toolbar drop-down menu and select and check the commands. You can also right-click any command in any Ribbon tab and click Add to Quick Access Toolbar to add commands to File Explorer’s Quick Access Toolbar.
If you want to remove a command from File Explorer Quick Access Toolbar, you can click the drop-down menu of Quick Access Toolbar to uncheck that command to remove it. You can also right-click the command on the Quick Access Toolbar and choose Remove from Quick Access Toolbar.
To Reset File Explorer’s Quick Access Toolbar
If you want to reset the File Explorer’s Quick Access Toolbar to default settings, you can check the instructions below.
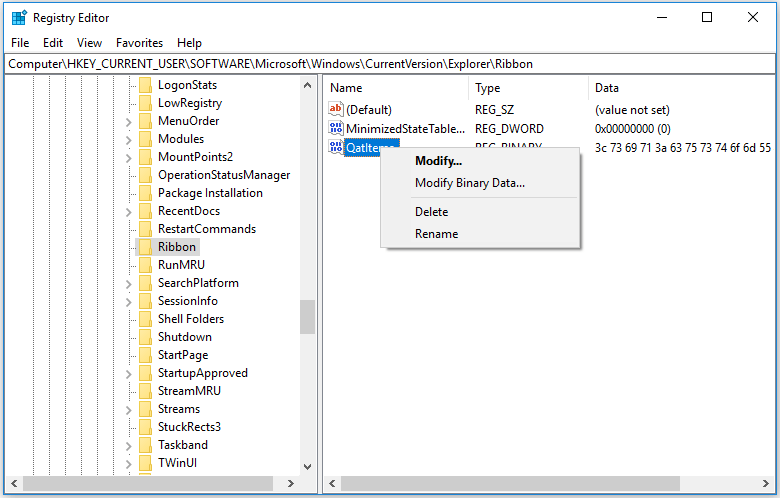
- Press Windows + R, type regedit in Run dialog, and press Enter to open Registry Editor on your Windows 10 computer.
- Navigate to the following path: HKEY_CURRENT_USER\Software\Microsoft\Windows\CurrentVersion\Explorer\Ribbon.
- You can see a key named QatItems in the right window. It records the settings you make for the File Explorer Quick Access Toolbar. Right-click QatItems key and click Delete to delete it.
- Close Registry Editor and restart your Windows 10 computer, and the Quick Access Toolbar of File Explorer should be reset.
If you want to customize the File Explorer’s Quick Access Toolbar, you can follow the operation above.
How to Recover Files on Windows 10 PC or Laptop
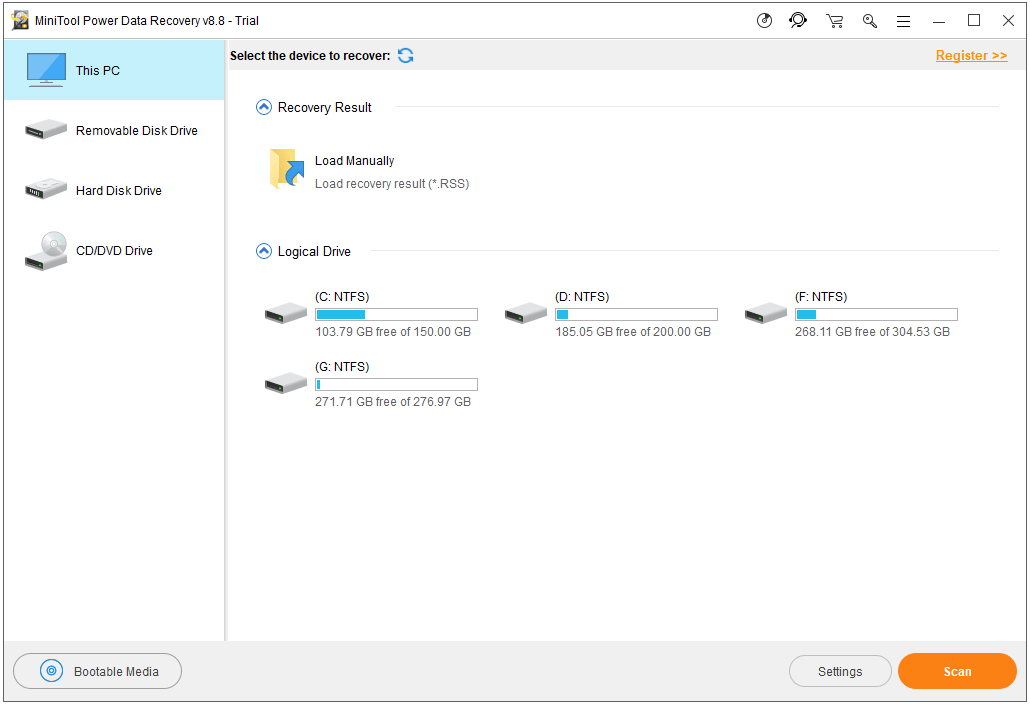
MiniTool Power Data Recovery is a professional free data recovery software compatible with Windows 10. If you suffer some data loss, you can use this tool to easily recover lost data. It lets you recover deleted of lost data from Windows 10 PC or laptop, external hard drive HDD and SSD, USB drive, SD cards, and more.
Only 3 simple steps to allow you to recover data from storage devices. You can download and install MiniTool Power Data Recovery on your Windows 10 computer, and below is the easy guide to recover data with it.
To recover data from external drives with this tool, you need to connect the drive to your computer first. After that, launch the software, and choose the device to scan. When it finishes scanning, you can check the scan result to find deleted/lost files and specify a new safe location to store them.
User Comments :