If you want to disable laptop keyboard in Windows 10/11, you come to the right place. In this post from MiniTool, you can know how to disable laptop keyboard easily. Just try these methods mentioned below to do this work.
On a laptop, there is a keyboard for you to type letters. But sometimes some keys are damaged or you want to use more features, an external keyboard is your choice. To use the external keyboard well, you may choose to disable the keyboard of your laptop.
But how to turn off laptop keyboard in Windows 10/11? It is a simple task and here you can follow these methods below to easily perform the task.

How to Disable Laptop Keyboard in Windows 10/11
There are three common ways for disabling the keyboard of your laptop: uninstall the driver for the keyboard, install an incompatible keyboard driver, and use Group Policy Editor. Now, let’s see them.
Uninstall the Keyboard Driver
To disable laptop keyboard, you can uninstall the driver. Just follow these steps below:
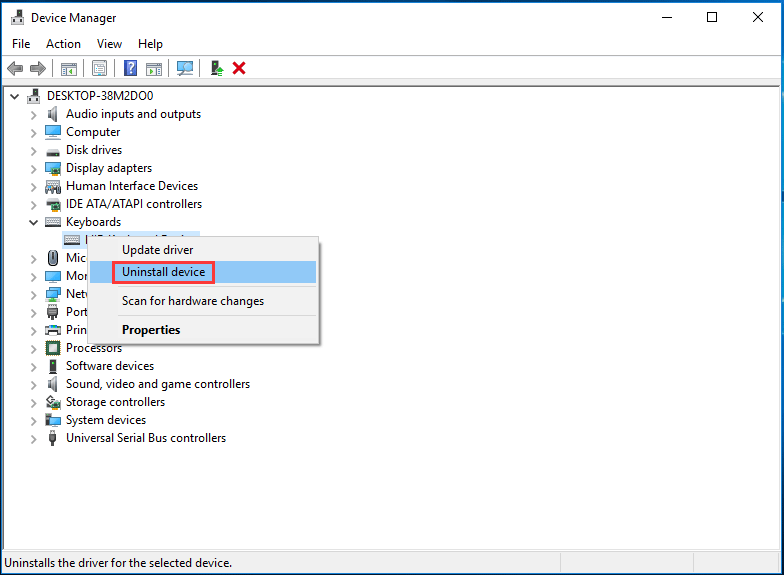
Step 1: Press Win + X to open the Start menu and choose Device Manager in Windows 10/11.
Step 2: Expand Keyboards, right-click your laptop keyboard, and choose Uninstall device.
This is a temporary way to turn off laptop keyboard. If you restart your PC, the keyboard will also work.
Update the Incorrect Driver to Disable Keyboard Driver
Although it is a bit eccentric to update a device with an incompatible driver, in this situation, it is a viable method to disable laptop keyboard. When an incompatible driver is installed, the keyboard will stop working.
Step 1: Also, open Device Manager.
Step 2: Go to Keyboard, right-click your Standard PS/2 Keyboard, and choose Update driver.
Step 3: Choose Browse my computer for driver software.
Step 4: Click Let me pick from a list of available drivers on my computer.
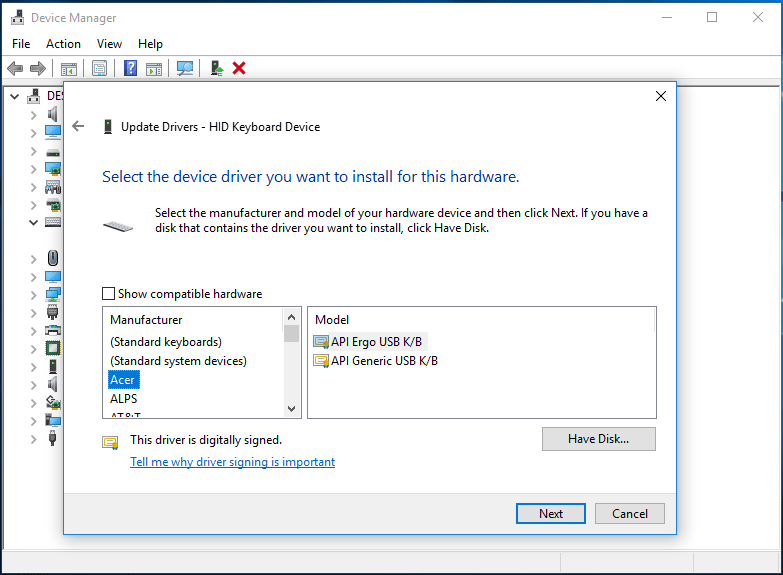
Step 5: Uncheck the option of Show incompatible hardware.
Step 6: Choose a manufacturer that is different than your standard keyboard, choose a model, and click Next.
Step 7: Click Yes and Close to finish the operation.
Restart your computer and your laptop keyboard won’t function.
Disable Laptop Keyboard via Group Policy Editor
If you want to disable the keyboard on your laptop permanently, you must disable Windows’s ability to automatically install the keyboard driver again. Otherwise, the keyboard can work every time your PC starts up.
How to disable keyboard on laptop via Group Policy Editor?
Step 1: Type gpedit.msc to the search box of Windows 10 and click the result to open Local Group Policy Editor.
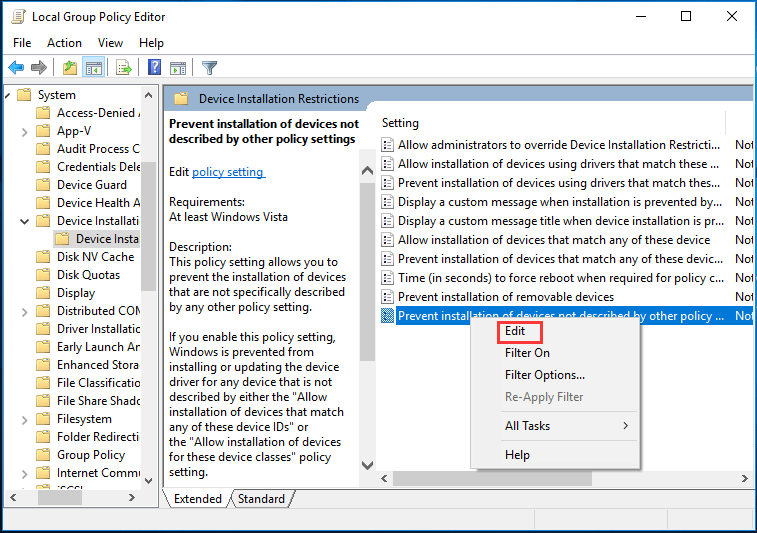
Step 2: Go to this path: Administrative Templates > System > Device Installation > Device Installation Restrictions.
Step 3: Right-click Prevent installation of devices not described by other policy settings and choose Edit.
Step 4: Check Enabled and save the change by clicking Apply and OK.
How to Disable Certain Keyboard Keys on Laptop in Windows 11/10
Some of you don’t want to disable the entire keyboard but some specific keys. To do this work, follow these steps:
Step 1: Download the free tool called Simple Disable Key.
Step 2: Run this tool and go to the field labeled Key.
Step 3: Choose the key you want to disable and click Add Key.
Step 4: Choose if you want to disable the key in specific apps, during certain times or always.
Step 5: Click OK.
Bottom Line
This post shows you how to disable laptop keyboard and how to disable certain keys on the laptop. Just follow these methods mentioned above to perform the disabling task.
About The Author

Position: Columnist
Vera has been working at the MiniTool Team for over 10 years as a technical editor and content writer. She mainly focuses on disk and partition management, data recovery, Windows backup and restore, and PC troubleshooting. Through in-depth software testing and hands-on experience, she has helped users solve a wide range of computer problems and better protect their data on Windows devices.
User Comments :