Is your computer feeling a little slow or low on storage? No worries. Windows 11 comes equipped with useful built-in tools that can help you free up space and enhance performance. Here, this MiniTool post will guide you through this straightforward process to free up storage space with Windows 11 memory optimization.
About Windows 11 Memory Optimization
Today, the demands of modern applications and multitasking are increasing hugely. Effective memory optimization is becoming more essential for ensuring users’ Windows 11 PC to remain fast and responsive.
Whether you use your computer casually or are an experienced professional, enhancing your system’s memory can result in significant improvements. In this guide, we will show you how to free up storage space with Windows 11 memory optimization with detailed instructions.
How to Free Up Storage Space with Windows 11 Memory Optimization
Option 1. Open Memory Optimization
How to use Windows 11 memory optimization? The first step is enabling Storage Sense. Storage Sense is created to help you manage disk space more efficiently and liberate storage. Utilizing Storage Sense allows you to see temporary files, system files, applications, features, and more while cleaning up unnecessary items.
You can access Settings directly to adjust Storage Sense. To do this:
Step 1. Press Win + I to launch Windows Settings.
Step 2. In the settings menu, scroll down to locate System and select it.
Step 3. In the Storage section, you can toggle on Storage Sense. This page will display how your storage is utilized on the C drive.
Step 4. To personalize Storage Sense, go to the Configure cleanup schedules section and choose the frequency for Storage Sense to run.
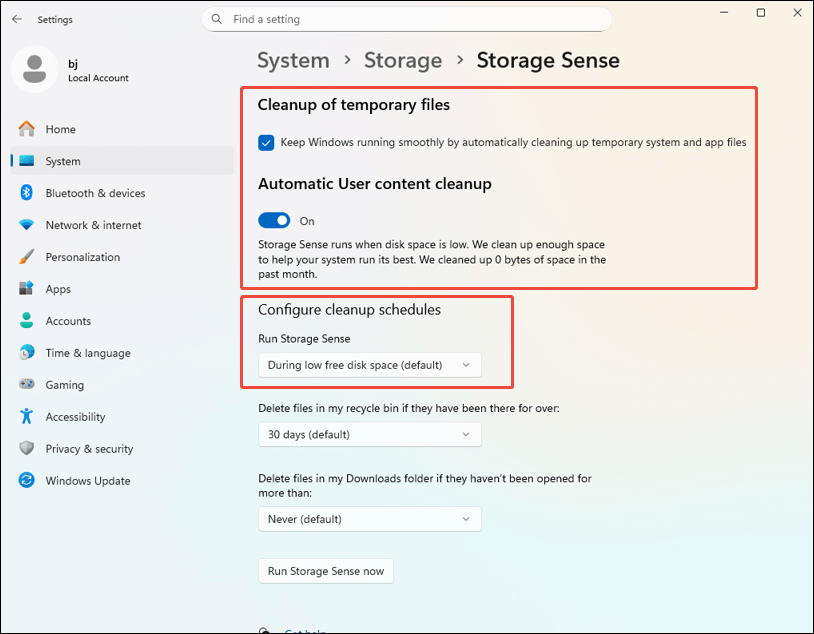
Step 5. Click the Run Storage Sense now button.
Option 2. Check Disk Space
Make sure Storage Sense is turned on. Next, you can view the storage space. Windows Storage is a built-in feature located within Settings that allows you to quickly monitor disk space usage. It serves as a free analyzer for Windows space. Since it is integrated into the Windows operating system, there’s no need to install any additional software to assess disk space consumption.
To view hard drive space usage using Windows Storage, follow these steps:
Step 1. Right-click on the Start menu and select Settings.
Step 2. Next, choose System from the window that appears.
Step 3. Go to Storage, where you can see the used and available space for each drive.

Step 4. To find out what is consuming space on Windows 11, double-click on the drive you want to inspect, and it will display the categories of files stored on that drive. Meanwhile, you can click Show more categories to broaden the list and discover additional items you can clean.
Option 3. Clear Temporary Files in Recycle Bin & Downloads
To free up disk space using memory optimization in Windows, one feature of this tool is clearing up temporary files in Windows.
Step 1. Go to Settings > System > Storage.
Step 2. Go to the Storage Sense section.
Step 3. Next, in the Configure cleanup schedules section, set the period for cleaning temporary files in the Recycle Bin and Downloads folder.
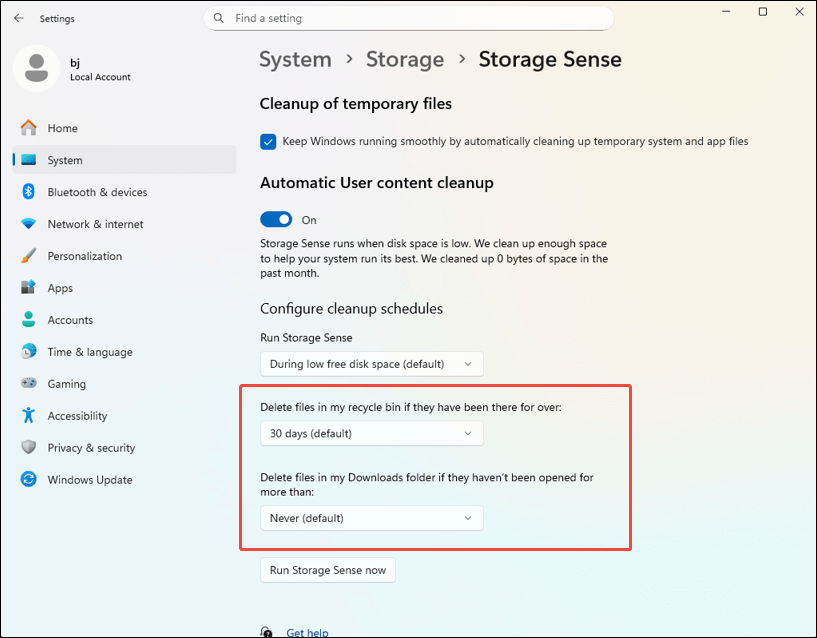
Step 4. Click the Run Storage Sense now button.
Option 4. Select Subcategories for Temporary Files
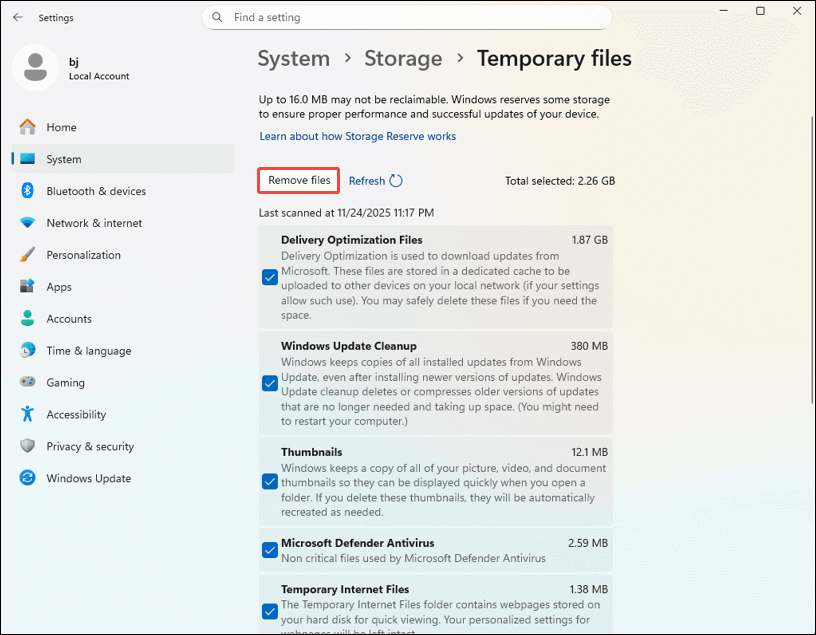
Windows 11 memory optimization will automatically check certain temporary files for you, such as Windows Update Cleanup, Files for Transfer Optimization, and Thumbnails. These files can be safely removed. Depending on your setup, you might also notice items like Previous Windows Installation(s), System Error Memory Dump Files, and Windows Upgrade Log Files. According to your demands, you can choose the kinds of temporary files to clear.
Step 1. Go to Settings > System > Storage.
Step 2. In the Local Disk (C:) section, click the Temporary files option.
Step 3. It will list the temporary files you can remove. Check the wanted remove files and click the Remove files button. the
Option 5. Optimize Drive
Another feature is Optimize Drive in Windows 11 memory optimization. It can help your computer run more efficiently, or analyze them to find out if they need to be optimized.
Step 1. Go to Settings > System > Storage. Ensure the Storage Sense is enabled.
Step 2. Scroll down and click Optimize Drives under the More storage settings section.
Step 3. In the pop-up interface, select the drive you want to optimize and click the Optimize button.

Step 4. You can set a scheduled optimization by clicking the Change settings button.
MiniTool Power Data Recovery FreeClick to Download100%Clean & Safe
Alternatives: Free Up Storage Space in Windows 11 with MiniTool System Booster
For those looking to free up storage space, MiniTool System Booster is an excellent choice. This PC optimization tool not only helps with cleaning up temporary files but also enables you to uninstall programs you no longer need.
Beyond disk cleaning, MiniTool System Booster offers several advanced features, such as defragmenting hard drives, eliminating harmful software, enhancing download speeds, and decreasing Windows startup time, among others.
MiniTool System Booster TrialClick to Download100%Clean & Safe
In Conclusion
This detailed guide has introduced how to free up storage space with Windows 11 memory optimization and the best alternatives. Appreciate your time and support!
About The Author

Position: Columnist
Sandy became an English editor after graduation. She is devoted to finding effective solutions for diverse IT problems and provides articles on data recovery, data backup, and computer partitions and drives. In her spare time, she likes listening to music and playing games.
User Comments :