Do you know you are allowed to hide or show the translucent selection rectangle on your Windows computer? Yes, you can use the semi-translucent blue color or completely translucent solution. This post from MiniTool Software will show you how to switch between these two formats of translucent selection rectangle Windows 10.
When you select an area on your Windows 10 desktop, the selected space will be highlighted. But there are two different highlight formats: semi-translucent blue color with a dotted outline marking its borders and completely transparent with a dotted outline marking its borders. The following image just displays these two different forms. You can see which format you are using currently.

Perhaps, you are not satisfied with the translucent selection rectangle Windows 10 you are using. And you want to show or hide translucent selection rectangle on your Windows 10 PC. In this post, we will show you two effective methods. You can read both of them and then select one method you prefer to use.
How to Show and Hide Translucent Selection Rectangle on Windows 10?
- Use Windows Control Panel.
- Use Windows Registry Editor.
Show and Hide Translucent Selection Rectangle via Windows Control Panel?
You can show or hide translucent selection rectangle on Windows 10 using the advanced system settings under Control Panel. Here is a detailed guide:
1. Click Windows Search and search for control panel.
2. Select the first search result to open Control Panel.
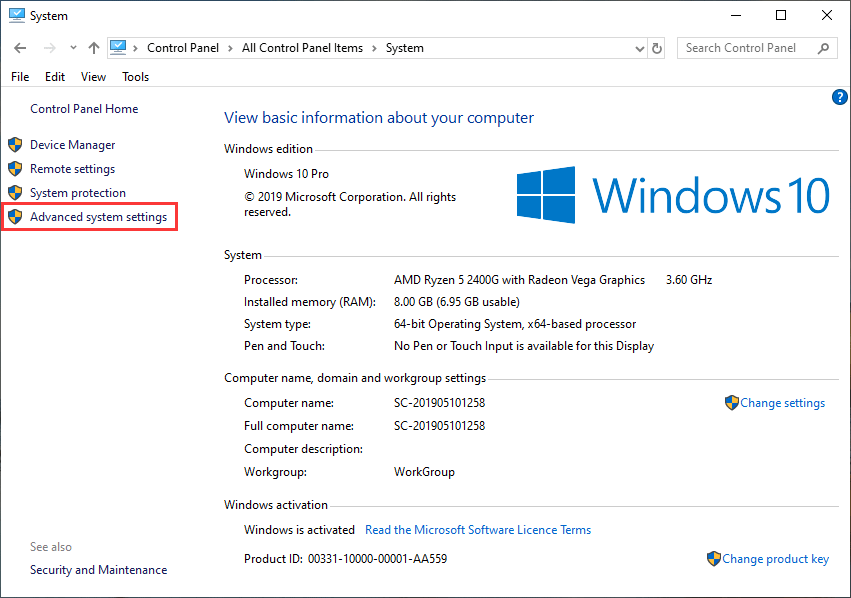
3. Click System.
4. Click Advanced system settings from the left menu.
5. In the Advanced tab, you need to click Settings under the Performance section to continue.

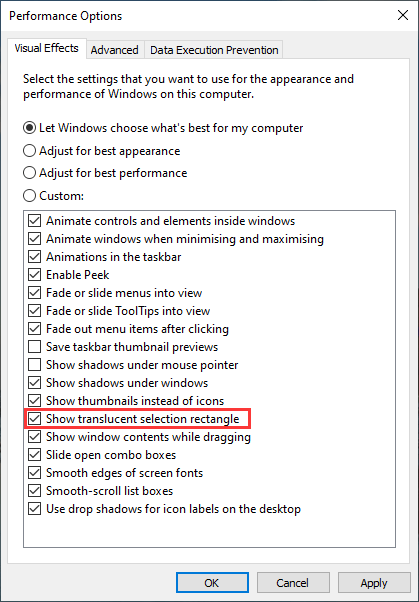
6. You will see the Performance Options window that stays at the Visual Effects interface by default.
- If you want to use the semi-translucent blue color with a dotted outline marking its borders format, you need to make sure that the Show translucent selection rectangle option is selected.
- If you want to use the completely transparent with a dotted outline marking its borders format, you need to uncheck the Show translucent selection rectangle
Show and Hide Translucent Selection Rectangle via Windows Registry Editor?
Alternatively, you can also use Windows Registry Editor to hide or show translucent selection rectangle. You can follow these steps to do the job:
1. Press Win+ R to open Run.
2. Type regedit and press Enter. If you receive the User Account Control (UAC) interface, you need to click Yes to open Windows Registry Editor.
3. Go to the following path:
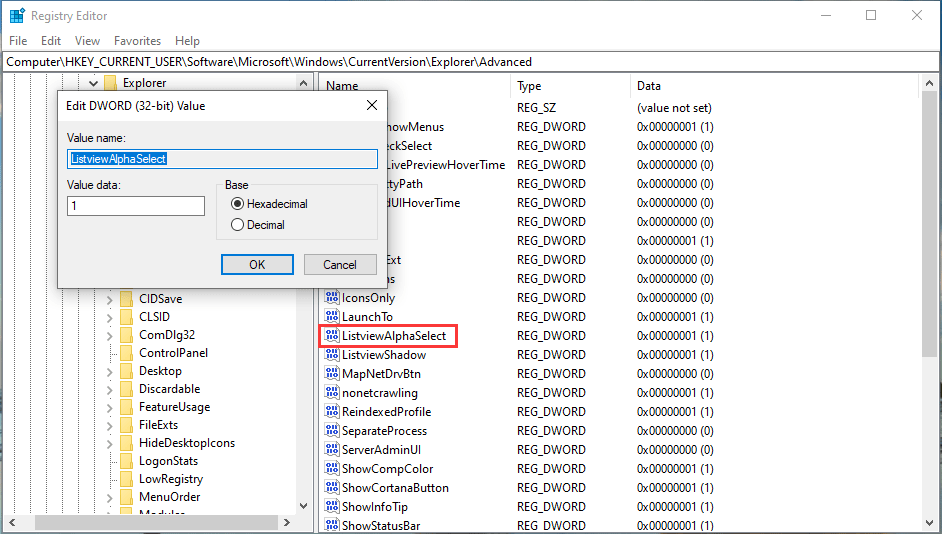
HKEY_CURRENT_USER\Software\Microsoft\Windows\CurrentVersion\Explorer\Advanced
4. Find ListviewAlphaSelect and double-click on it.
5. You will see the Edit SWORD (32-bit) Value Here are two different cases:
If you want to show translucent selection rectangle, you need to set the Value data as 1.
If you want to hide translucent selection rectangle, you need to set the Value data as 0.
Bottom Line
Now, you should know how to hide or show translucent selection rectangle on your Windows 10 computer. You can just select one method based on your own situation. Should you have any other issues, you can let us know in the comment.
About The Author

Position: Columnist
Stella has been working in MiniTool Software as an English Editor for more than 8 years. Her articles mainly cover the fields of data recovery including storage media data recovery, phone data recovery, and photo recovery, videos download, partition management, and video & audio format conversions.
User Comments :