The hard drive is the main storage device of your computer. To use the hard drive to store information or install Windows, you need to create disk partitions on the hard drive. If you need to store different types of directories and files in different partitions, you need to divide a disk into multiple partitions.
Generally, disk partitions can be divided into primary partitions and logical partitions. MBR disks can have up to 4 primary partitions or 3 primary partitions + 1 extended partition. GPT disks can accommodate 128 primary partitions. You may be interested in this post: MBR VS GPT (Focus on Difference and How to Convert Safely).
Understanding the specific partitions of the disk will help you better manage disk partitions and find files. How to check hard drive partitions? Try the methods listed below.
How to Check Disk Partitions via File Explorer
The easiest way to view disk partitions on a hard drive is through File Explorer, just like opening a file on a certain disk.
Just press the Windows + E key combination to open File Explorer. Next, you need to click This PC, then all the recognized partitions will be listed in the right panel.
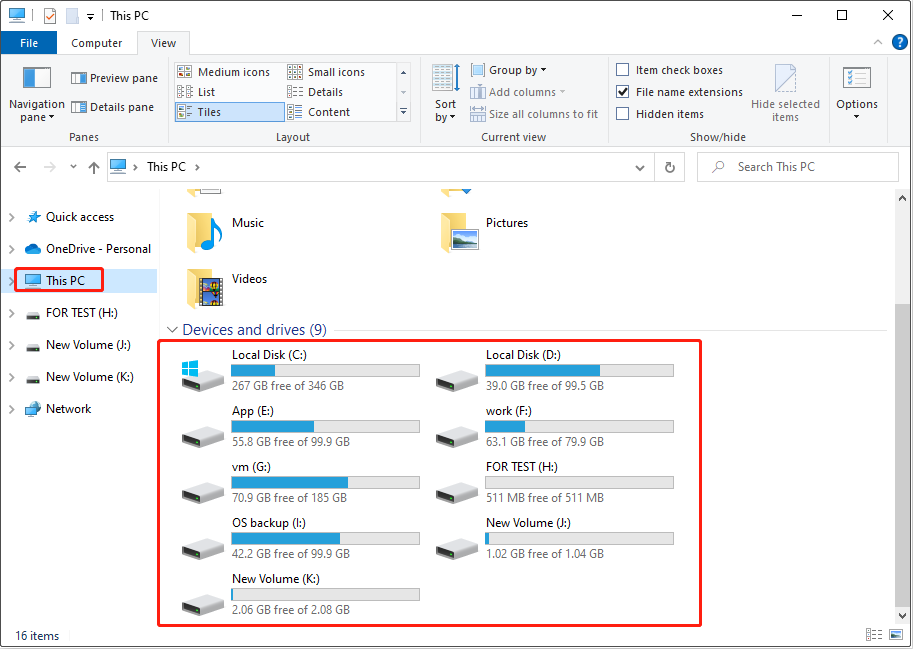
Besides, you can right-click a partition and select Properties to change the volume label, check the file system, etc.
How to Check Disk Partitions via Disk Management
Disk Management is a tool on Windows that can display detailed information about every drive on your PC and all partitions for each drive.
Right-click the Windows logo button and select Disk Management. In Disk Management, all detected partitions are listed, including unallocated space.

You can change the partition label, drive letter, file system, delete unallocated space, etc. from Disk Management.
How to Check Disk Partitions in CMD
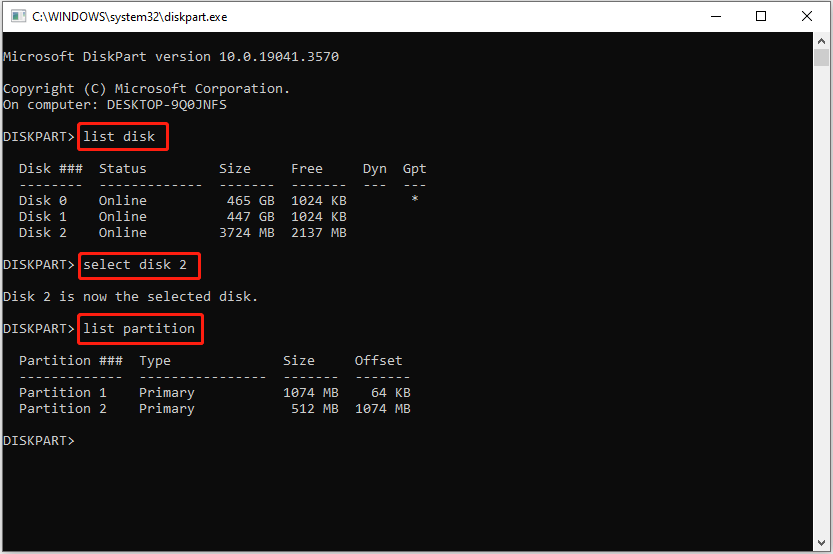
In addition to being used to troubleshoot and solve certain types of Windows problems, delete external hard drive files permanently, etc. the CMD tool can also be used to view partition information. To do so, you can refer to the steps below.
Step 1. Press the Windows + R keyboard shortcut to open the run window.
Step 2. In the input box, type diskpart and press Enter.
Step 3. If a User Account Control window appears, select the Yes option.
Step 4. In the command line window, type the following commands. Press Enter after each command.
- list disk
- select disk x (replace x with the target disk number)
- list partition
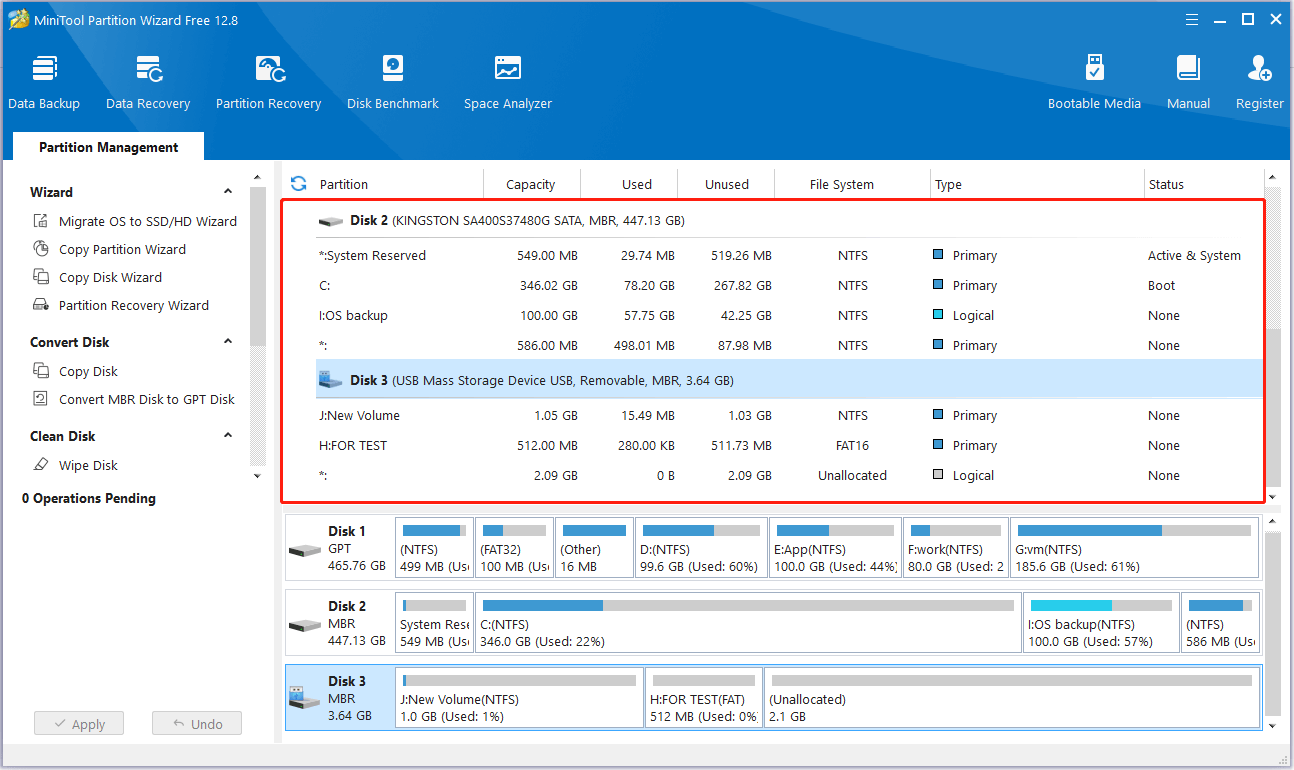
How to Check Disk Partitions via Partition Manager
You can check hard drive partitions via a professional third-party partition management tool as well. MiniTool Partition Wizard is such a reliable and free partition manager. In addition to viewing disk partitions, it allows you to copy partitions, move/resize partitions, align partitions, format partitions, hide/unhide partitions, etc.
MiniTool Partition Wizard FreeClick to Download100%Clean & Safe
Bonus Time: How to Recover Lost/Deleted Partitions
If a disk partition is lost after shrink or Windows update or is accidentally deleted, you can use MiniTool Partition Wizard to recover the lost partition and the data on it.
MiniTool Partition Wizard FreeClick to Download100%Clean & Safe
To recover lost partitions, please refer to this tutorial: How Do I Recover Hard Disk Partition With Ease?
If you prefer to recover deleted files from the unallocated space only, you can use free data recovery software, MiniTool Power Data Recovery. This file restoration tool can help to recover deleted documents, videos, pictures, emails, etc. from USB drives, HDDs, SSDs, SD cards, and so on.
MiniTool Power Data Recovery FreeClick to Download100%Clean & Safe
Wrapping Things Up
This post introduces how to check hard drive partitions and how to recover lost partitions in Windows 10.
Should you have any doubts about this article, do not hesitate to send an email to [email protected].
About The Author

Position: Columnist
Shirley holds a bachelor’s degree in English and has been an editor at the MiniTool Team for many years. She specializes in IT-related content, with a focus on data recovery, file backup, disk management, and other technical topics. She is committed to delivering clear, accurate, and practical solutions to help users resolve common computer issues.
User Comments :