Sync Provider Notification can generate notifications in File Explorer that advise you to try new features for a better experience with Windows 10/11. If you are bothered by these notifications, you can find 2 ways to disable this feature in this post from MiniTool Website.
What Is Sync Provider Notification?
Sync Provider Notification is a feature released by Microsoft Windows. It is designed to display some notifications or suggestions in File Explorer to improve your experience by trying new features in Windows 10/11.
However, many of you might find that ads seem to flood File Explorer. Don’t fret. In the following content, we will show you two methods to manage Sync Provider Notification in detail.
Although you can disable Sync Provider Notifications, it is always recommended to try new features to improve your experience and optimize your system.
How to Enable or Disable Sync Provider Notification?
Way 1: Enable or Disable Sync Provider Notification via File Explorer
Step 1. Press Win + E on the keyboard to open File Explorer.
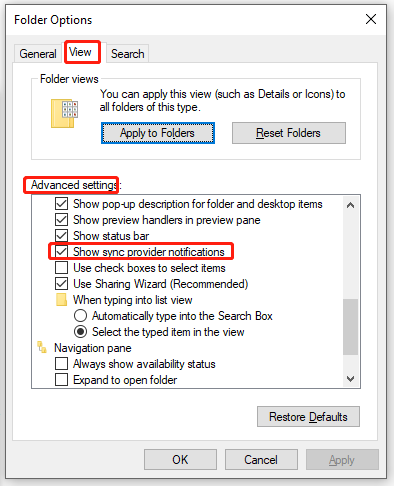
Step 2. Press the View menu and hit Options on the ribbon.
Step 3. In the View tab, scroll down to locate Show sync provider notifications under Advanced settings. Check or uncheck the box before it to enable or disable sync provider notifications.
Way 2: Enable or Disable Sync Provider Notification via Registry Editor
Step 1. Press Win + R altogether to evoke the Run dialog box.
Step 2. Type regedit and hit Enter to open Registry Editor.
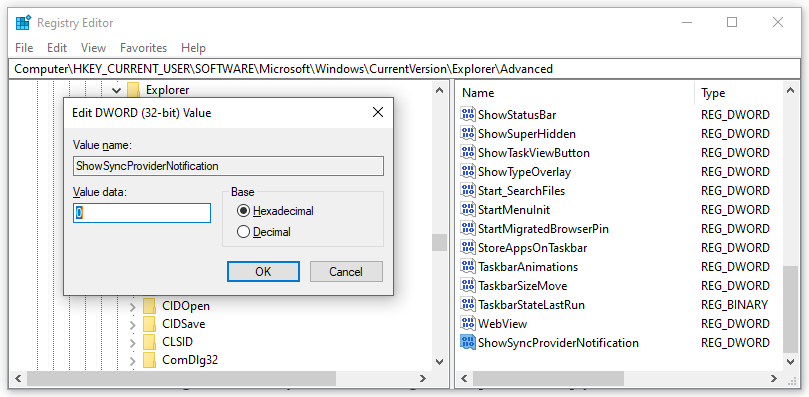
Step 3. In Registry Editor, navigate to the following path:
HKEY_CURRENT_USER\Software\Microsoft\Windows\CurrentVersion\Explorer\Advanced
Step 4. Right-click on Advanced > select New > DWORD (32-bit) Value > rename it as ShowSyncProviderNotification.
Step 5. Right-click on ShowSyncProviderNotification and choose Modify. If you want to disable sync provider notification, set the value data as 0. If you want to turn it on, set the value data as 1.
Step 6. Hit OK to save the changes and reboot your computer.
Suggestion: Back up Your Files for Unexpected Need
Data loss might occur at any time while using the computer. To keep your data safe, you had better back up your schoolwork, work documents or other important data with a reliable backup software – MiniTool ShadowMaker. With a backup copy in hand, you can retrieve your data easily after experiencing a power cut, blue screen of death, black screen and more. Here’s how to create a backup for crucial files:
Step 1. Download MiniTool ShadowMaker Trial and then you can enjoy the service for free within 30 days.
MiniTool ShadowMaker TrialClick to Download100%Clean & Safe
Step 2. After installing this program on your computer, launch it and hit Keep Trial.
Step 3. In the Backup page, go to SOURCE > Folders and Files and then you can choose the files that need to protect. As for selecting a storage path for the backup files, go to DESTINATION.
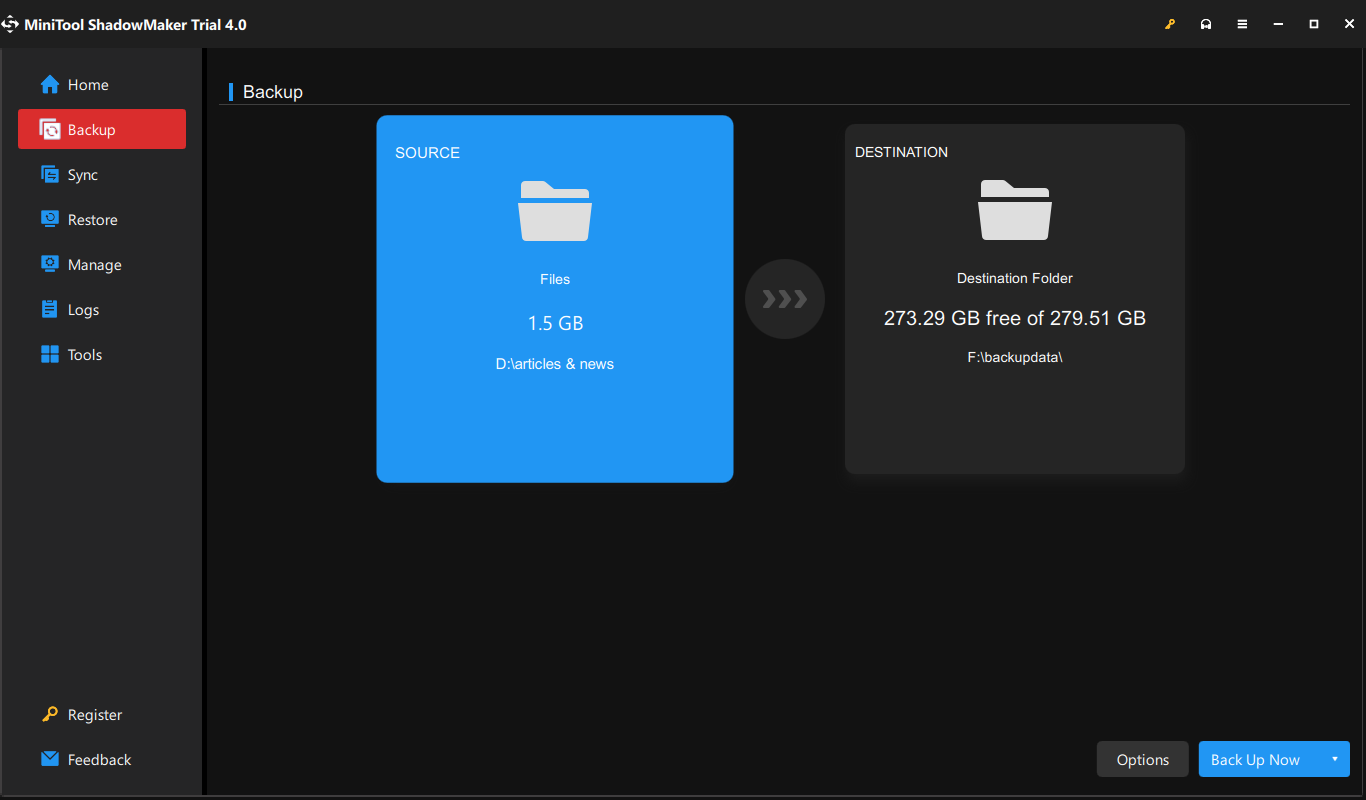
Step 4. Click on Back Up Now to start the process at once or delay the task by hitting Back Up Later. You can find the delayed task in the Manage page.
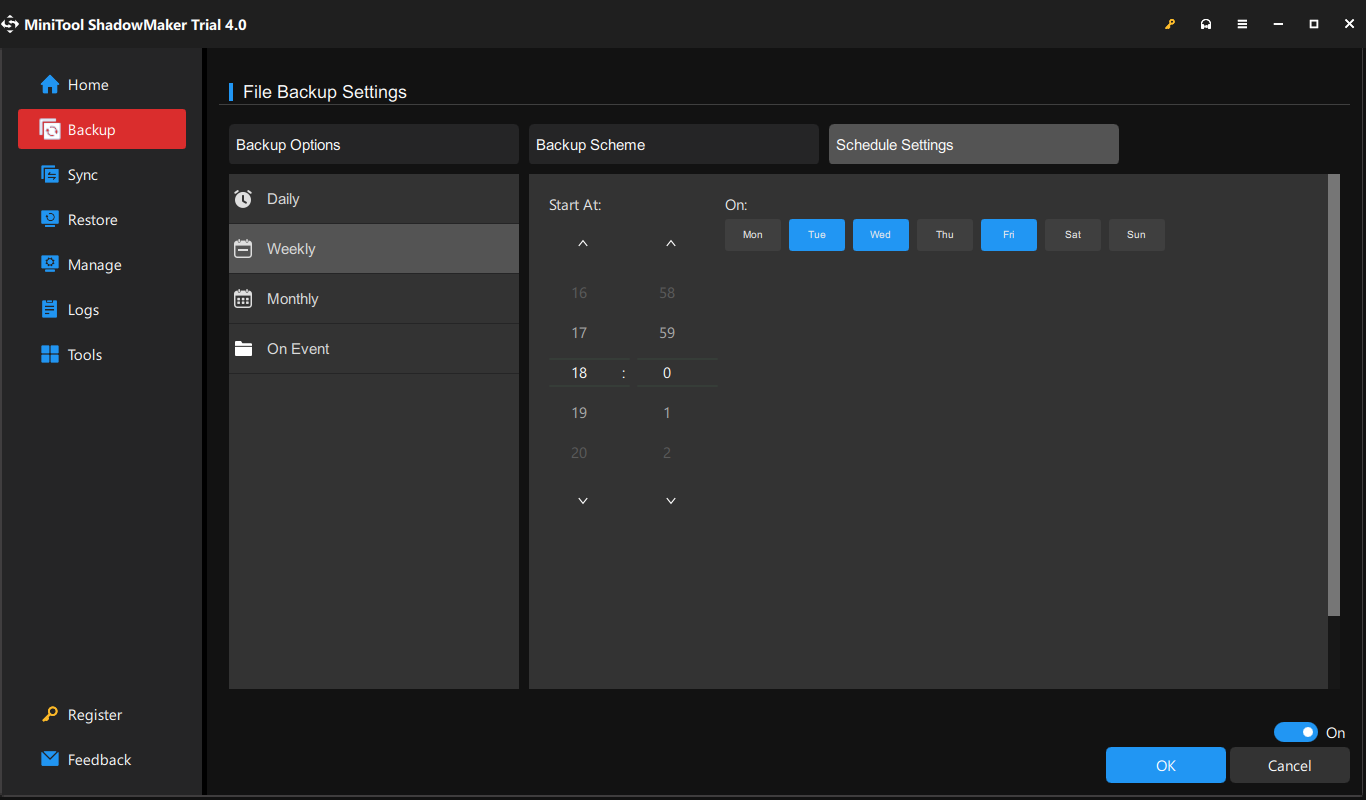
If you need to back up your files daily, weekly, or monthly, you can go to Options > Schedule Settings > toggle it on and then you can customize a scheduled backup.
Wrapping Things up
In short, this guide introduces how to enable Sync Provider Notification or how to disable Sync Provider Notification in two ways. It is noted that you should back up your important files regularly with MiniTool ShadowMaker to avoid accidental data loss.
User Comments :