What Is Plug and Play Windows 10?
Plug and Play (also known as PnP or PlugPlay) is used to describe a service in Windows that recognizes the devices as soon as they are connected without any physical configuration or user intervention. For example, if you enable this service, your computer can recognize and adjust hardware changes and devices plugged such as memory cards, hard drives, USB flash drives, Fire-wire-powered devices and more with little or no input from a user.
The PlugPlay service is using the umpnpmgr.dll file that is located in the C:\Windows\system32 directory. When this service is started, it is running as LocalSystem in a shared process of svchost.exe along with other services.
If your computer cannot recognize the hardware you plug in or the hardware, hard drive or USB flash disk is connected improperly, the plug-and-play device might be disabled and that will cause instability on your operating system. Therefore, to protect your data, we sincerely advise you to back up your data with a reliable backup software – MiniTool ShadowMaker.
MiniTool ShadowMaker TrialClick to Download100%Clean & Safe
How to Enable Plug and Play Windows 10?
Plug and Play will be started only if the user, an application or another service starts it. Enabling this feature is very easy. At times, when you find the Safely Remove Hardware icon is missing, you can check if this service is running properly. Here’s how to enable Plug and Play service Windows 10:
Step 1. Press Win + R altogether to open the Run box.
Step 2. Type services.msc in the Run box and click on OK to open Services.
Step 3. In Services, scroll down to find Plug and Play and right-click on it to choose Properties in the drop-down menu.

Step 4. Set the startup type to Automatic and hit Start.
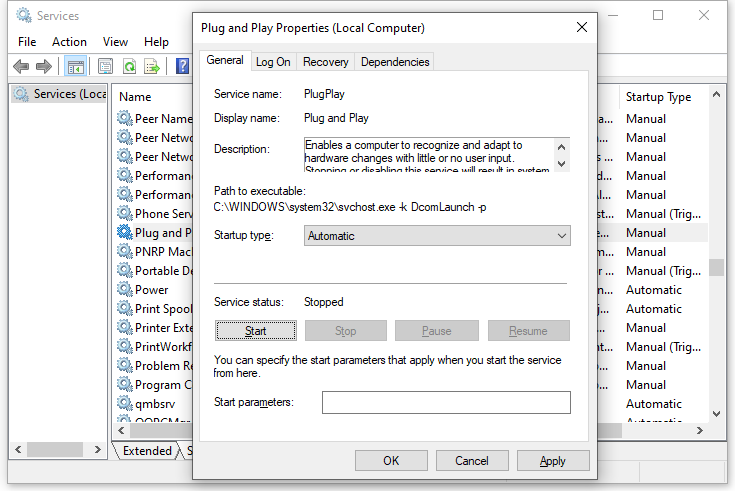
Step 5. Click on Apply & OK to save the changes.
How to Restore Default Startup Configuration of Plug and Play?
If you want to restore Plug and Play to its default startup configuration, please go through these instructions:
Step 1. Press Win + S to evoke the search bar.
Step 2. Type cmd to locate Command Prompt and right-click on it to choose Run as administrator.
Step 3. In the command window, type the following command and then hit Enter.
sc config PlugPlay start= demand
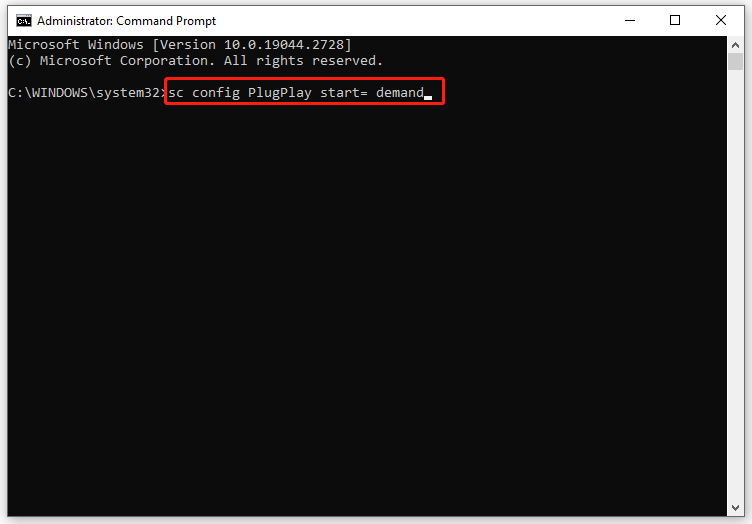
Step 4. After the process is done, type exit and hit Enter to close Command Prompt.
Step 5. Restart your computer.
Final Words
In summary, Plug and Play service allows your operating system to adapt to hardware changes with minimal intervention by a user. After enabling this service, you can add or remove the devices without manual configurations or any knowledge of computer hardware.
User Comments :