Secure Boot is a security standard that can prevent your computer from booting with untrustworthy software. Enabling it will add an extra layer of security to your device. In this post from MiniTool Website, we will show you how to enable Secure Boot on Gigabyte screen in detail.
What Is Secure Boot and Why Do You Need to Enable It?
Secure Boot can ensure your device only starts with reliable software, so it can stop various malware from getting into the boot process and harming your system. Then, some of you may ask, how to enable Secure Boot?
Secure Boot is easy to enable on the BIOS menu of Gigabyte devices with UEFI software. It is noted that Secure Boot doesn’t operate along with Compatibility Support Mode (CSM), so you need to disable CSM before enabling Secure Boot.
How to Enable Secure Boot on Gigabyte?
Move 1: Check Secure Boot Status and UEFI Support
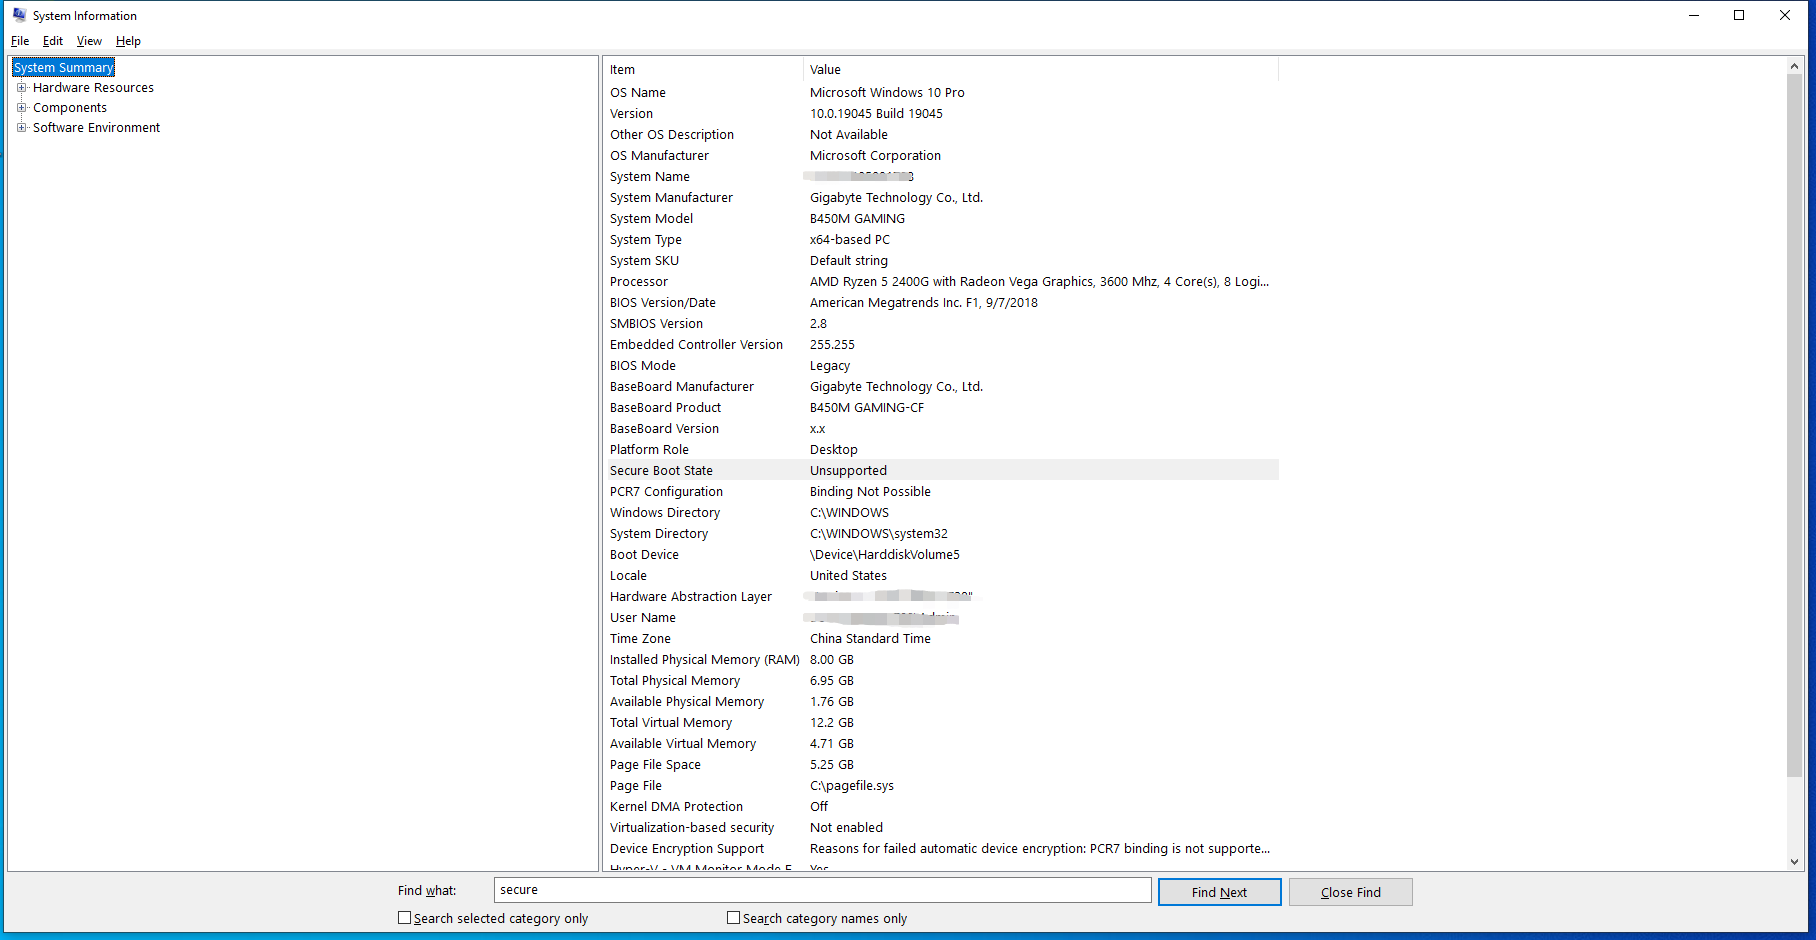
When you are installing older versions of Windows or Linux on some UEFI-enabled devices, Secure Boot might be disabled. Therefore, you need to check if Secure Boot is disabled or enabled from System Information.
Step 1. Press Win + R to open the Run box.
Step 2. Type msinfo32 and hit Enter to open System Information.
Step 3. Select System Summary in the left pane and check Secure Boot State in the right pane. Next, check if UEFI is mentioned beside BIOS Mode.
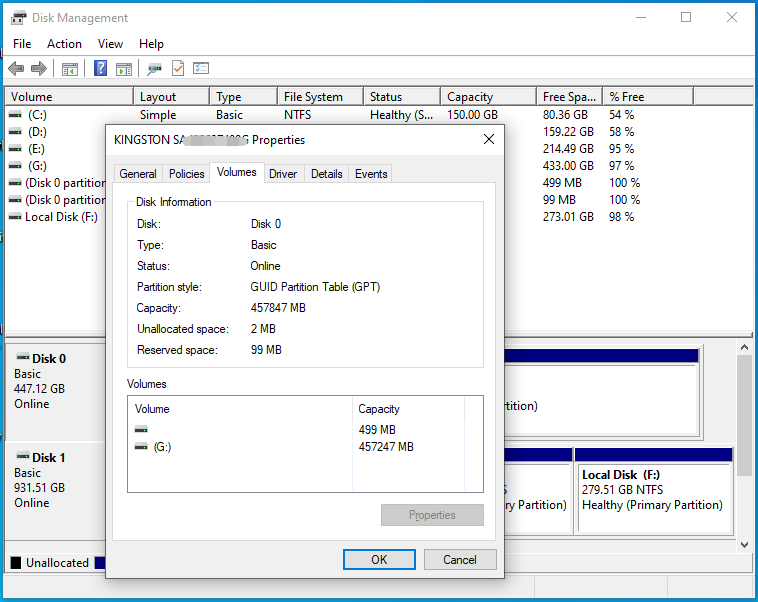
Move 2: Check If Your Device Is A GPT Disk
Secure Boot is one of the features of the United Extensible Firmware Interface (UEFI) firmware. Since UEFI is only compatible with the disks using the GUID Partition Table (GPT) style, you need to check if your device is a GPT disk. Follow these steps:
Step 1. Press Win + X to open the quick menu and select Disk Management from it.
Step 2. Right-click on the disk and select Properties from the drop-down menu.
Step 3. Under the Volumes tab, check if the partition style is GUID Partition Table (GPT).
MiniTool ShadowMaker TrialClick to Download100%Clean & Safe
Move 3: Disable Compatibility Support Mode
To make Secure Boot available, you need to disable Compatibility Support Mode. Here’s how to do it:
Step 1. Reboot your computer and hit the Del key continuously after pressing the Power button.
Step 2. Then, you will enter into the BIOS menu. Use the arrow keys to locate the BIOS tab.
Step 3. Under the BIOS tab, navigate to CMS Support and hit Enter.
Step 4. Select Disabled and hit Enter.
Step 5. Save the changes.
Move 4: Enable Secure Boot
After all the preparations are made, you can enable Secure Boot on Gigabyte motherboard now.
Step 1. Enter BIOS and go to the BIOS tab.
Step 2. Select Secure Boot and hit Enter.
Step 3. Select Enabled and press Enter.
Step 4. Save the changes and exit the BIOS menu.
Final Words
What is Secure Boot? How to enable it on Gigabyte motherboard? I believe your answers are clear now. After enabling Secure Boot, your computer will be less likely to get attacked by threats.
User Comments :