Do you know how to take apart Xbox One controller? This post from MiniTool will show you how to disassemble Xbox One controller? In addition, you can visit MiniTool to find more Windows tips and solutions.
You may often experience inconvenient things like a stuck joystick or unruly when playing on Xbox One controller. In this situation, you may choose to take apart Xbox One controller to fix it so that you can enjoy the games as usual.
So, do you know how to take apart Xbox One Controller to fix or clean stick? If no, keep on your reading and this post will show you how to disassemble Xbox One controller.
How to Take Apart Xbox One Controller?
In this section, we will show you how to take apart Xbox One Controller.
Before going ahead, it is recommended to work on a tray to prevent screws or other parts from falling on the floor or getting lost.
Now, here is the tutorial on disassembling Xbox One controller.
- Take out the orange pry tool from your tool kit.
- Then slide the pry tool between the plastic seam on the grips as shown.
- Take the grip away from the main controller body. Please note that there is also adhesive holding it in place under the plastic, so you can put some forces.
- You should repeat the above step for both grips.
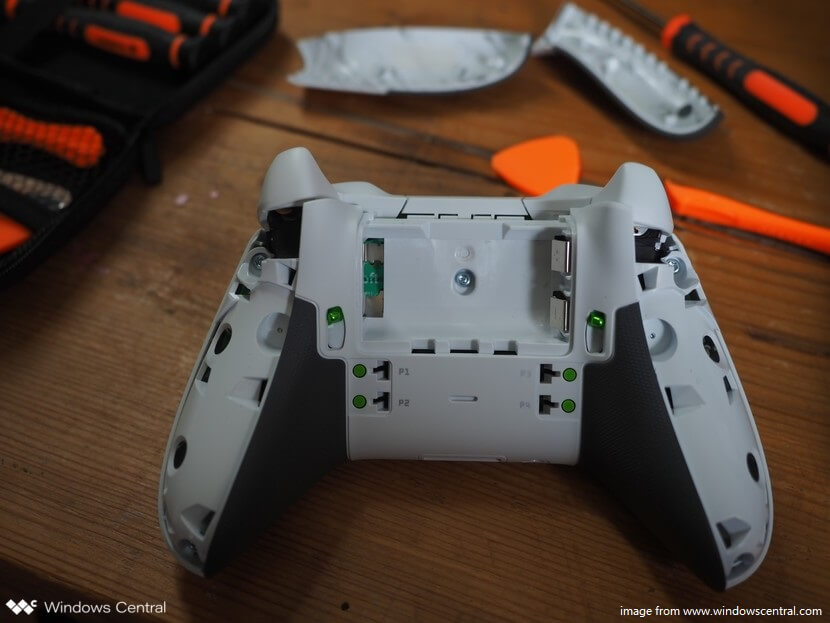
- Then you can remove the screws. Once the screws are removed, the Xbox One controller will come apart like a sandwich. You should be extremely careful. Otherwise you may damage the cable that connects the battery to the circuitry.
- Then find your T8 screwdriver from your kit and start to remove the five security screws as shown. One screw is hidden behind the stickers in your battery housing.
When all steps are finished, you have successfully disassembled Xbox One controller.
Besides knowing how to take apart an Xbox One controller, you also need some basic information of Xbox One controller. The Xbox One controller is composed of three parts, including the front faceplate, the body with circuitry and the backplate with the battery housing. So, when you disassemble Xbox One controller, you should be very careful and do not lose any part of the controller.
When reassembling the controller, you need to make sure that the battery connectors are lined properly inside the backplate and you also need to make sure that the audio jack is fitted properly into the outer shell.
If there is no Torx on Xbox One controller, how can you take apart it? So, in the following section, we will show you how to take apart Xbox One controller without Torx.

How to Take Apart Xbox One Controller Without Torx
In this section, we will show you how to take apart Xbox One controller without Torx.
Now, here is the tutorial.
- Prepare a 2mm slotted screwdriver. It would be better if it is electronics grade.
- Then take down the two millimeters slotted bit. There are seven screws including the hidden bonus screw.
- Wedge the screwdriver and you can unscrew them easily. You must unscrew all of them. Otherwise it won’t be taken apart.
- After that, you have successfully disassembled Xbox One controller without Torx.
Final Words
How to take apart Xbox One controller? This post has shown you the step-by-step guide. If you have any different ideas of disassembling Xbox One controller, you can share it in the comment zone.
User Comments :