VMware is a useful virtualization technology and in it, Install VMware Tools is a popular feature to use. Some people find that this feature is greyed out. So why does that situation happen and how to use it if the Install VMware Tools greyed out. This article on MiniTool Website will have a detailed explanation.
Install VMware Tools Greyed Out
First of all, some people may wonder what the Install VMware Tools feature is? VMware allows you to run several virtual machines in a sandbox environment and with the help of the Install VMware Tools feature, you can easily copy and paste data contents between guest and host machines.
The Install VMware Tools feature plays much important role in using VMware, which can improve your graphics performance and give you a more improved feature to transfer files between host computer and virtual machine.
You can find this feature in the VM drop-down menu at the top menu bar. But when you attempt to enable it, unfortunately, no click can work and that often happens for two reasons:
- The system doesn’t have a virtual optical drive.
- This function is already mounted.
After figuring out the behind reasons, you can go to the next part to find out how to fix Install VMware Tools greyed out.
Related article: [SOLVED!] VMware Bridged Network Not Working
Fix: Install VMware Tools Greyed Out
Since the feature is so useful and important, what should you do when you find the Install VMware Tools option is greyed out? Here is the way.
Step 1: Please shut down your virtual machine if you have powered on it.
Step 2: Launch VMWare Workstation Player but do not power on it and click VM on the top menu bar.
Step 3: Click Settings to configure the changes.
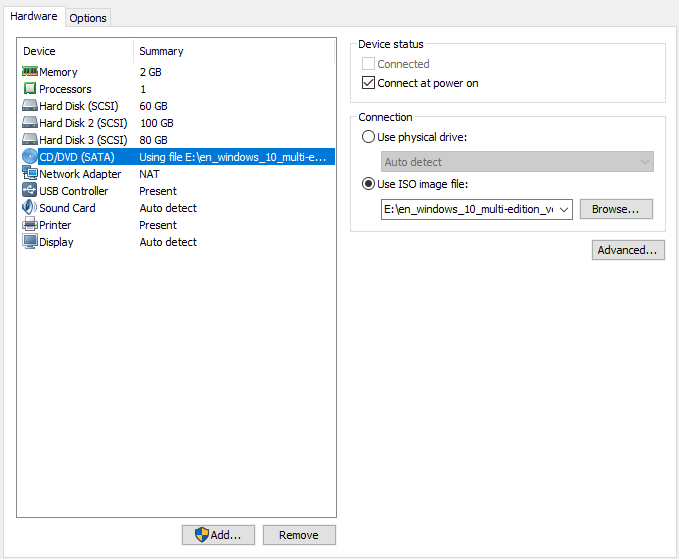
Step 4: When the Virtual Machine Settings window pops up, click on CD/DVD under the Hardware tab from the left panel and choose the Remove button.
Step 5: Then repeat the above step to remove your Floppy Drive under the Hardware tab.
Step 6: After the remove, click Add…, choose CD/DVD Drive, and then Next to finish that process.
Then you will see the option “Use Physical Drive > Auto Detect” enabled on right pane.
Step 7: You can click OK to exit and turn on your VM.
Step 8: Once the VM has booted successfully, switch to the menu at the top left-hand section to go to Player > Manage > Install VMWare Tools or VM > Install VMWare Tools.
Then you can follow the on-screen instructions to finish the Install VMWare Tools installation. The whole process won’t cost you much time.
Besides, after the installation, if you find the Install VMWare Tools feature does not work sometimes, you can manually start the VMware Tools Installer by choosing VM > Cancel VMware Tools Install and then VM > VMware Tools Install.
Related article: Download and Install VMware Workstation Player/Pro (16/15/14)
It is highly advised to back up your important data regularly so that your data can be better protected. MiniTool ShadowMaker is a free backup program that allows you to perform a scheduled backup. Click the download button and enjoy it.
Bottom Line:
To fix the Install VMware Tools greyed out issue, you can follow the above steps to resolve this issue. it is easy to follow and no other technical requirements. Hope this article can be useful for you.
User Comments :