When do you come across the error start service failed 1058? How to fix this system error 1058? This post from MiniTool will show you how to fix the issue of start service failed 1058. Besides, you can visit MiniTool to find more Windows tips and solutions.
What Is Error of Start Service Failed 1058?
When a service suddenly stops, you may receive the error message: Error 1058: The service cannot be started, either because it is disabled or because it has no enabled devices associated with it.
You may also receive this error message when you try to start a service.
What causes this error of start service failed 1058? This error may occur if the service is disabled or if the service is disabled for the hardware profile that you are currently using.
So, do you know how to fix the error cannot create service startservice failed 1058? If not, keep on your reading and find solutions below.
How to Fix Start Service Failed 1058?
In this section, we will show you how to fix the system error 1058.
Windows 10/8/7/Vista
First of all, we will show you how to fix the start service failed 1058 error in Windows 10/8/7/vista.
Now, here is the tutorial.
- Press Windows key and R key together to open the Run
- Type servies.msc in the box and click OK to open Services window.
- In the Services window, scroll down to find the service that is disabled or stopped.
- Then right-click it to choose Properties.
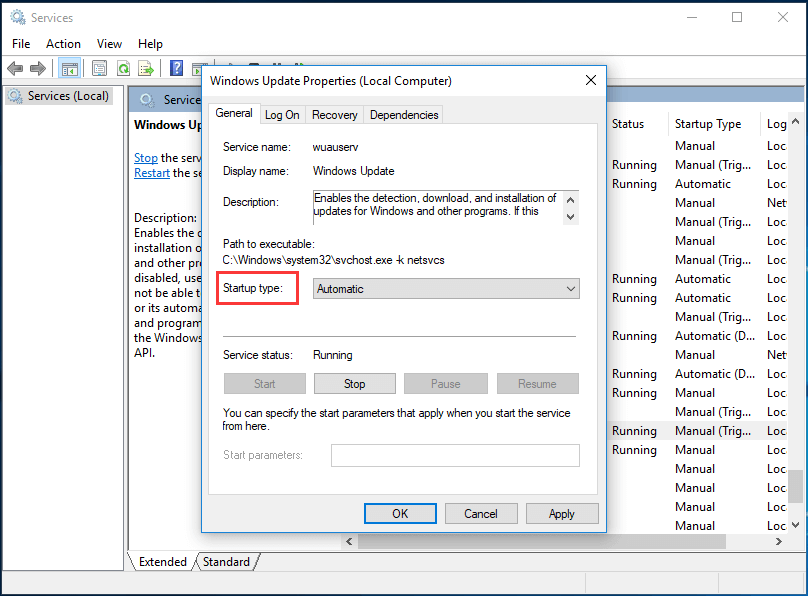
- On the General tab, make sure the Startup Type is not disabled. If it is disabled, change the option to Automatic.
- Then go to the Log on Make sure that the service is enabled for the appropriate hardware profile.
- Then click Apply and OK to save the changes.

After all steps are finished, run the service again and check whether the issue of start service failed 1058 is fixed.
Windows XP
Here, we will show you how to fix the error of startservice failed 1058 in Windows XP.
Now, here is the tutorial.
- Click Start and go to All Programs.
- Then choose Administrative Tools and click Services to continue.
- Scroll down to find the service that is stopped or disabled.
- Double-click the service.
- Then go to the Log on tab.
- Verify that the service isn’t disabled for the hardware profile that you are using. If the service is disabled for the hardware profile, click Enable.
- After that, go to the General tab and verify that the service is not disabled in the Startup Type If it is disabled, change it to Automatic.
- After that, click Apply and OK to save the changes.
After all steps are finished, restart your computer and check whether the issue of start service failed 1058 is solved.
To sum up, this post shows what the error of start service failed 1058 is and shows how to fix the system error 1058. If you come across this system error, try these solutions. If you have any different ideas to fix it, you can share them in the comment zone.


User Comments :