What to do if you cannot shrink a volume beyond the point? How to shrink volume with unmovable files? MiniTool explores the answers in this post. It collects two feasible ways to shrink volume with unmovable files on Windows computers.
When you shrink volume with unmovable files via Disk Management, it offers you a small space or even none. Then you can’t shrink volume successfully. Why does this situation occur? It may be that you are shrinking the volume beyond the point where any unmovable files are located.
What are unmovable files? They are Windows-generated data including hibernation files, page files, and system volume information folder (used by the system restore). As the name indicates, they can’t be automatically moved by built-in tools on Windows like Disk Management.
As unmovable files are hidden by default, they are invisible in File Explorer. Even so, they are still on your hard drive. Then you cannot shrink a volume beyond the point. How to fix the issue? In other words, how to shrink volume with unmovable files.
In this post, two available methods are provided. You can pick one from them to shrink volume with unmovable files on Windows 10/11.
Related article: What Does Shrink Volume Do? How to Safely Shrink a Volume?
#1: Shrink Volume with Unmovable Files via MiniTool Partition Wizard
MiniTool Partition Wizard, a comprehensive partition manager, allows you to shrink/extend/move partitions on Windows 11/10/8/7 and Windows Servers. Compared with Disk Management, it boasts many advantages. For instance, it enables you to shrink partitions when Shrink Volume is greyed out in Disk Management.
Besides, this software contains more features than Disk Management. For example, it includes features like Disk Benchmark, Data Recovery, Space Analyzer, Surface Test, and so on, while Disk Management doesn’t. It helps you convert MBR to GPT, partition hard drives, clone a hard drive, migrate Windows 10, etc.
In this scenario, you can shrink volume with unmovable files on Windows by using the Move/Resize feature of the software. Download and install MiniTool Partition Wizard on your computer, and then follow the steps below to complete the operation.
MiniTool Partition Wizard FreeClick to Download100%Clean & Safe
Step 1: Launch MiniTool Partition Wizard to enter its main interface.
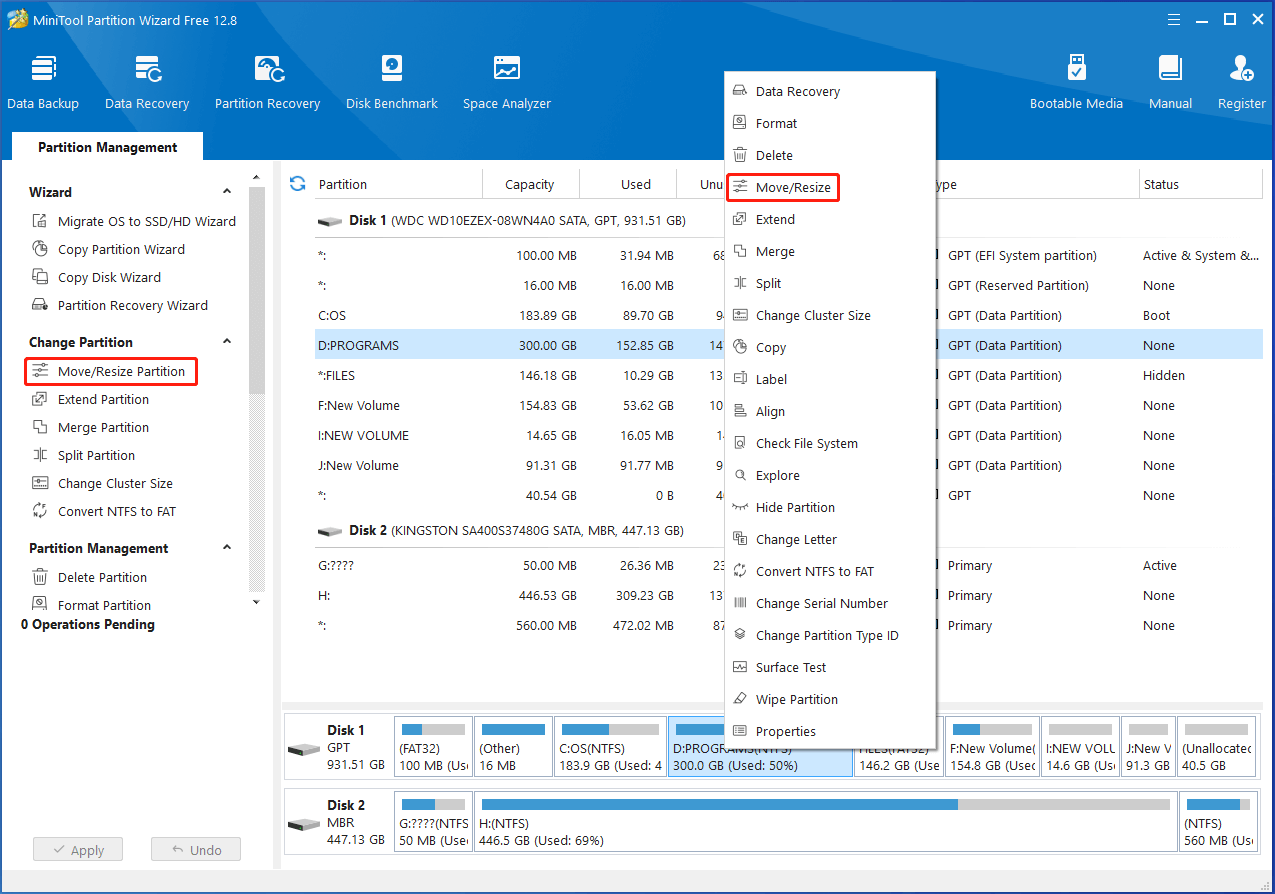
Step 2: Right-click the partition to shrink and click Move/Resize on the context menu. Alternatively, click on the target partition and tap Move/Resize Partition on the left panel.
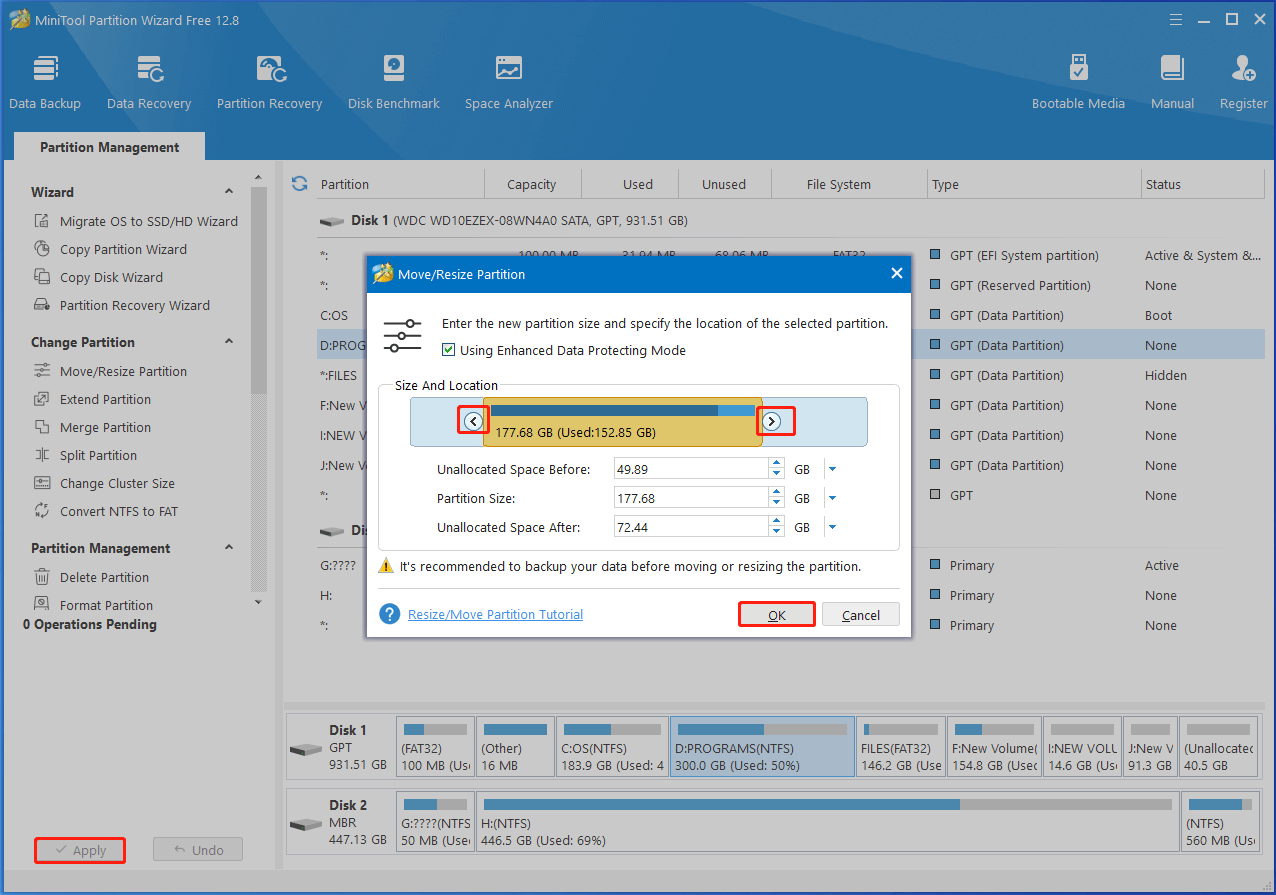
Step 3: Drag the arrow icon at the two ends of the target partition with your mouse to shrink it. You can also adjust the partition size by typing the exact number in the corresponding field. Then click OK to save changes.
Step 4: Click Apply to carry out the operation.
Cannot shrink a volume beyond the point where any unmovable files are located? Shrink volume with unmovable files using MiniTool Partition Wizard now!
MiniTool Partition Wizard FreeClick to Download100%Clean & Safe
Also read: Volume Shrinking Taking Forever? Top 5 Methods to Fix It
#2: Disable Unmovable Files on the Computer
If you cannot shrink a volume beyond the point where any unmovable files are located, disable unmovable files on the computer and then try the shrink operation. As mentioned earlier, unmovable files include hibernation files, page files, and system protection.
Hence, the process of disabling unmovable files is to disable hibernation files, page files, and system protection. After that, shrink volume with unmovable files on Windows computers as usual.
Move 1: Disable Hibernation Files
Step 1: Open the Run dialog window by pressing Windows + R keys.
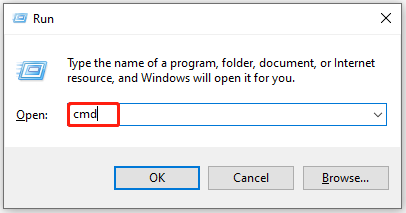
Step 2: In the Run window, type cmd and press Ctrl + Shift + Enter keys simultaneously.
Step 3: In the elevated User Account Control window, click Yes to confirm the operation.
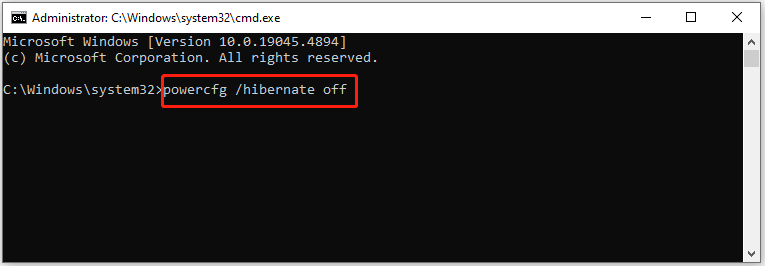
Step 4: In the Command Prompt window, input powercfg /hibernate off and hit Enter to execute the command.
Move 2: Disable Page Files
To disable page files, simply follow these steps.
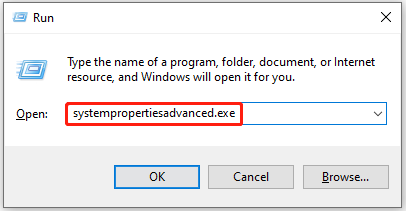
Step 1: Open the Run window, type systempropertiesadvanced.exe, and click OK.
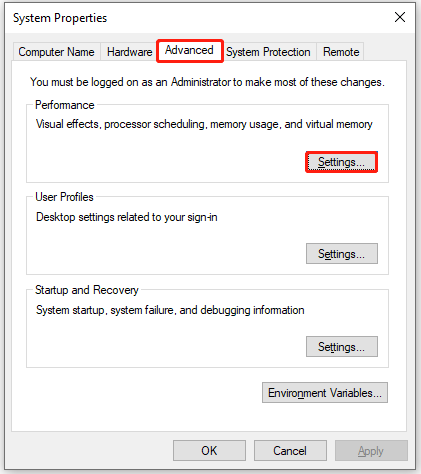
Step 2: In the System Properties window, navigate to the Advanced tab and click Settings under Performance.
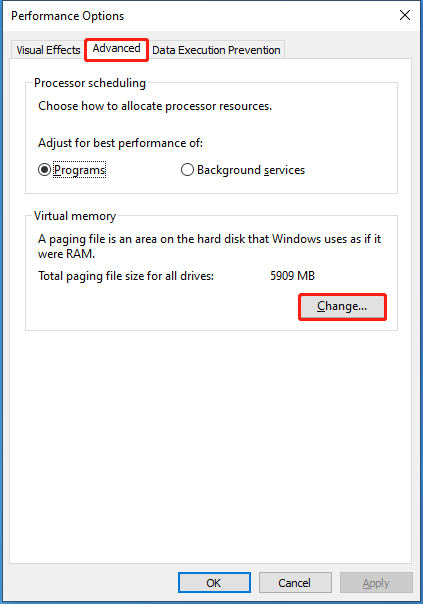
Step 3: In the next window, click the Advanced tab and click Change under Virtual memory.
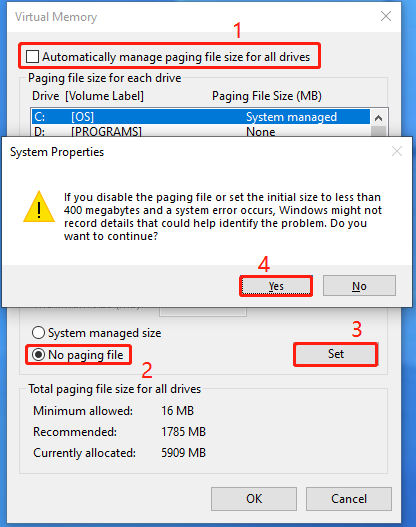
Step 4: Uncheck the “Automatically manage paging file size for all drives” option, tick the “No paging file” option, click Set, and then click Yes in the warning window to continue.
Move 3: Disable System Protection
Step 1: Open the Run window, type SystemPropertiesProtection.exe, and click OK. This will open the System Properties window.
Step 2: Choose the C drive from the list and click Configure.
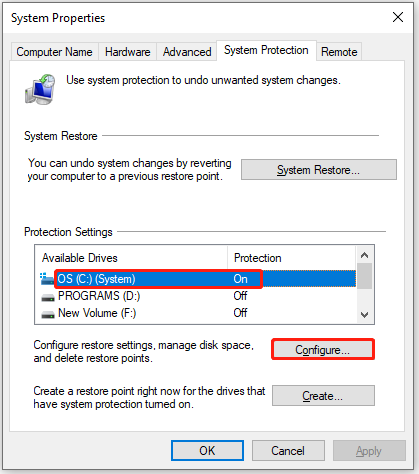
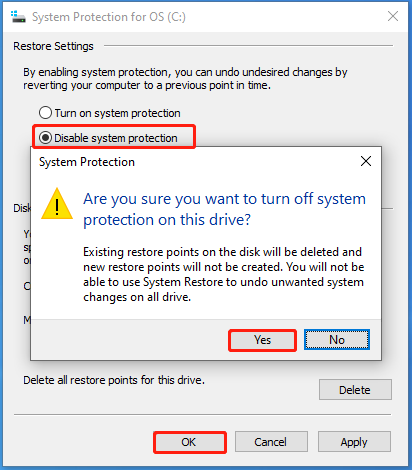
Step 3: Check the option “Disable system protection” and click OK to save changes. Then click Yes in the warning window to allow the operation.
Step 4: Restart the computer.
Wrap Things Up
This post explains why you cannot shrink a volume beyond the point and shows you how to fix the issue. You can shrink volume with unmovable files on Windows using the offered methods in the post. If you encounter any issues while using MiniTool Partition Wizard, contact us by sending an email via [email protected]. We will make a reply as soon as possible.
User Comments :