It’s well-known that most SSDs have faster transfer speeds and better performance than traditional HDDs. So, a lot of users choose to upgrade a hard drive to SSD on Windows. This also brings a series of new questions, such as “Can I use SSD and HDD at the same time”, “What should I put on my SSD”, “What to do after installing new SSD”, etc.
Here is a user who asked the question – “What to do after installing SSD” on the answers.microsoft.com forum:
What to do after installing new SSD? Hi there, I am planning to replace my HDD with SSD. So, after installing the new SSD, what must I do to set up everything again?https://answers.microsoft.com/en-us/windows/forum/all/what-must-i-do-after-installing-new-ssd/858235a3-36aa-4ae3-8eeb-86bfb18db85d
What to Do After Installing New SSD on Windows 10/11
So, what to do after installing SSD on Windows 10/11 laptops? After analyzing extensive user reports from many forums and communities, we summarize 7 common steps. Let’s follow them in order.
Step 1. Verify the SSD Detection
After you install an M.2 SSD on a laptop, you’d better confirm if the SSD can be recognized by your computer properly. To do this, you can access your computer’s settings, like Disk Management, BIOS/UEFI, and Device Manager, and then see if the newly installed SSD shows as a recognized device.
Step 2. Migrate OS to SSD
Another important thing about what to do after installing a new SSD is to move your Windows OS to the drive. This is because an SSD usually offers you a faster boot/startup speed. Then, how to migrate Windows OS to SSD without reinstalling? MiniTool Partition Wizard is your best choice.
As a powerful disk clone utility, the MiniTool software can clone hard drive, migrate OS to SSD, copy partitions, convert MBR to GPT, convert dynamic disk to basic, and rebuild MBR. Moreover, it can do many partition management works, such as extend/resize/move/format/wipe/align partitions, convert NTFS to FAT32, change cluster size, etc.
MiniTool Partition Wizard DemoClick to Download100%Clean & Safe
Step 1. Open the software to enter its main interface and click on Migrate OS to SSD/HD Wizard from the left panel. Then select Option B to copy the OS only, and click on Next. Well, if you want to replace the whole system disk with the SSD, choose Option A.
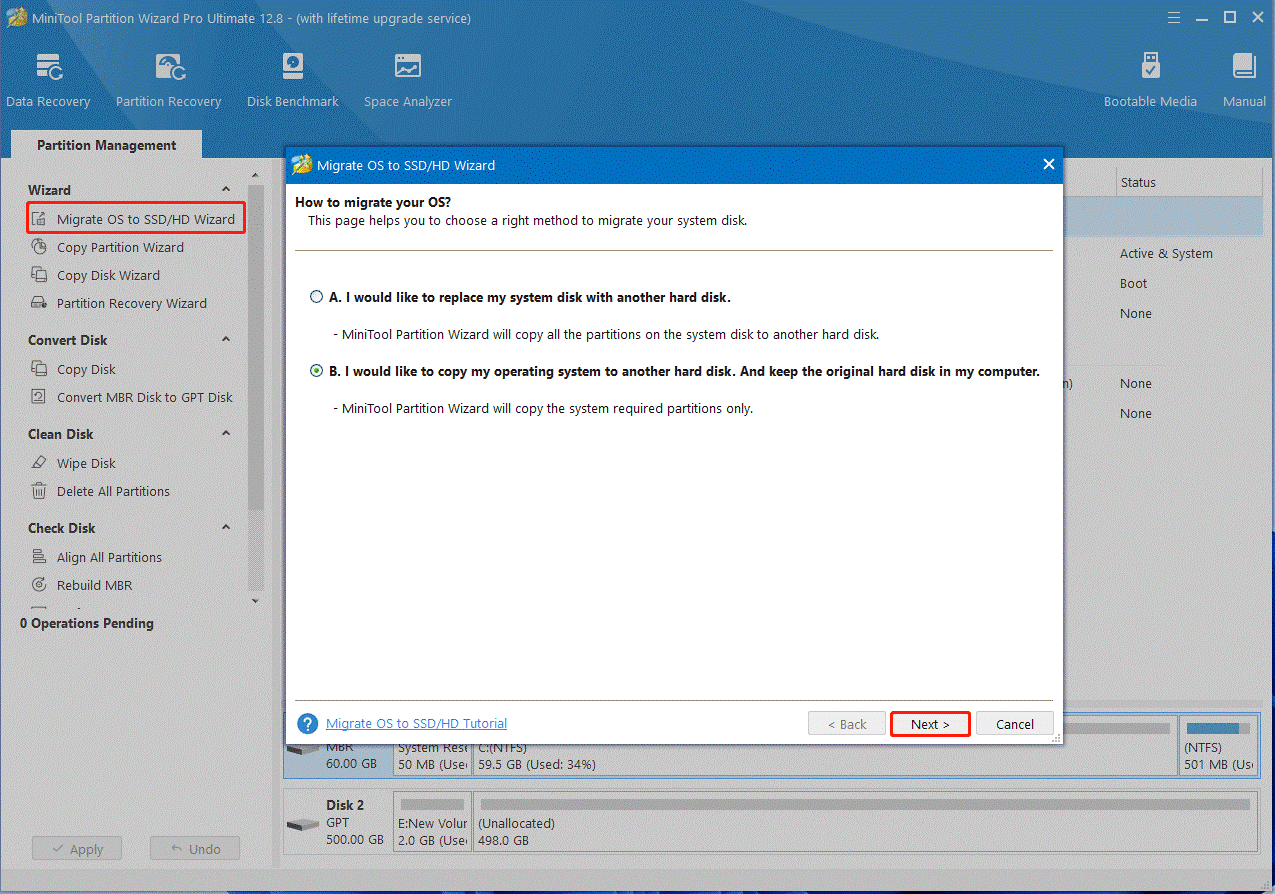
Step 2. Select the new SSD as the target disk and click on Next > Yes to confirm this operation.
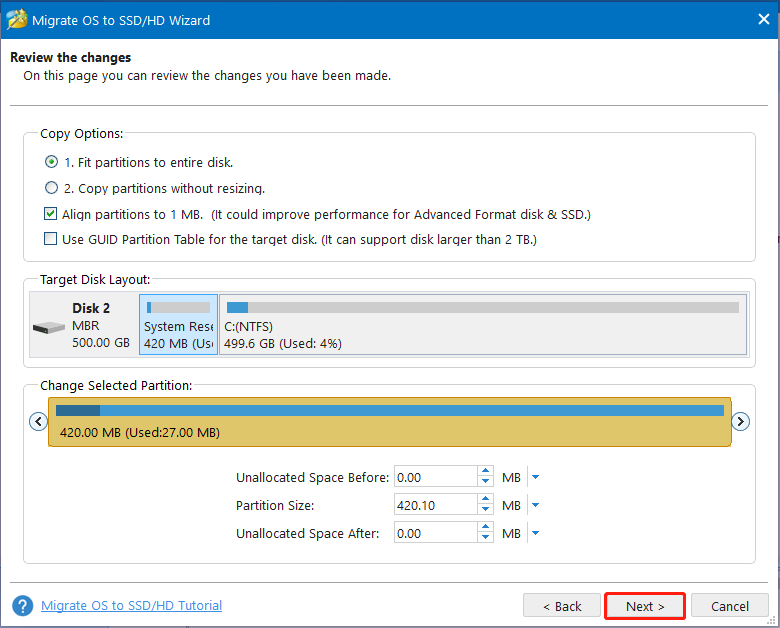
Step 3. Review copy options based on your needs and click on Next.
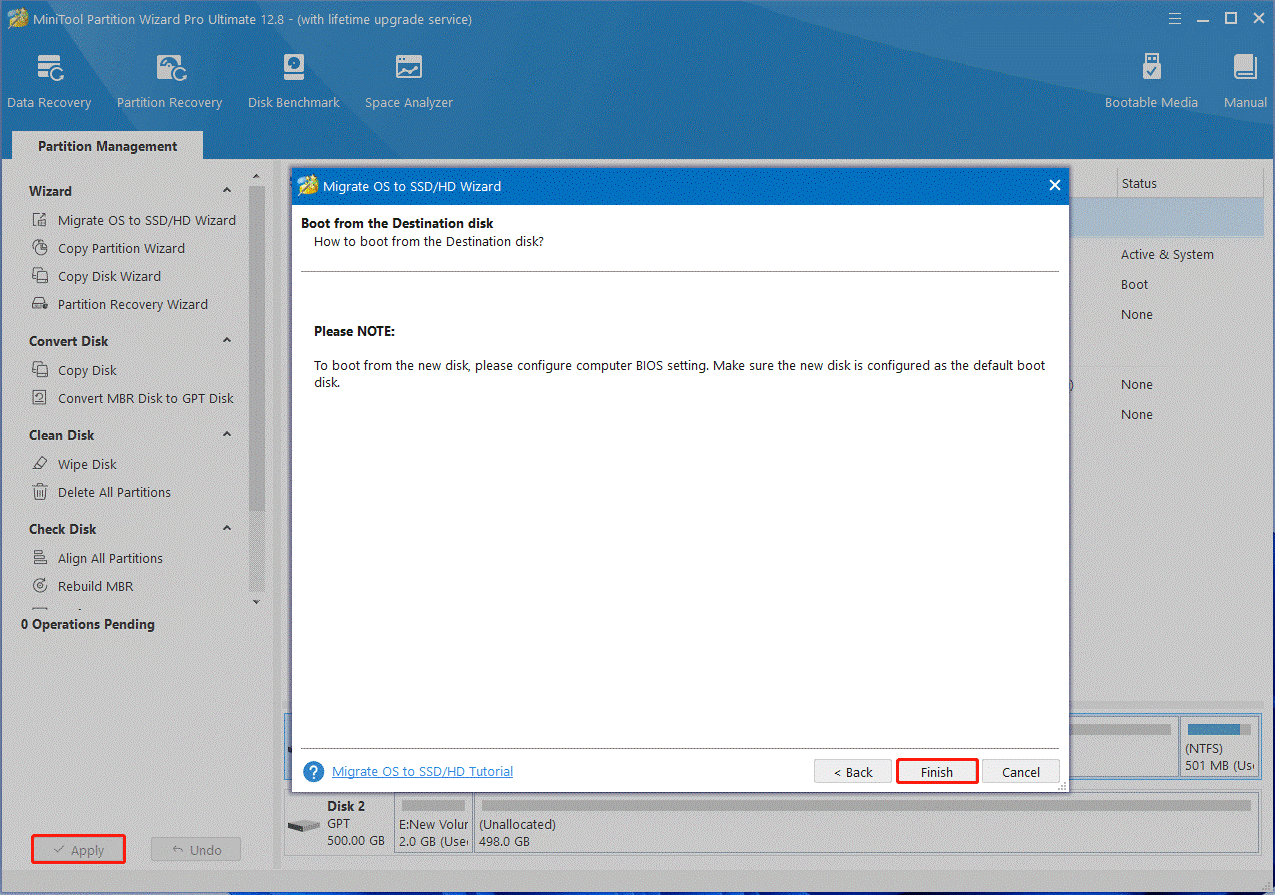
Step 4. Read the note information and click Finish to confirm it.
Step 5. Click on Apply to execute the migration process. Then what to do after adding a new SSD and migrating OS? Let’s move to step 3.
Step 3. Set up the SSD as the Primary Boot Drive
Once migrated, don’t forget to set the new SSD as your primary boot drive in BIOS. Here’s a simple guide for you.
Step 1. Start your computer, and then hold the F2 and Delete hotkey before the computer is booted. By doing so, you will enter BIOS.
Step 2. Navigate to the Boot tab using the left or right arrow key.
Step 3. Select the new SSD and put it to the primary boot order by pressing the “+” or “–” key.
Step 4. Press F10 and Enter to save the boot order changes and exit BIOS. Then restart your PC and it should boot from the SSD. Up till now, you should have prepared the SSD ready for further use.
Step 4. Move Frequently Used Programs and Files to SSD
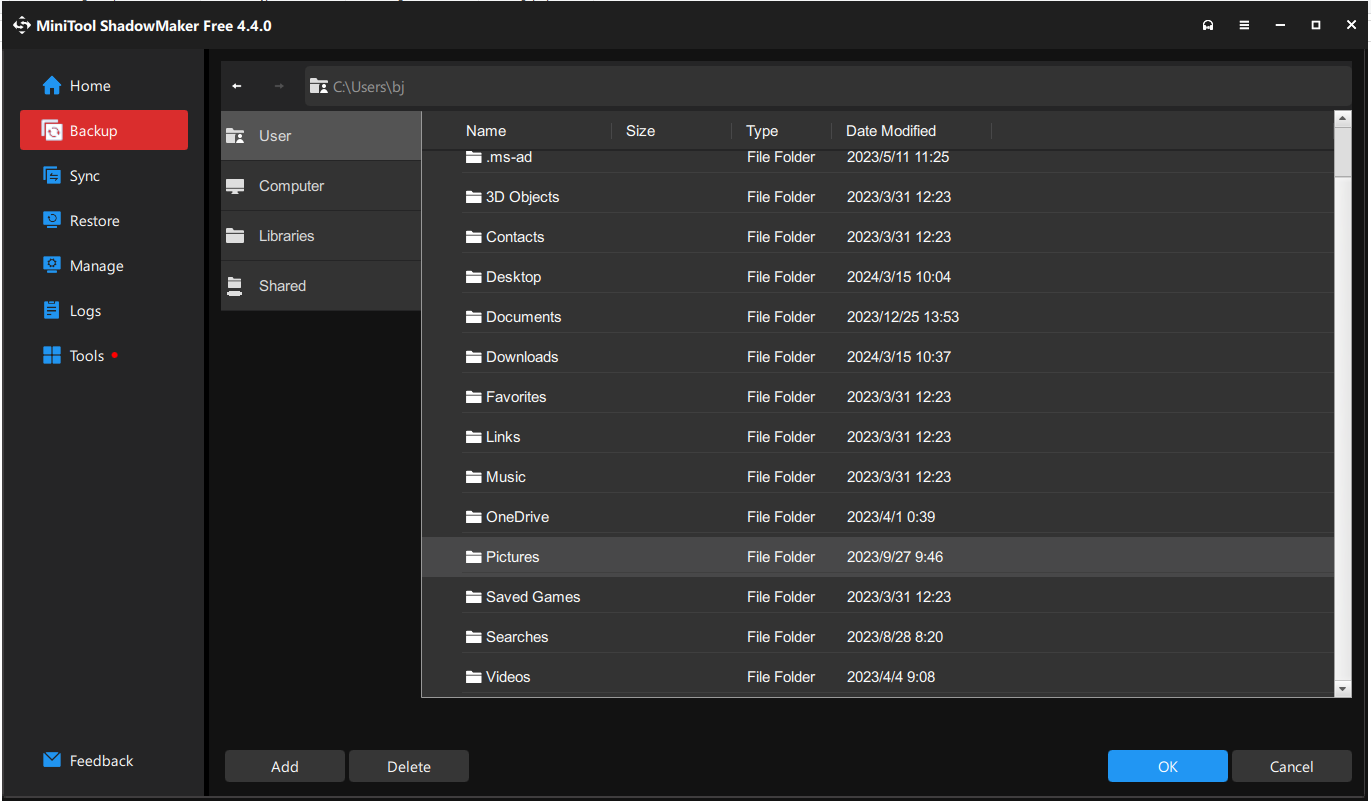
The next step on what to do after installing new M.2 SSD is to move all your frequently used programs and files, like games, videos, documents, and so on to it. To do this work, you can manually transfer them into the SSD, but it may be time-consuming.
If you want to save time when backing up or transferring files on Windows, MiniTool ShadowMaker is worth trying. Its Backup and Sync features can help you move these files from the old hard drive to the new SSD easily.
MiniTool ShadowMaker TrialClick to Download100%Clean & Safe
Step 5. Install the Latest Drivers or Software
In addition, it’s important to install the latest driver or software for the SSD. This can help optimize the performance of the SSD. For example, if you have an NVMe M.2 SSD on Windows, make sure to install the latest NVMe SSD drivers. Alternatively, you can automatically download the latest SSD drive from Device Manager.
Step 6. Disable Unnecessary Services and Startup Programs
About what to do after installing a new SSD on Windows, some users from the Quora forum suggest that disabling unnecessary services and startup apps speed up the boot time and overall performance of the SSD. For that:
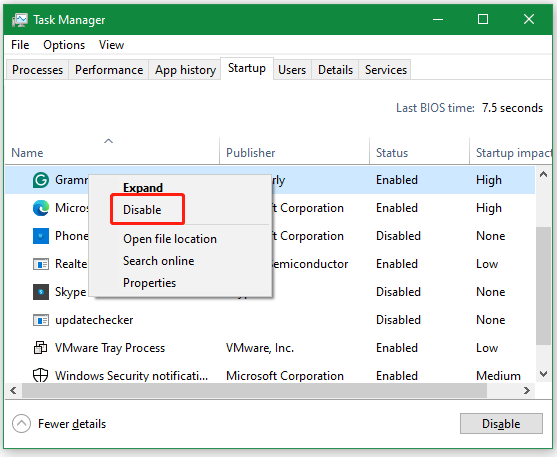
Step 1. Press the Ctrl + Shift + Esc keys altogether to open the Task Manager.
Step 2. Navigate to the Startup tab, right-click the necessary programs, and select Disable. Then repeat the same process to disable other programs.
Step 7. Enable TRIM
The last step on what to do after adding a new SSD is to enable TRIM. TRIM plays an important role in extending the lifespan of your SSD. It can help the OS precisely detect the data location that you want to move or delete. It can also command your drive to thoroughly clean the file from the sectors so that new data can be written into the drive faster. So, we recommend you enable TRIM on SSD.
Bottom Line
What to do after installing new SSD on Windows 10/11? We recommend you migrate Windows OS to SSD first using MiniTool Partition Wizard and try other steps according to your needs. If you have any suggestions or questions about the MiniTool software, contact us via [email protected] to get a quick reply.
User Comments :